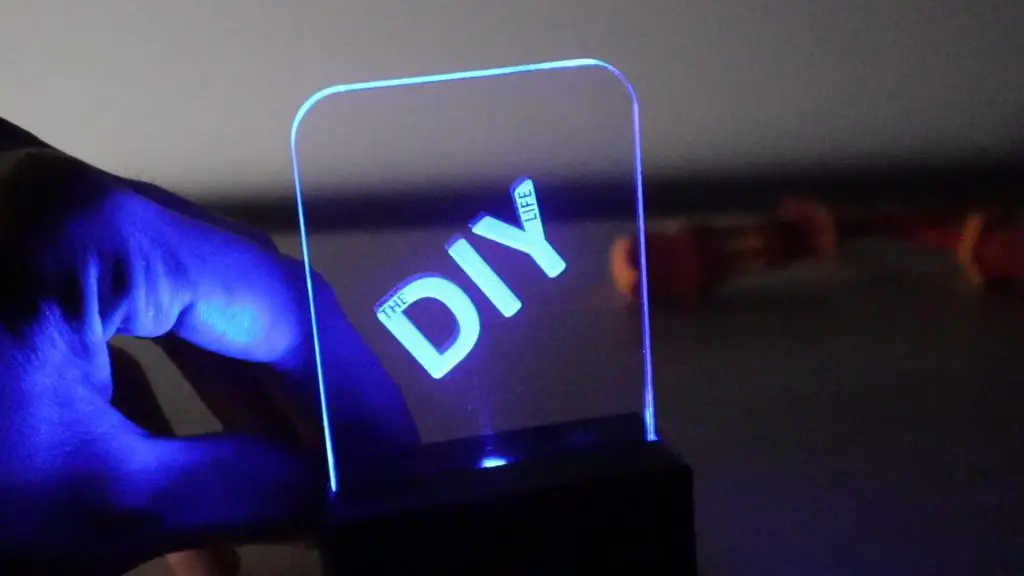
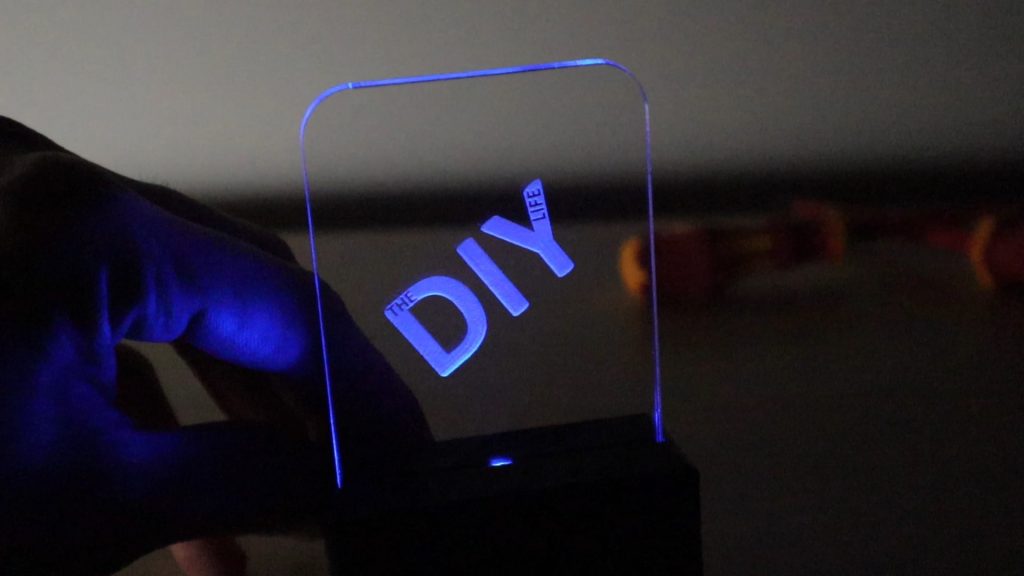
In this project, I’ll be showing you how to make a simple light up acrylic sign with a dimmer and power switch for under $5. In fact, this one cost me just under $3 to make. They’re battery-powered and all of the electronics are contained in the free-standing base, making them perfect for a table, desk, or shelf. The LED lighting is eye-catching, especially in darker environments, so they’re great marketing and promotion tools for indoor or night time events.
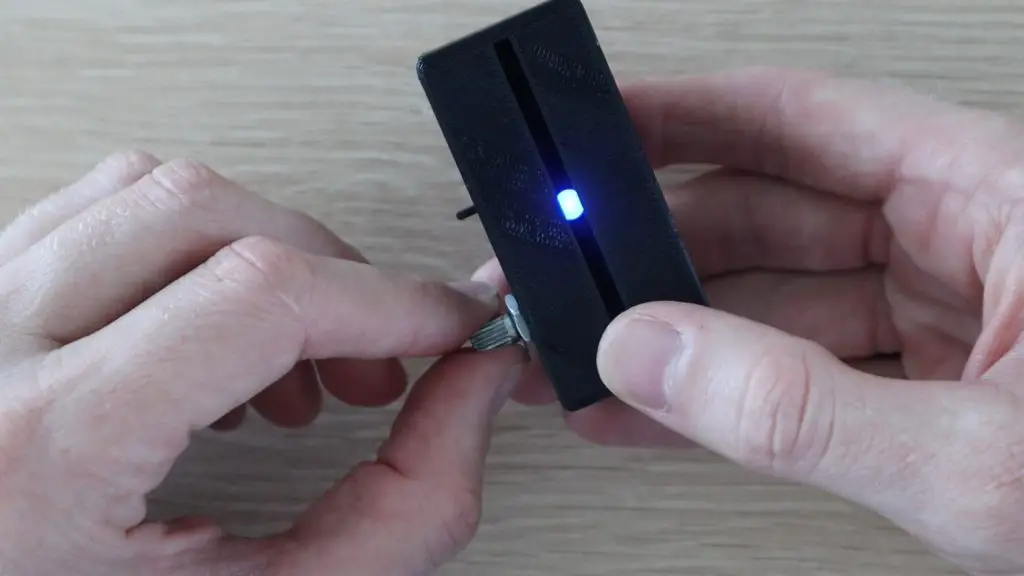
You can change the brightness of the sign using the adjustment pot on the back of the base.
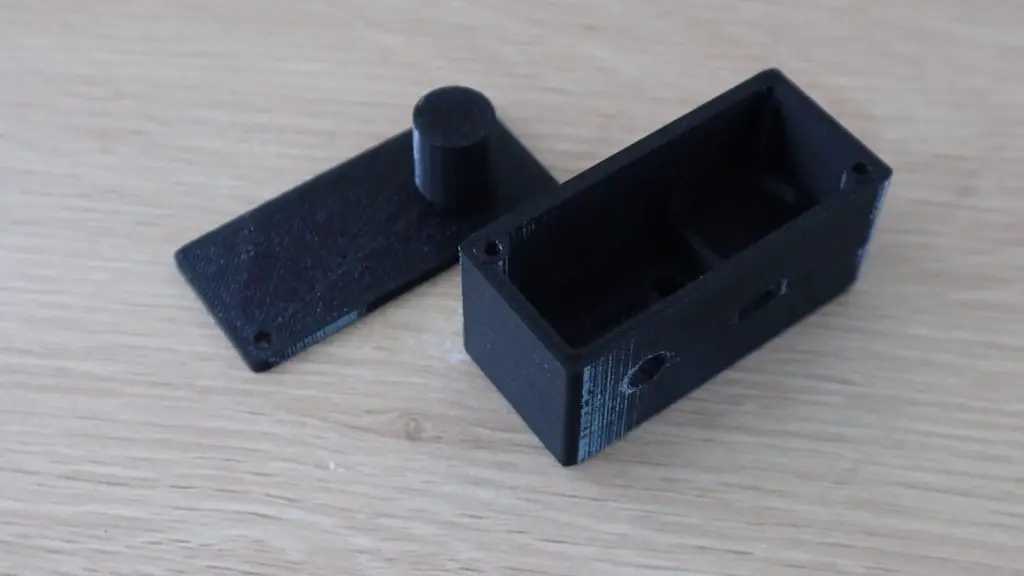
Each sign is powered by a CR2032 coin battery which can easily be replaced through the bottom screw-on cover.
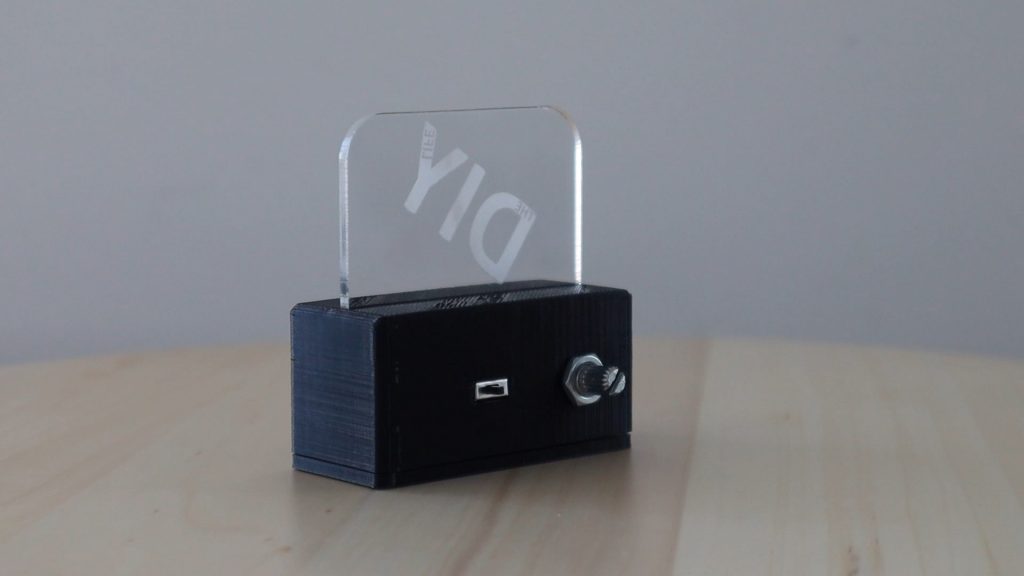
A small power switch and adjustment pot on the back allows you to switch the LED on and off and make adjustments to the brightness.
Here’s a video of the build and the sign being used, read on for the step by step build instructions.
What You Need To Make Your DIY Acrylic Sign
- 10K Pot – Buy Here
- 22K Resistor – Buy Here
- 5mm Blue LED (Can be any colour) – Buy Here
- Power Switch – Buy Here
- CR2032 Battery – Buy Here
- M3 x 15 Screws – Buy Here
- 60mm x 50mm x 3mm Acrylic – Buy Here
You’re also going to need some basic DIY tools and a 3D printer, but if you don’t have a 3D printer, you can also make use of an online printing service to print the components for you and ship them to your door.
Here’s the 3D printer I’ve used:
- Creality Ender 3 Pro – https://amzn.to/3aYDssg
- Black PLA Filament – https://amzn.to/2QNYemS
The above links are affiliate links, intended to indicate the correct components required and provide an option for any components you aren’t able to source locally. For this project, it would be most cost effective to visit a local electronic component store to source the parts you need.
How To Make Your Acrylic Sign
Cut & Engrave The Acrylic
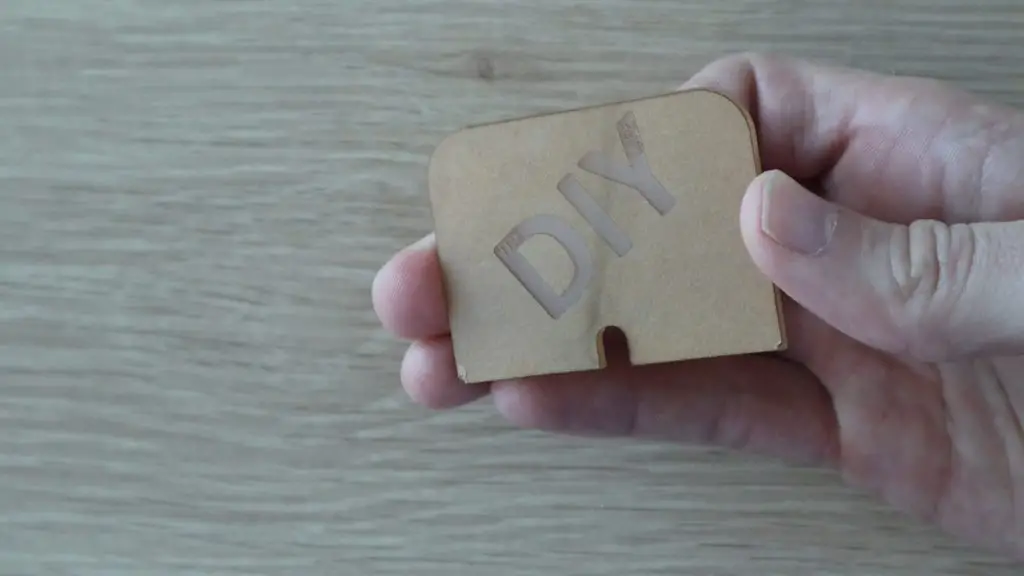
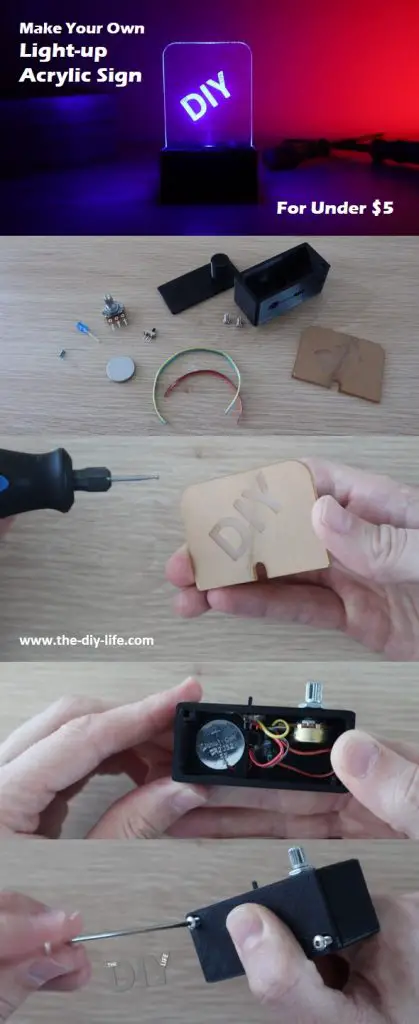
The start out, you’ll need to cut and engrave your acrylic sign. This is the part which is going to be glowing when the LED is illuminated, so it’s worthwhile spending a bit of time on it to make sure that it’s done neatly.
Also, keep the protective film on the acrylic while you’re working on it as any scratches or chips will be illuminated by the LED as well.
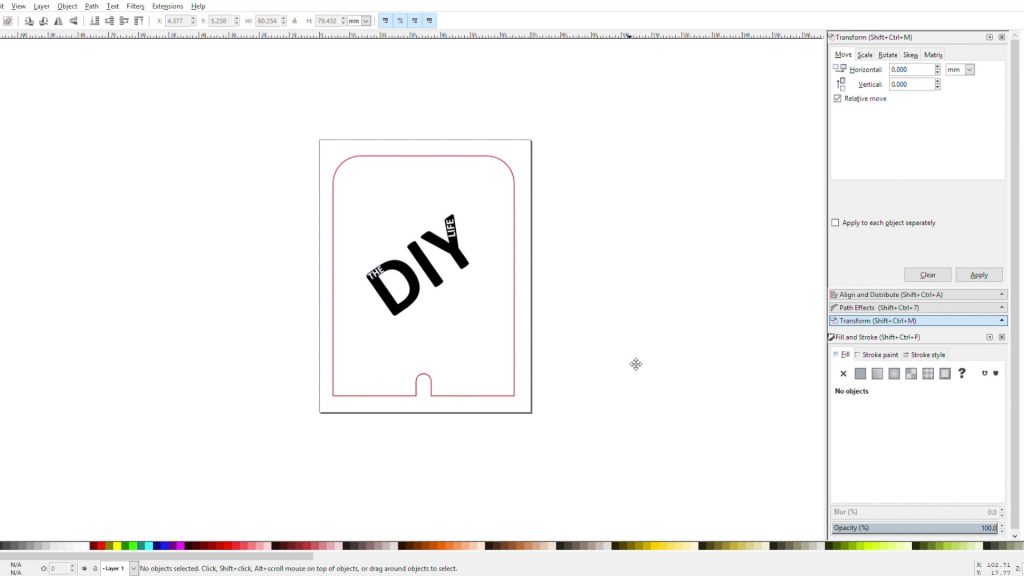
I designed the sign to be 60mm wide with a 5mm cutout in the center for the LED. You can make the sign as tall as you’d like to accommodate your logo and any text you want to display. Any length up to 120mm on this size base should work well.
You can print out the templates provided through the above link as a guide, or use the .svg files to laser cut your own. I’ve used two sizes in this example, a smaller one which is 50mm high and a larger one which is 80mm high.
The easiest way to cut and engrave the acrylic is with a laser cutter. If you don’t have access to one, there are a number of online services that will cut and engrave the acrylic for you.
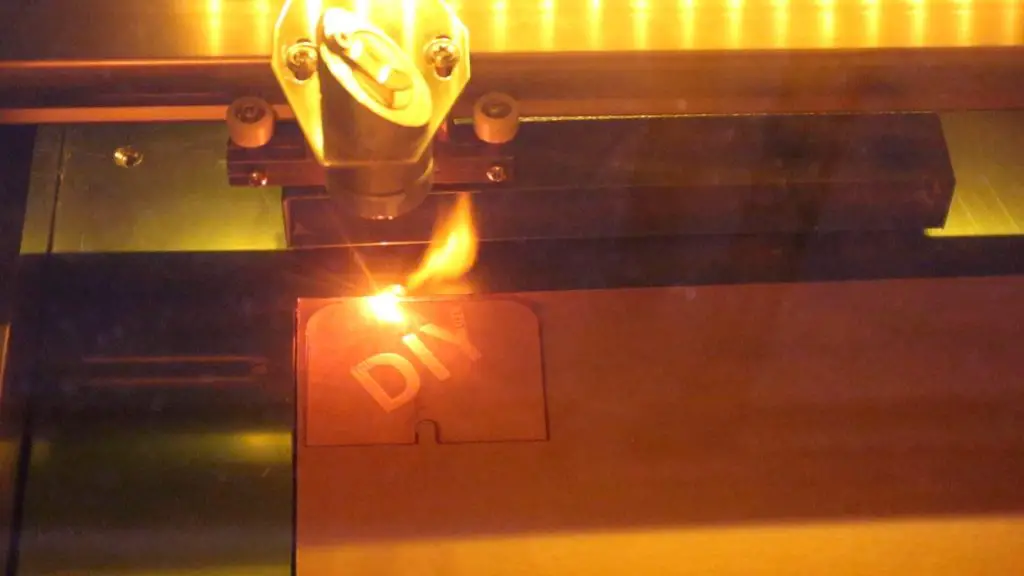
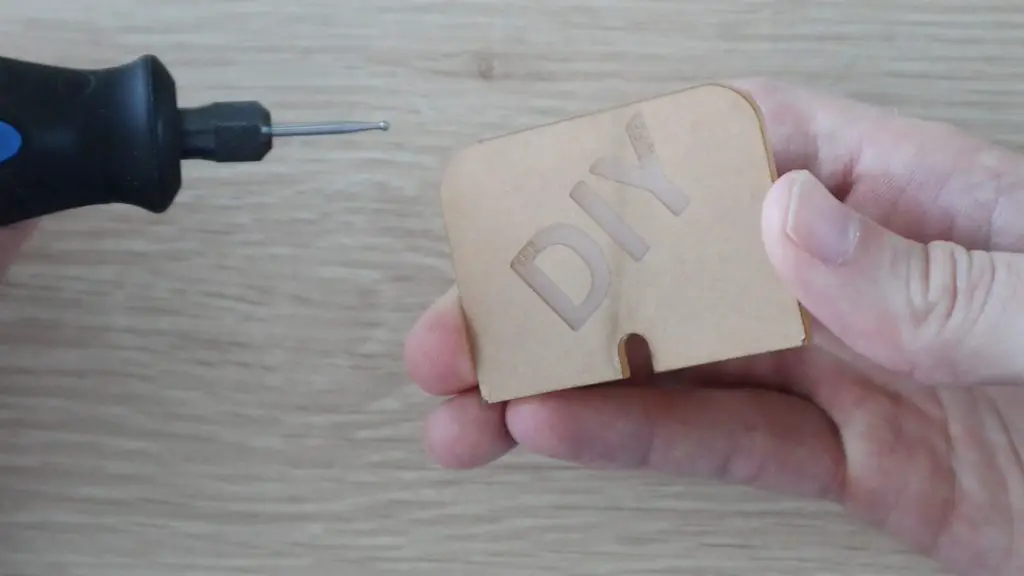
If you’d like to keep the cost down, you can also cut the acrylic yourself using a simple hack saw or band saw and engrave your logo by tracing out the text using a sharpie and then engraving it with a Dremel or other rotary type tool.
3D Print The Base
Next, you’ll need to print out the two plastic components which make up the base. I printed these out in black PLA with a 15% infill.
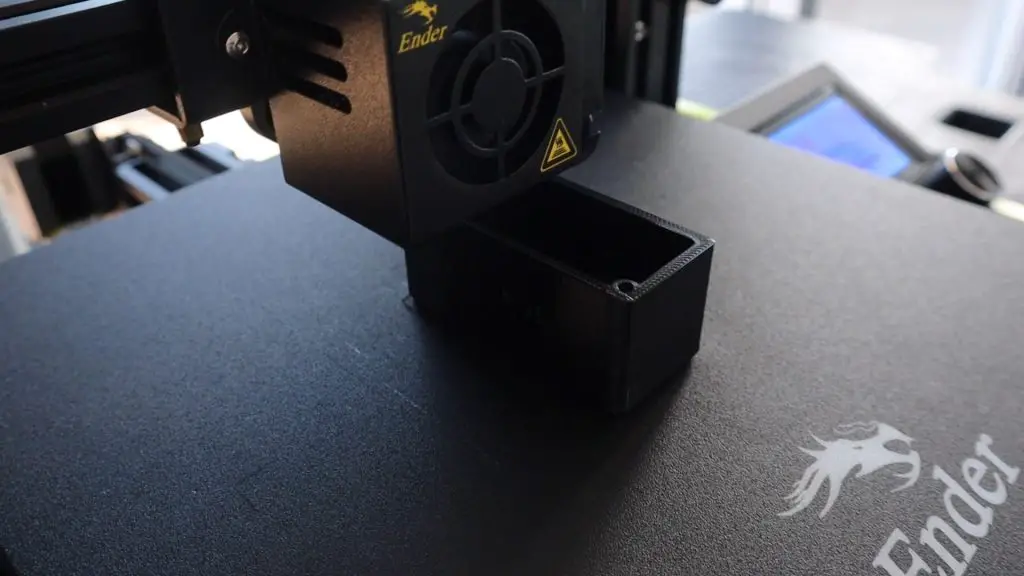
You can make the base any colour you’d like to match your theme or brand colours.
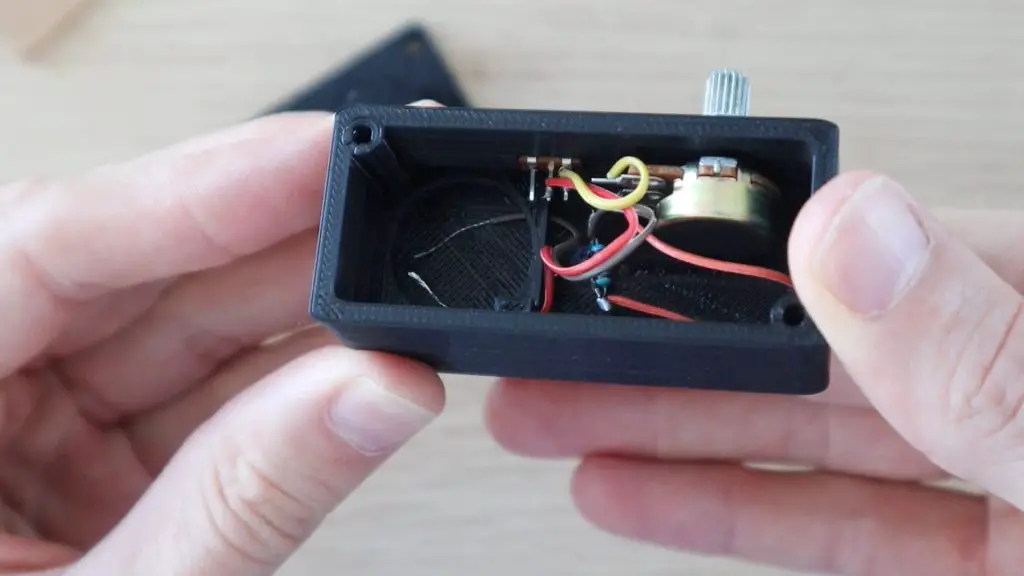
Solder The Electronic Components
Finally, we’ll assemble the electronic components.
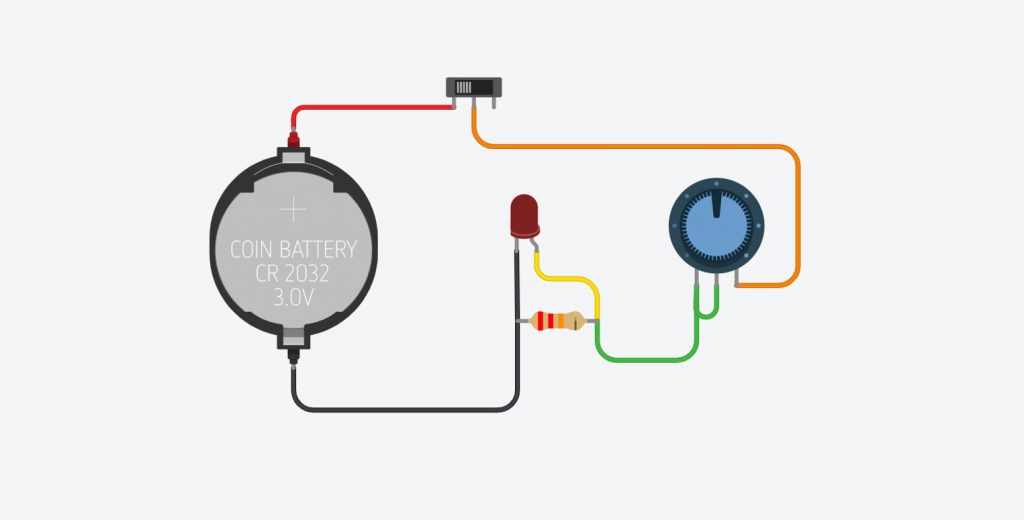
The circuit is a simple LED dimmer circuit with a 22K resistor across the LED and a 10K pot to control the brightness. It’s connected to a power switch to turn the LED on and off and the lead then feeds into the battery tray in the housing, so you don’t need to buy a separate battery holder.
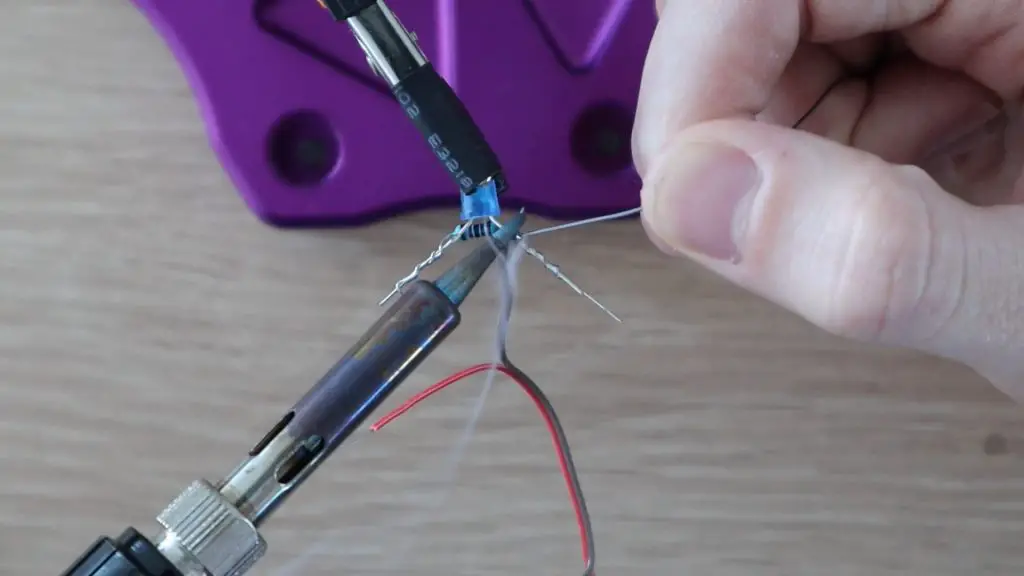
Try to solder the resistor directly across the legs of the LED and the bridge onto the legs of the pot to save additional wiring.
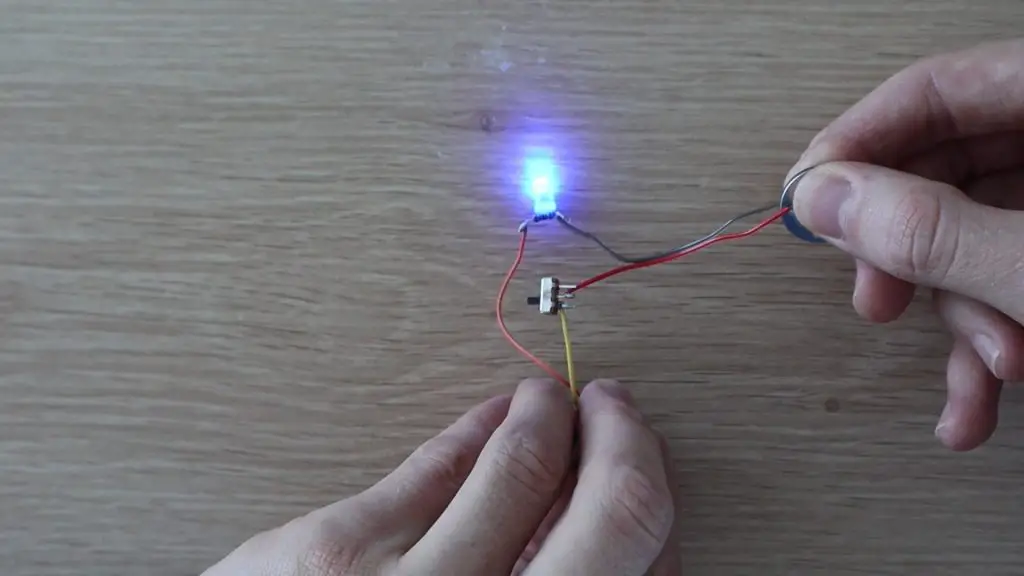
Try holding the leads onto the battery and sliding the power switch to provide power to the LED and test that the circuit works. Also, try turning the pot and check that the LED is able to be dimmed.
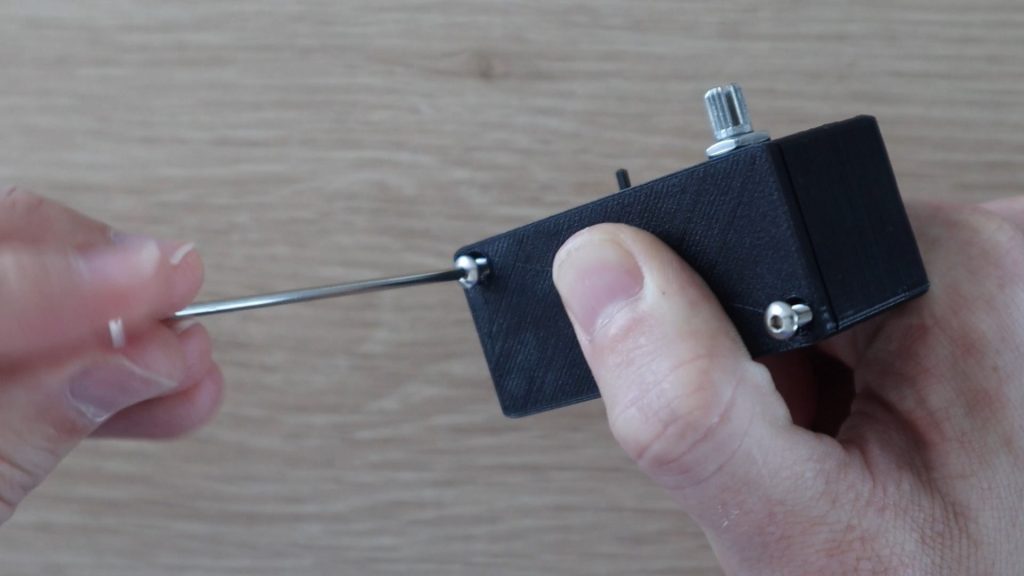
Once you’ve soldered and tested the electronics, install the components into the housing.
There are already cut-outs in place in the housing for the switch and the pot.
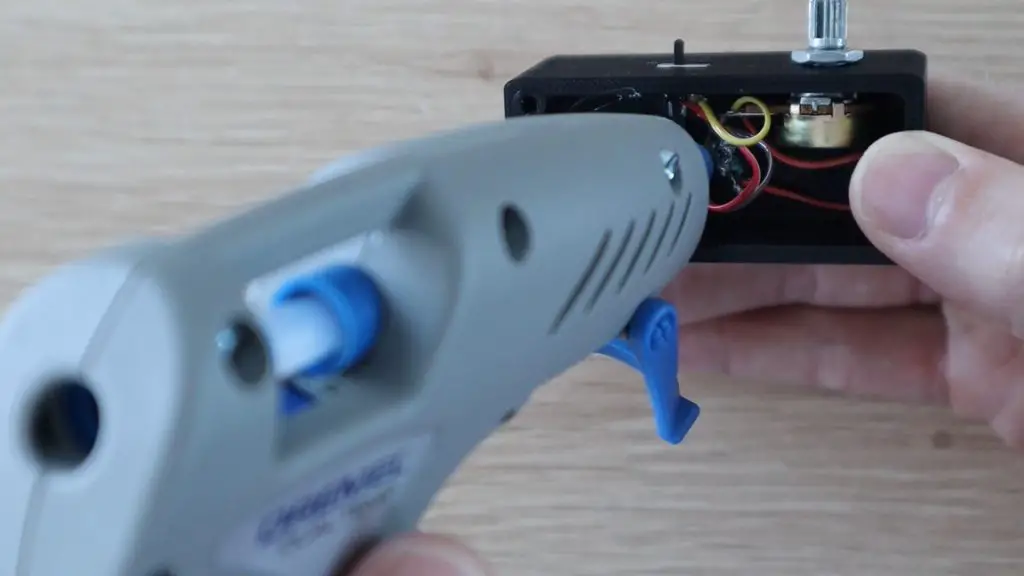
I put a drop of hot melt glue onto the inside of the switch and over the LED to keep them in place.
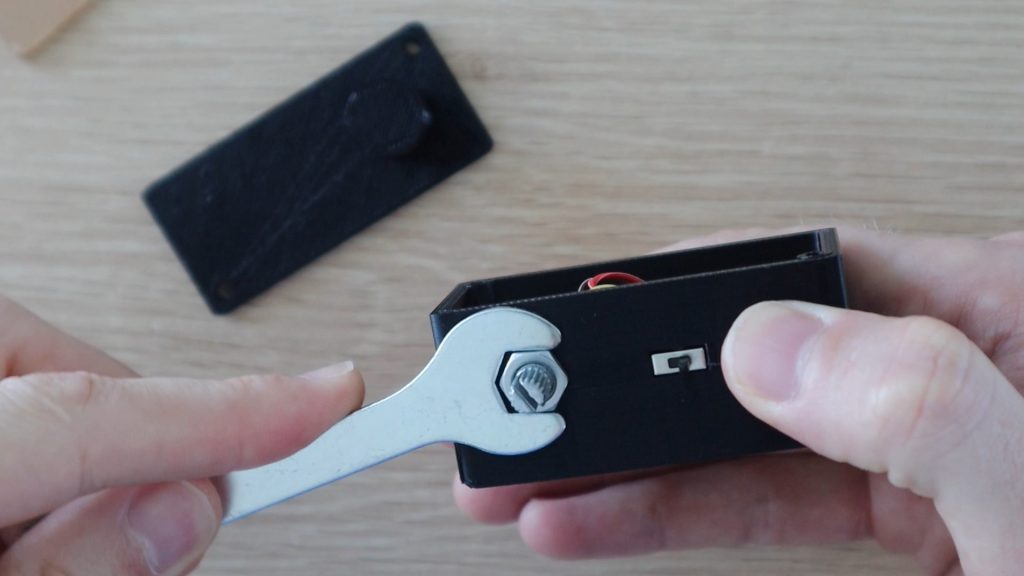
The pot is held in place with a nut on the outside.
Assemble The Acrylic Sign
To complete the sign, you need to install the battery, close up the base with the cover and then insert the acrylic sign.
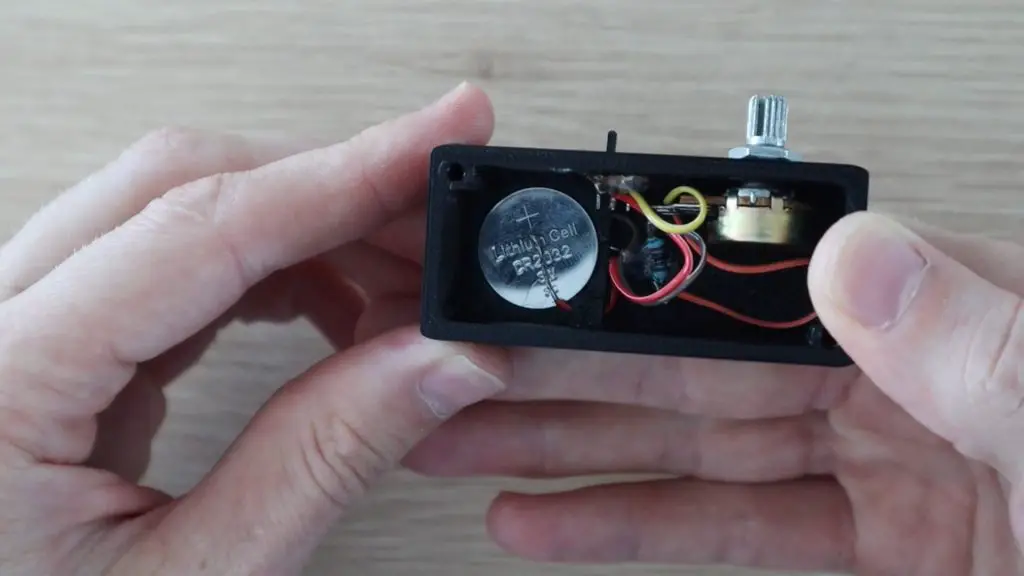
Place the battery into the battery holder with the negative lead touching the bottom of the battery. Then place the positive lead over the top of the battery.
When you install the bottom cover, the cylinder on the cover will press this lead down onto the battery to keep it in contact.
Once you’re happy with everything functioning then close up the bottom cover and secure it with two M3 x 15mm machine screws.
You can do one last check on the electronics before installing the acrylic sign if you’d like.
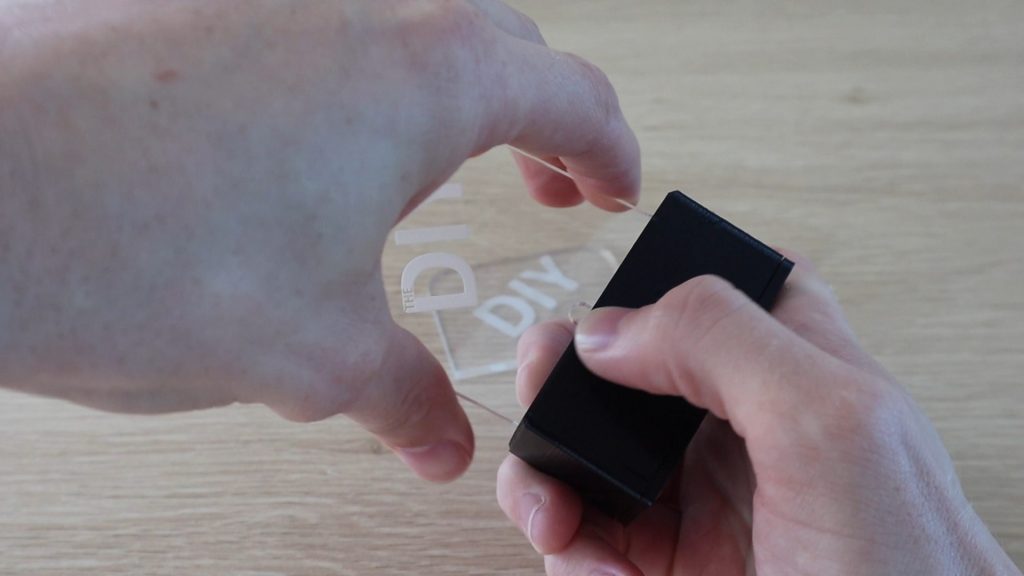
Now you just need to push your acrylic sign into the base and switch it on. It should be a snug fit into the base so you don’t need to glue it and you can then easily swap out or change the signs if you’d like.
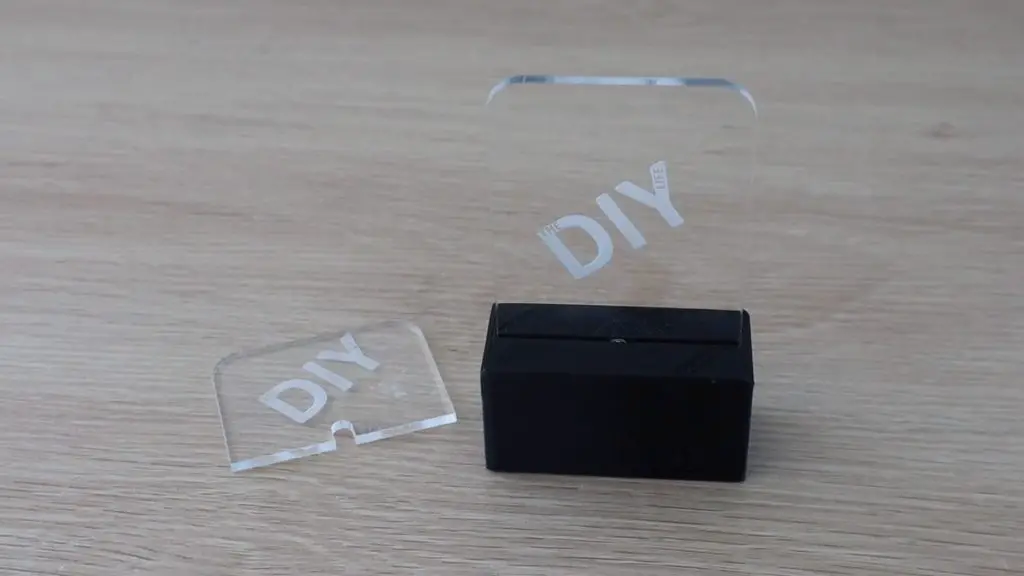
You sign is now complete.
I hope that you enjoyed this project, have fun making your own Acrylic signs. Let me know what you’ve made them for in the comments section.
Share This Guide
Hi, how deep is the cut for the words DIY? Does it make a difference to teh quality of the finished item
Thanks
Loved this take on marketing through design! I added one of those custom light up signs to my cafe, and it’s become both a branding piece and a selfie spot for customers. The return on visibility has been bigger than expected