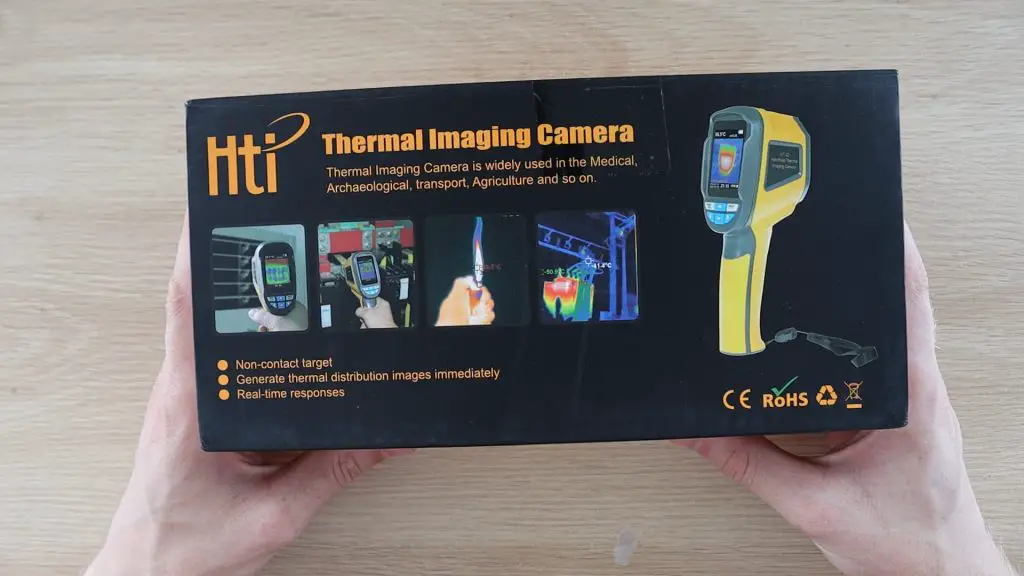
Today I’m going to be unboxing and reviewing the HT-02 Thermal Camera, which Banggood have sent me to share with you. They’re currently selling for $200, which is really cheap for a thermal camera. If you’re not familiar with thermal cameras, entry-level ones from well-known brands typically start around the $1,000 mark and they easily go up to the $10,000 to $20,000 mark. So we’ll have a look at some of the features of this camera as well as what you can and can’t do with it.
Here’s my video review of the camera, read on for the written review.
Where To Get One?
If you’d like to get your own HT-02 thermal camera, you can get one from Banggood through this link – HT-02 Thermal Camera. They’ve got US and China shipping options, so you should get yours in a couple of days.
Unboxing The HT-02 Thermal Camera
The camera comes in this black and yellow box which has a magnetic flap on the front.
There isn’t much else to the box, it doesn’t give you much information on the specifications of the camera itself, but you can get all of that online on the product page. We’ll also have a look at some of the more important ones in the next section.
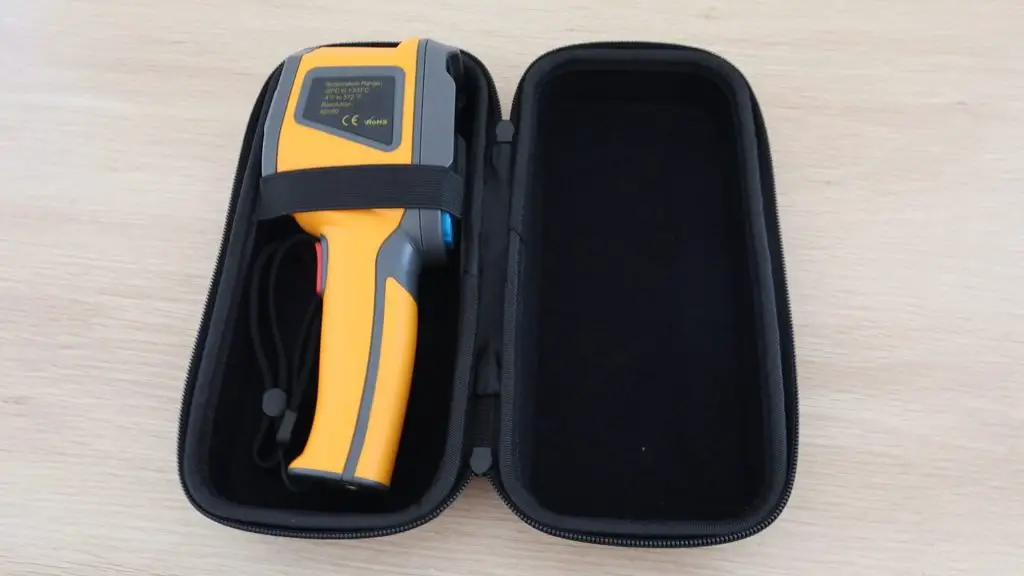
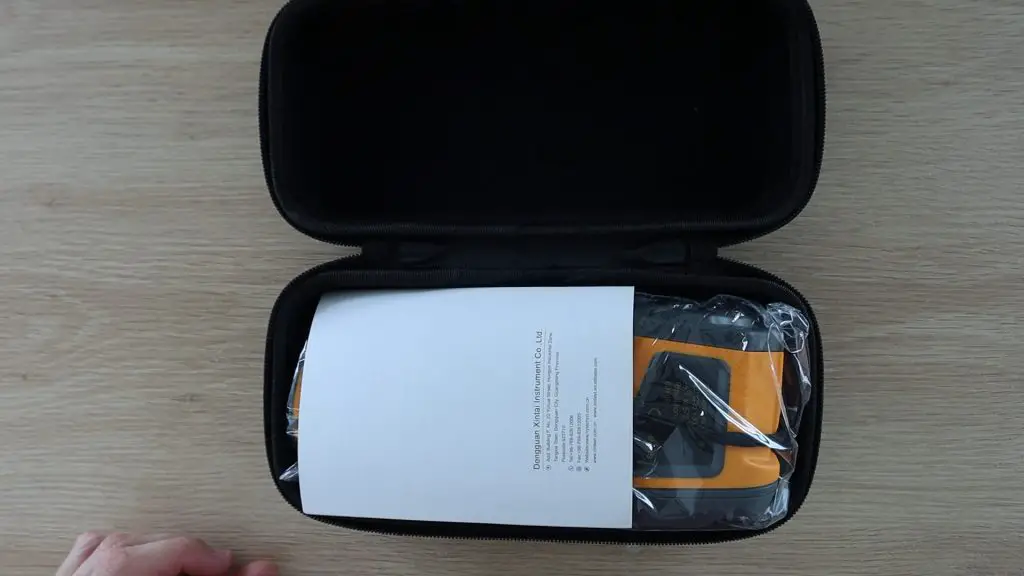
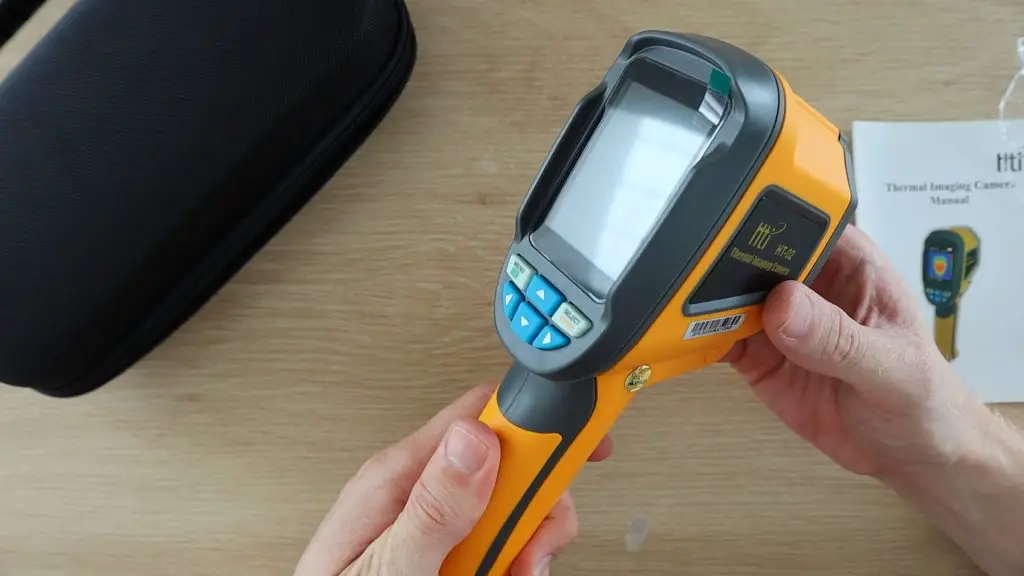
Inside the box, you’ve got a nice hard shell carry case with the camera inside it.

The case zips closed and inside that we’ve got the manual right on top. So let’s have a look at that first.
The Manual & Specifications
The manual is only in English, and it’s actually not that bad. There are one or two settings or sentences which don’t really make sense, but overall it’s pretty understandable and will get you through setting up and using the camera quite quickly.
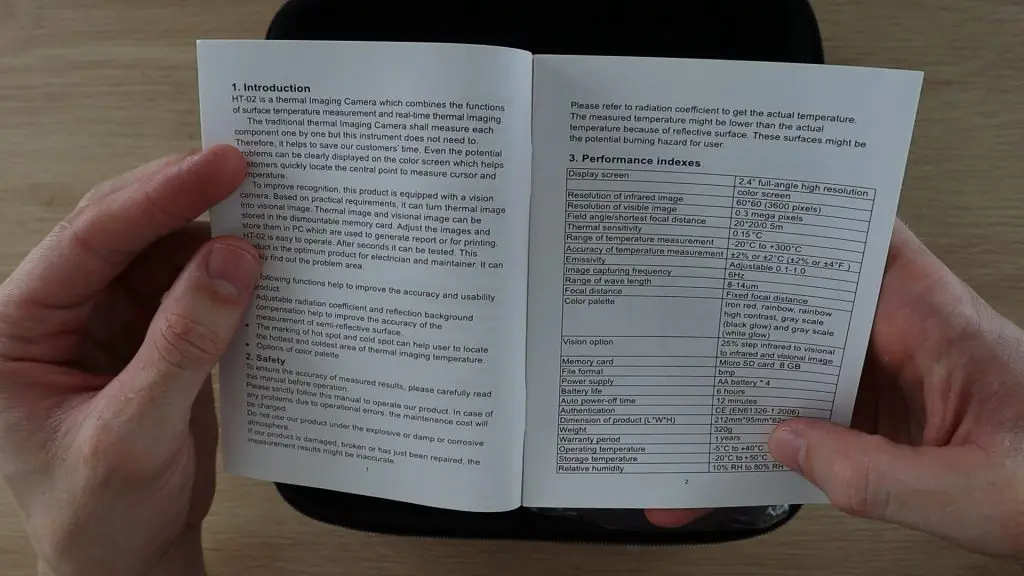
Here are some of the main specifications for the HT-02 thermal camera:
- Display: 2.4inch colour display
- Thermal Image Resolution: 60 x 60 (3600 pixels)
- Thermal Sensitivity: 0.15℃
- Temperature Range: -20℃ – 300℃ (-4o℉ – 572℉)
- Measuring Accuracy: ±2℃
- Wavelength Range: 8-14μm
- Image Frequency: 8HZ
- Emissivity: 0.1-1.0 / Adjustable
- Focus Mode: Fixed
- Image Storage: SD card(MAX 32G)
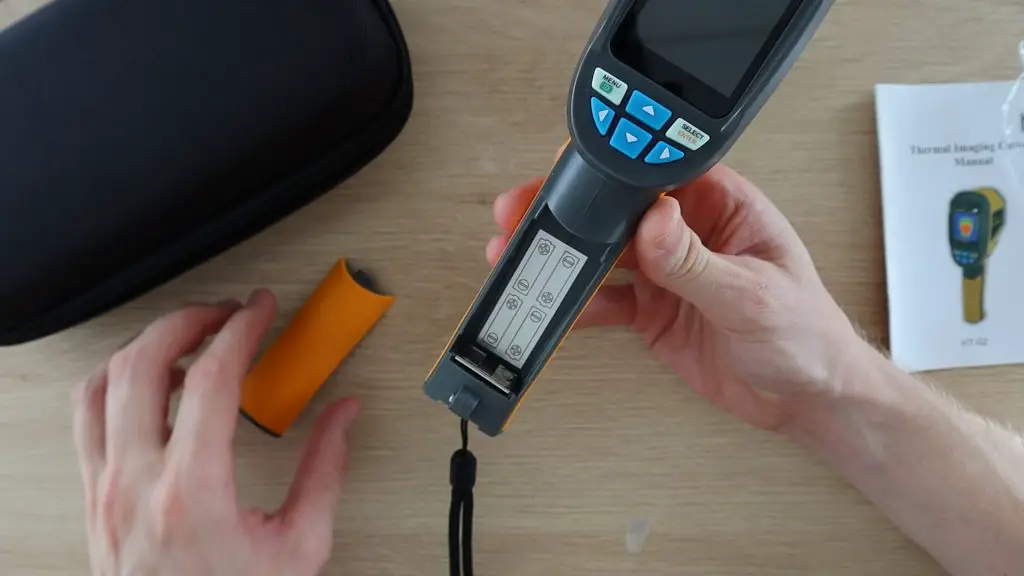
- Power Supply: 4 x AA batteries (NOT included)
- Operating temperature: 0℃ – 50℃
- Drop Resistance: 2m
- Size: 230 × 80 × 52mm
- Weight: 410g
It has an infrared image resolution of 60×60, which is a total of 3600 pixels. This is on the lower end for thermal cameras, but should still be good enough to get a fair amount of detail for objects when you’re not too far away. It also has a regular camera, with a resolution of 0.3 megapixels. The focal distance is 0.5m, this is the optimal distance between the camera and the subject. It has a temperature range of -20C to 300C, which is pretty good, it’s actually better than most other entry level thermal cameras. Its accuracy is claimed to be within 2% or 2C. It’s also got a range of colour palettes and includes an 8GB SD card. It is powered by 4 AA batteries, which give it a total run time of around 6 hours.
The manual runs you through all of the components, features and buttons.
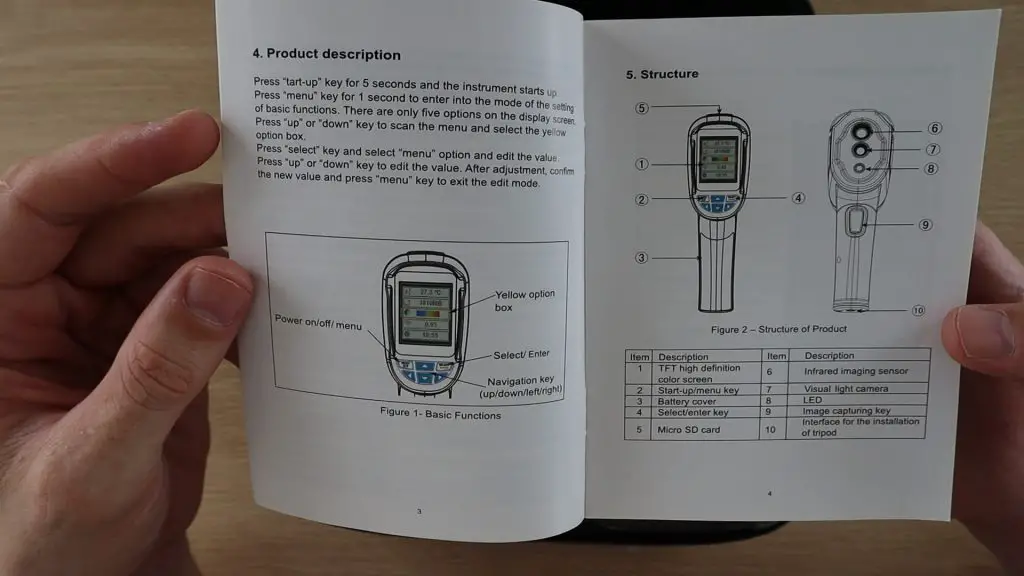
It also shows you the menu functions and how to replace the batteries.
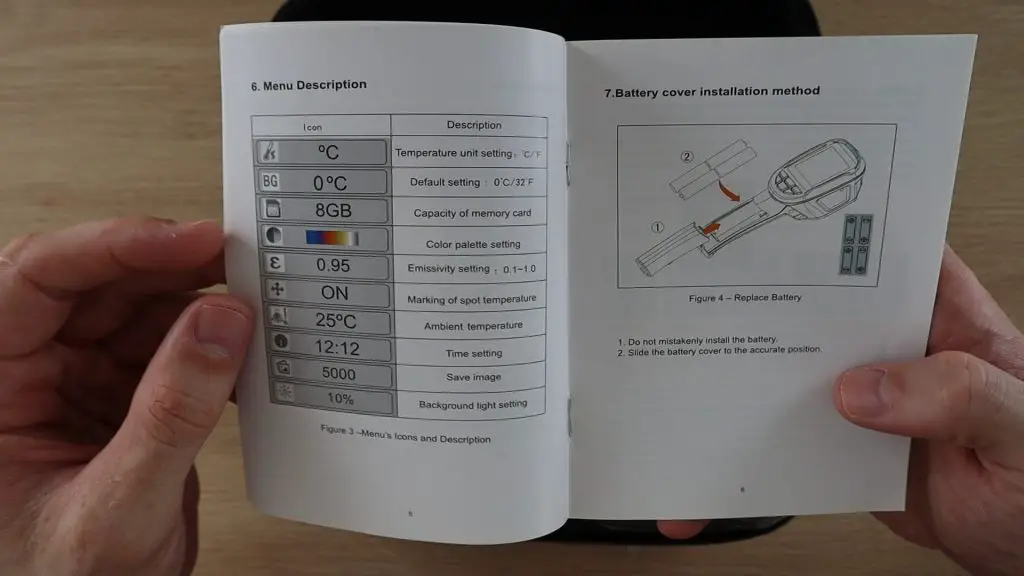
We then have a section on how to take measurements and change colour palettes.
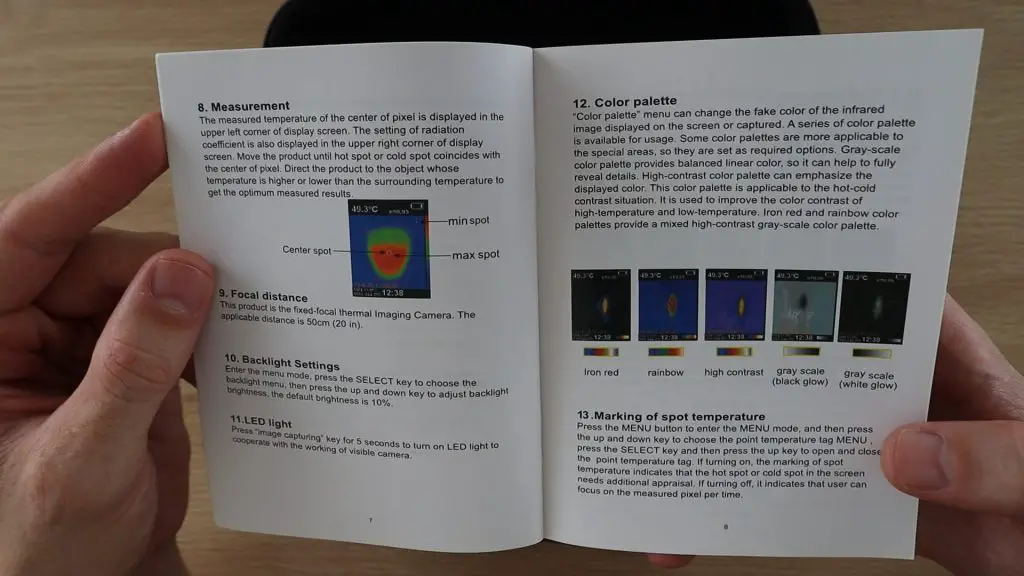
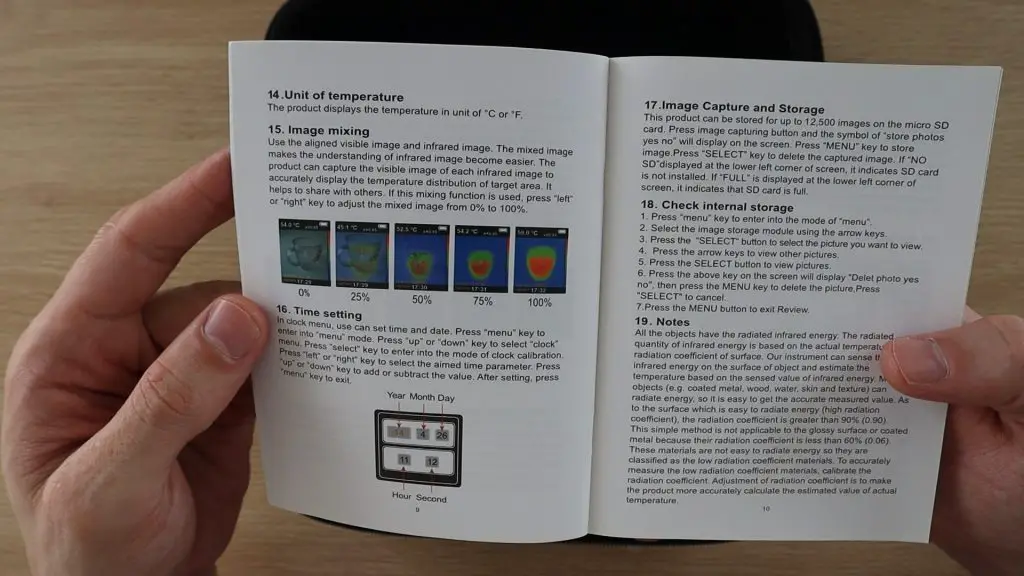
There is also a guide on how to mix images. This feature is quite useful, it enables you to overlay the thermal image and camera image so that you can better locate warm or cold spots on objects. You’re given 5 different levels of mixing from a complete camera image to a complete thermal image and 3 levels in between.
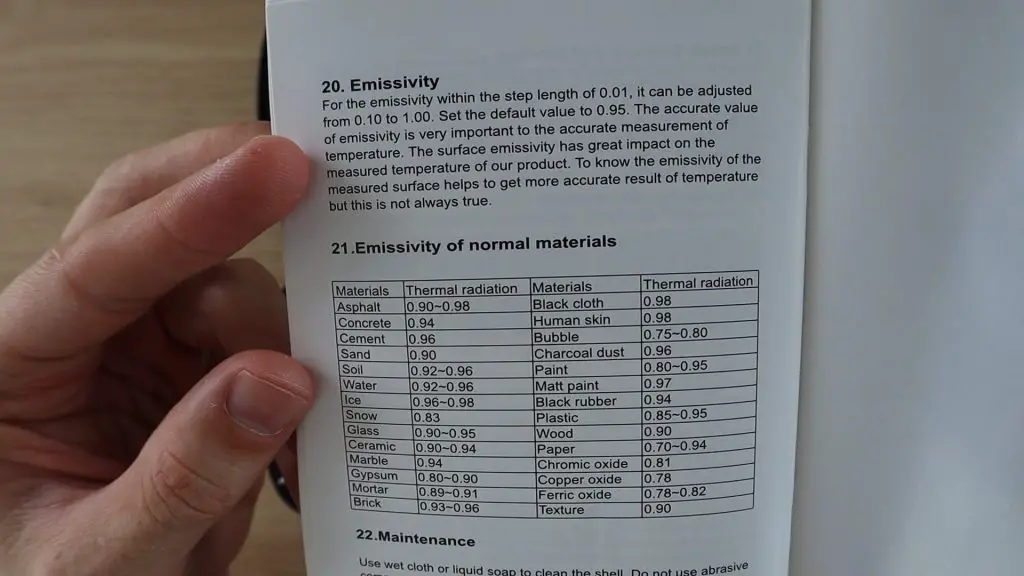
They also include a small guide on the emissivity of common materials. Different materials emit infrared energy at varying levels and this is the means to calibrate the thermal imaging on the camera to get more accurate results. The default is 0.95, which is a good starting point for most materials and for when you’re measuring a variety of materials in one image, but this is something to keep in mind when you’re taking measurements of certain materials, particularly with metals.
That’s pretty much it for the manual. We’ll go over some of the features and operation of the camera while we try it out.
A Close Up Look At The Camera
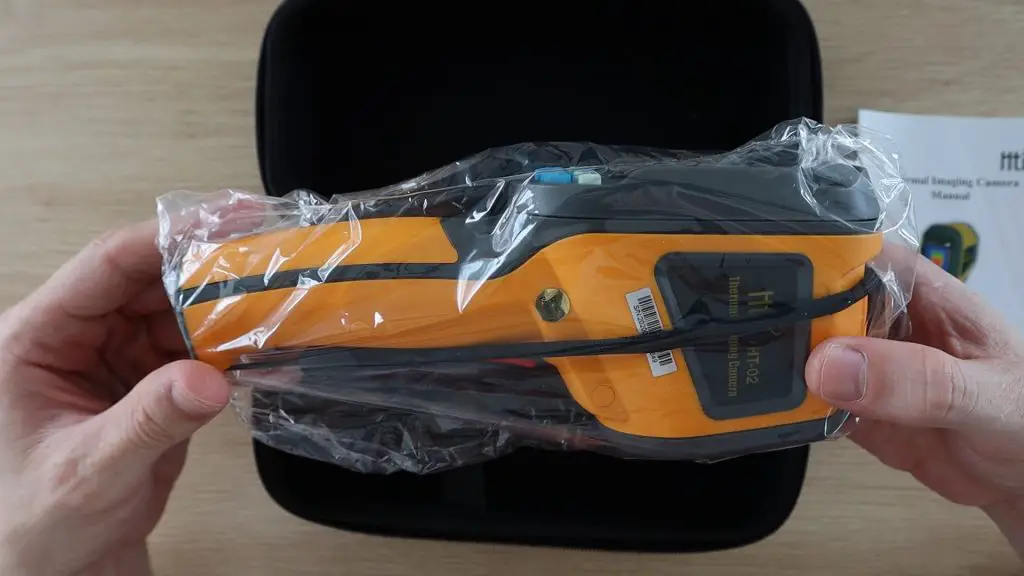
The HT-02 thermal camera is packaged in a sealed plastic bag and is held in place with an elastic strap on the inside of the case.
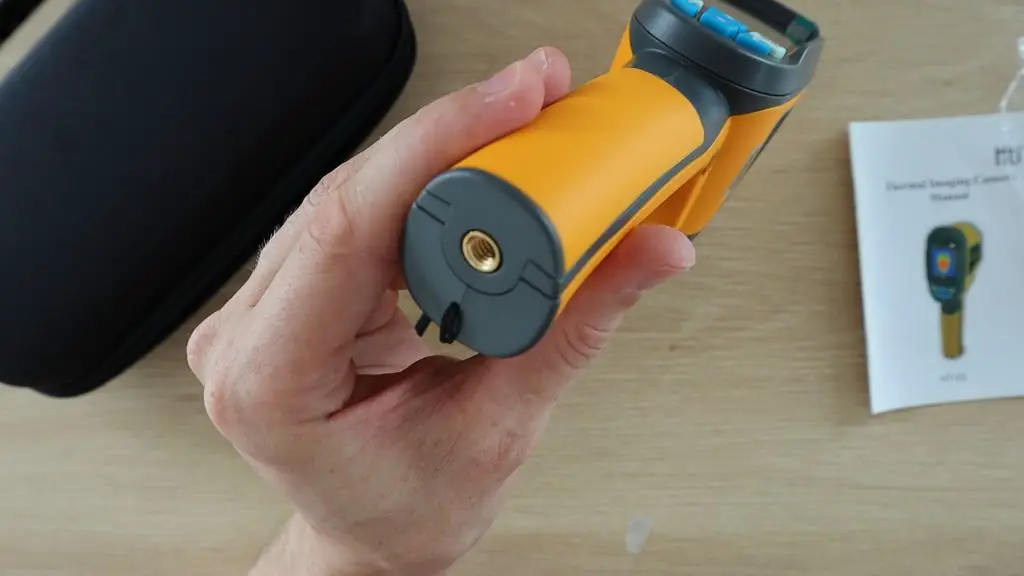
The camera actually feels quite solid. It’s got a wrist strap which is tied to the bottom of the handle and there’s also a 3/8” thread on the handle which is useful to mount it onto a tripod or stand.
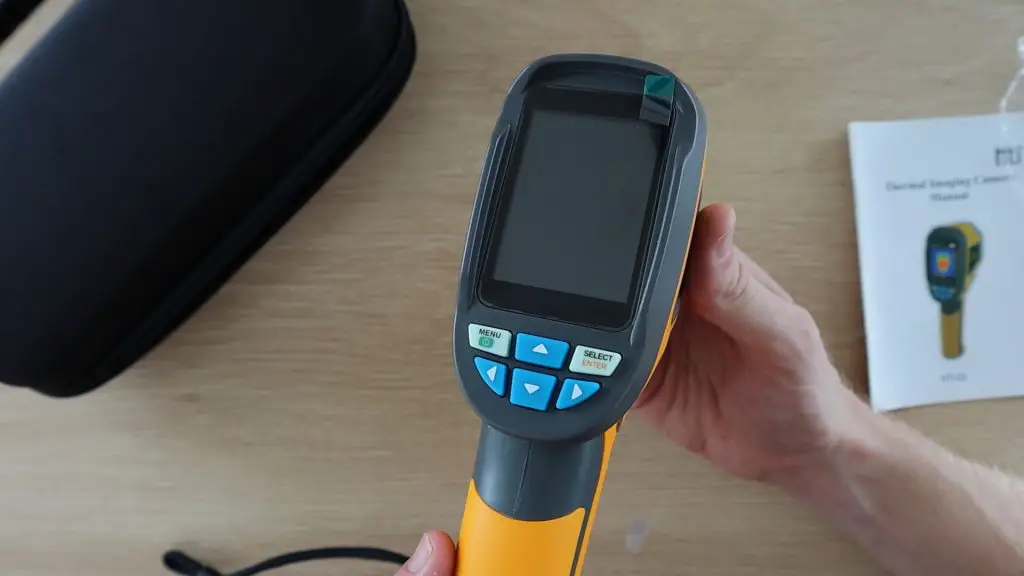
On the back we have the colour display and 6 buttons for navigating through the settings and menus.
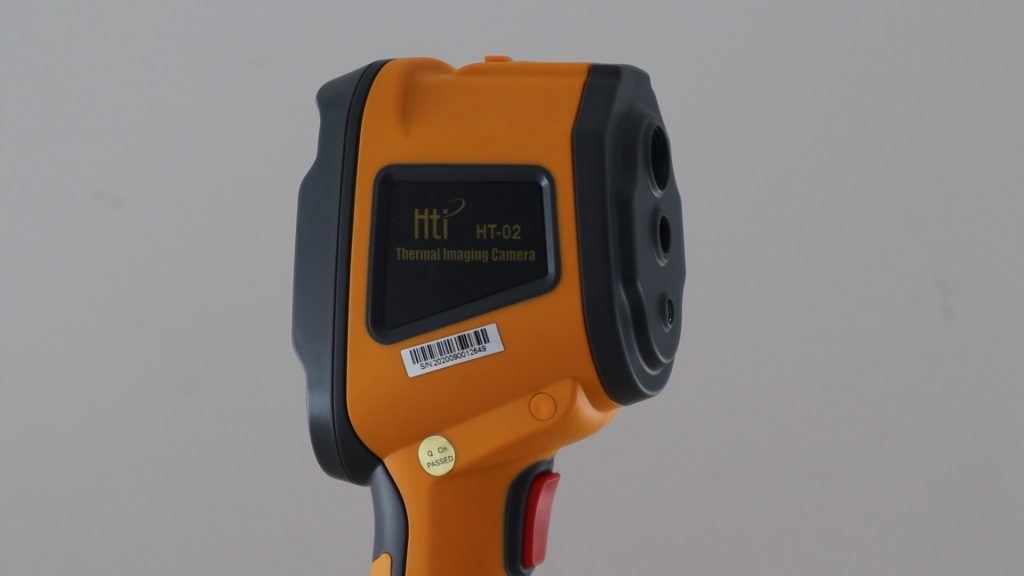
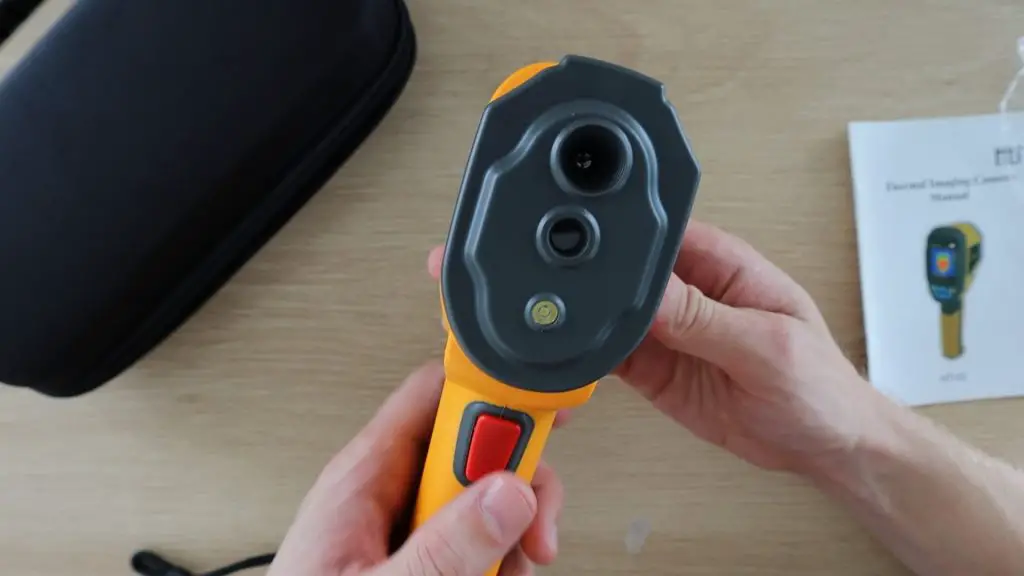
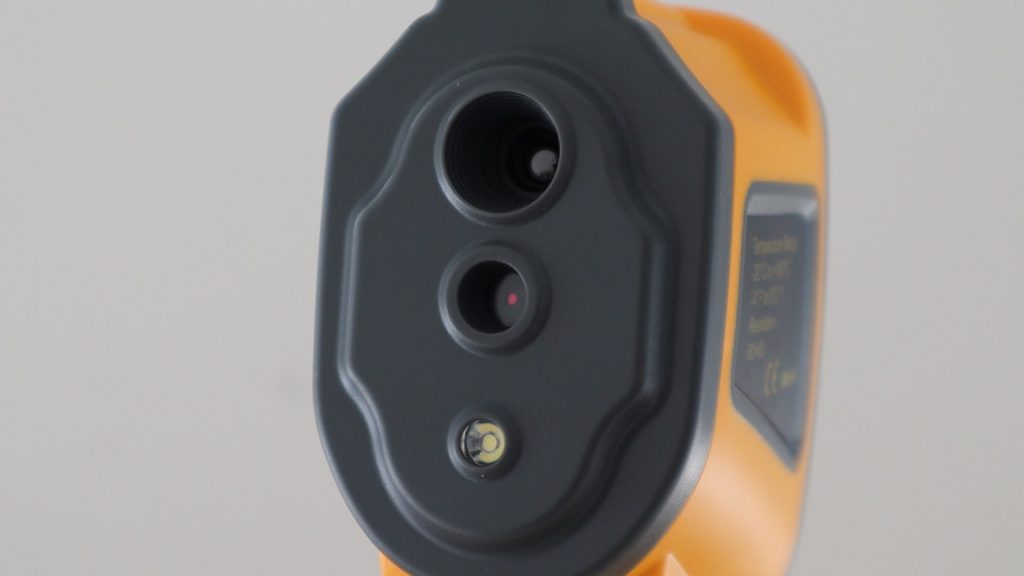
The screws are all covered on the sides with small rubberized plugs. On the front we’ve got the thermal camera at the top, then the visual camera underneath it and lastly an LED light. We’ve also got a red trigger button on the handle which is used to take photos.
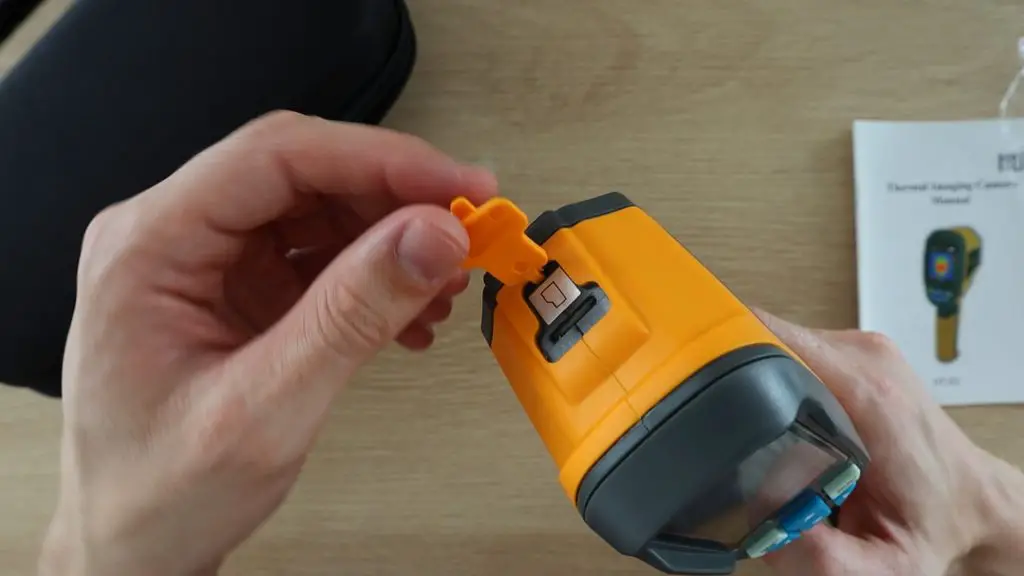
At the top of the camera is the micro SD card slot, which is again covered with a rubberised flap and you’ve given an 8GB micro SD card, which should be plenty of space for the resolution that the camera runs at.
I’ve mentioned before that it feels quite solid and pretty well built. The yellow material on the outside has a rubbery feel to it, so it feels like something you could use around a workshop.
I wouldn’t chance dropping it from more than a meter or so, although the manual says it’s safe to drop up to 2m, but it feels like it would survive being bumped around a bit or thrown into a bag with some other measurement equipment.
Testing The Camera
Now that we’ve got the HT-02 thermal camera unpacked, let’s try it out.
We’ll need to put 4 AA batteries into the handle to power it. The battery compartment is in the handle of the camera and the cover just slides into place.
We then need to push and hold the menu button to turn it on. It takes a few seconds to power up and it then goes straight into the thermal camera mode.

Navigating the Menus
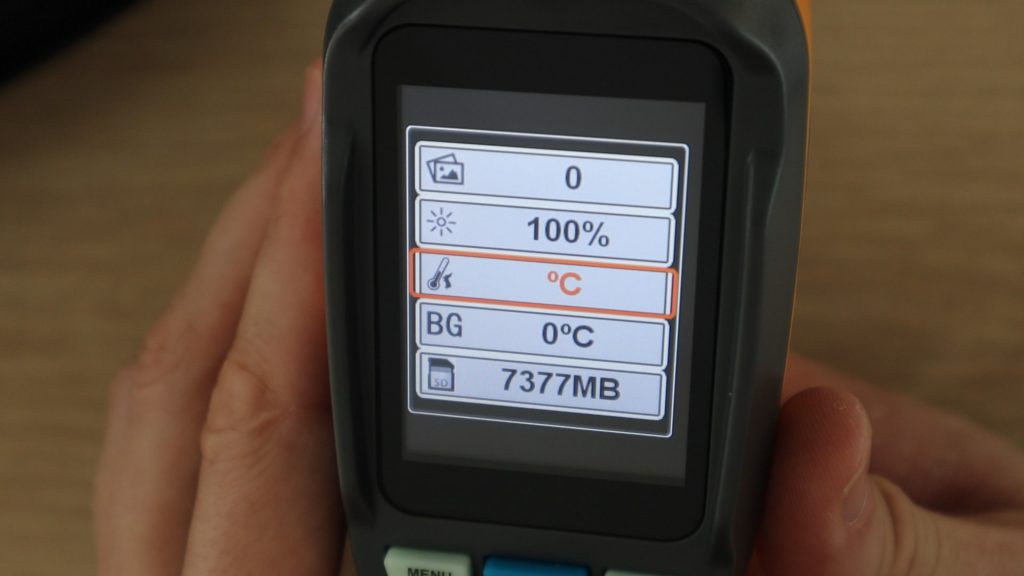
Let’s take a look at the menu and some of the settings. To access the menu, you just press the menu button. You can then scroll up and down through the menu options using the up and down arrows and select menu options with the select button. You push the menu button again to exit the menu.
The menu is pretty simple and is quite intuitive, for the most part.
There’s an option to switch between degrees Celsius and Fahrenheit.
Then there’s a setting called BG. I’m not really sure what this setting is for. The manual just describes it as Default Setting, it might be some sort of calibration offset value. I just left it alone for the test.
We’ve then got the storage space on the card, colour pallet options, emissivity settings, single or multi point measurement, ambient temperature, the time, the number of pictures taken and the display brightness.
The Thermal Imaging Screen
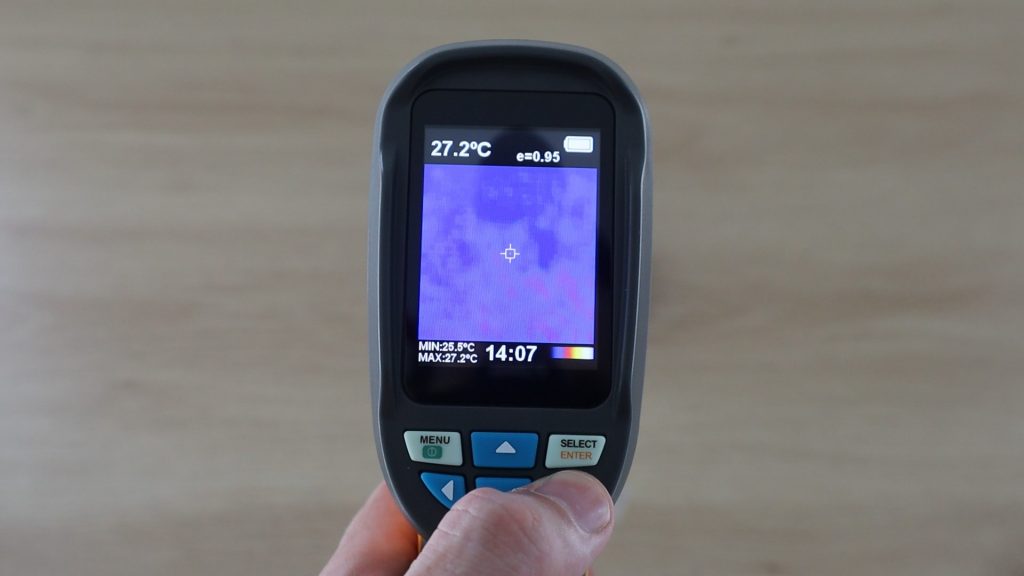
Outside of the menus, and when you turn the camera on, you’re taken to the measurement screen, which is where the thermal image and measurement values are shown.
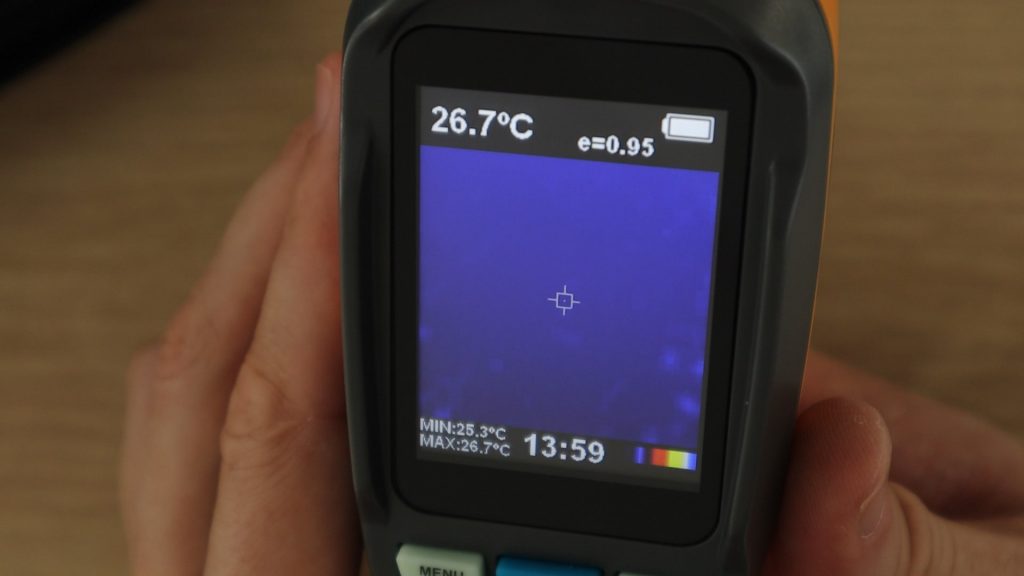
You’ve got the thermal image in the centre, with the centre point temperature (defined by the crosshairs in the centre of the display) on the top left and then a battery level indicator along with the emissivity setting on the right. At the bottom you’ve got the colour pallete setting, the current time and then the minimum and maximum temperature in the current image.
The LED on the front is turned on by pressing and holding the trigger button and is turned off in the same way.
Taking Measurements & Images
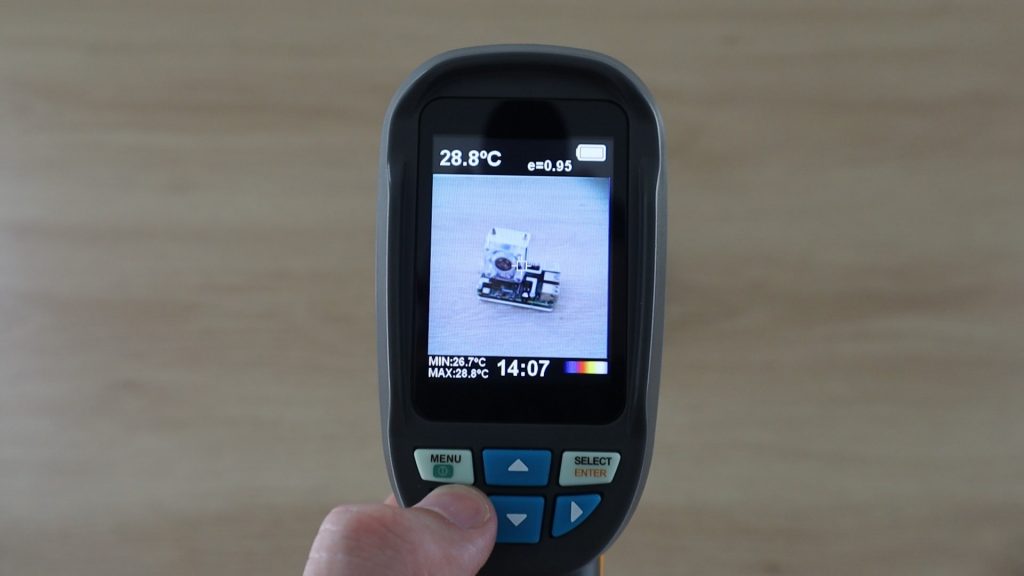
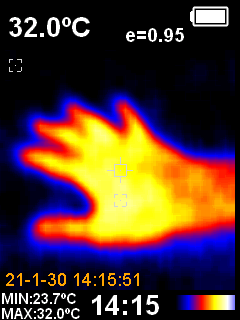
Let’s start off by looking at a Raspberry Pi.
This Pi hasn’t been turned on in a while, so it should be the same temperature as the rest of the room. So you can’t see anything on the thermal camera.
If we switch to the visual camera you can see that the Pi is in the shot, it’s just not emitting any heat yet.
Now let’s try plugging it in and watch it heat up a bit. After a few minutes, you can see we’re now getting a warm spot on the bottom of the Ice Tower.
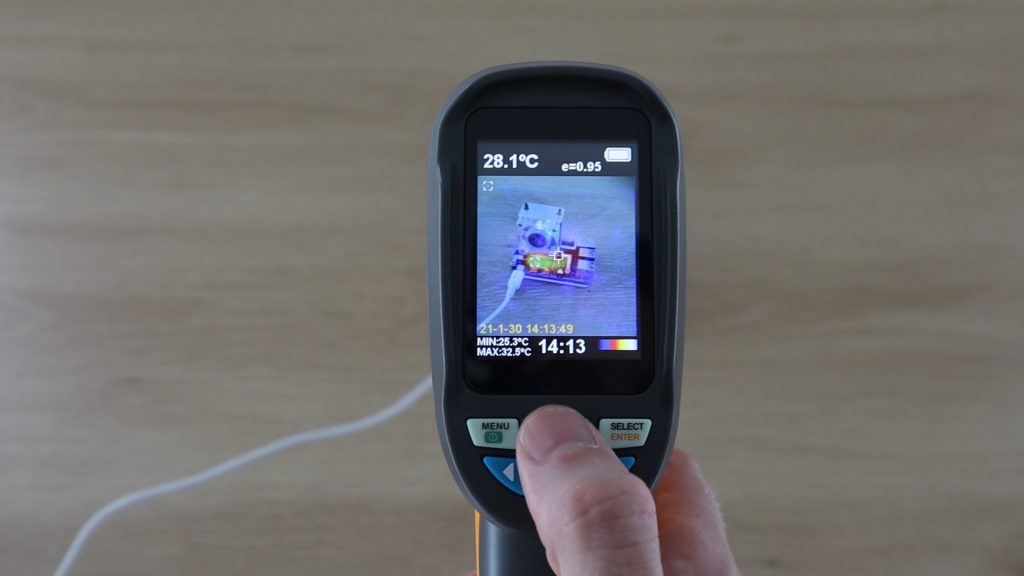
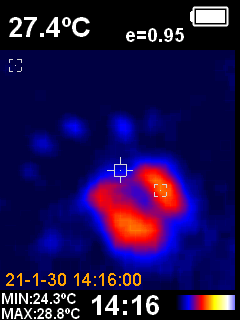
If we try the multi-point mode we can see the points on the display where the highest and lowest temperatures are being measured. The highest temperature looks like it is on the bottom of the heat sink in the area in contact with the CPU, as expected, and the lowest temperature is on the desk around it.
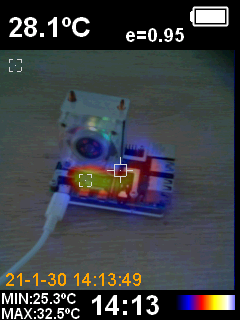
The HT-02 thermal camera seems to take a screenshot of the display, so you get all of the information around the image saved with each photo as well. It doesn’t look like you can turn this on or off, but it is pretty important to have with each picture anyway.
Thermal and Visual Image Blending Options
There are 5 blending options for the thermal and visual camera images. 0%, 25%, 50%, 75% and the 100% thermal image and you can easily switch between them using the side arrows. This is useful to locate specific areas in your picture which are generating heat.
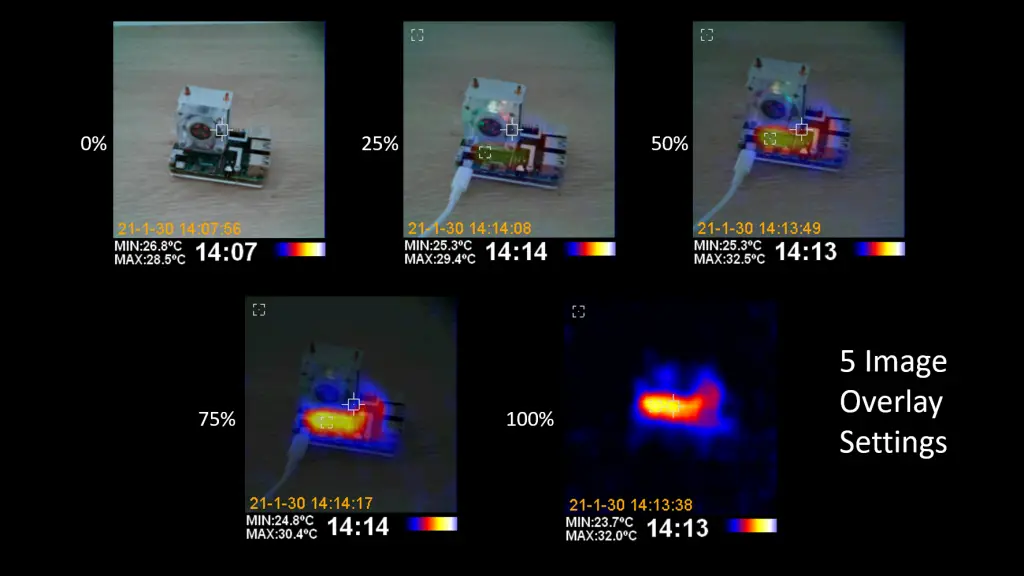
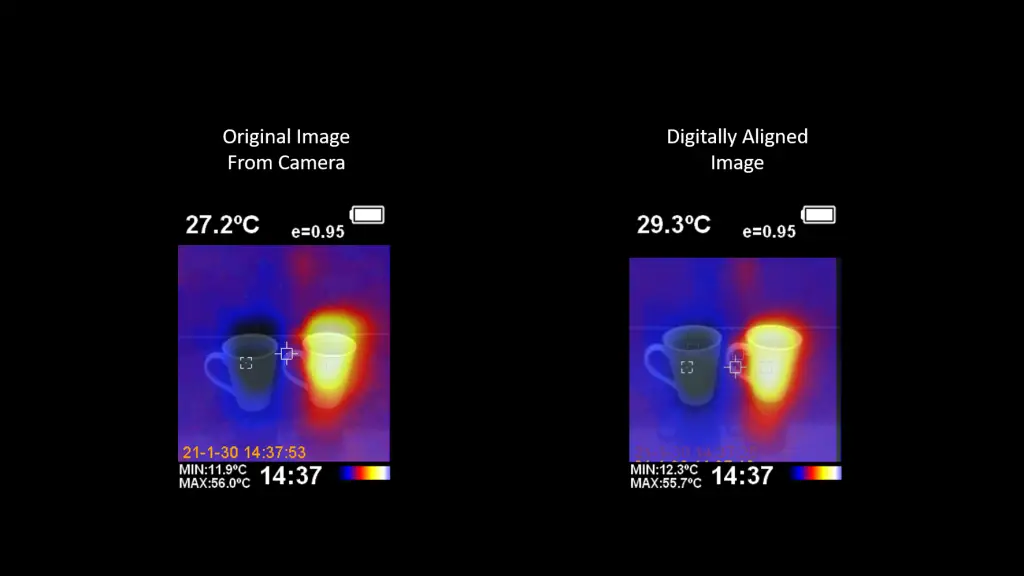
You’ll notice that the thermal image of the Pi is slightly higher than the visual image. This is because the two cameras obviously have to be spaced slightly apart, and the camera’s alignment is set up for the 0.5m focus distance. So if you’re closer than this then you get a slightly misaligned image. This is going to happen on any camera though because you can’t have both cameras in the same position. Some other cameras do have a means to adjust the focus point, either optically or digitally to correct this and some even do it automatically
Thermal Signature On Objects
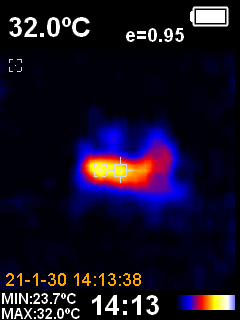
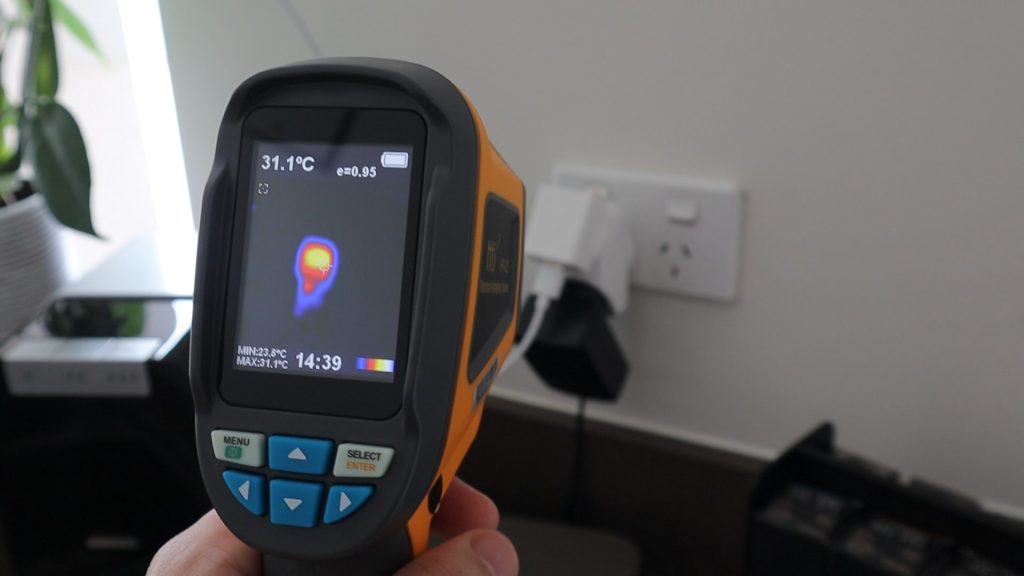
Let’s try looking at my hand placed on the desk through the camera. The colour display is bright and produces nice vibrant colours according to the colour palette you’ve got selected.
Even with the fairly low resolution of the thermal sensor, you still get pretty good definition and you can make out objects fairly well, as long as they’re not really small.
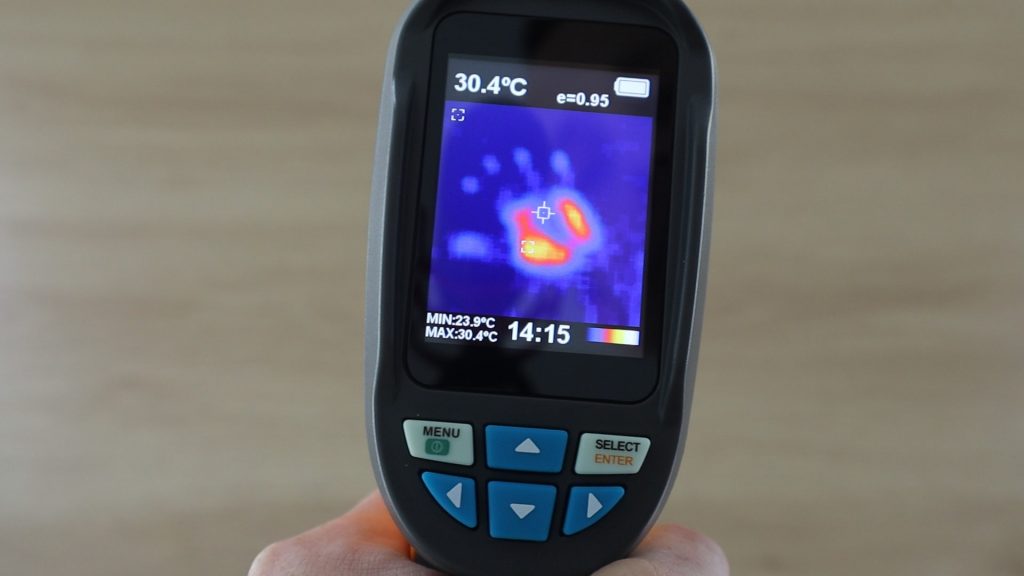
You can see my hand’s thermal signature stays around for a while after I’ve removed my hand from the desk.
Comparing Hot And Cold Measurements
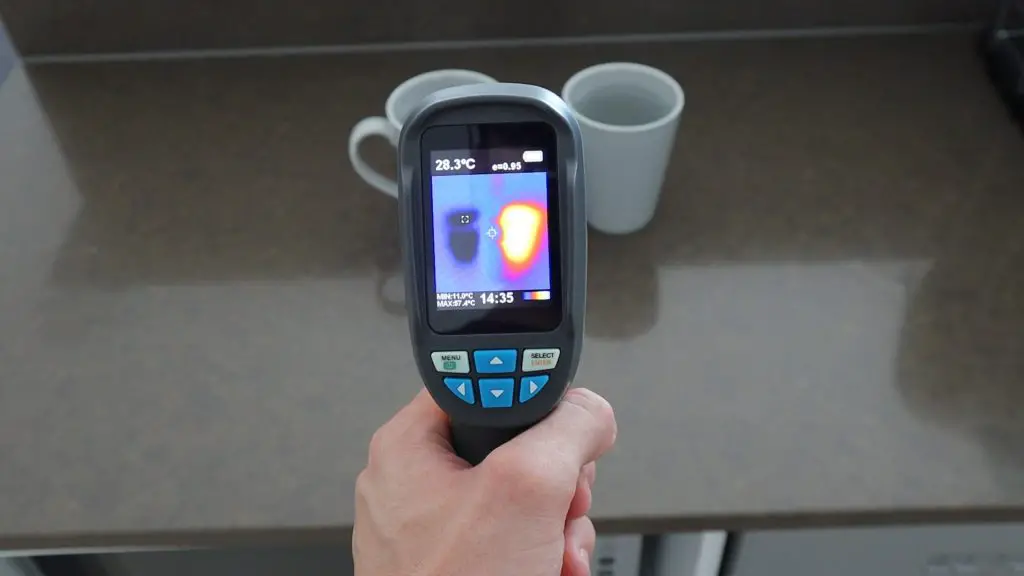
Lastly, let’s have a look at these two cups of water. The one is cold and the other is hot, which you can’t really tell from my camera unless you notice the thin wisps of steam above the one cup.

Here’s what they look like from the thermal camera.
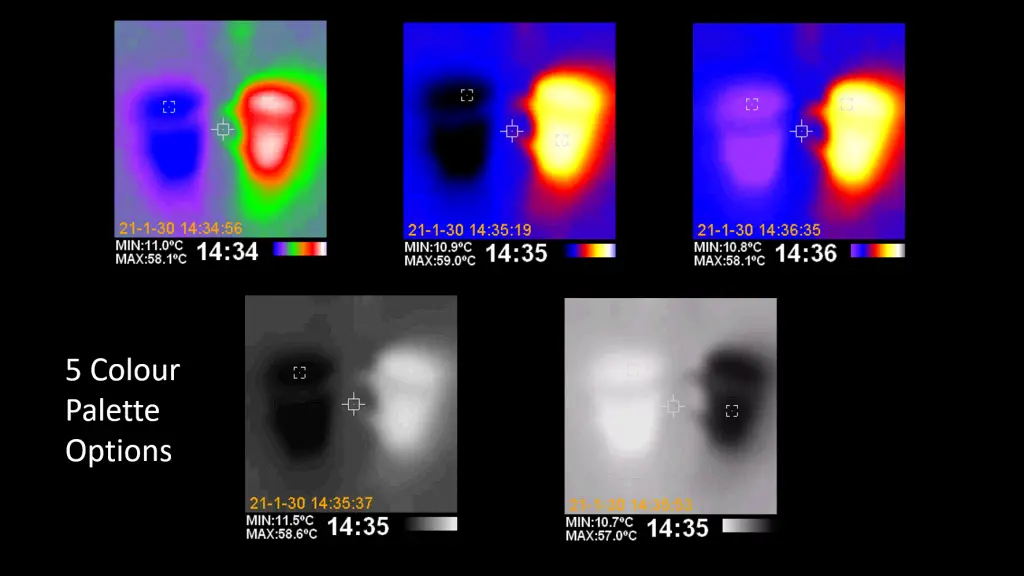
Here’s a look at the different pallet options available:
You can also use this camera around your house or workshop to find gaps between doors and windows, or to see if equipment has been running or is still on.
Drawbacks and Suggestions
There are three main things I would have liked to have had on this camera, which all would have been relatively easy to add.
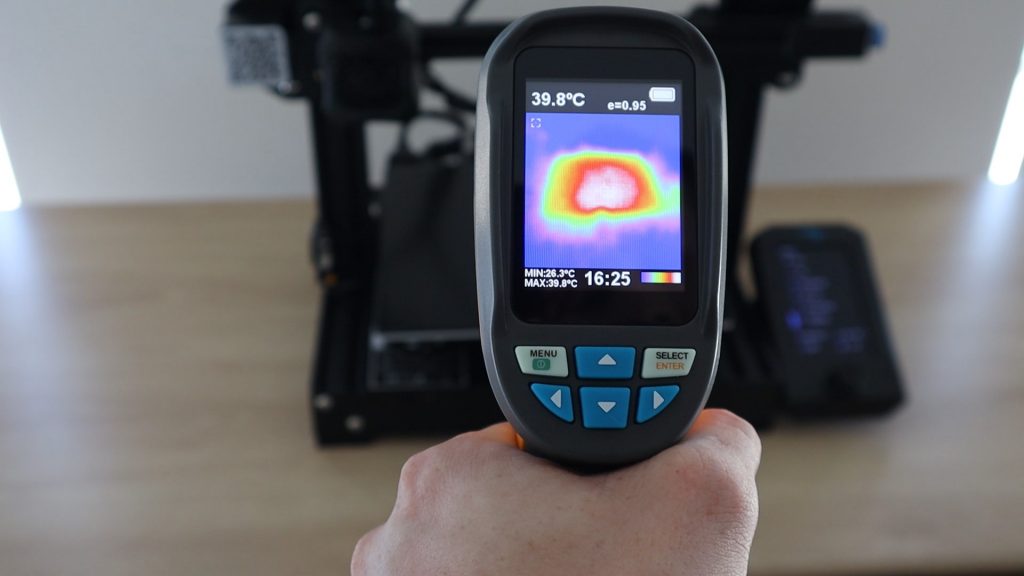
The first is that I would have liked to have a video option. It would be useful to see how objects heat up or cool down, like my 3D printer, and with the tripod mount already there, this would be a great tool for monitoring an object for a couple of minutes. You could also add a simple alarm which triggers if the temperature exceeds a certain high or low limit.
The next would be to be able to digitally adjust the alignment of the two overlaid images. It’s not always possible to get your object at exactly 0.5m and you’re then left with a slightly mismatched image. This doesn’t make the feature unusable, as you can still generally see where the overlay is supposed to be, but this would be pretty simple to do right on the camera and would give you much better quality images. Here’s an example of an image that I’ve fixed up, compared to the original image.
Lastly, it would have been nice to have a rechargeable battery. People just don’t use AA batteries as often as they used to and it’s a bit of a mission to have to get to a store to get some more if they die while you’re busy using the camera. Obviously, an internal battery and charger would push the price up a bit, but I think the extra ten to twenty dollars would be worth it for the convenience. If you do use rechargeable AA batteries in the camera then it shows up a low battery warning and shuts down prematurely because rechargeable AA batteries are only 1.2V each and not the usual 1.5V.
Conclusion
Overall, I think the HT-02 thermal camera is a great value for money camera and I’d definitely recommend getting one to try out if you’re unsure about spending thousands of dollars on a more well-known brand. It has a few drawbacks, but none of them are serious. It’s still a perfectly functional camera and is great for getting started with thermal imaging. If you’re interested in getting one for yourself, here’s a link to the product page.