Today we’re going to be taking a look at a new water-cooling kit that has been designed for a Raspberry Pi 5. We’ll see how its custom water block and performance stack up against the DIY solution that I built for my Pi 4 a few years ago. I also used this solution on my Pi cluster, cooling 8 Raspberry Pi 4s at once. It worked really well for that too, so I expect it’ll also work well on the more powerful Pi 5.
Here’s my video of the comparison, read on for my write-up:
Purchase Links For Parts & Equipment Used
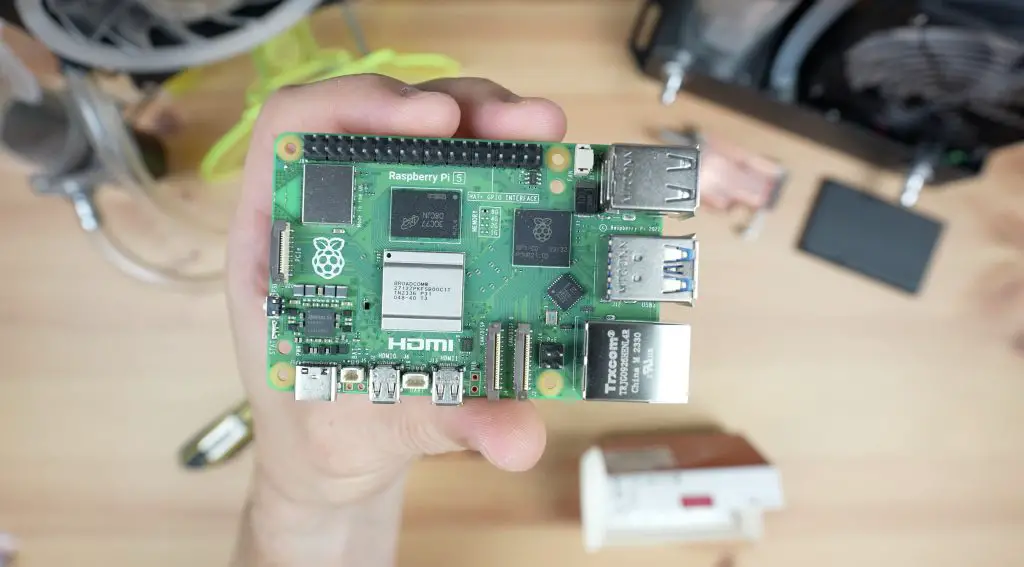
- Raspberry Pi 5 – Buy Here
- MicroSD Card – Buy Here
- Pi 5 Power Supply – Buy Here
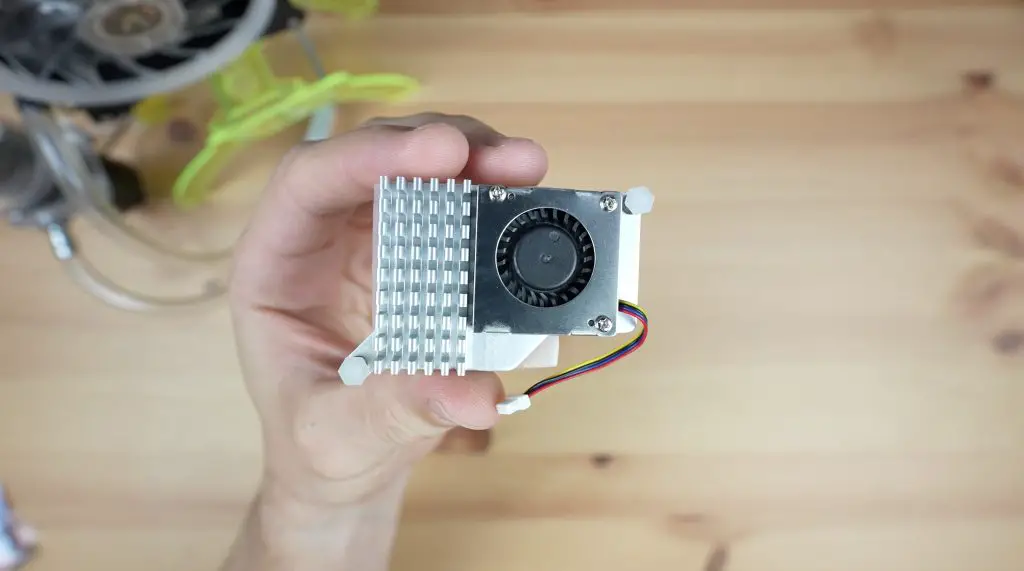
- Pi 5 Active Cooler – Buy Here
- DIY Water Cooling Block Kit:
- Water Cooling Kit – Buy Here
Tool & Equipment Used:
- Gweike Cloud CO2 Laser Cutter – Buy Here
- InfiRay P2 Pro Thermal Camera – Buy Here
- Jobi Gorilla Pod – Buy Here
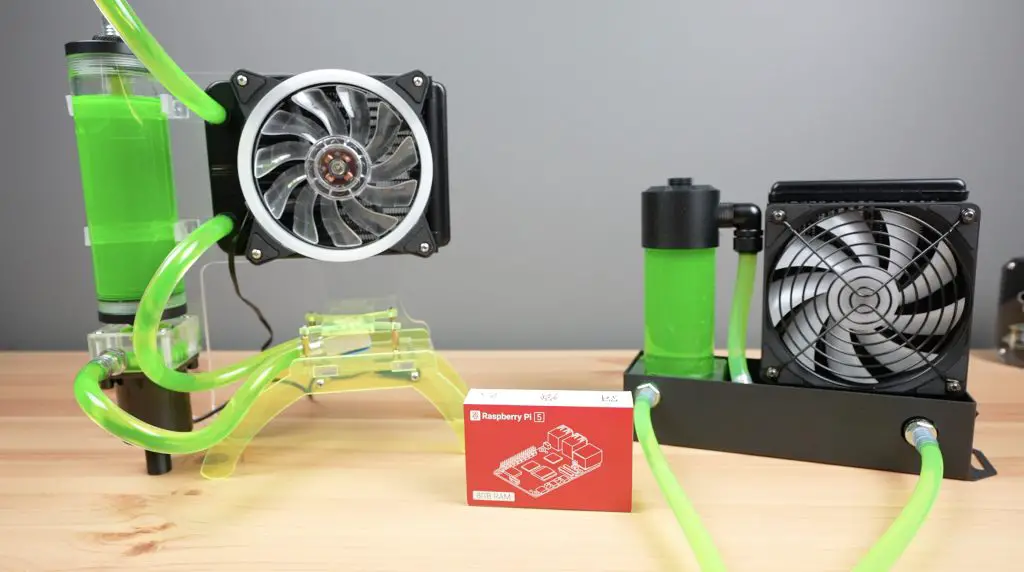
Unboxing The Seeed Studio Water Cooling Kit
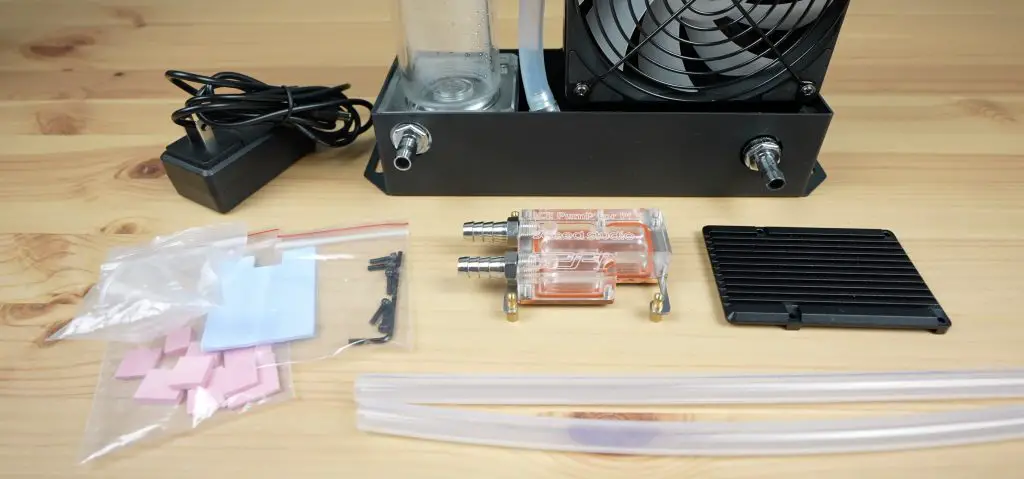
The water cooling kit that we’re going to be using has just been launched, it is available from Seeed Studio’s web store and currently costs $120.
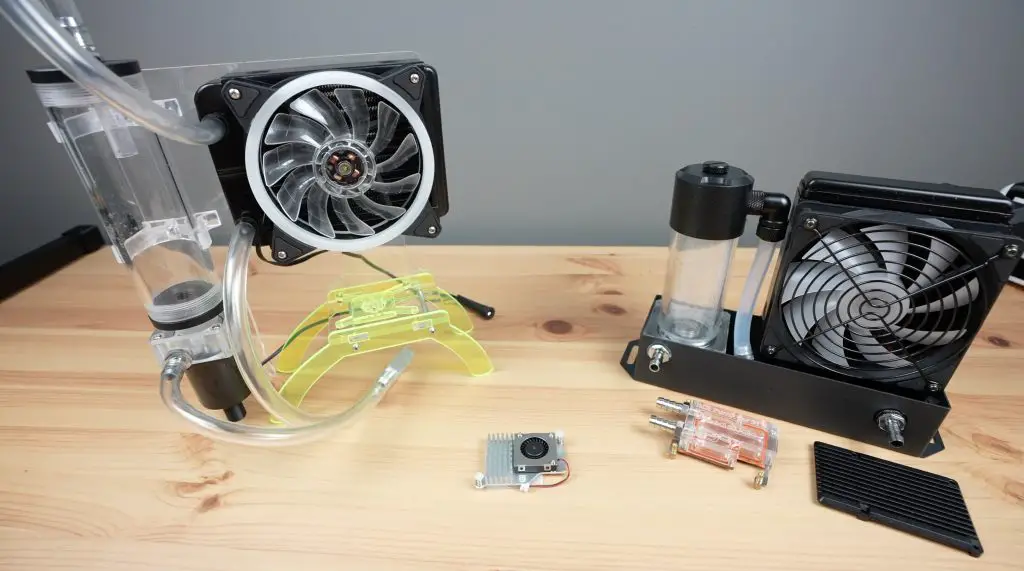
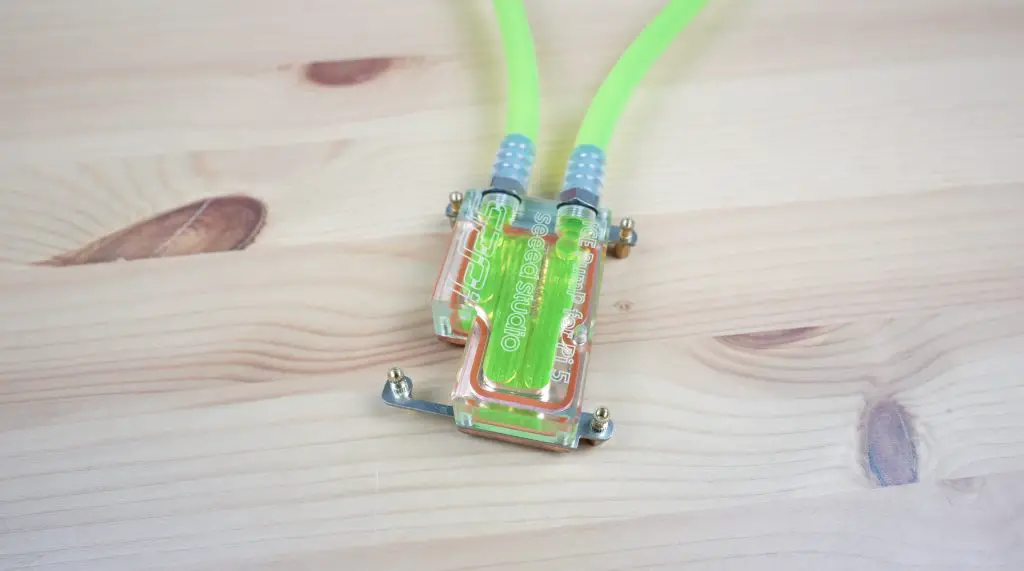
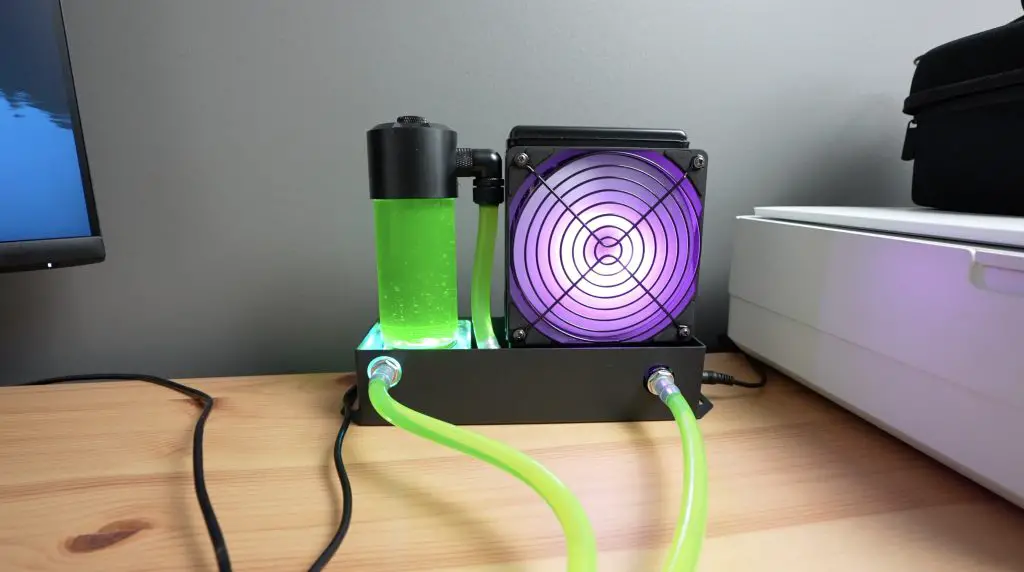
It includes a fan and water pump assembly, a cooling block, a 12V power adaptor, the installation hardware like some thermal pads and screws as well as some flexible tubing to run to the water block.
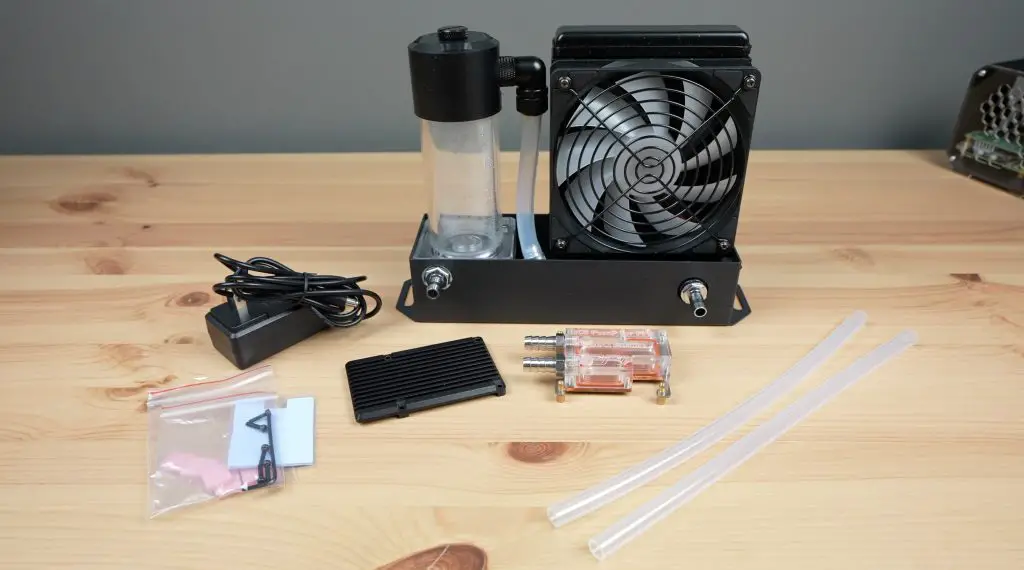
The water block is a custom design for the Pi 5 and the kit comes with a black aluminium heatsink for the bottom of the Pi as well.
Outlining The Thermal Testing Process
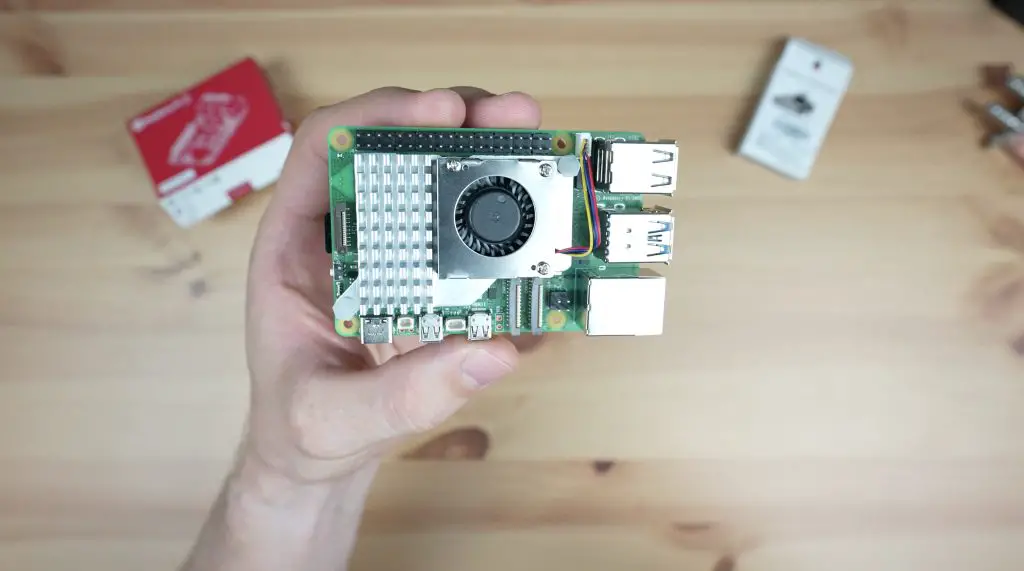
To test the thermal performance of the manufactured water cooling option, we need something to compare it to. For that, I’m going to try two different cooling solutions. The first is the active cooler that is designed for the Pi 5. This is a cheap and simple solution, costing just $5, and is also commonly available. It’s got an aluminium heatsink covering the CPU and surrounding heat-generating components with a small PWM fan on it.
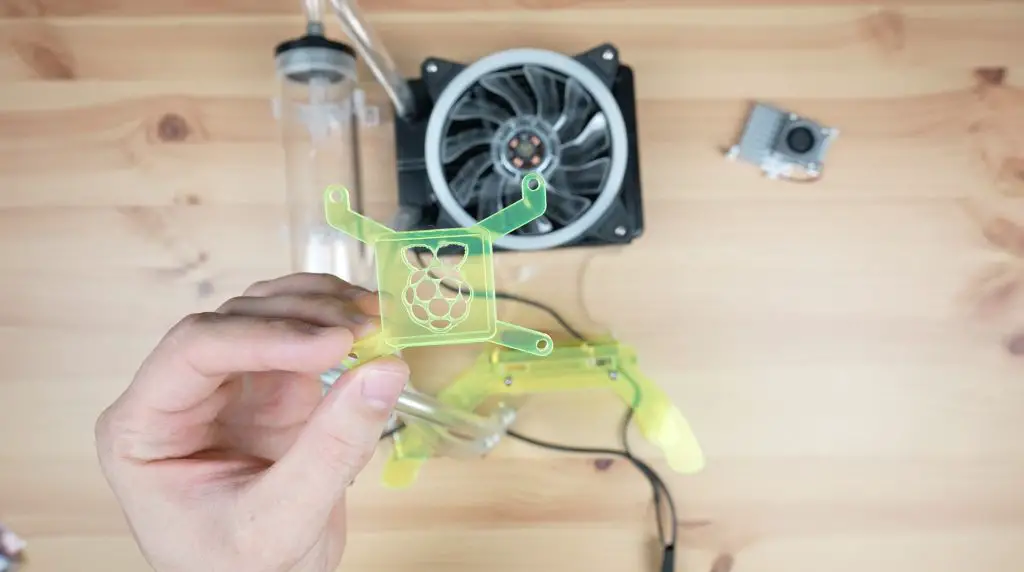
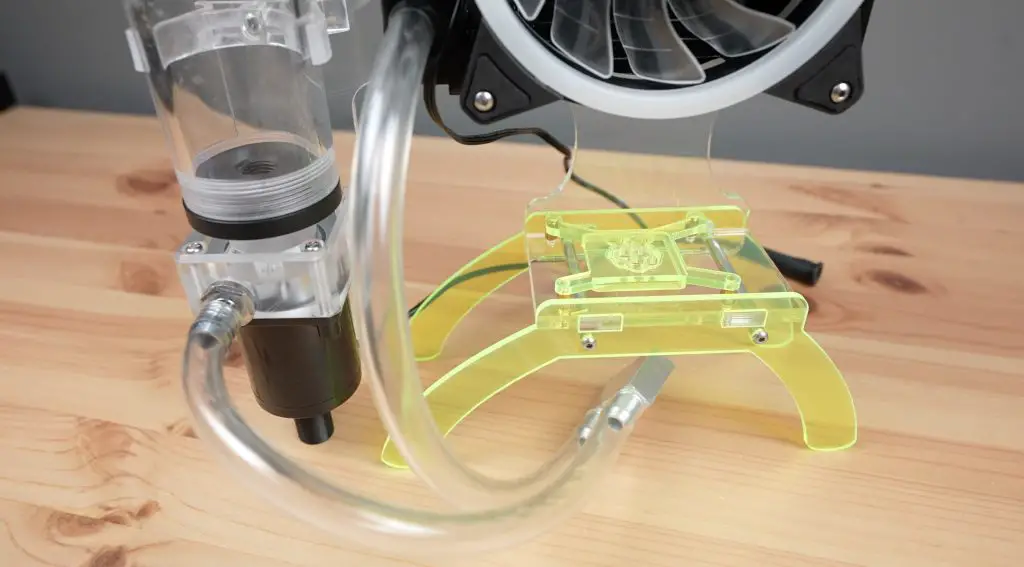
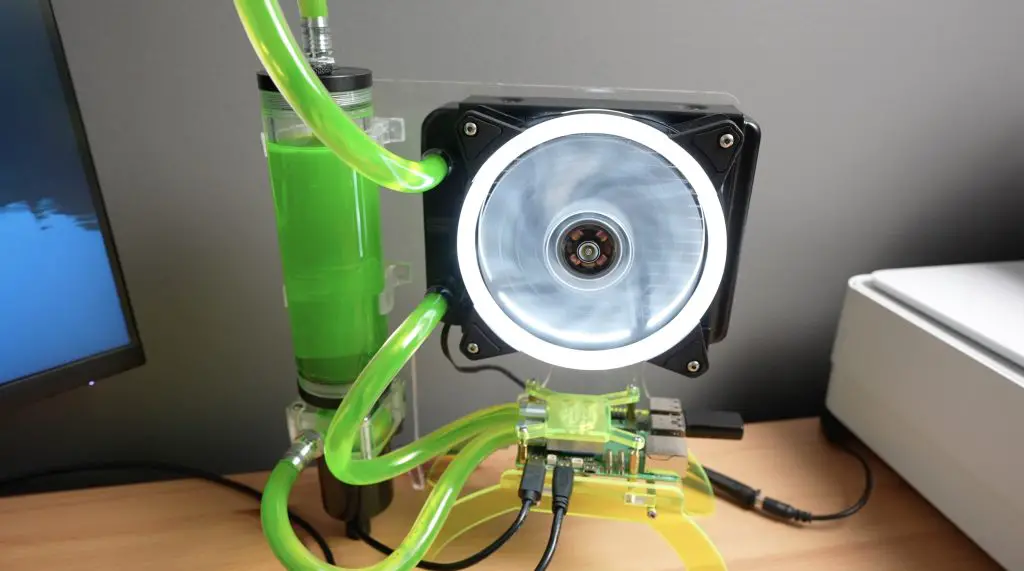
The second is my original water cooling setup from my Pi 4. I’ve had to make some changes to it to work with the Pi 5 – I’ve redesigned the heatsink bracket for the new CPU location and I’ve strengthed the legs and holder for the Pi as these were a little flimsy on the original. Other than that it’s pretty much the same set of components, especially in the cooling loop.
I’m going to use the same Raspberry Pi 5 with each cooling solution for consistency and I’ll just switch it between each solution for the test. I’m also going to be using the official Pi 5 power supply so that we don’t run into any power or undervoltage issues.
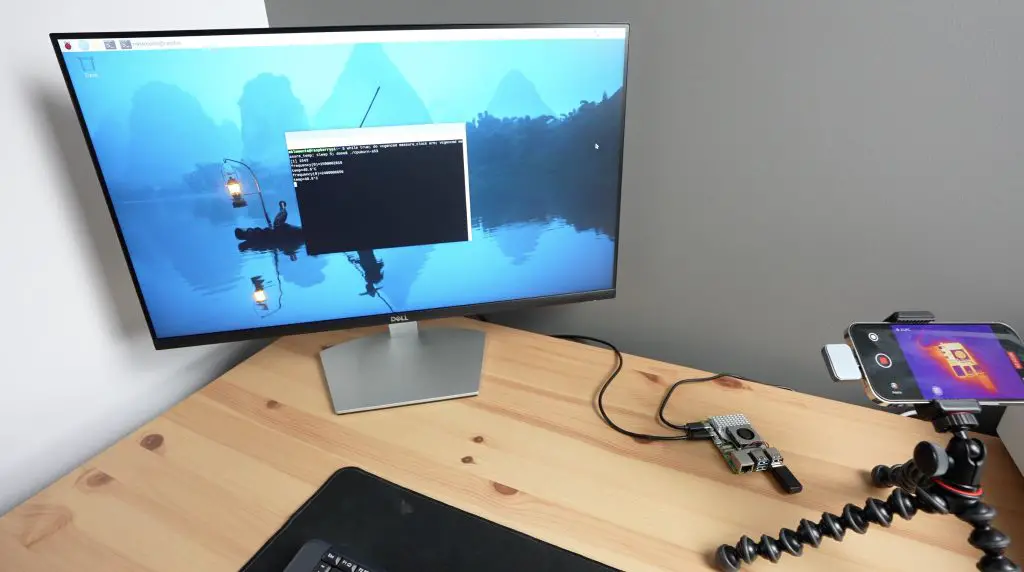
To test the thermal performance of each solution, I’m going to use a utility that I used to test my previous setup called CPU burn. It can be installed on your Pi using the following commands:
wget https://raw.githubusercontent.com/ssvb/cpuburn-arm/master/cpuburn-a53.S
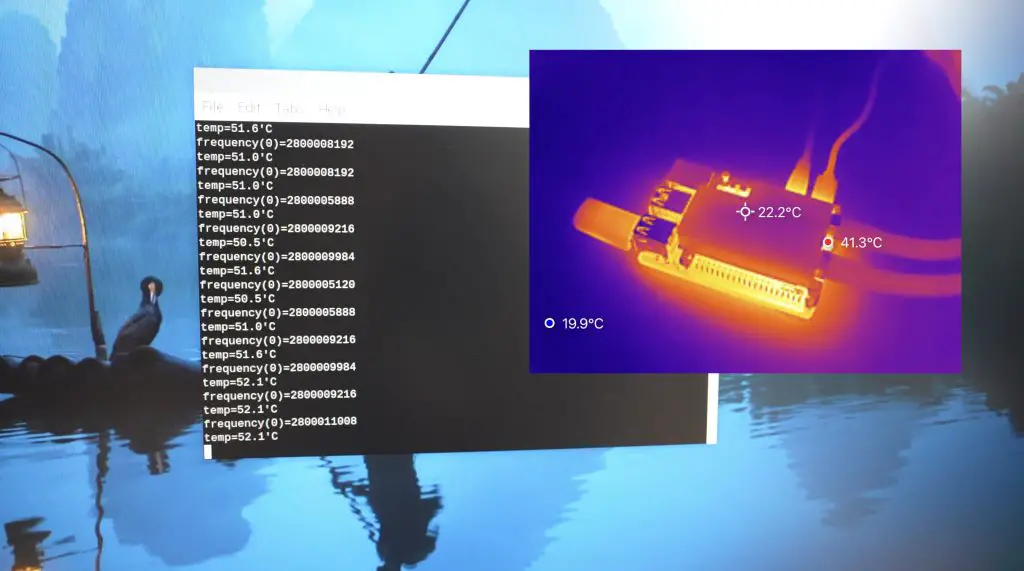
gcc -o cpuburn-a53 cpuburn-a53.SIt is then run in the terminal with the below command, which will also display the CPU temperature and clock frequency:
while true; do vcgencmd measure_clock arm; vcgencmd measure_temp; sleep 10; done& ./cpuburn-a53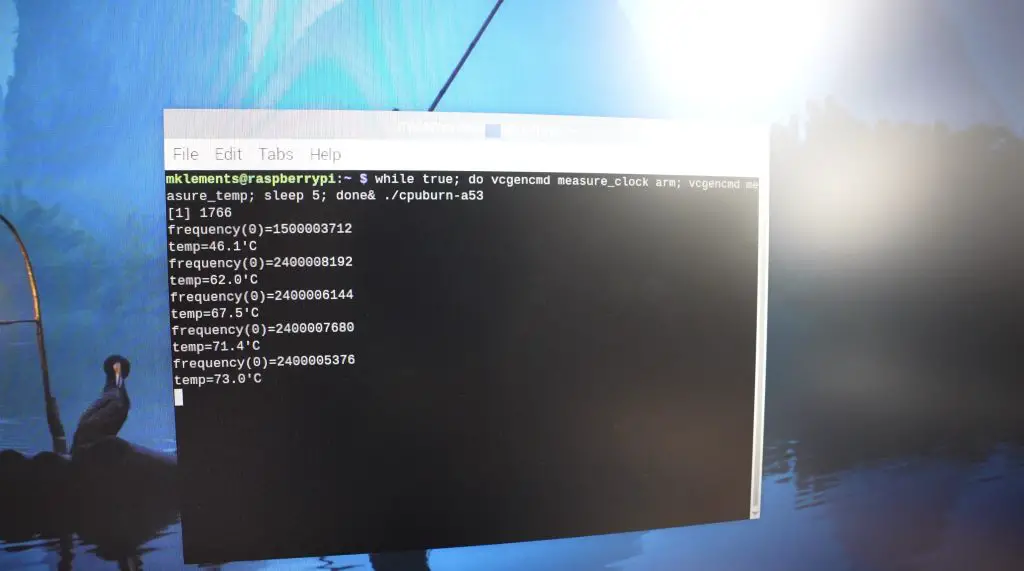
This utility fully loads each of the CPU cores. I’ll leave this running for about 10 minutes on each so that we reach the point of equilibrium every time. I expect both of the water cooling setups to perform quite well, so we’ll also try overclocking the Pi to 2.8GHz and see how each handles the additional overclocking heat as well.
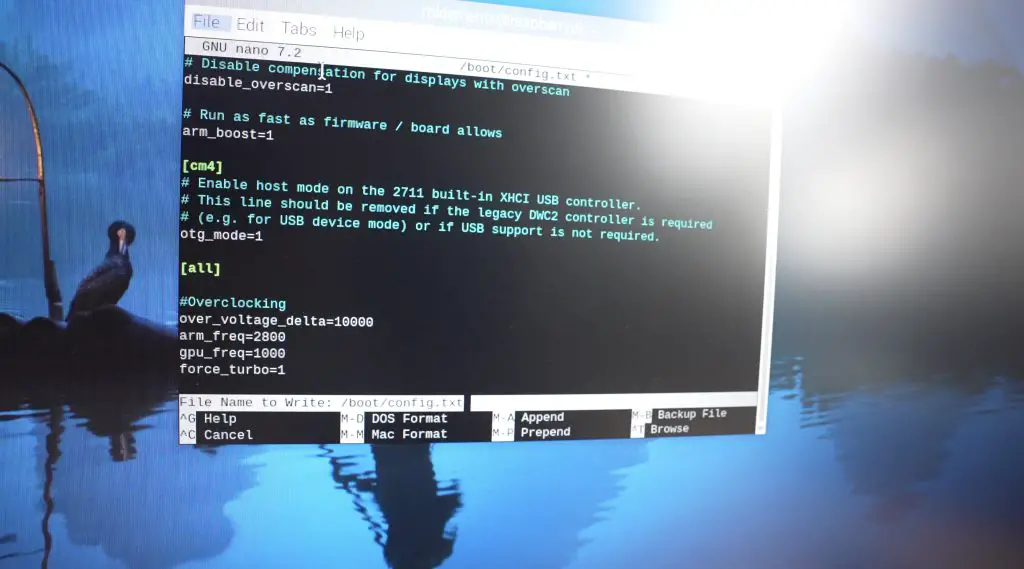
I did try to get my Pi overclocked to 3Ghz but I couldn’t get it to be stable enough to survive a 10-minute stress test with CPU Burn at this CPU frequency.
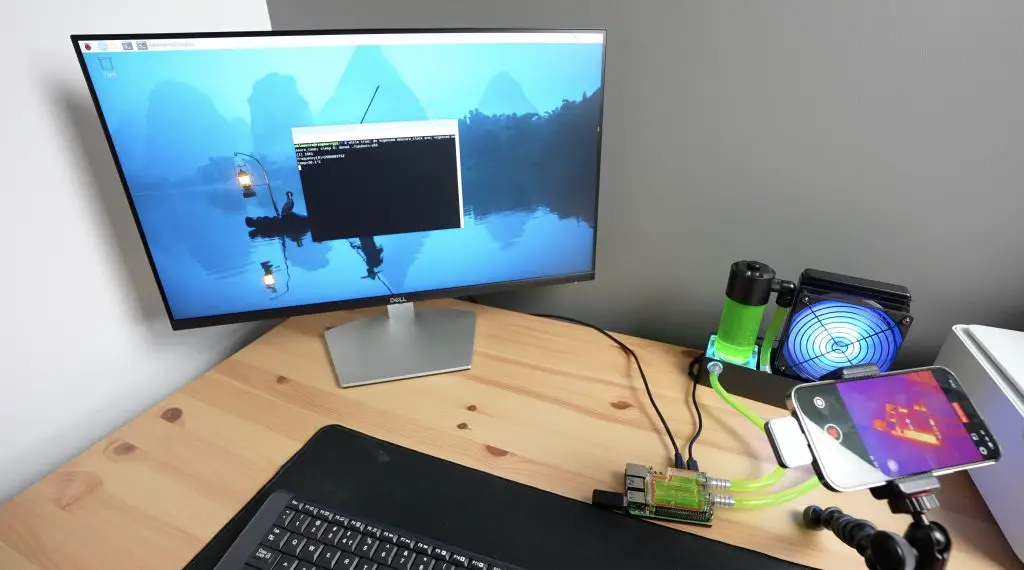
I’m going to set up a thermal camera to watch each solution during the test so that we can see any hot spots. The thermal camera doesn’t work on metallic surfaces, so it will be a bit limited but we should still be able to see any significant issues.
Just out of interest, I ran the test first without any cooling solution connected and ran into thermal throttling after about half a minute. Thats evident by the drop in CPU clock frequency once we hit 85°C.

Thermal Testing The Three Cooling Solutions
Testing The Raspberry Pi 5 Active Cooler
I’m going to start with the Pi 5 Active cooler as a baseline.
With the active cooler installed on the Pi, running CPU burn at the base CPU frequency of 2.4Ghz, the starting temperature is 41°C and the temperature climbs pretty quickly. Starts to stabilise after about 5 minutes and we have an average stabilised temperature of about 66°C.

With the Pi overclocked to 2.8GHz, the temperature starts at about 54°C and climbs a bit faster. This time it stabilises after about 4 minutes at an average of 74°C. At this temperature, the fan steps up to its highest rpm and this actually brings the pi down to about 71°C quite quickly and it then floats between 71°C and 74°C depending on the fan speed.


I’m actually quite impressed by this result, I didn’t expect this $5 cooler to handle a fully loaded overclocked Pi without thermal throttling.
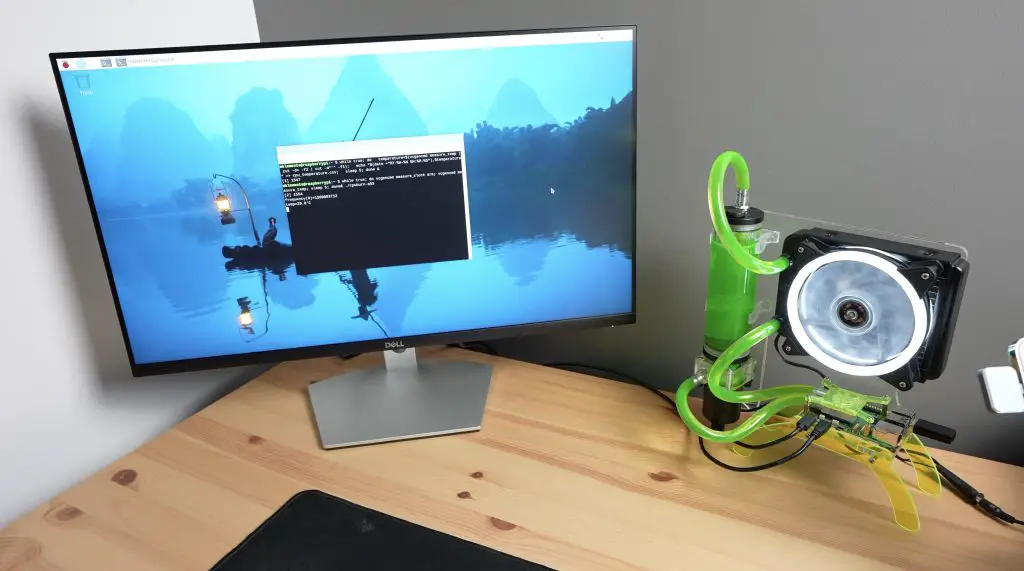
Testing The Seeed Studio Manufactured Water Cooling Kit
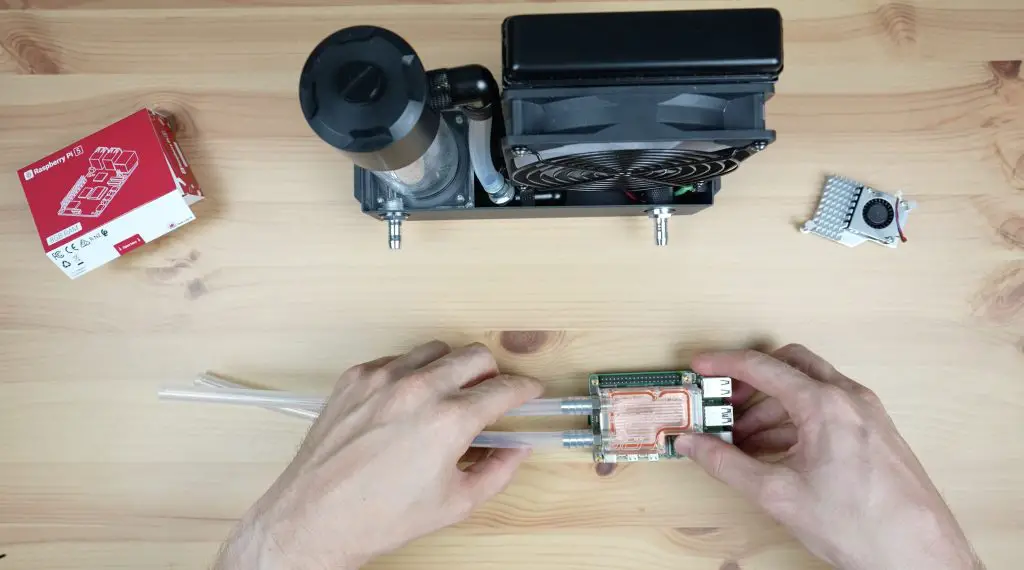
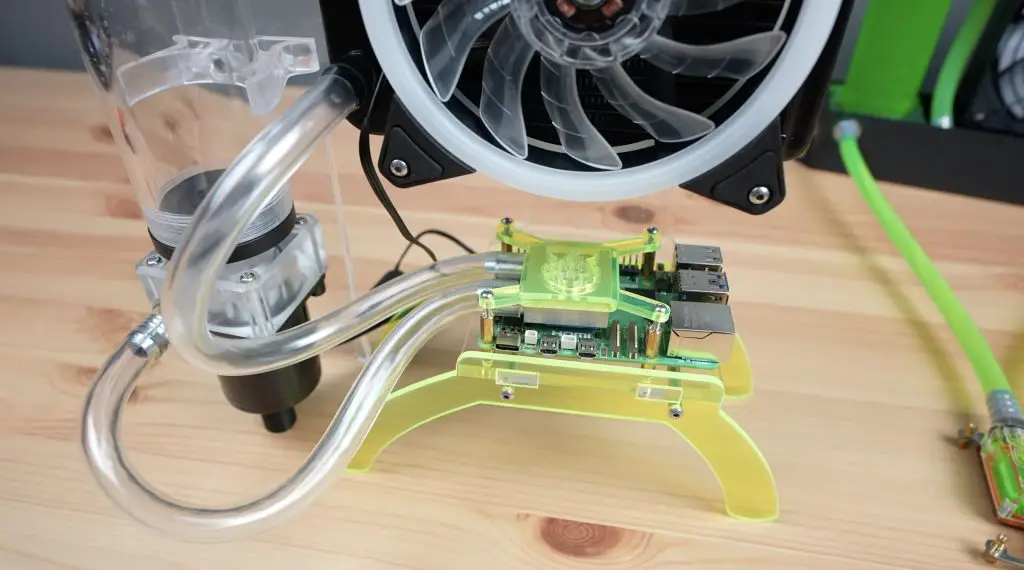
Next, let’s get the Pi fitted to the water cooling kit. Assembly is pretty straightforward, the water block obviously goes onto the top of the Pi with the thermal pad between it and the CPU and surrounding chips.
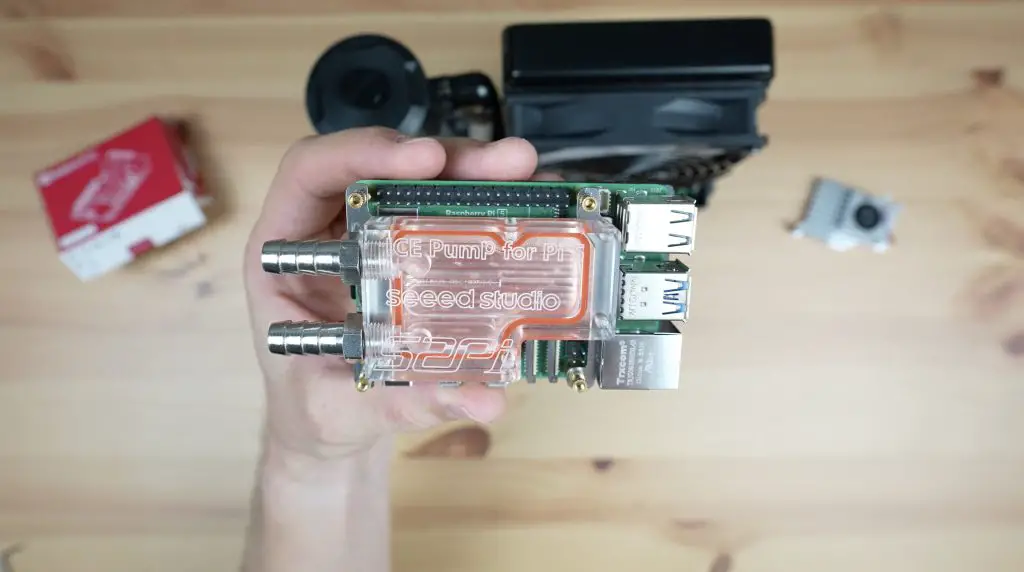
The aluminium heatsink goes underneath the Pi. This provides a bit of additional cooling but also protects the Pi and prevents any shorts on the contacts on the bottom if you’ve got it on a desk or workbench.
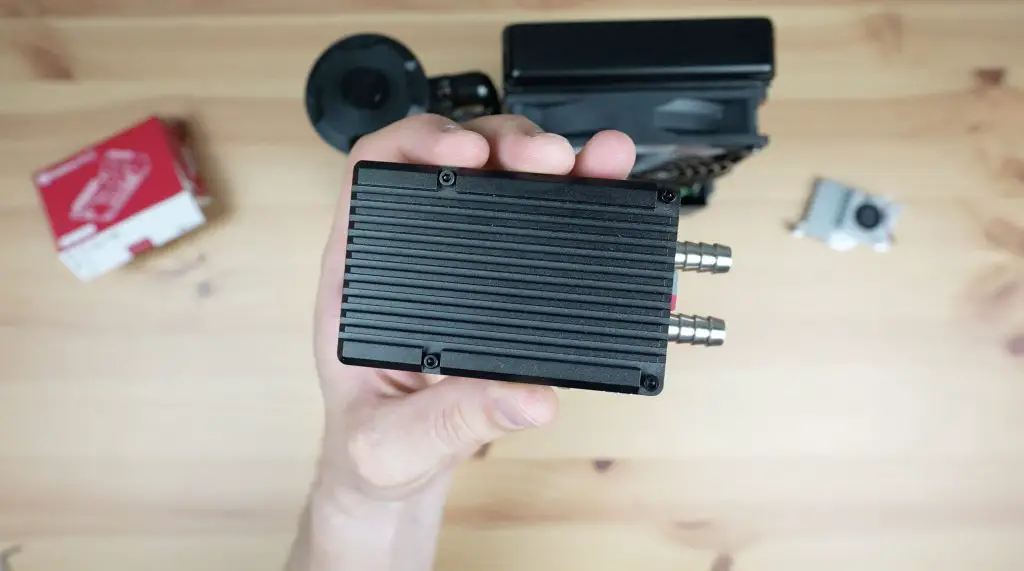
We then connect up the flexible tubing between the water block, pump and radiator. There isn’t a place to mount the Pi to the assembly, so we’ll just leave it on the desk alongside it. This is by design though as the kit can be used with multiple Pi’s running in a cluster as well.
I have to say that this custom water block with a copper base does look pretty good on the Pi, even if it’s a bit unnecessary. It fits well around the taller components and still looks like it will allow you to hook up an SSD to the PCIe port.
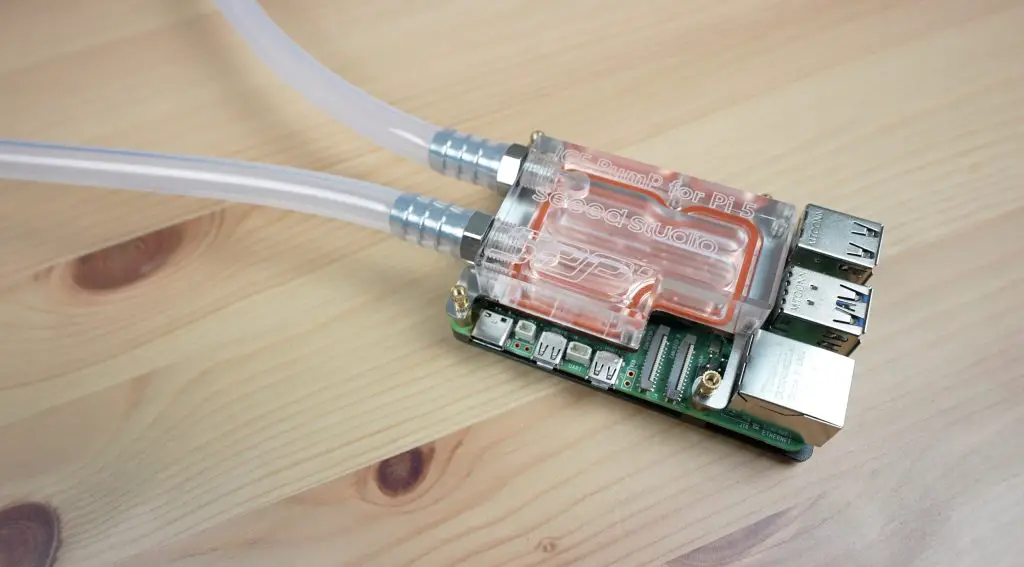
Next, let’s fill up the loop with coolant (don’t use water – more on that in my final thoughts) and then boot up the Pi and start our tests.
This block handles the base frequency of 2.4Ghz really well. We start off at about 30°C, then there is a small spike in temperature when the test ramps up but the temperature doesn’t climb much after that. It stabilises after around one and a half minutes at a temperature of about 45°C.

With the Pi overclocked to 2.8GHz, we now get a marginally higher starting temperature of 33°C and again it stays relatively flat, stabilising after a minute and a half at about 51°C.

So this cooling solution works really well and we’re still way under the thermal throttling limit for the Pi. Now let’s see if my DIY version can compete with it.
Testing My DIY Water Cooling Kit
I used thermal paste for my original Pi 4 build, but I want to try to keep the comparison to the manufactured option fair, so I’m using a thermal pad between the CPU and heatsink as well.
I like that my solution has a place to mount the Pi but the kit’s custom cooling block looks a lot better than my simple square block and bracket.
Through testing, similar to the previous solution, this block handles the base frequency really well. We start with a slightly lower temperature of 29°C, then there is a small spike in temperature when the test is started but again, the temperature doesn’t climb much under full load. It stabilises after about one and a half minutes at a temperature of about 42°C. So actually around 2-3°C lower than the kit.

With the Pi overclocked to 2.8GHz, we again get a higher starting temperature of 35°C and it stabilises after a minute and a half at about 49°C, also about 2°C lower than the kit.


Testing Results Discussion and Final Thoughts
Both the water cooling kit and my DIY solution work significantly better than the active cooler on an overclocked Pi. That’s not to say that the active cooler isn’t a good option, it is actually quite capable of cooling an overclocked Pi at full load as well.
I’m a little surprised that my DIY solution with the simple aluminium block performed better than the kit’s copper-based block. I assume this is most likely because of a difference in the thermal pads, mine has a really thin and good-quality pad. Another possible reason may be that mine has a greater metallic surface area with the water whereas the kit’s block only has a copper surface on the bottom. The acrylic is a poor conductor of heat.
I think the main benefit of a water cooling setup, besides looking cool, is that they have the capacity to cool a few more than one Pi. Typically a good 120mm radiator can dissipate over 200W. Given that the Pi 5 uses about 12W, even if all of this energy was being converted into heat, we’d still be able to cool over 16 Raspberry Pi 5’s with one pump and radiator set. So while these are overkill for a single Pi, they’re actually quite a good cooling solution for clusters.
There are a couple of things that I like about each water-cooling solution over the other;
The manufactured option has a really good-looking water block and it offers better coverage to the surrounding components.
The cooling block from the manufactured kit is also available individually so it’s possible to buy one pump and radiator set and use it across multiple Pis, which is great!
I do have some concerns that they’ve used copper for the cooling block and supplied an aluminium radiator, so you may run into issues with galvanic corrosion in your loop long term. So, I’d definitely stay away from using water in the loop and I’d use proper coolant to try and assist in limiting this.
My only other comment on it is that the included reservoir’s return line pushes a lot of air back into the loop which makes it noisy. My DIY solution is significantly quieter and you only really hear the fan noise.
I think my stand looks better overall and offers a place to mount the Pi but I am probably a bit biased. I’ve said a water-cooling solution is really better suited for a cluster, so the stand is unnecessary in any case.
Let me know in the comments section below which solution you prefer and also if there is something else you’d like me to test it on.
It’s not for one pi. It’s for a dozen. Meant to cool multiple pics that are densely packed.
Hi Dear Micheal. I think you are one the most talented individuals in the SBC and embeded systems fields and looking forward to see more video & instructions of your Mods and designs in the future. I just wanted to ask that you that if it is possible, would you share your new BRACKET cad file for Raspberry PI 5 too?It would be very helpful in my own design. I’m newbie in the CAD design part and want to add modifications to yours as well (with your permission of course), but need a jump start to do that. Thanks again foŕ your awesome and detailed work here. Good luck.
Hi
Really interested in the DIY water cooling solution, I would like to use it with my Bitaxe Gamma crypto miner, which has a 40mm heatsink. I am not sure if you have any experience or if you are familiar with Bitaxe Gamma crypto miner, if you do do you think this will work with your cooling solution
I’ve seen images of the Bitaxe Gamma crypto miner – if it uses a 40mm heatsink then I don’t see any reaosn why it wouldn’t work with my cooling solution. You’d just need to ammend the acrylic bracket to pick up on the mounting holes on the corners of the Bitaxe Gamma.