Today we’re going to see if we can game on the new Geekom IT13 mini PC. This mini PC is powered by a 13th Gen Intel Core i9 13900H with 14 cores – 6 performance cores running at up to 5.4Ghz and 8 efficiency cores running at up to 4.1Ghz. It has 32GB of DDR4 RAM running at 3200Mhz and a 2TB NVMe SSD, so while not the latest generation of components it should still be a fairly powerful mini PC.
Where To Buy The Geekom IT13
The Geekom IT13 is currently available from their official web store or on Amazon in the following countries;
- Geekom Australia – Buy Here
- Amazon Australia – Buy Here
- Geekom USA – Buy Here
- Amazon USA – Buy Here
- Geekom UK – Buy Here
- Amazon UK – Buy Here
I’ve also used the below components for this project;
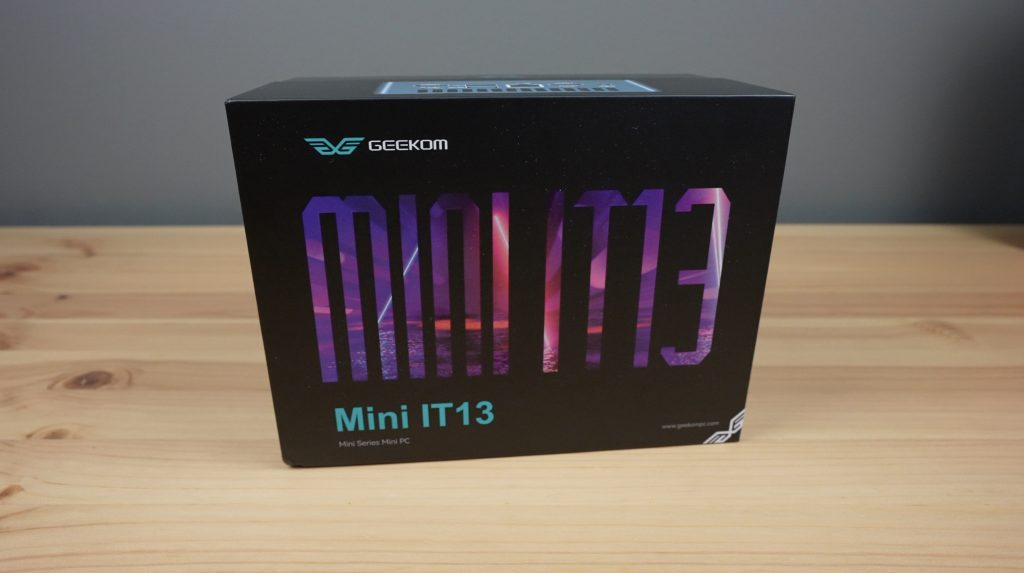
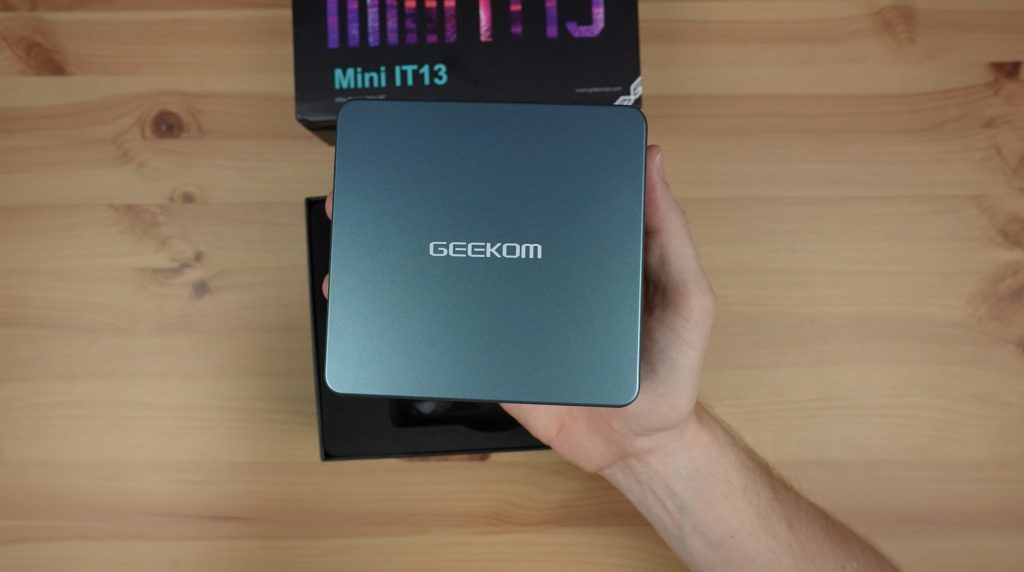
Unboxing & First Look At The Geekom IT13 Mini PC
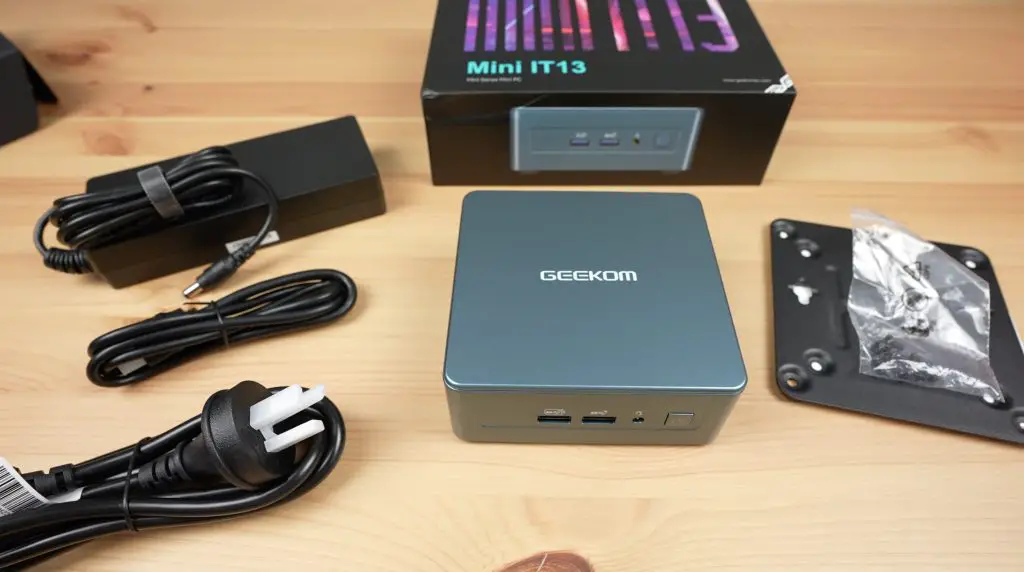
The Geekom IT13 Mini PC comes in a black branded box and is fairly well protected. The PC is at the top as you open the box and the manuals and cables are beneath it.
In the box, you get the Geekom IT13 mini PC, a 120W power adaptor, HDMI cable and vesa mount.
Graphics are likely to be the bottleneck when gaming as we’ll be relying on integrated Intel Iris Xe graphics, but we’ll see how this performs.
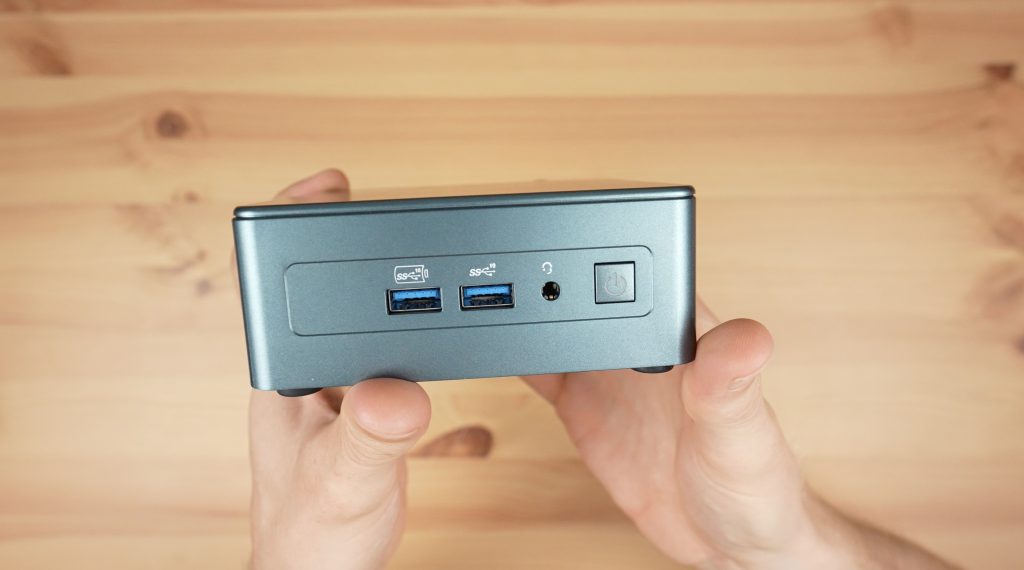
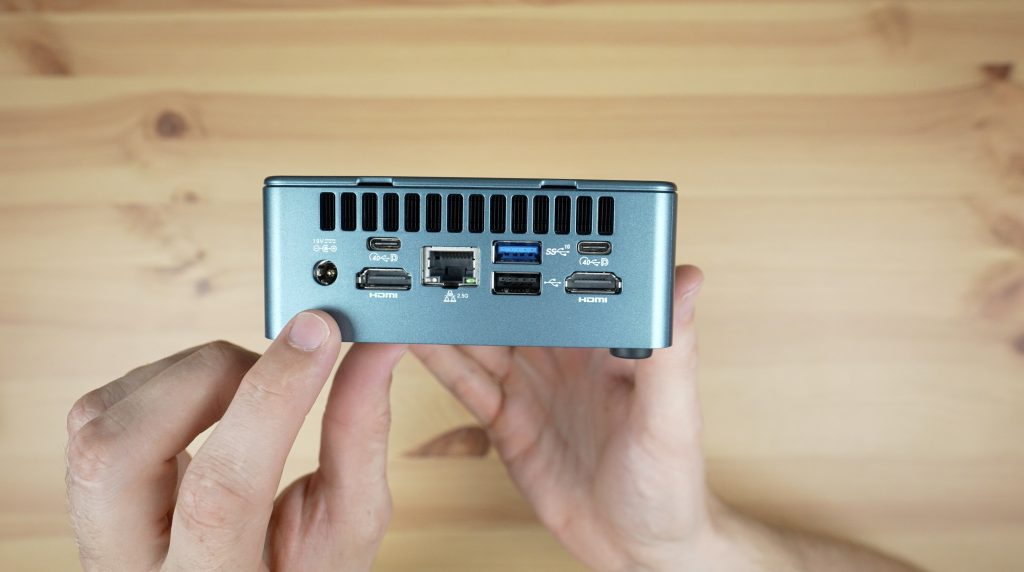
Taking a look around the PC, on the front we’ve got two USB 3.2 gen 2 ports, a 3.5mm audio port and the power button.
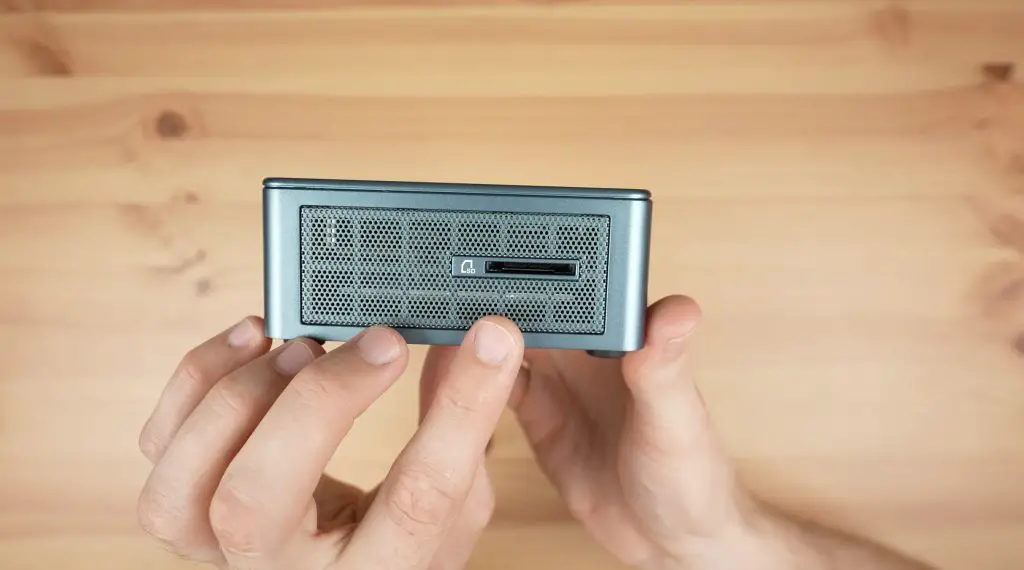
The sides are mainly just ventilation holes but we do have a full size SD card slot on the right-hand side.
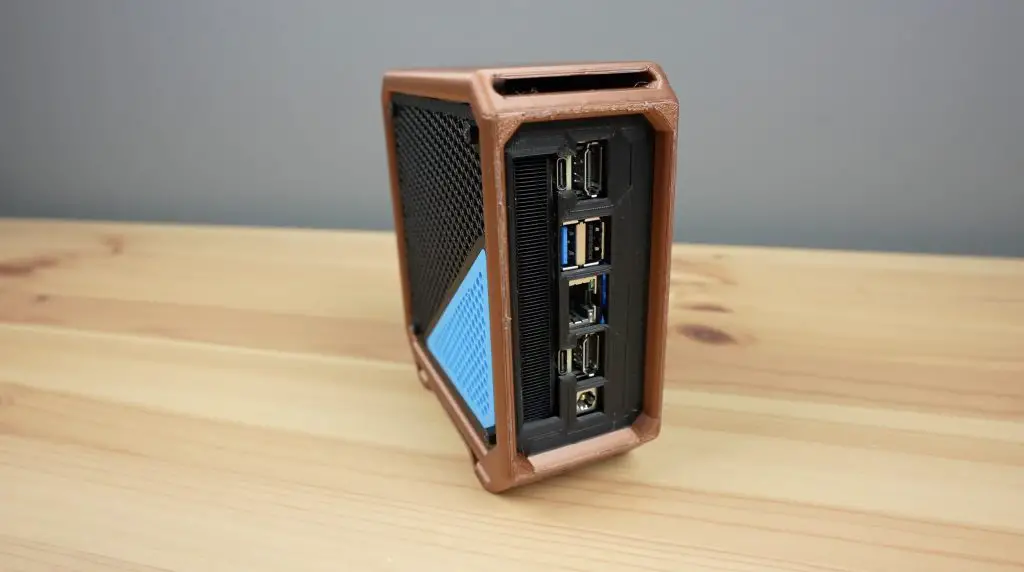
On the back, we’ve got the main set of IO, including the DC input, two HDMI 2.0 ports and two USB 4 ports. So you can connect up to four displays, two 4k displays through HDMI and two 8k displays through USB 4. We’ve also got a 2.5G Ethernet port in the middle as well as one USB 3.2 gen 2 port and one USB 2.0 port. Adding to connectivity, internally we’ve got WiFi 6e and Bluetooth 5.2.
First boot & Initial Performance Tests
Next, let’s get it booted up. I’m pleased to say that the Geekom IT13 comes with a fresh install of Windows 11 Pro and it doesn’t have any pre-installed bloatware, which is good to see.

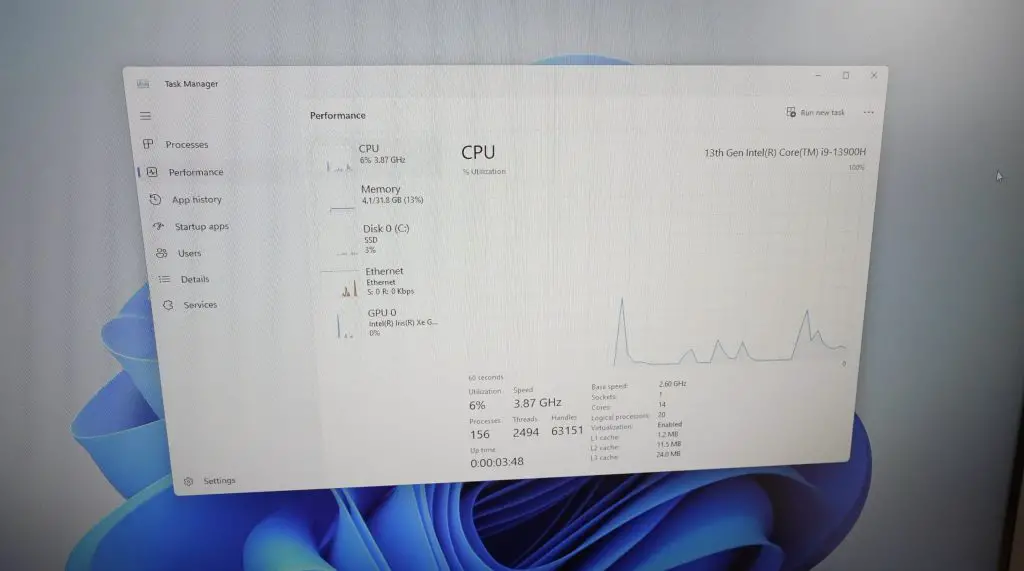
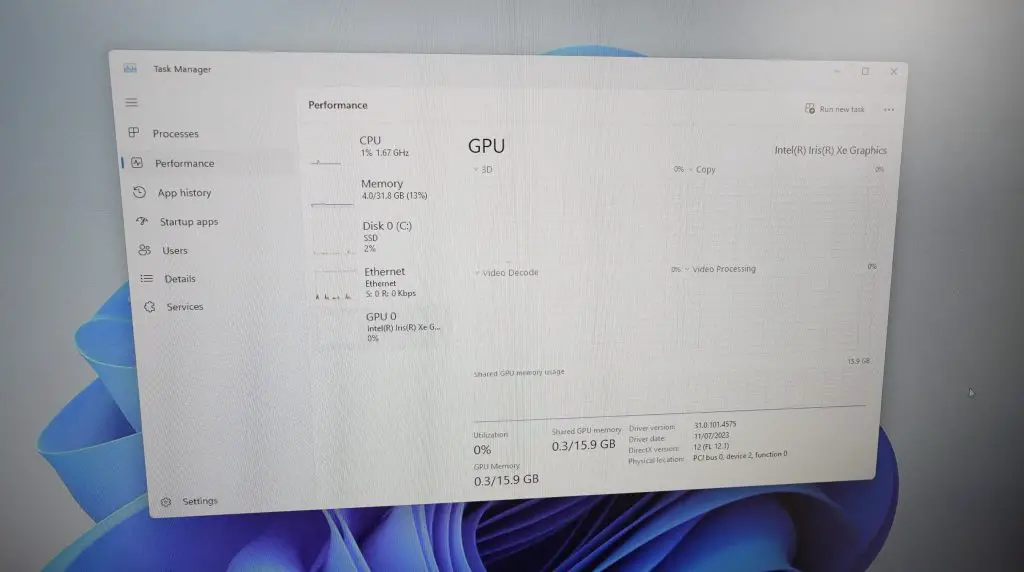
If we open up the performance monitor, we can see our CPU is a 13th Gen i9, we’ve got 16GB of RAM running at 3200Mhz, the 2TB SSD is showing up and the GPU is the integrated GPU with shared memory.
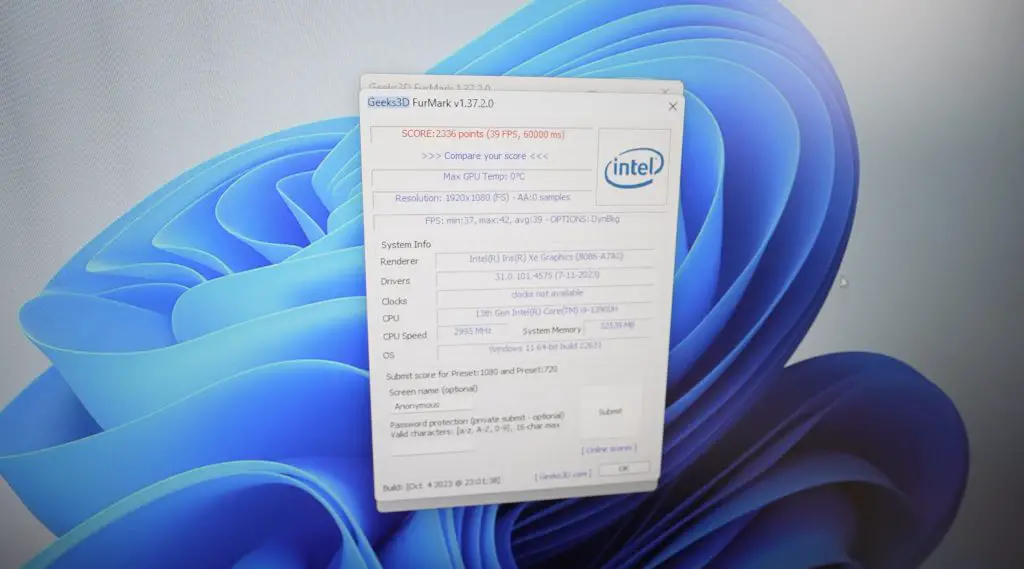
Next, I want to run two benchmarks, Furmark to test the GPU and thermals and CPU Z to test the CPU.

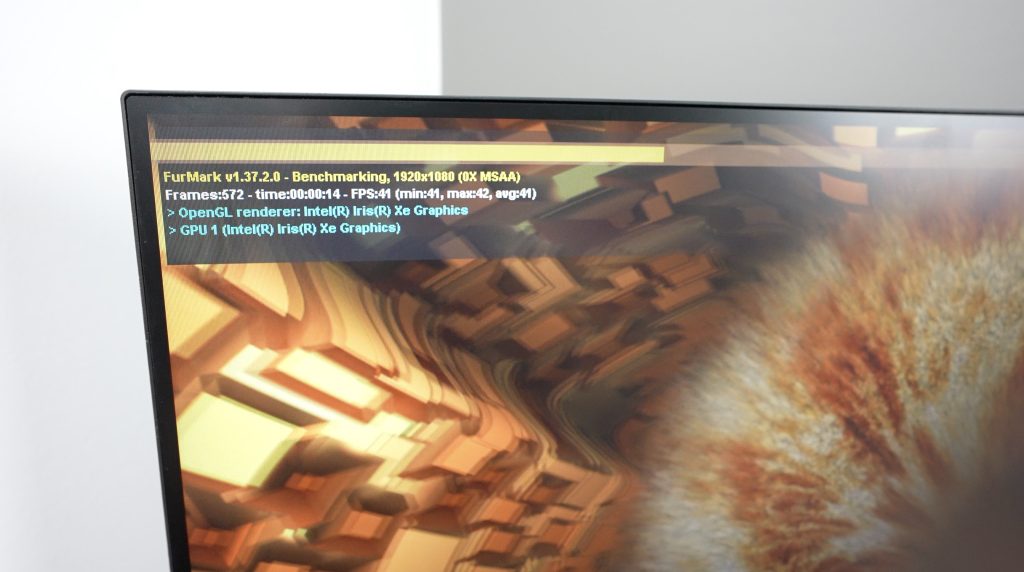
Running the 1080p Furmark benchmark, under full load, the IT13’s fan does get quite loud. I’ve provided a clip of the fan noise in my Youtube video. The smaller cooler also probably doesn’t have enough thermal capacity to handle a sustained full load indefinitely.

On completion, we get a score of 2,336 and an average over three tests of 2,338. This is not great but is fair for a PC that is relying on integrated graphics.
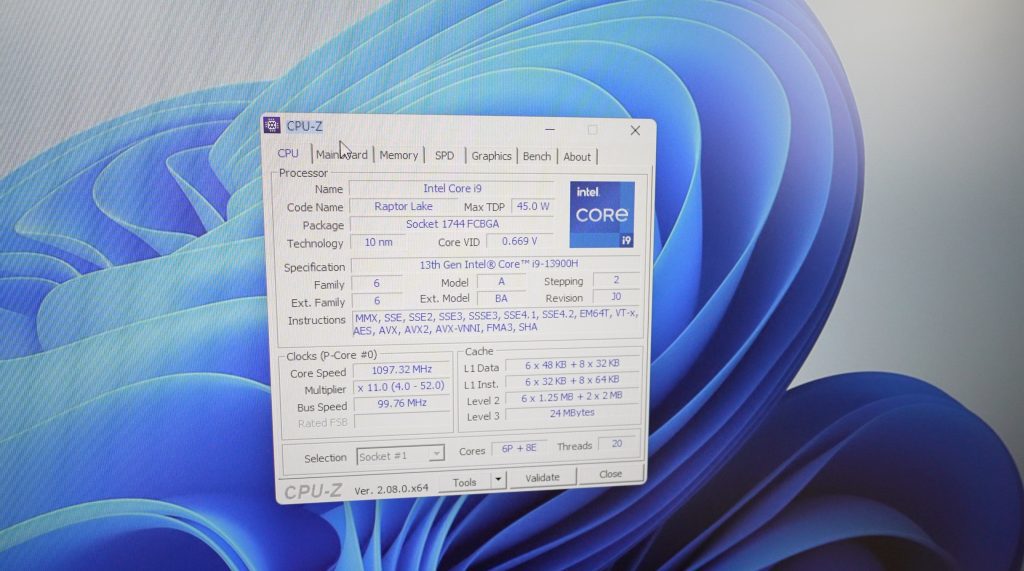
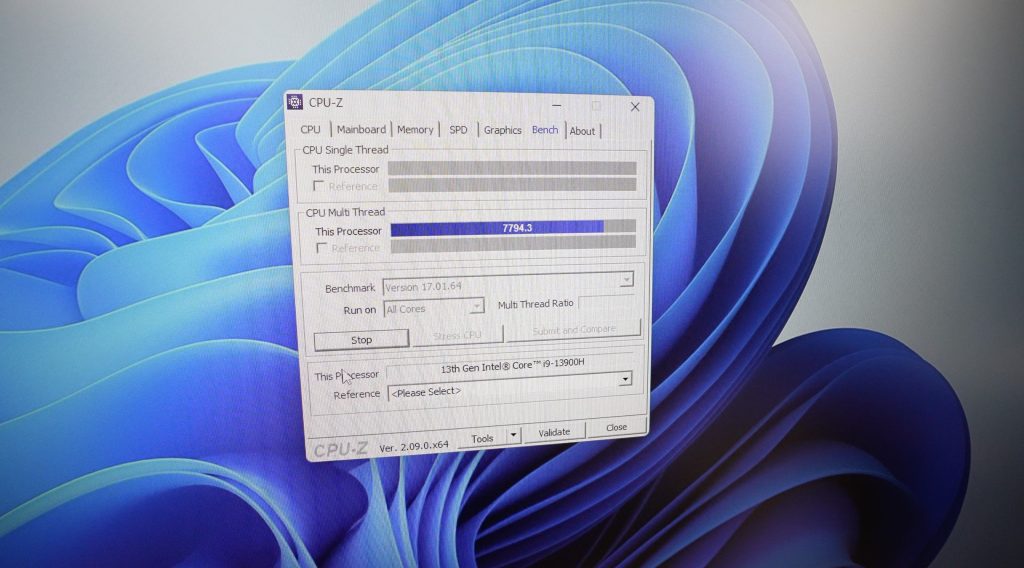
Next, let’s open up CPU Z. Here we can see a bit more information than we could in the performance monitor but it all looks as expected.
Running a CPU benchmark, similar to the Furmark benchmark, the fan ramps up quite quickly. The score does also drop on consecutive tests and under a sustained load so it looks like the cooling solution is fine for a small base load and for short spikes in load but doesn’t handle a full sustained load for a long period of time. We’ll look at this a bit closer when we open it up.
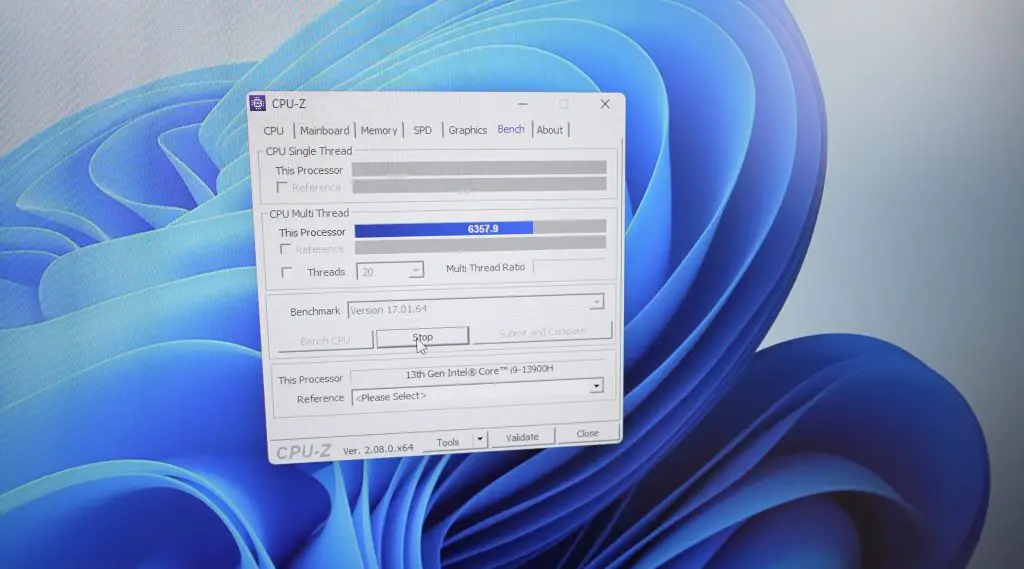
Over three tests we get an average multithread score of 7,618, which is pretty good for the Geekom IT13’s low-power CPU.
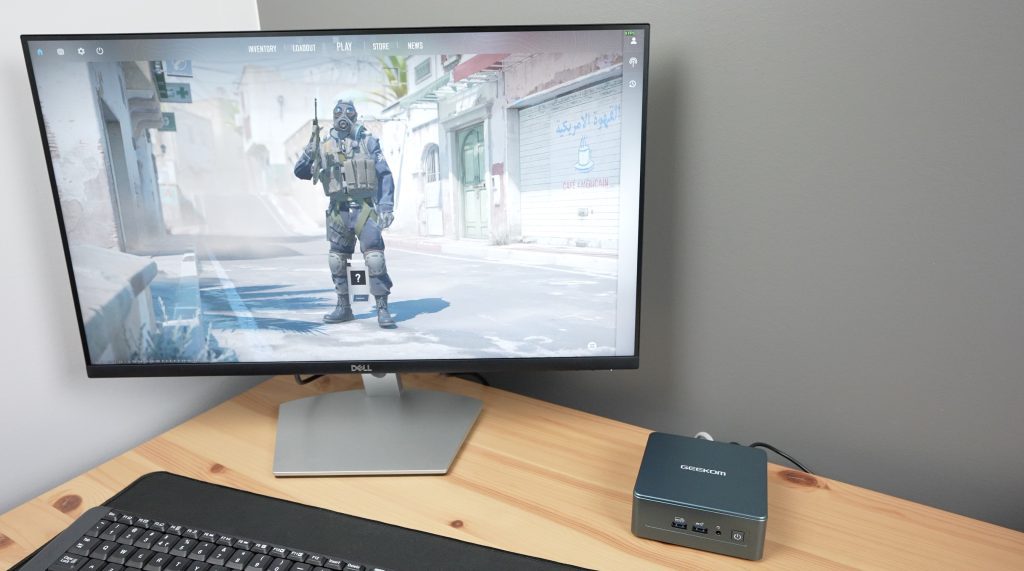
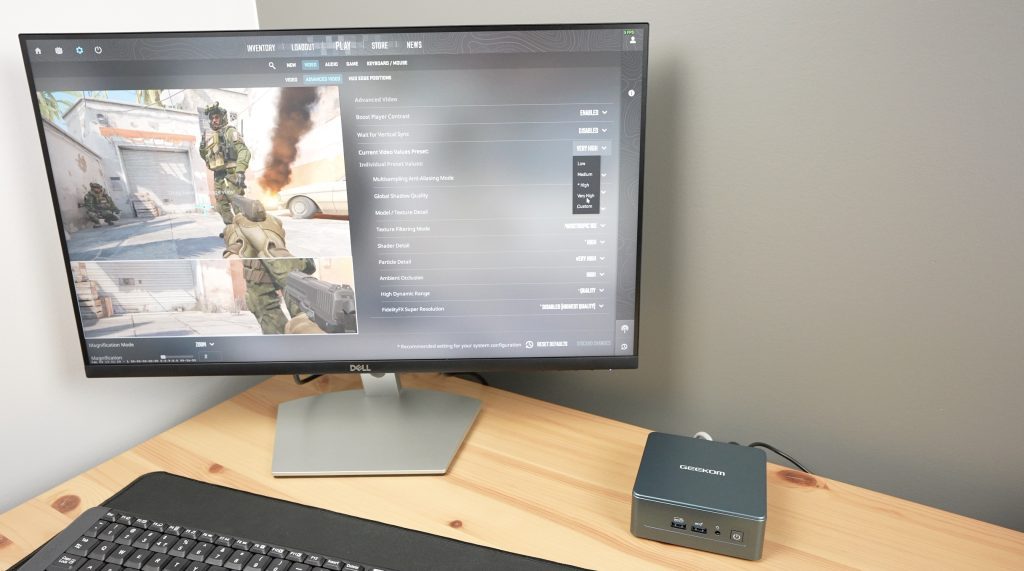
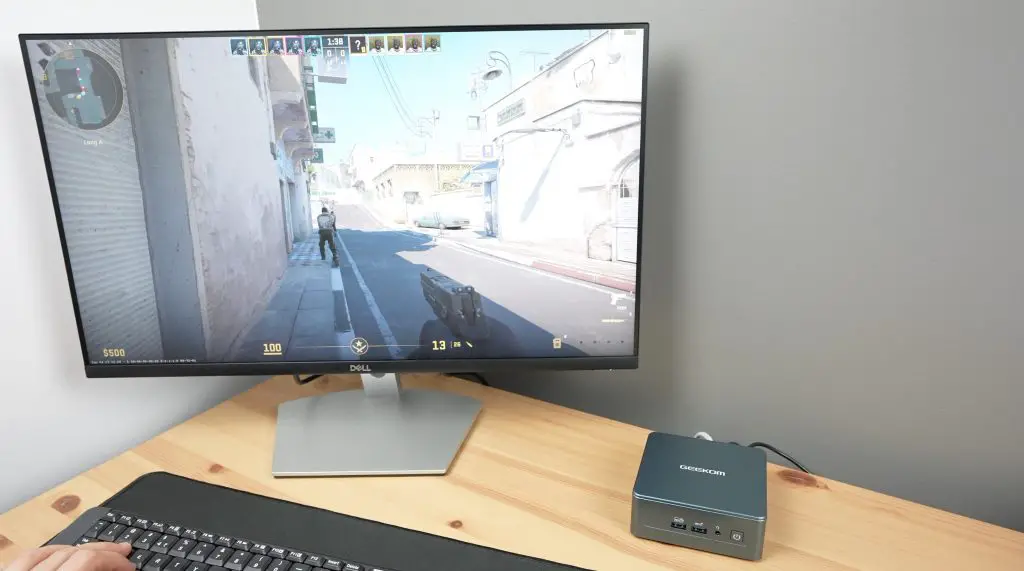
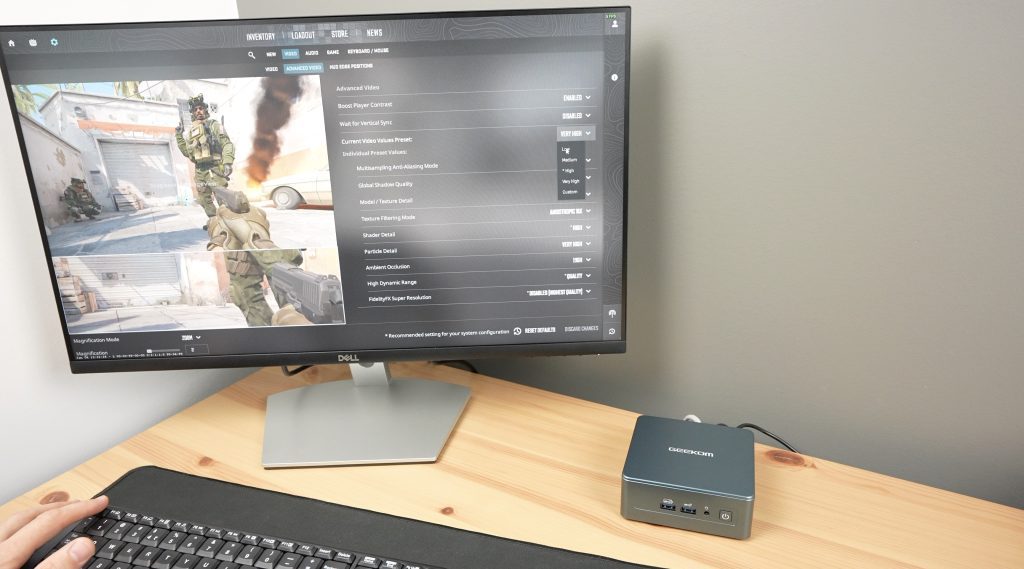
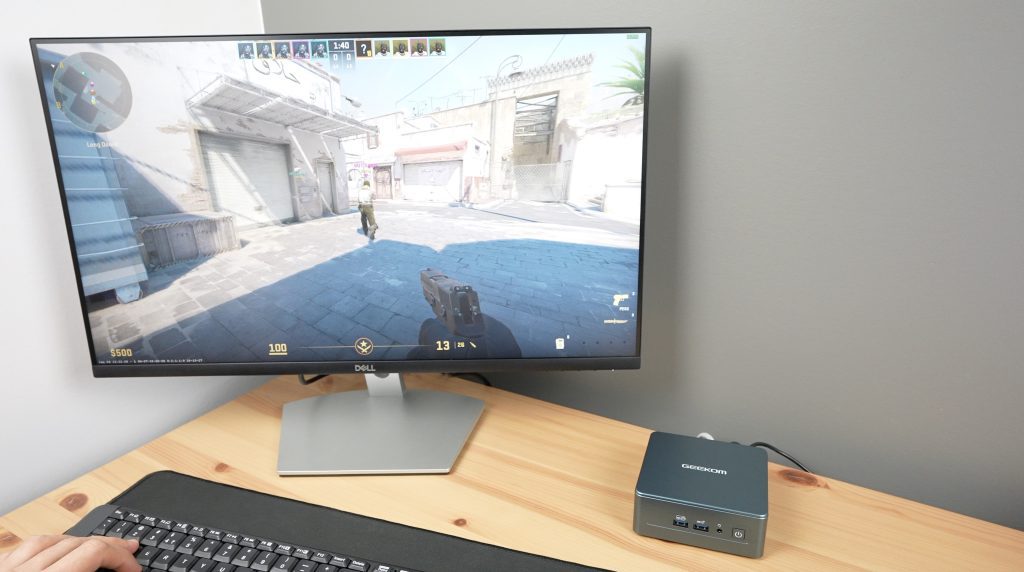
Now that we’ve done some benchmarking, let’s try gaming on it. I’m going to open up Counterstrike and see how it performs.
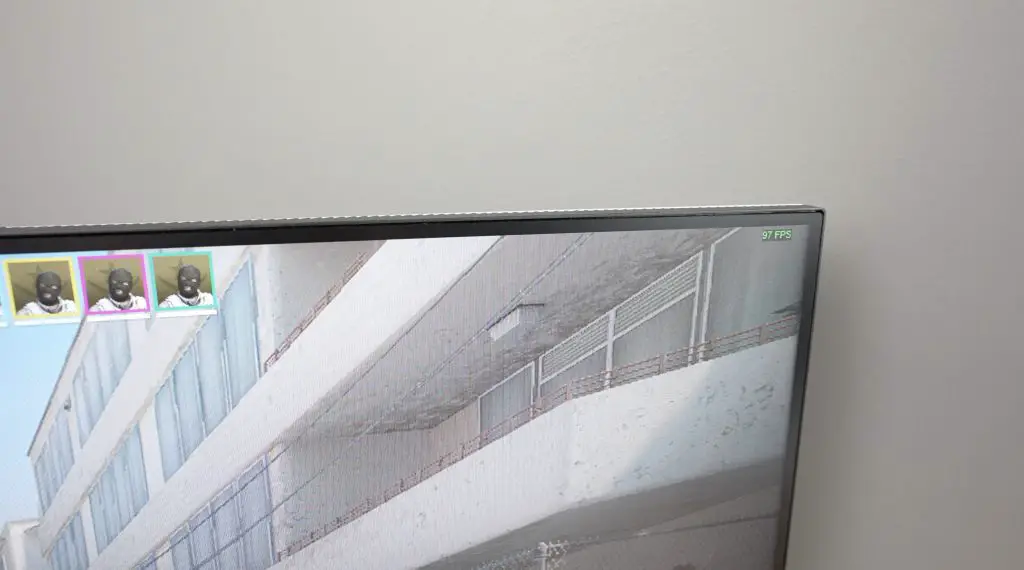
We’re not off to a good start, on the Home Screen we’re already at a dismal 9-10 fps. This is with the graphics set to “Very High” but the integrated GPU is really struggling.
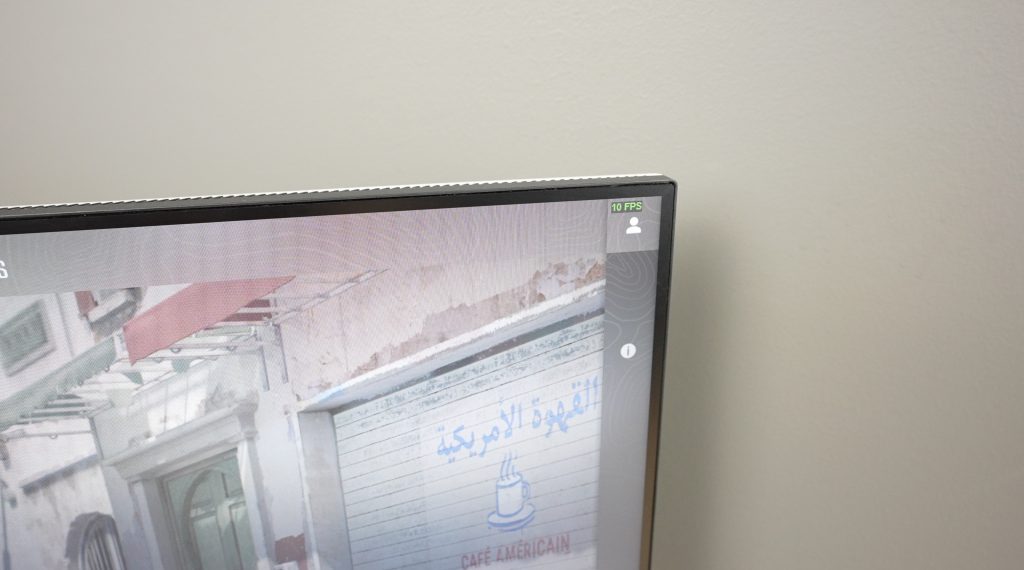
In the game, the performance is oddly a little better but still hovers around 10-15 fps. I guess technically I could play like this but it gives me a headache after a few minutes and it’s almost impossible to aim at anything.
With the graphics set down to “Low” we get over 90 fps, which is much more playable. It looks terrible, but at least we can now participate in the game.
On “Medium” settings there is a fair balance between playability and appearance. I feel like you wouldn’t be disappointed playing on these settings given that the Geekom IT13 can fit into your pocket.
But I don’t want to leave it at that, let’s open it up and see what’s on the inside and what we can do to improve the GPU performance.
Opening Up The Geekom IT13
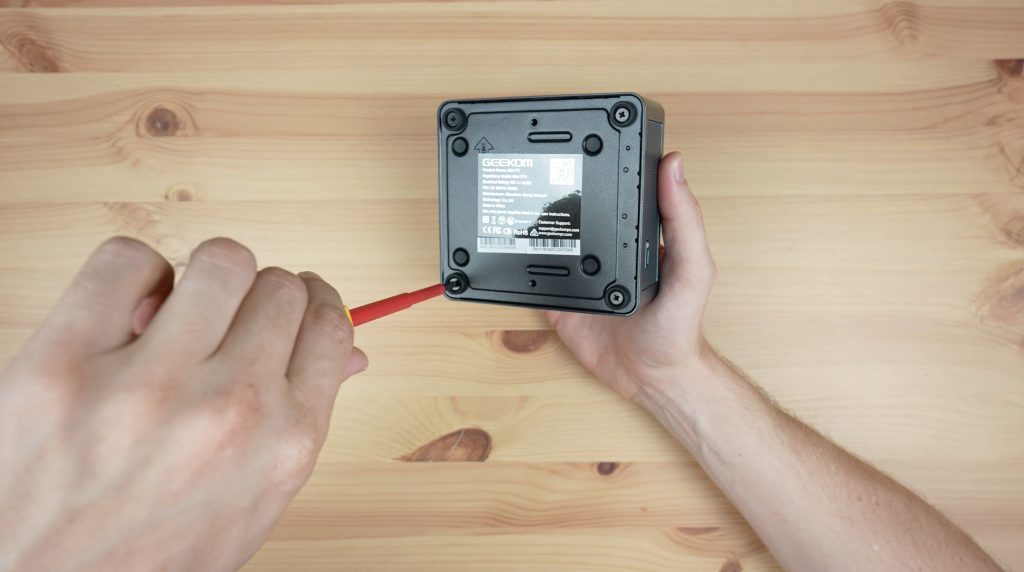
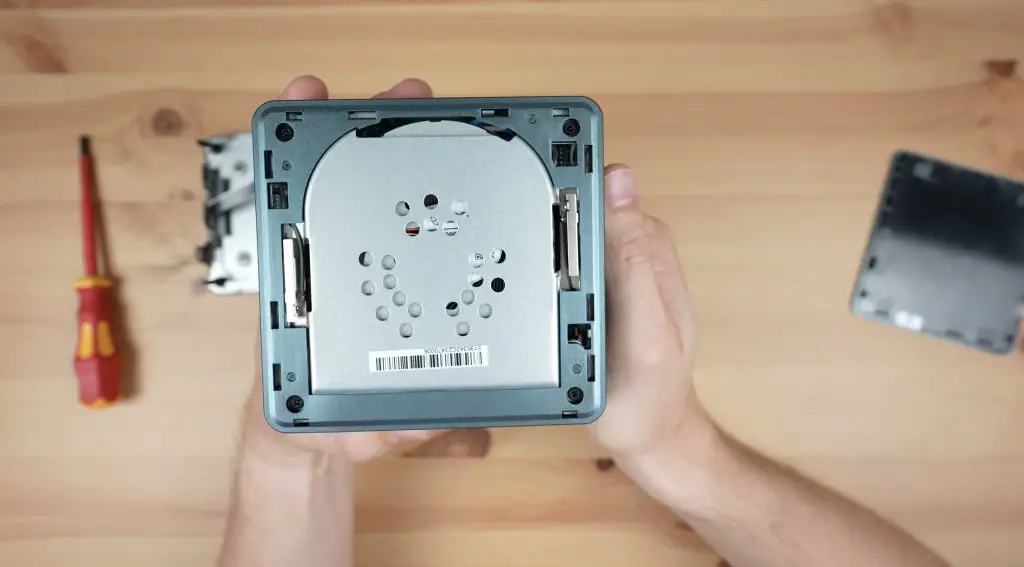
I think the best place to start is by removing the screws at the bottom.
Under the bottom cover, we’ve got a bay for a 2.5” drive.
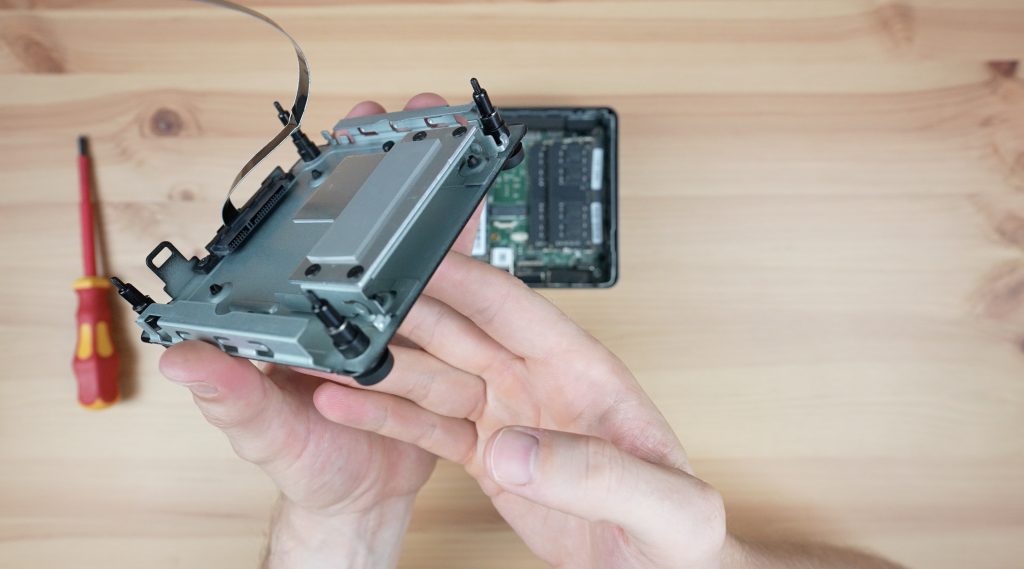
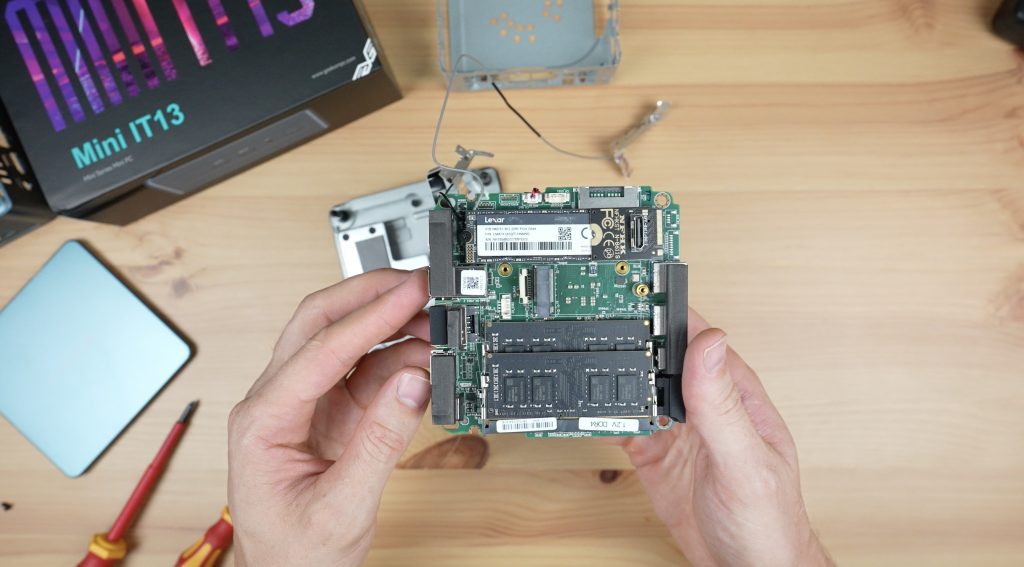
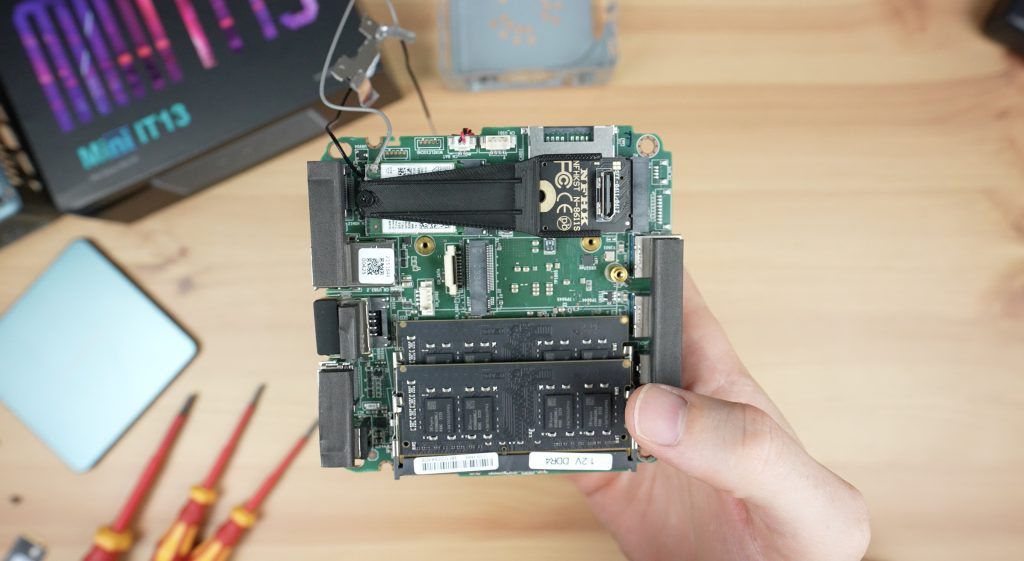
On the motherboard, we’ve got a 2TB Lexar NVMe drive and two sticks of DDR4 RAM. We’ve also got an M.2 SATA port. They claim that the Geekom IT13 is user-friendly to upgrade and it certainly looks that way. You could easily swap out the RAM, replace the NVMe drive or add additional storage through the second M.2 port or 2.5″ drive bay.
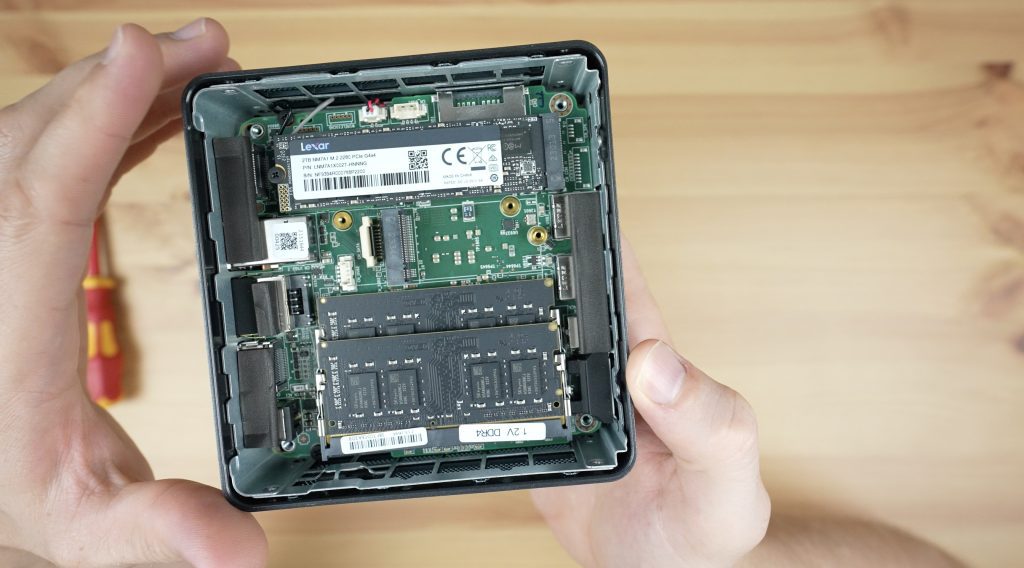
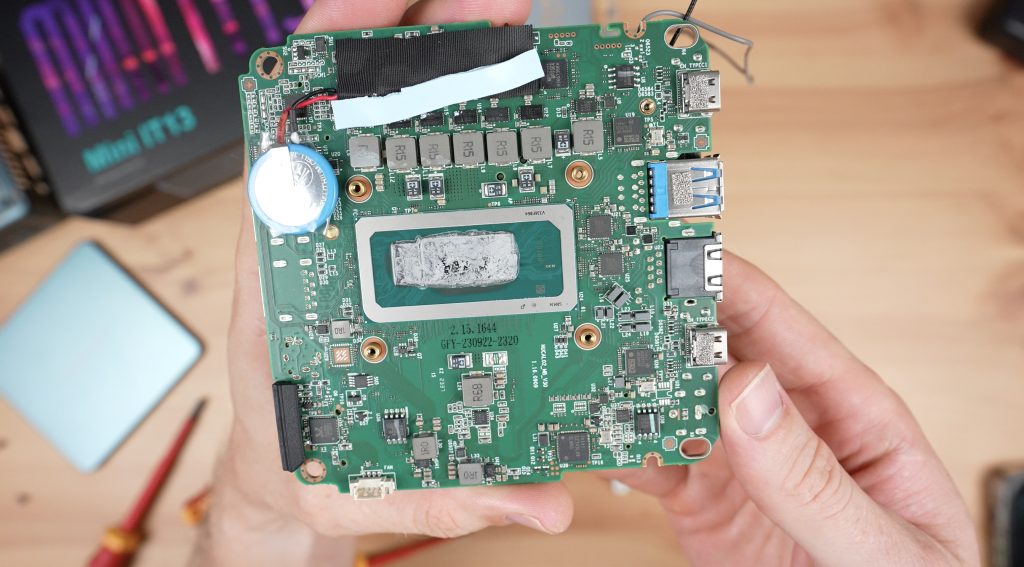
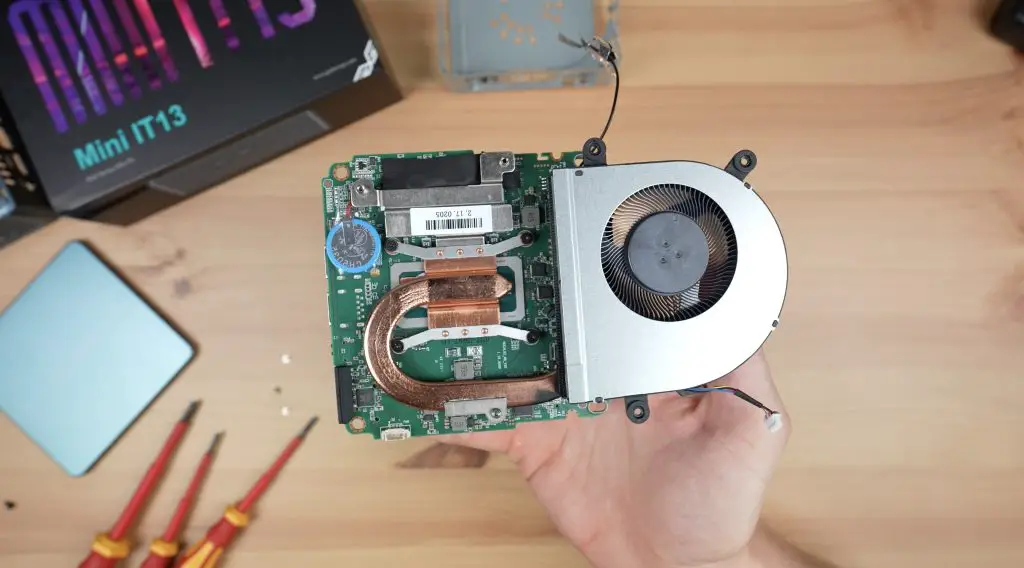
I presume we’ll need to remove the screws on the top to get the motherboard out and I want to take a look at the cooling solution so let’s get that done.
Under the fan, the heatsink has a very small contact area with the CPU so I wonder if trying to replace the thermal paste with some better quality paste will make any improvement.

With the heatsink removed, the thermal paste looks like it is applied evenly but looks a little dry so I’m going to try clean it off with some alcohol and then use better quality thermal paste on it.
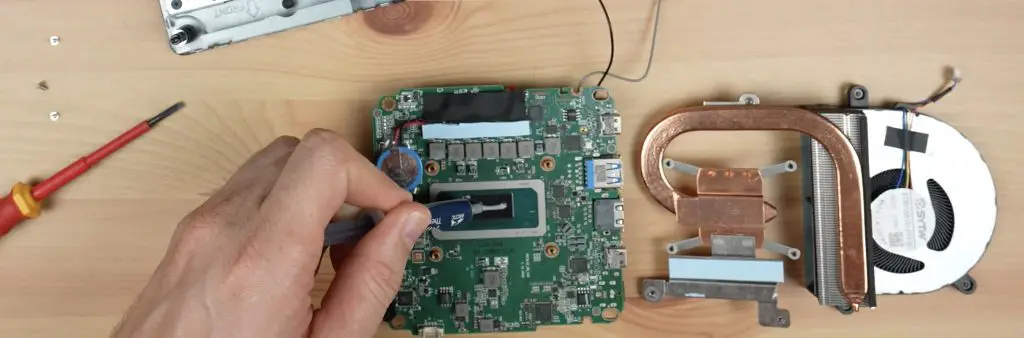
After re-applying the thermal paste, I think that’s about all we can do to the cooling setup without replacing it.
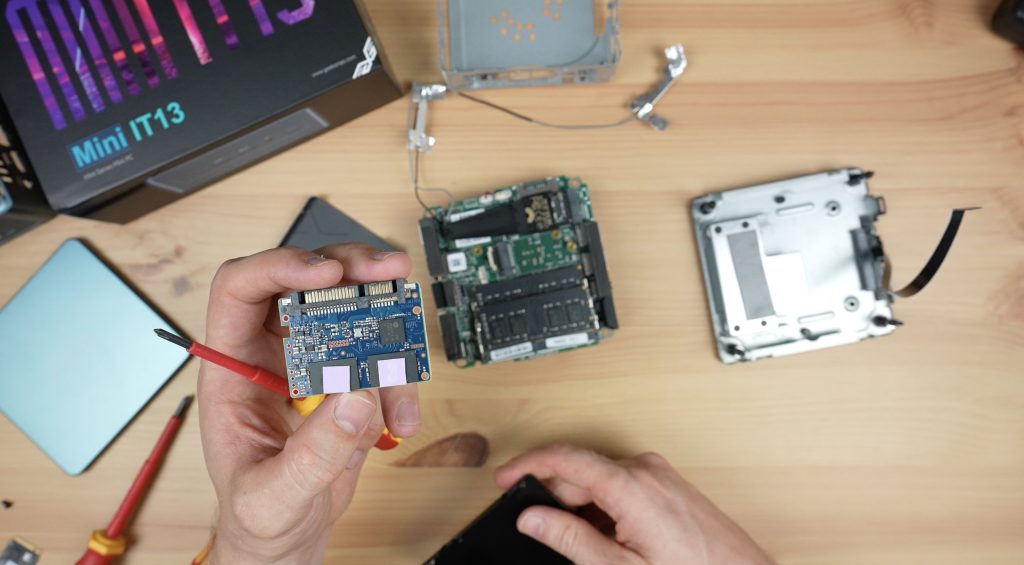
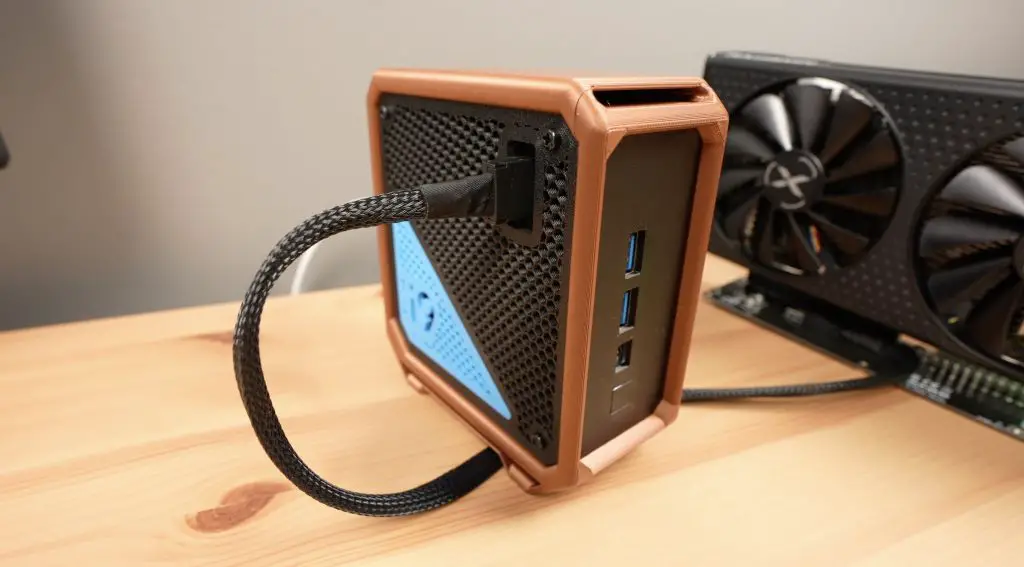
Next, I’m going to try a bit of a hack job. I’ve got a small M.2 adaptor that’ll plug into the port that the NVME drive is in. If we swap that out then this adaptor allows us to use an Oculink cable to plug in an external GPU.
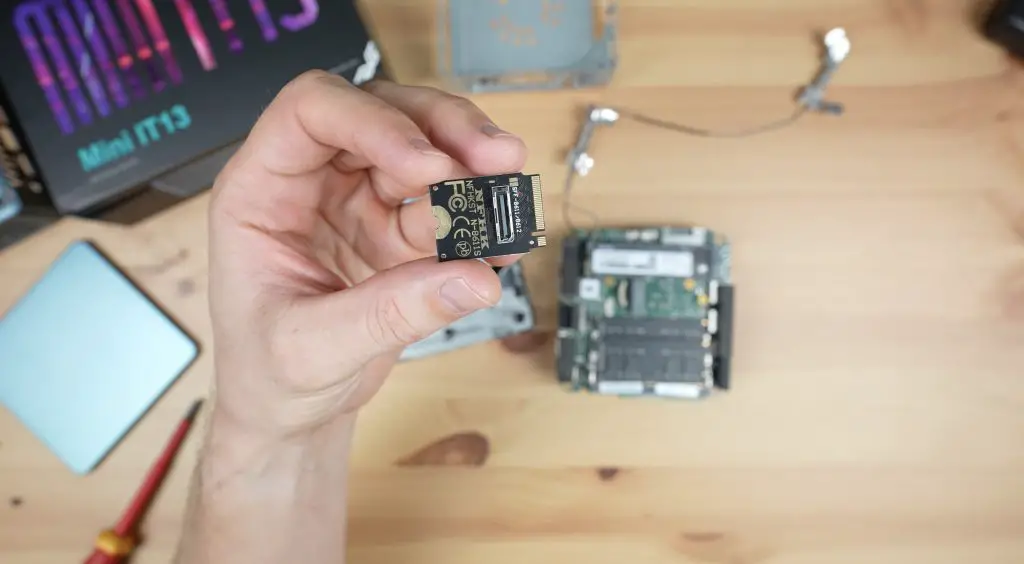
The adaptor is a bit small so I’ve 3d printed another adaptor for the adaptor so that it’ll fit into the same slot.
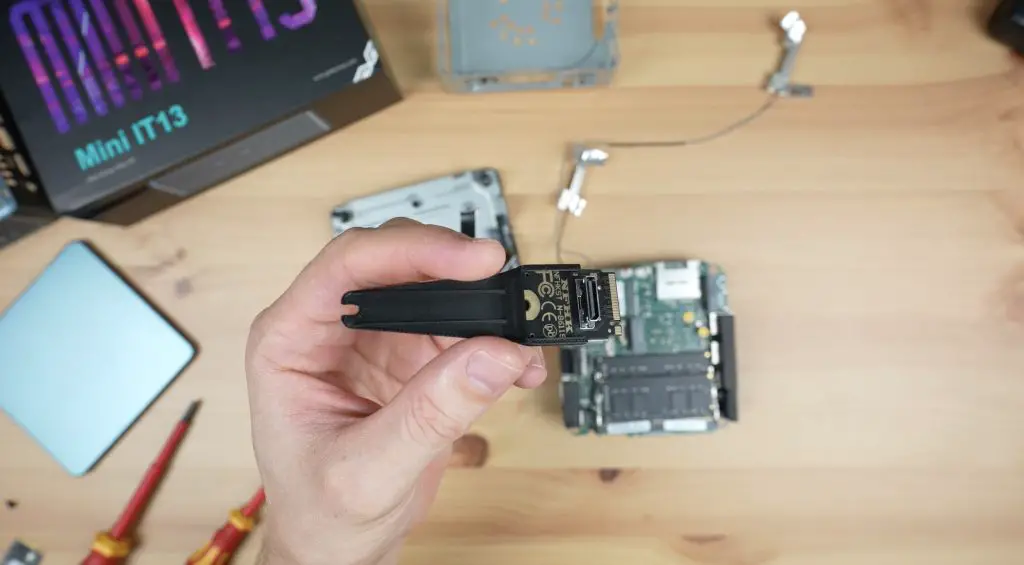
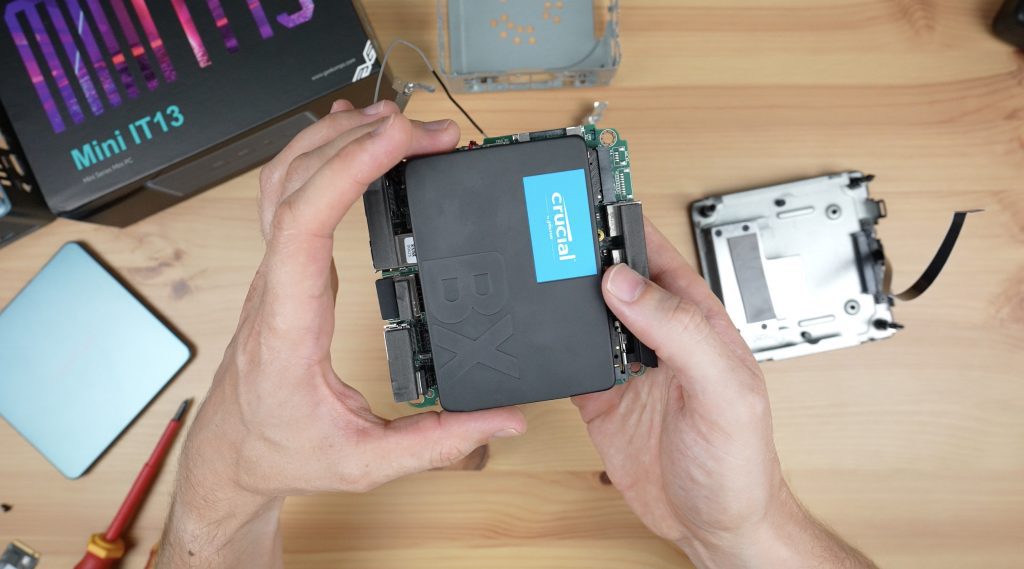
This now allows us to use a GPU which will dramatically improve gaming performance but we don’t have a boot drive anymore. If I had an M.2 SATA drive I could plug that into this port, but I don’t, so I’m going to instead use the SATA port on the 2.5” bay to add a 2.5” SSD.

If I put the drive into place over the motherboard then it’s going to block access to the Oculink port so I’m going to remove the drive from its enclosure as well and this will make the whole build more compact.
And that’s the hardware complete and ready for a second round of tests.

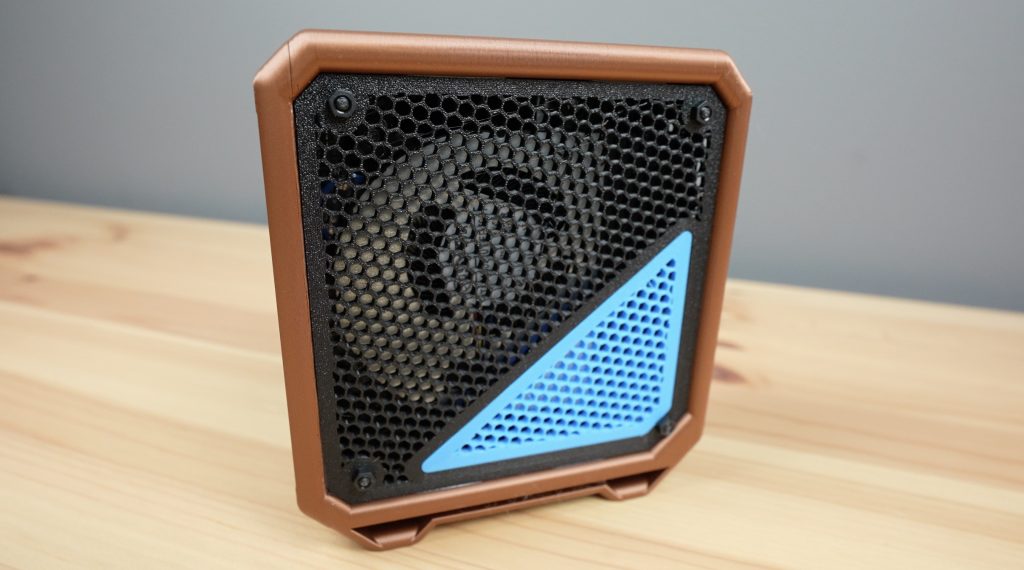
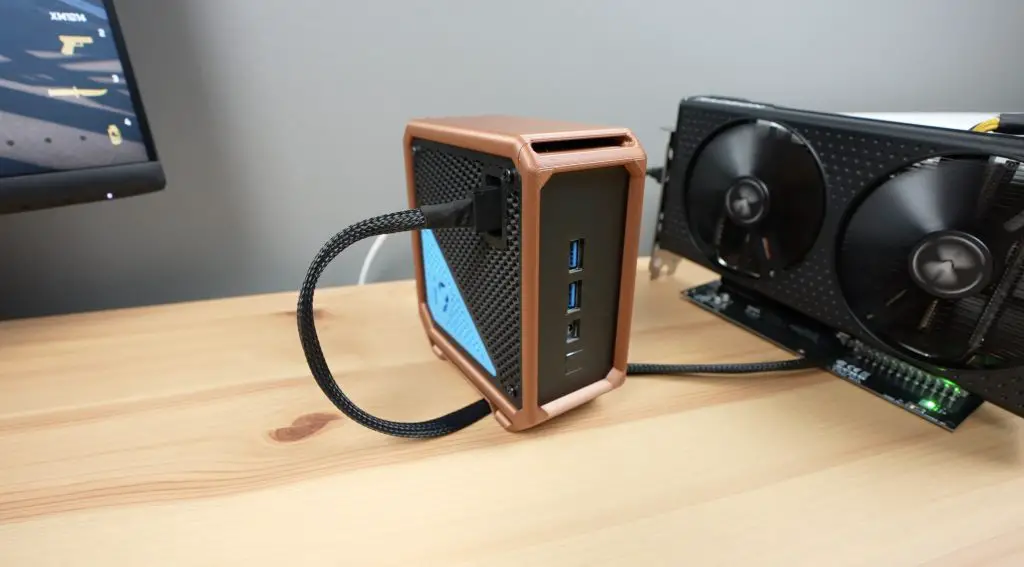
Designing & 3D Printing A New Case For The Geekom IT13
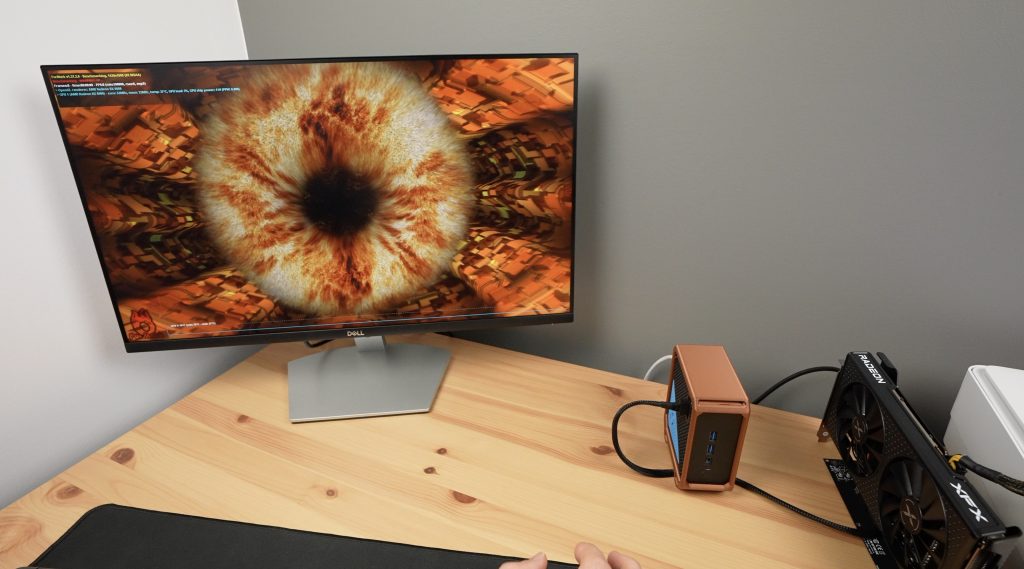
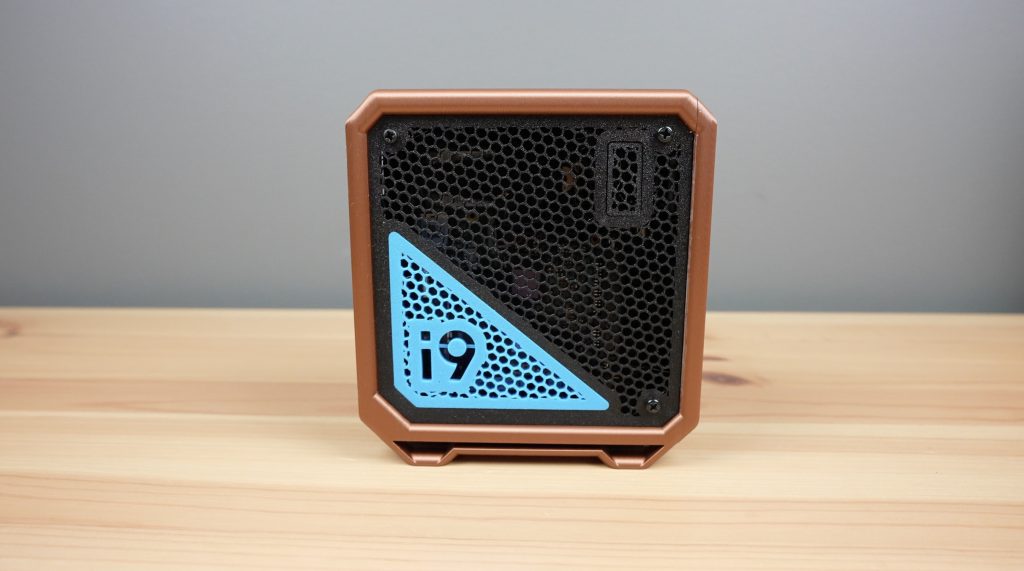
I obviously can’t put the computer back into the Geekom IT13 case as the Oculink port would be facing the bottom and there isn’t a cutout for it. So, rather than have a Frankenstein mix of computer parts on my desk, I’ve designed and 3D printed a new case for it.
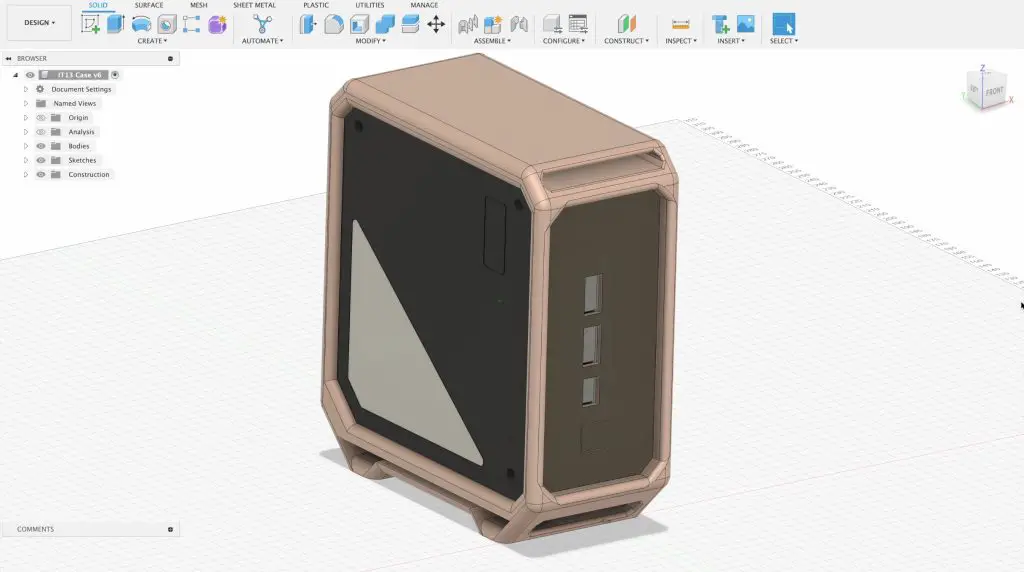
I printed it out of copper, black and blue PLA. I initially wanted to print the case on it’s side to reduce the number of supports required but this then required a large number of filament changes to get the copper and black colour scheme. I rather printed the case in the vertical orientation which significantly reduced the number of filament changes and the associated print time.
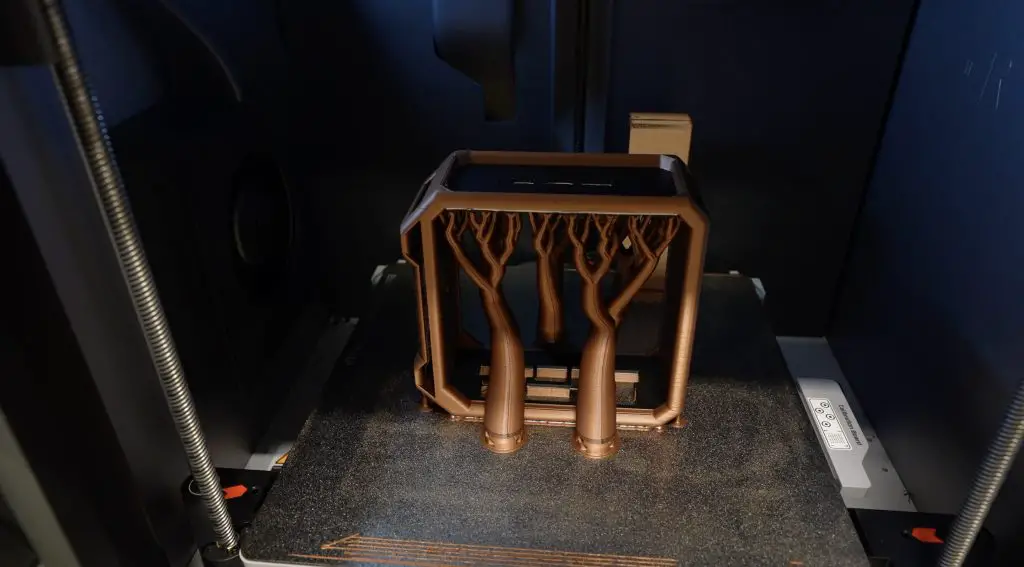
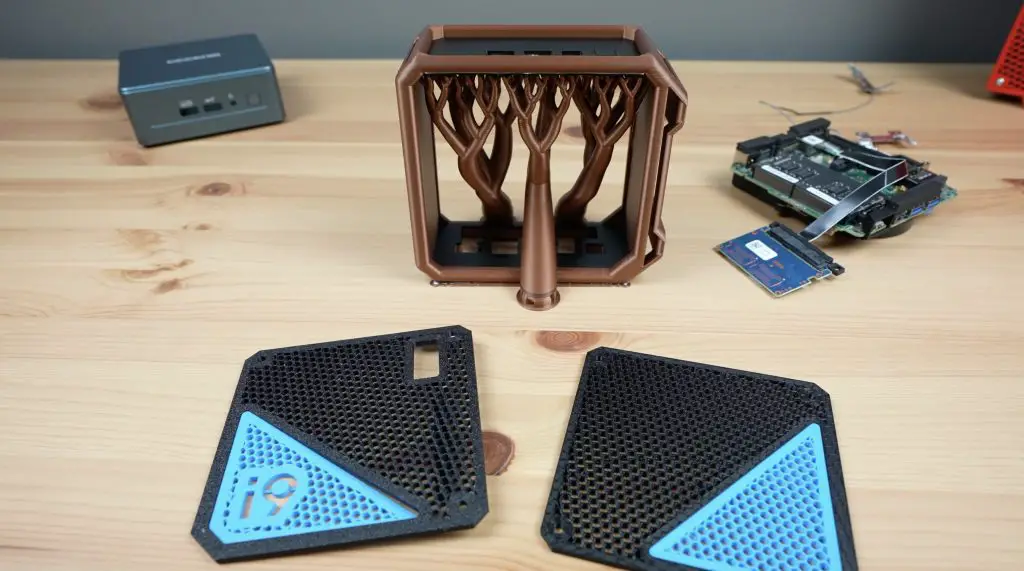
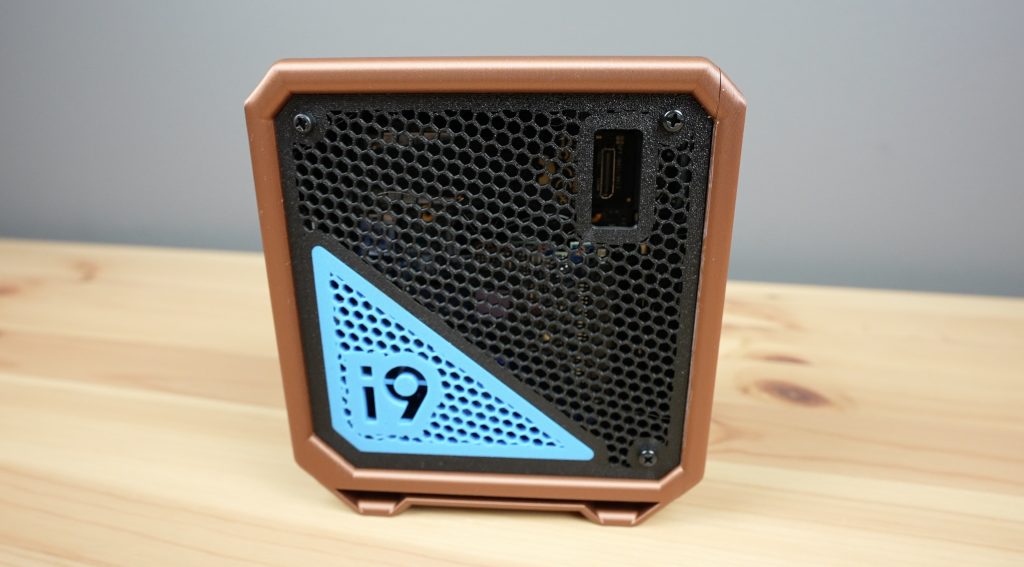
This case stands the Geekom IT13 upright and allows easy access to the Oculink port on one side. It’s also got space to mount the SSD and has a lot of airflow on both sides through the hexagon mesh for cooling.
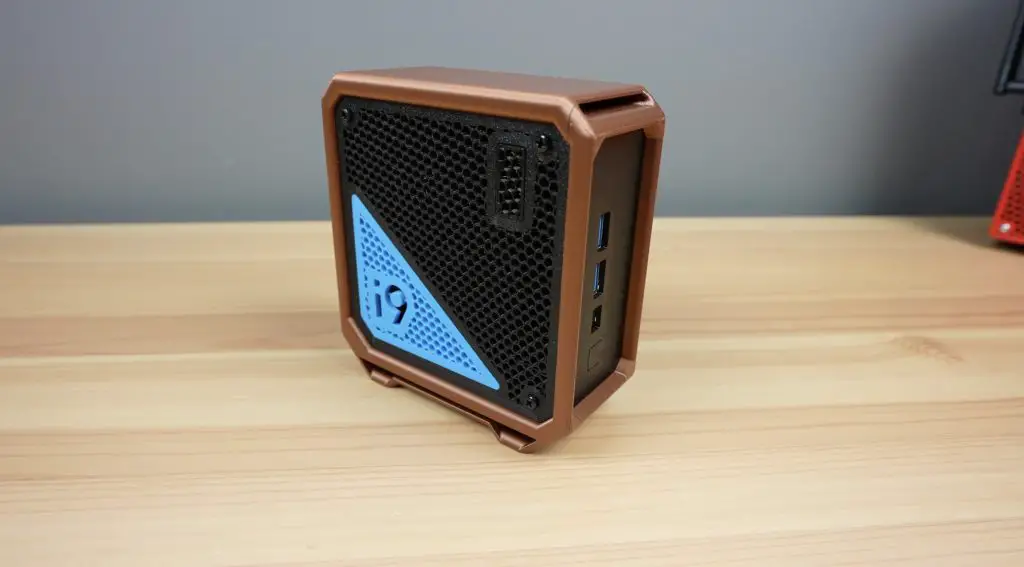
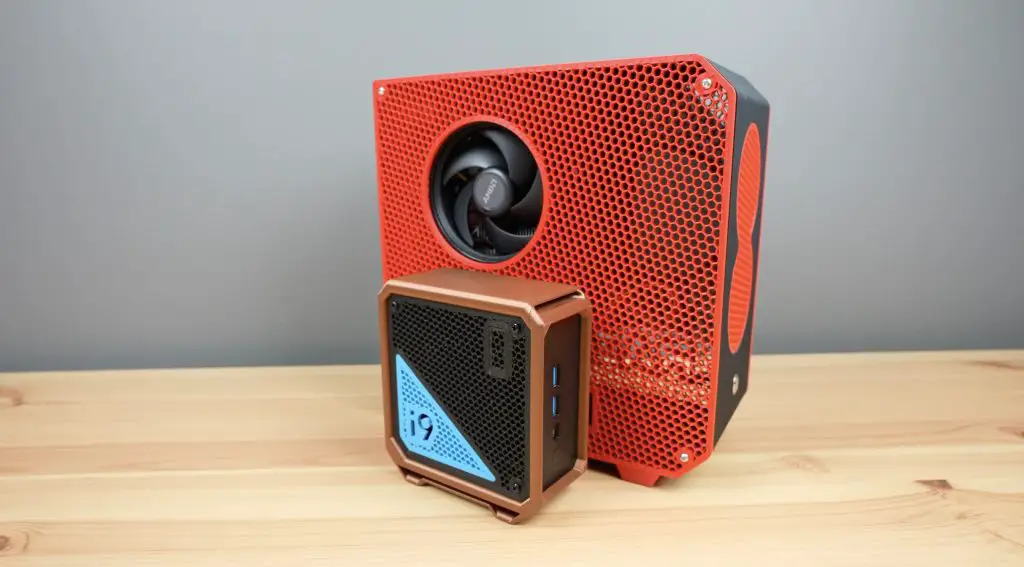
It’s probably difficult to tell on camera but this computer is tiny. It is even dwarfed by my recent mini-ITX computer build which I thought was quite small.
Testing My Modifications To The Geekom IT13
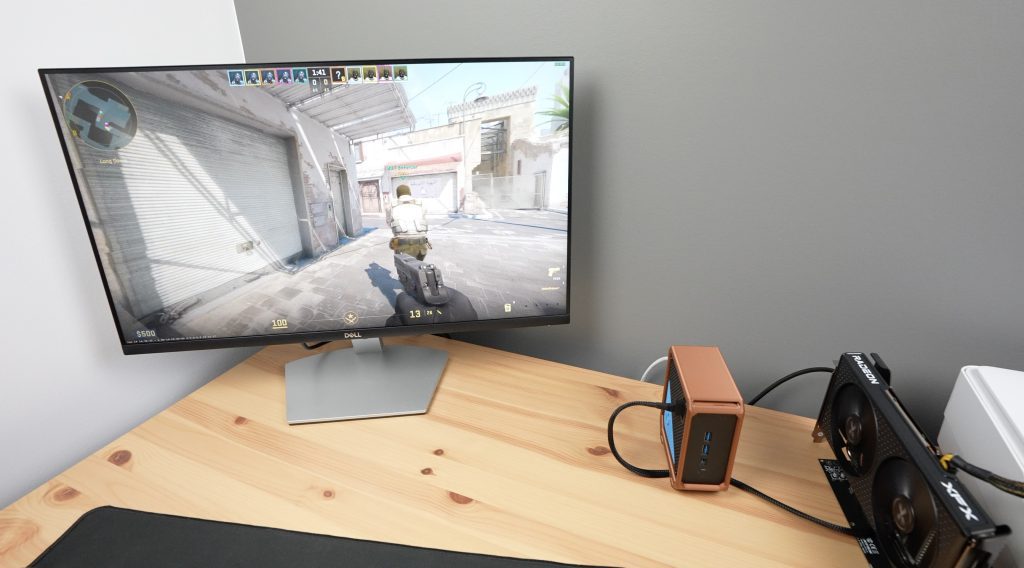
Next, let’s get it booted up and then see what kind of performance we get from it with the new thermal paste, new SSD and the external GPU. With the Oculink cover removed, we can plug our external GPU in.

I can’t tell much difference in the boot time with the SATA SSD instead of the NVMe drive, but honestly I’m just happy that this setup actually boots.

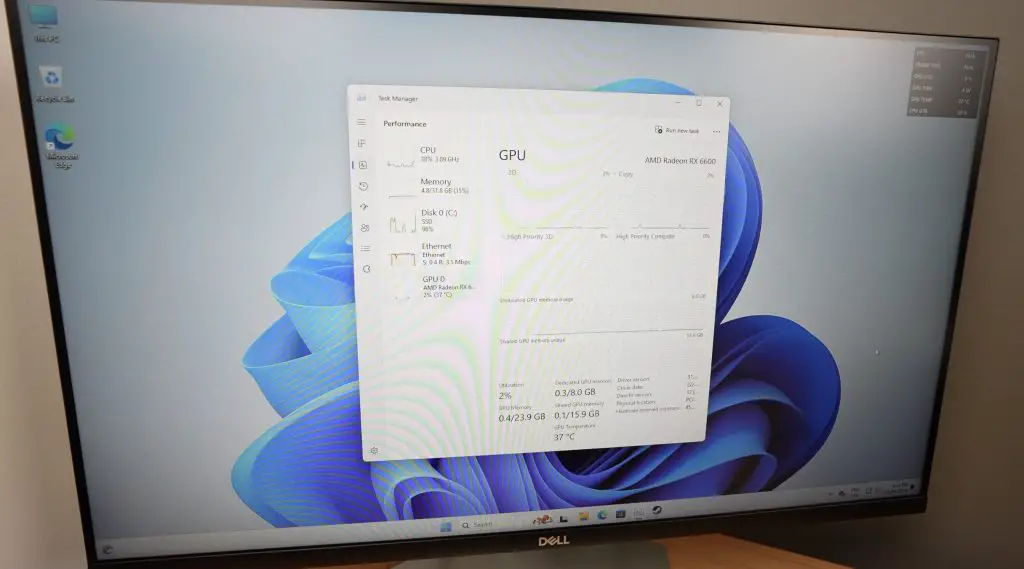
Opening up Task Manager, we can now see our Radeon RX 6600 GPU connected.
In CPU-Z we can see the same, but I’m really interested to see if the thermal paste makes any difference to the CPU benchmark figures. So let’s try that.
It still seemed to thermal throttle but it felt like it took a bit longer for the fans to spin up this time around. Again, you can hear the fans running in my Youtube video.
After a few seconds, the result was 7,756 and an average of three tests was 7,749. So we got a little over 100 extra points. This is only a bit over a 1% improvement so probably not worth removing the heatsink for if you pick one up, but I think it was worth trying out.
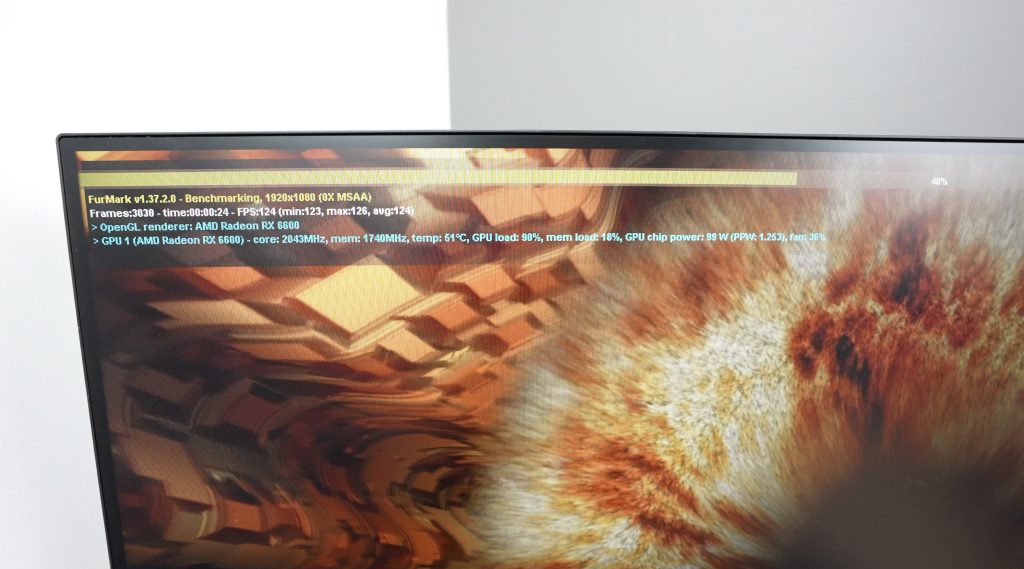
Next, let’s try Furmark and see what the new external GPU does.
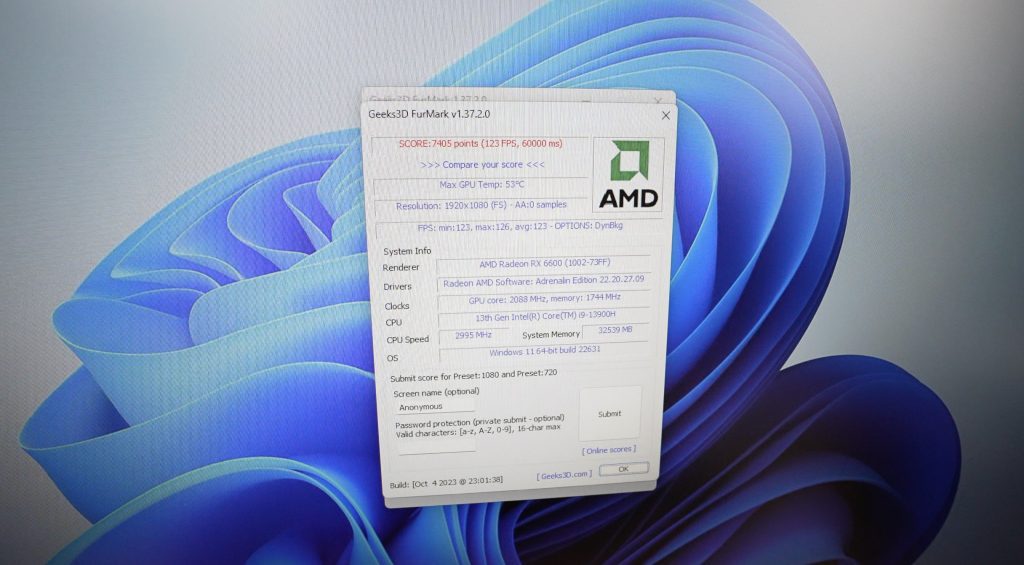
Even a few seconds in, the external GPU is obliterating our previous score. We’re getting significantly better performance with a new average of 123 fps.
Over three tests I got an average score of 7,411 – which is over three times better than what we got with the integrated GPU.
Lastly, let’s see if we can do better than 10 fps in Counterstrike.
With graphics set to “Very High” we’re now getting around 110-120fps in the home screen. This is already an order of magnitude better than what we got with the integrated graphics.
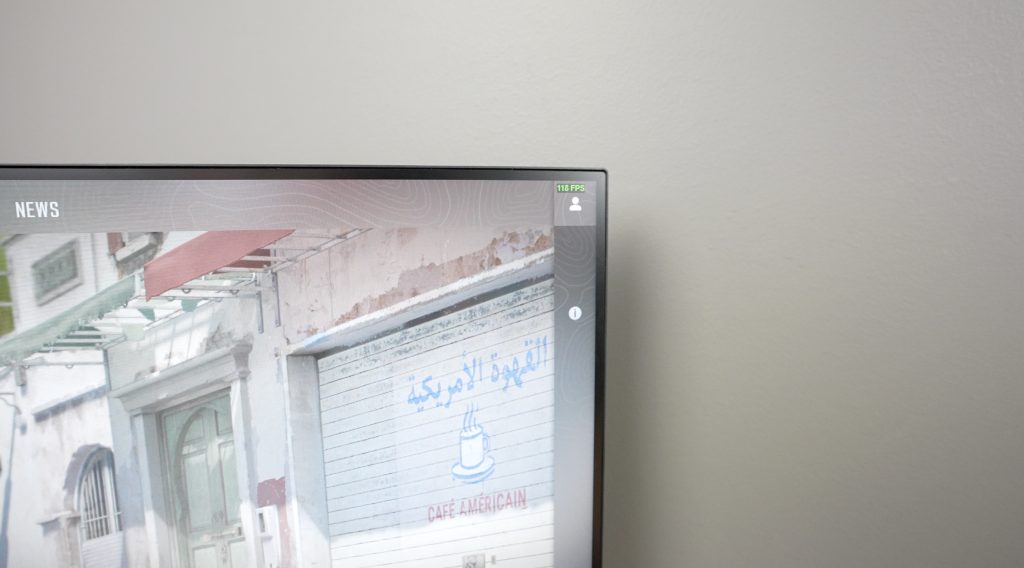
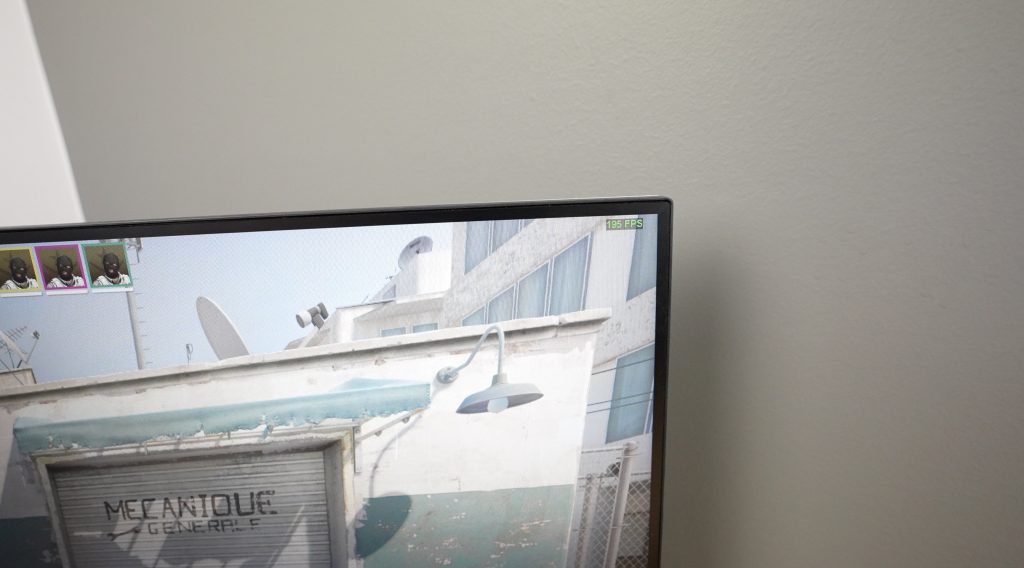
In-game is even better, we now get around 180-200fps.
Final Thoughts On The Geekom IT13
I knew that adding an external GPU would give us a big improvement, but I didn’t expect it to be an improvement of almost 13 times the original fps. I guess that’s what happens when your GPU is bigger than the computer.
I think this is a really cool little PC. It’s ultra-portable when you need it to be. You can just unplug the GPU and it’ll revert back to the integrated graphics if you need to take it somewhere, but you’ve still got the power of a dedicated GPU at home when you need it. The base Geekom IT13 is a really powerful mini PC that’ll tackle a wide range of workloads, it’s upgradable in future, and you can even add a GPU to it to significantly improve gaming performance if you really want to but it’ll handle mid-tier games on medium 1080p settings without any issues.
Check out Geekom’s web store to get your own IT13. Let me know what you think of it and my case design for it in the comments section below.
i would buy one please contatme
Good morning usa side here. I was wondering if you could make that set up for me. I saw your video on the modified geekcon IT 13 mini with the external GPU and I wanted the same for myself. Would you do that for me and if so how should we go about payment?
This Geekom IT13 sounds like a beast! With those Intel cores and decent RAM/SSD, it should handle games well. But the integrated graphics might be a wild card. Have you tried any graphically intense games yet?
Hello Michael ,you are so good!!!!!