If you’ve got some stubborn stains on your driveway, rust on your tools or your’re looking to remove some old paint from furniture then a sandblaster can really come in handy. Unfortunately they are usually quite expensive, but this sandblaster by Withered Perception works really well and costs less than $5 to make. Besides, if you’ve got an air compressor then you’ve likely got a blow gun anyway so you could make this sandblaster with things you already have lying around your home.
What You’ll Need
- Blow Gun Kit With Extension Nozzle – Buy Here
- Buy one from your local hardware store, it will be less than $5 otherwise use the link above.
- Old Drink, Soda or Gatorade Bottle
- A Drill and Drill Bits
- Craft Knife
- A File
- Hot Melt Glue Gun
- Your Air Compressor & Hose – To Use It Of Course
How To Make Your Sandblaster
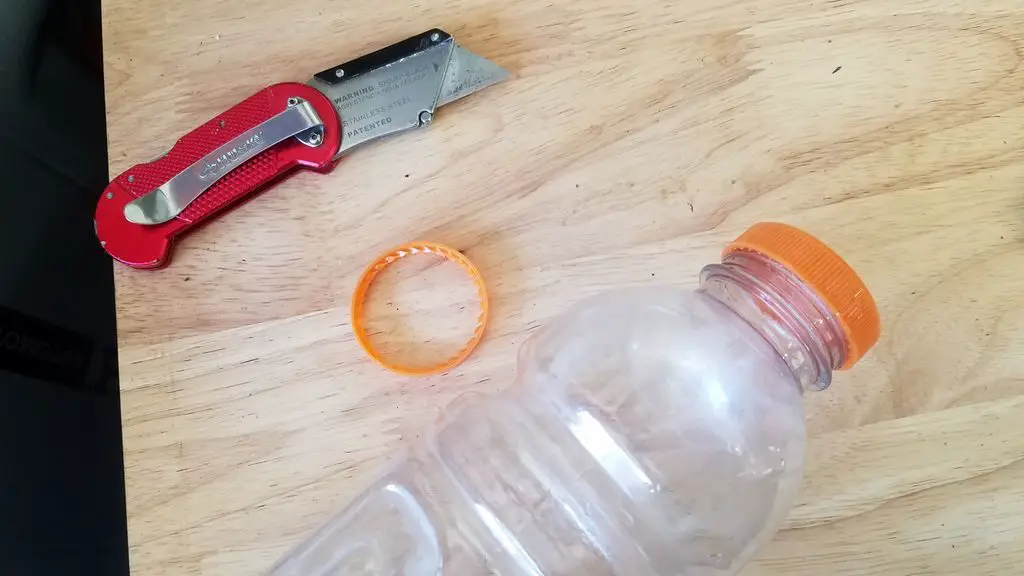
Use a craft knife to remove the cap ring from the neck of the bottle. You’re going to use this freed up area to push your air gun extension tube through.
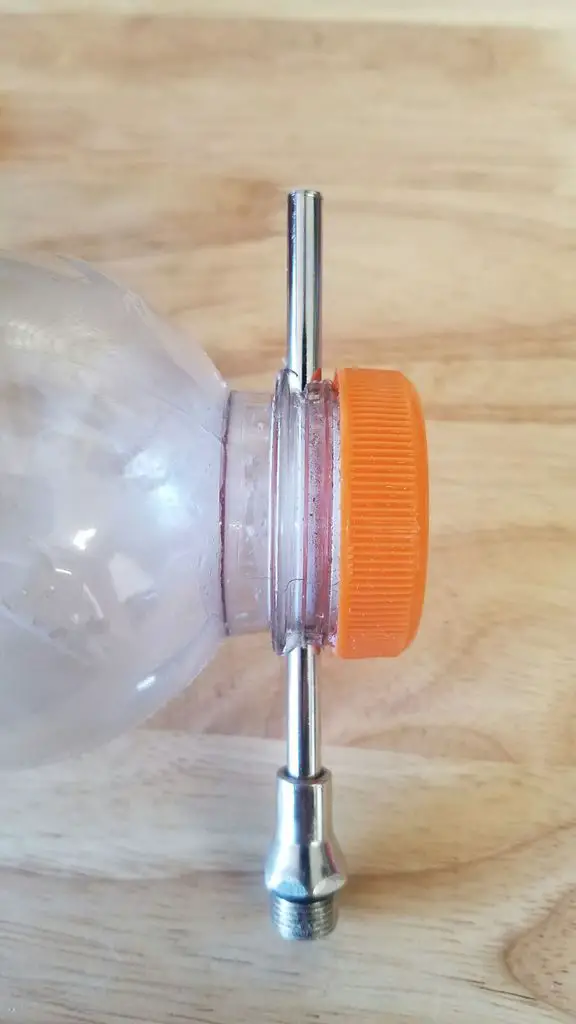
Drill a hole through the neck of your bottle which is just large enough for your air gun extension tube to pass through. You want it to be snug.

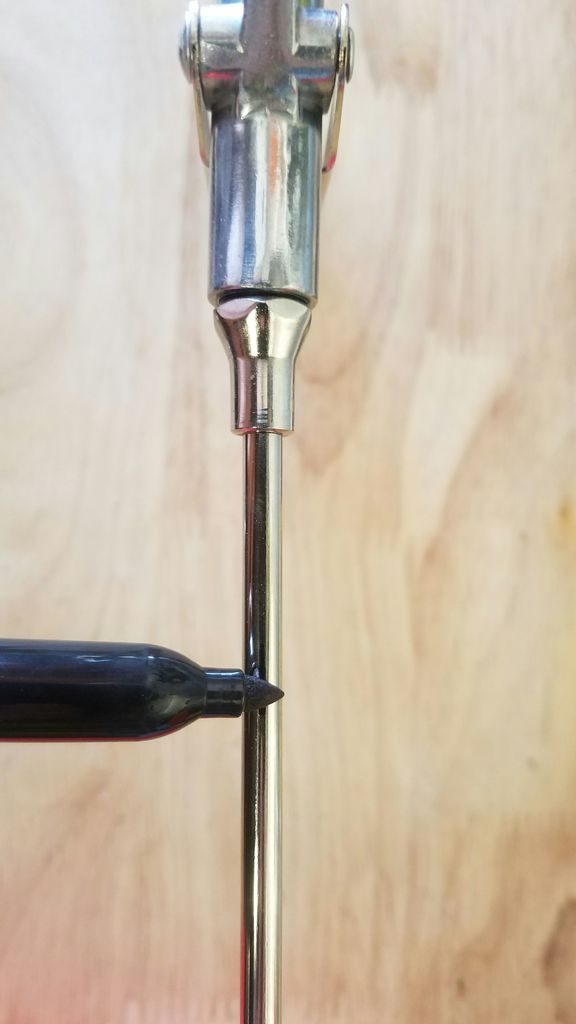
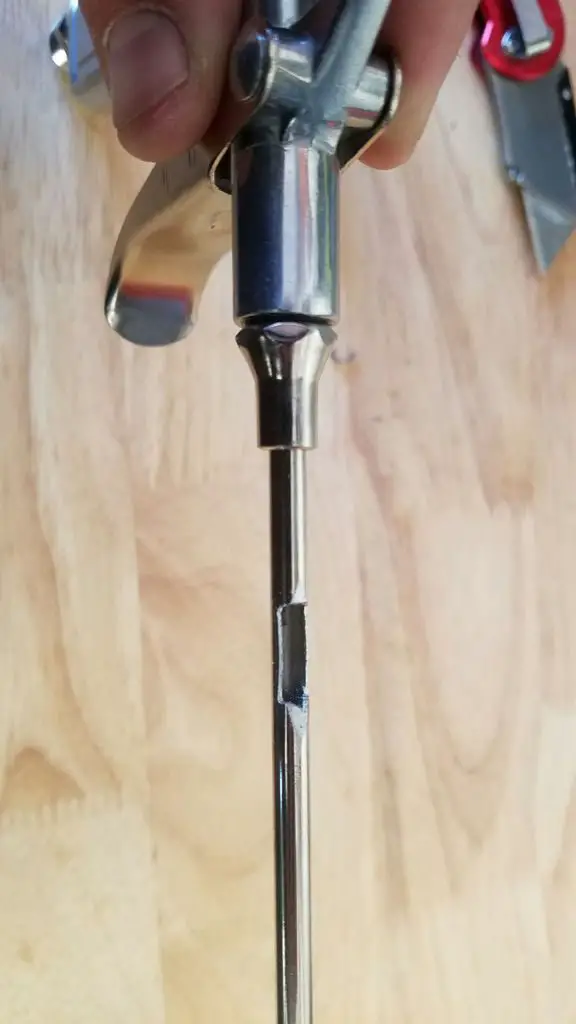
Mark the centre of the air tube section which sits inside the bottle, you’ll need to cut a slot into the bottom side of the tube.
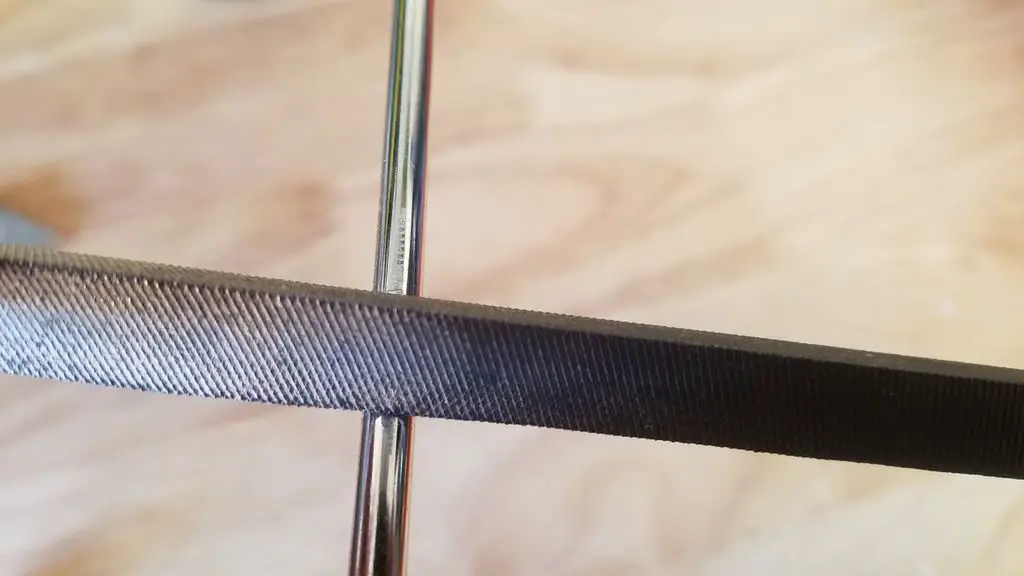
File a slot into the tube on your mark. The slot should be large enough to let your sandblasting media through but not too large that it floods the air stream. Turn the tube so that the slot faces downwards after you’ve filed the slot.
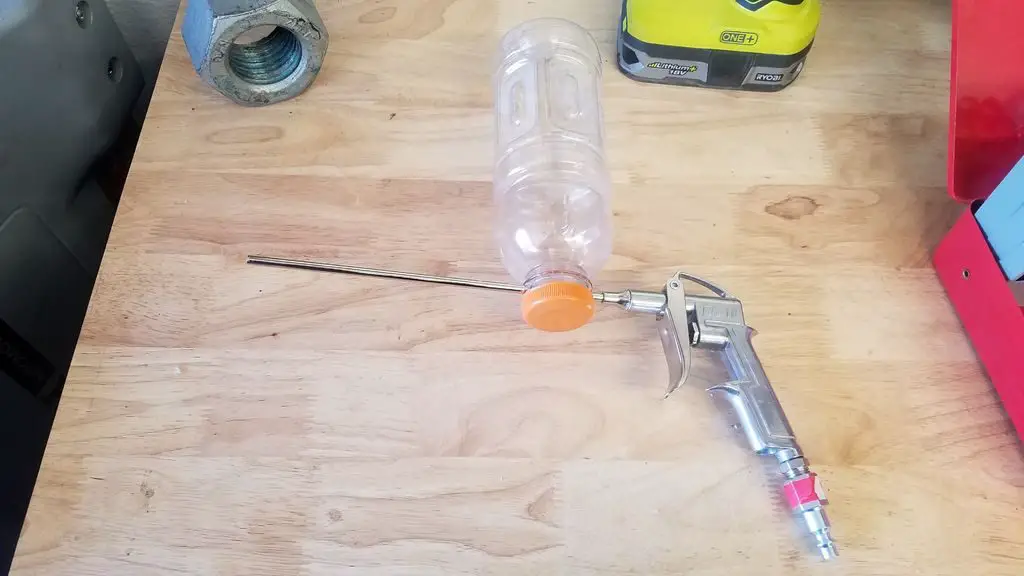
Push the tube back into the hole.
Apply some hot melt glue around the edges of the holes around the tube to seal the bottle.

Put on some safety goggles, respirator and gloves for safety and try out your new sandblaster.

Depending on what you’re trying to clean, you can select your own sand blasting medium. In this example, 20/40 crushed walnut has been used but feel free to experiment and see what works best for your application, like this abrasive media.
Have you tried making your own sandblaster? Let us know how it went in the comments section below. This post has been used and modified under the Creative Commons License CC BY-NC-SA 4.0.
If you enjoyed this article, have a look at these 10 essential tools for beginner DIYers.