I’ve you’ve spent some time on Pinterest or reading through home decor magazines lately then you would have seen that one of the latest garden trends is CNC cut privacy screens in various patterns. They really look amazing but can be quite costly to have manufactured, especially in custom sizes. Fortunately, DIY for Homeowners have found a way to make your own privacy screens which look just as great as the CNC cut ones using some old (or new if you don’t have lying around) PVC piping.
You may also want to have a look at making these stylish and modern hanging garden planters to go along with your new privacy screen.
What You Need To Make Your Own DIY Privacy Screen
- PVC Piping In Various Sizes – 100mm / 50mm / 25mm (4″ / 2″ / 1″)
- 2 x 50mm / 2″ PVC Elbows
- 2 x 50mm / 2″ PVC T-Pieces
- Sandpaper and Sander (If you have one)
- Hacksaw or Mitre Saw
- PVC Cement / Glue
- Spray Paint – Optional for Colour
How To Make Your PVC Piping Screen
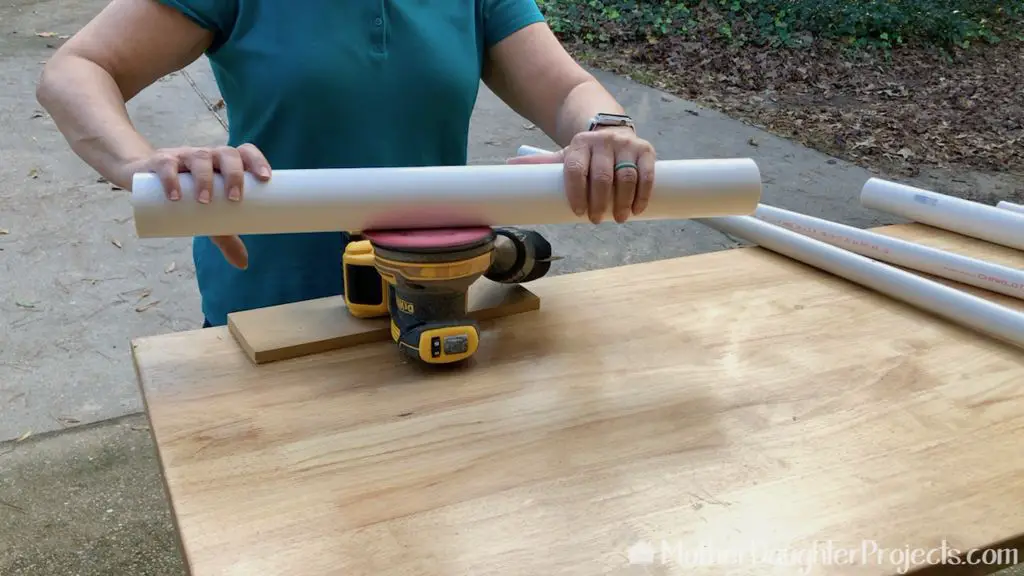
Start by lightly sanding the outside of all of your lengths of piping which you’re going to be using. This helps to remove any dirt, stains or marks on the piping and provides a nice rough surface for the adhesive to work on.
Next you need to cut your piping into a number of pieces of equal length. The length should be the same as the diameter of the piping you’re going to be using for the frame. This will usually be 50mm or 2″ piping, so you’ll cut your pieces to this length.
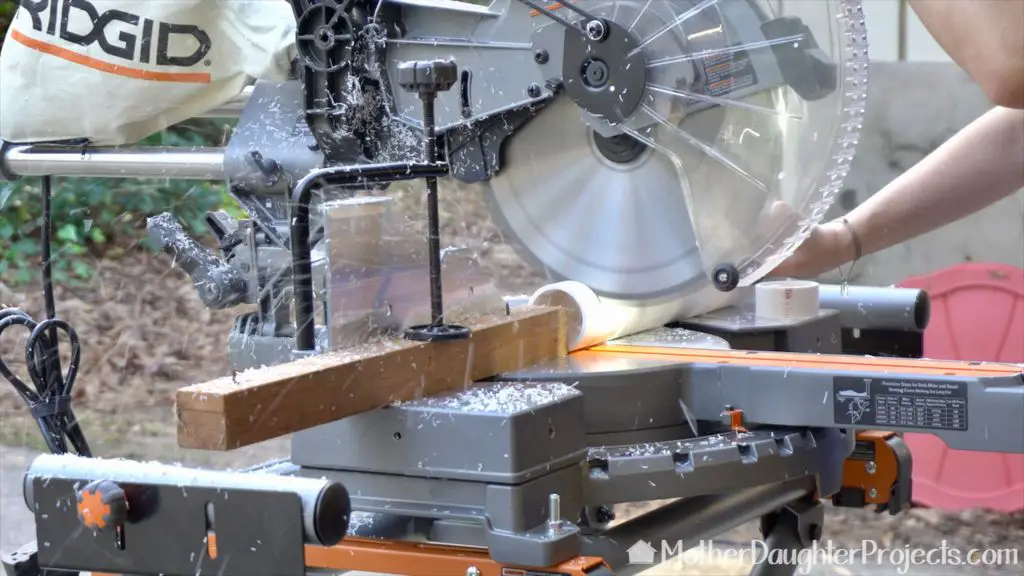
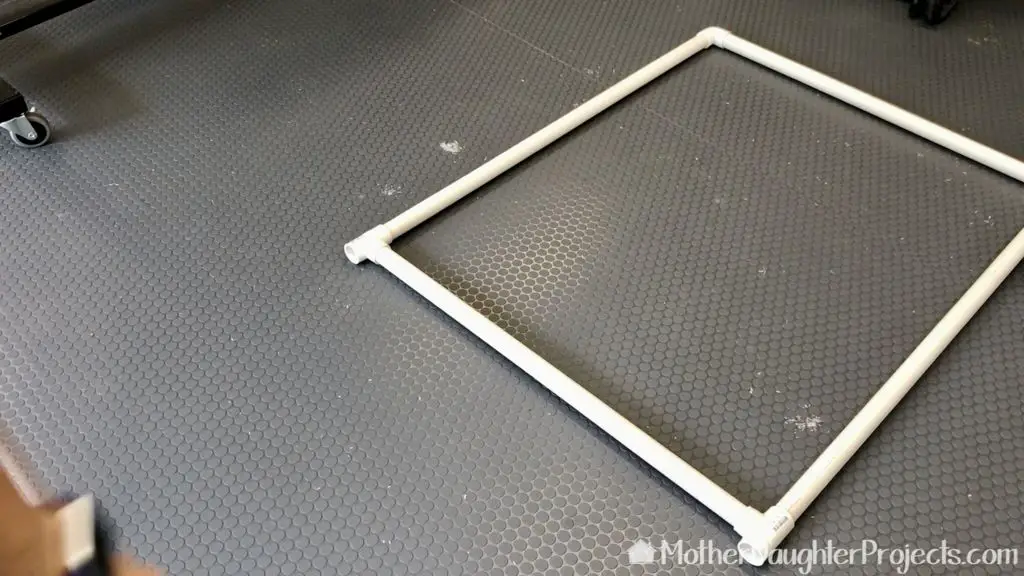
While you’re cutting, you need to cut four lengths of piping to build the frame for your screen, a length for each side. Cut two longer pieces for the long side and two shorter pieces for the short side of your screen. The top corners will be joined with the elbows and the bottom with t-pieces such that you can mount the screen over a dowel or piece of rebar hammered into the ground.
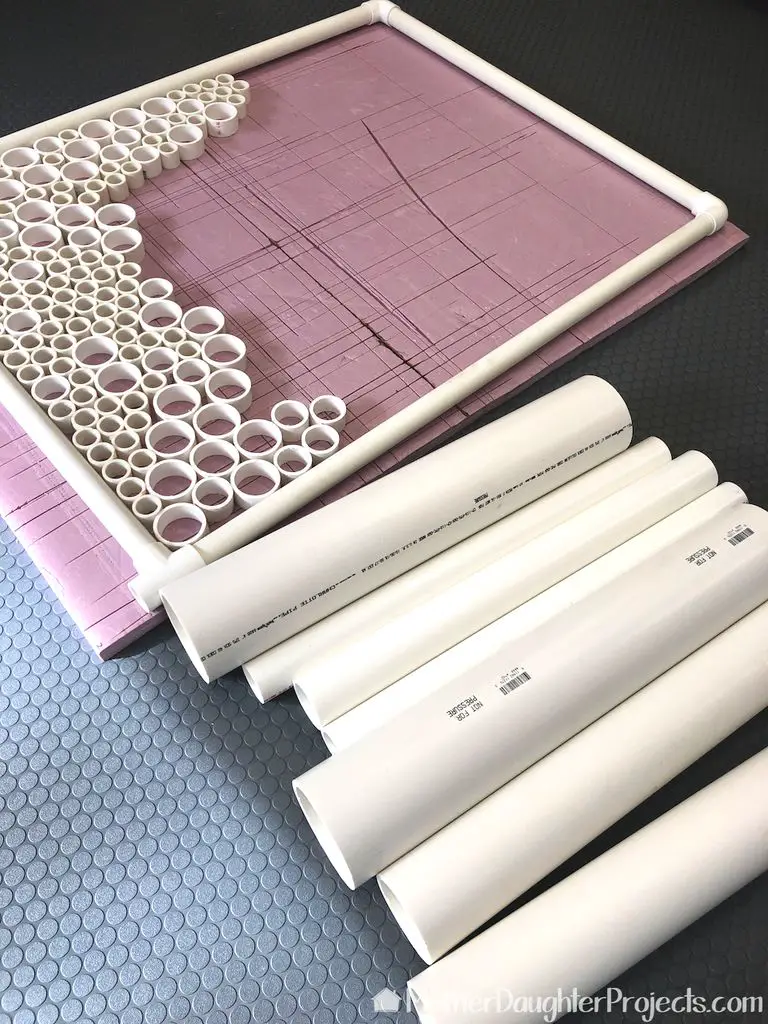
Once your frame is built, its time to start gluing the pieces of piping into place, this takes a lot of patience and you’ll likely find that you need significantly more pieces than you initially thought. Be careful with the PVC adhesive, it can be quite messy. Try to work over an old drip sheet or piece of plastic to avoid damaging your floor or work surface.
Once you’ve glued all of your pieces into place, allow the glue to cure for 24 hours before attempting to paint it.
If you do decide to spray it, make sure that you spray it with a high quality, UV resistant outdoor paint so that the colour lasts and the paint doesn’t start peeling off.
To mount or support the screen, hammer two lengths of dowel or rebar into the ground and slide the screen over the pieces at the t-piece end.

Place these screens in and around your garden wherever you need to close an area off or hide something you don’t want to be seen – like your dustbins or compost bin.
This post by DIY For Homeowners has been used and modified under the Creative Commons license CC-BY-NC-SA.