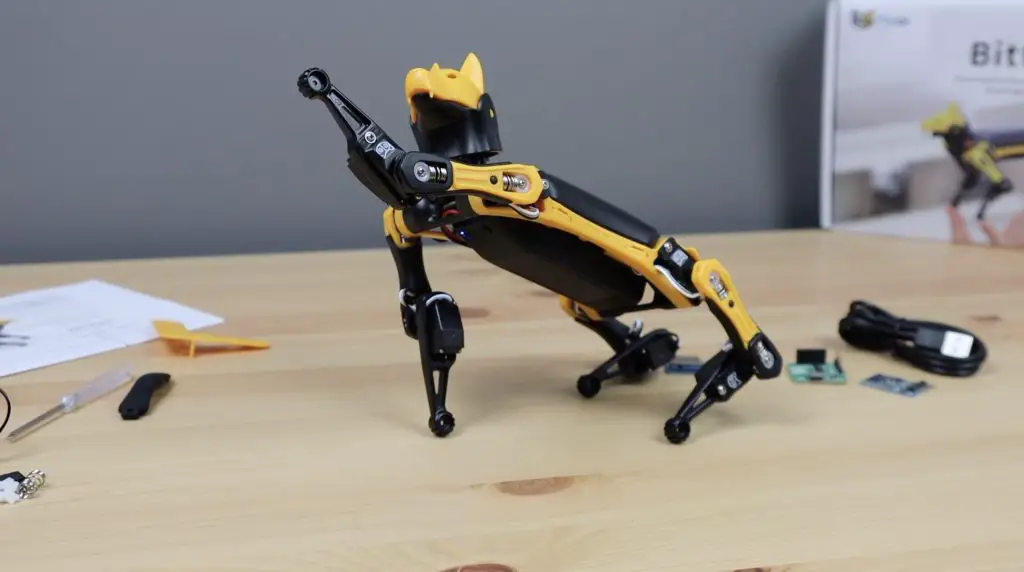
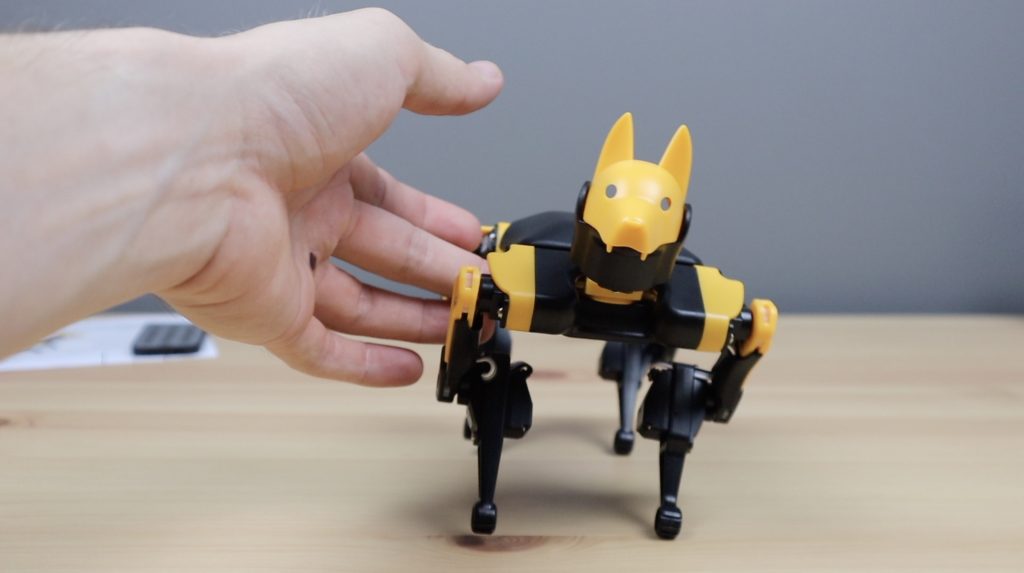
This is Bittle, a ready-to-run advanced open-source robot dog by Petoi that is based on the OpenCat robotic pet framework.
If you’ve ever wanted to explore building your own robotic quadruped, but have felt overwhelmed by the amount of information and options available or have been at a loss with where to start, then Bittle is the perfect product for you. So in this review, we’ll take a look at what Bittle is, how it works and what it can be used for.
Have a look at my video review to see Bittle in action, or read on for the written review:
Where To Get Bittle
Bittle is primarily available for purchase online through Petoi’s website or their Amazon store and comes in three packages:
- Base Kit – Includes all of the parts required to assemble your own robot dog
- Pre-assembled Kit – All of the components included in the base kit, but pre-assembled and ready-to-run
- Developer Kit – The pre-assembled kit with 10 replacement servos and an extra battery pack
Petoi have sent me the pre-assembled kit to try out and share with you, so that’s the kit that we’ll be taking a look at in this review.
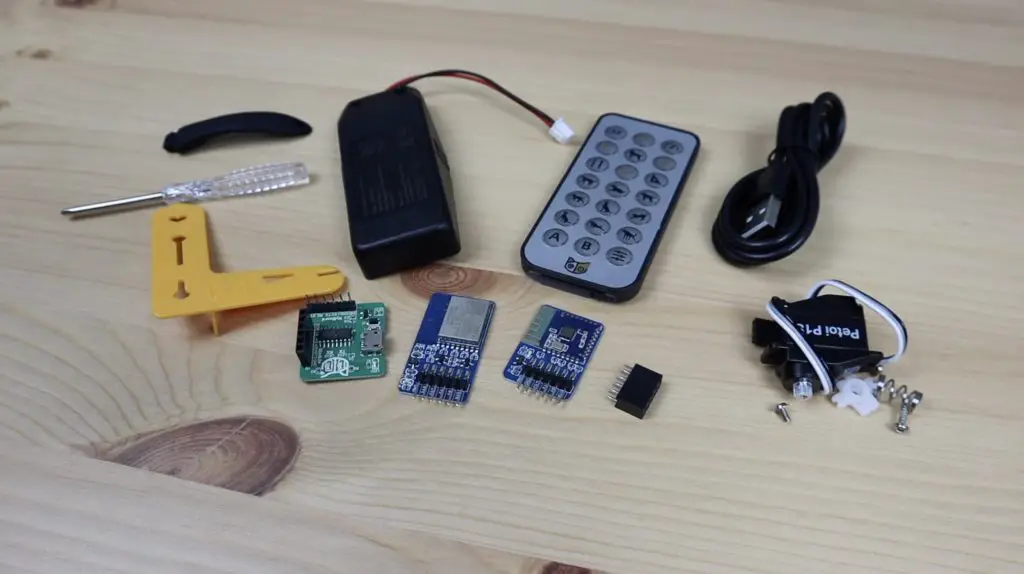
What’s Included In The Box
The base kit comes in a branded box with clear protective inserts to hold the included components in place.

Included is Bittle, along with a battery pack with an integrated charging circuit, and then an accessories kit.

The accessory kit includes an infrared remote, a spare servo and some screws, a calibration tool, a small screwdriver and a pack of modules that allow communication with Bittle. These modules include a USB programming module, a Bluetooth module and a WiFi module.
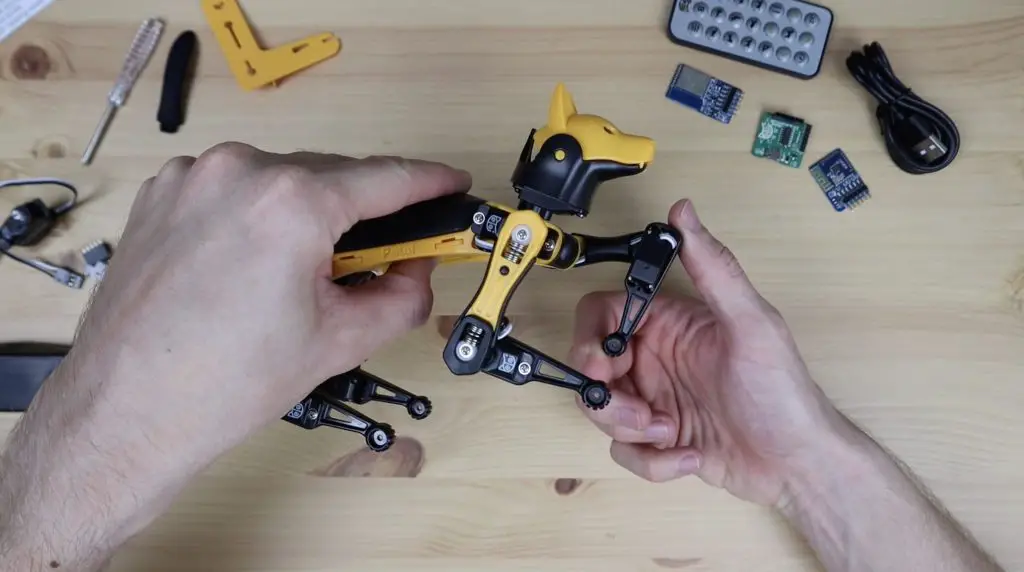
Assembling Bittle
If you’ve bought the base kit then you’ll need to do some assembly work before you can start using Bittle, including making up the legs, mounting the servos in place at the joints and connecting the wiring through to the control board that makes up Bittle’s body.
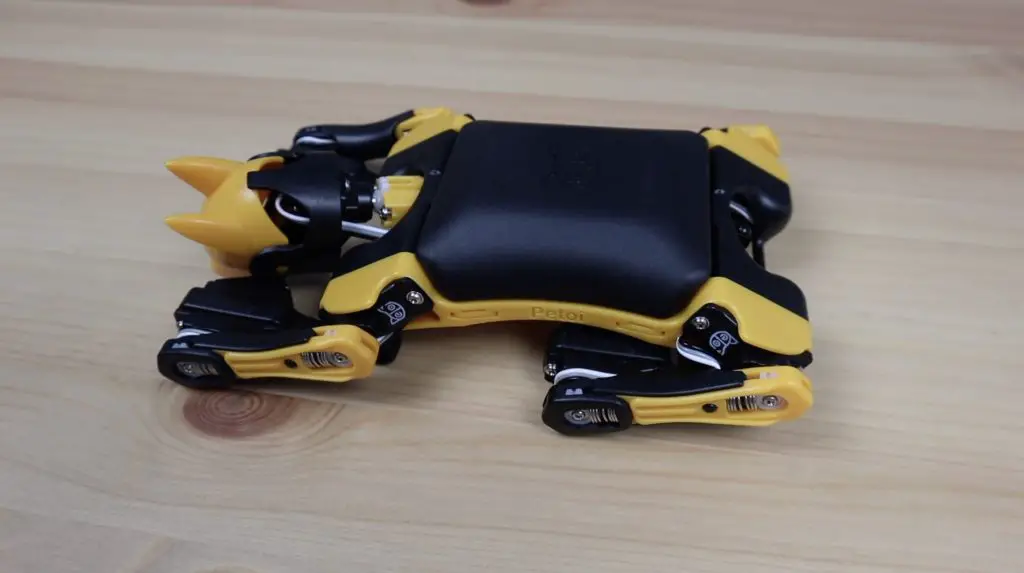
If you’ve got the pre-assembled kit, like I do, then you’ll just need to snap the head into place and plug in the battery. You’ll also need to move the servos to the correct starting position as they’re packed with the joints bent in the opposite direction to make Bittle more compact.
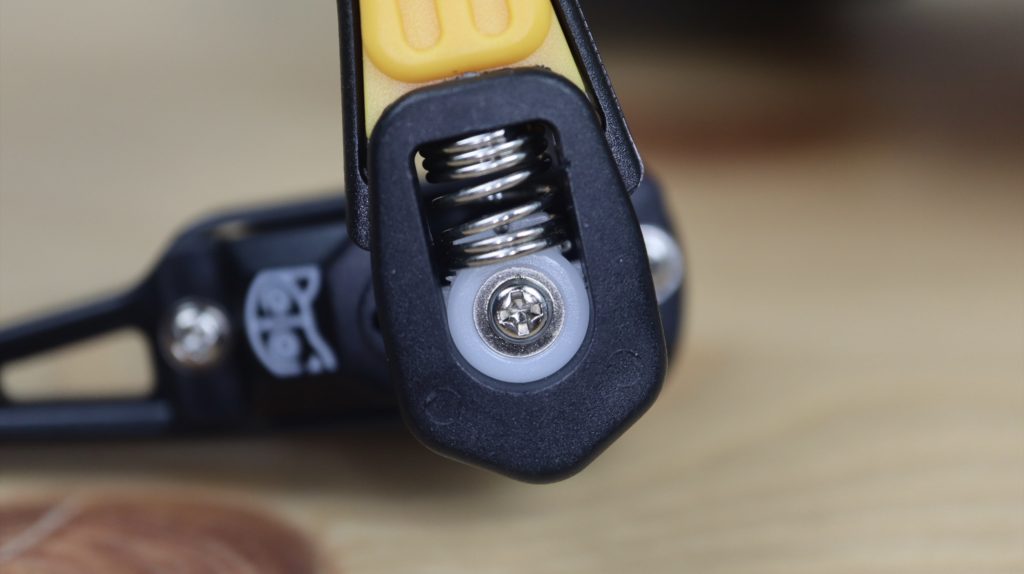
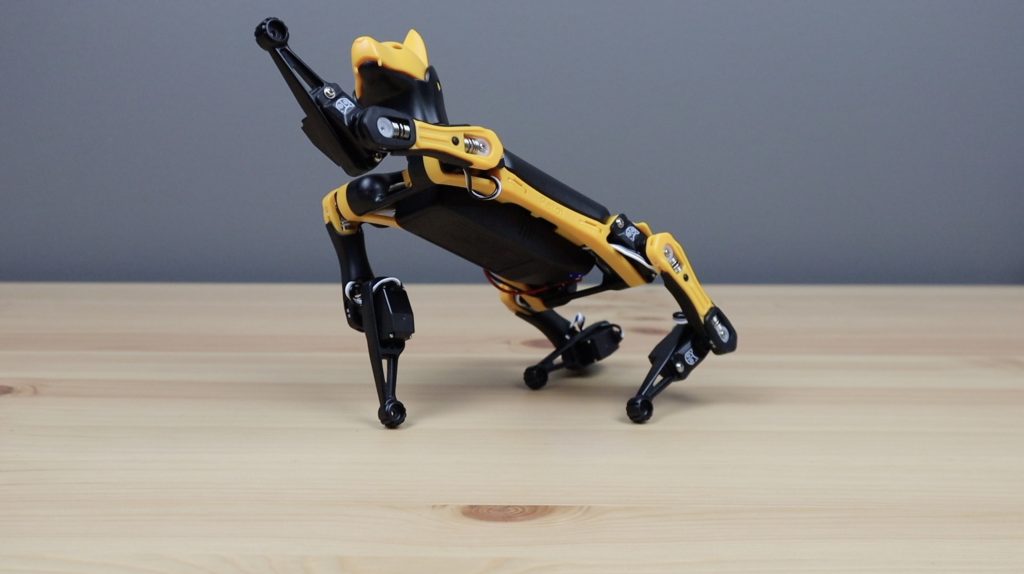
The body and components feel like they’re well made and are good quality. Part of what makes this robot dog look great and function so well is that they’ve taken the time to design and manufacture custom parts – like the servo arms that have been specifically designed to join the leg components with the inclusion of a spring to provide a bit of shock absorption.
Controlling Bittle With The Infrared Remote
Once assembled, the included 21 button IR (infrared) remote allows you to start playing around with some of the core functions of Bittle right away. It’ll allow you to walk, run, turn and do a couple of pre-programmed skills right out of the box using a small infrared receiver on Bittle’s back.

The arrow keys control Bittl’s walking/movement directions along with speed settings and 11 skill buttons allow you to execute some of the pre-programmed skills.
Getting the first movement out of Bittle is as easy as plugging in the battery pack and then aiming the remote at his back when you press one of the buttons.
Here’s Bittle waving hello…
Exploring Bittle’s Control Board
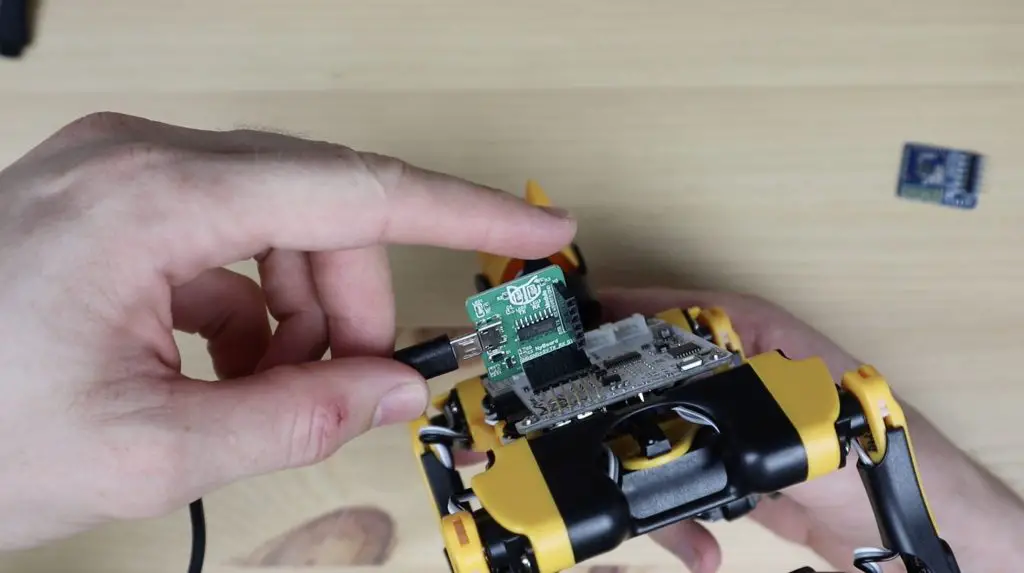
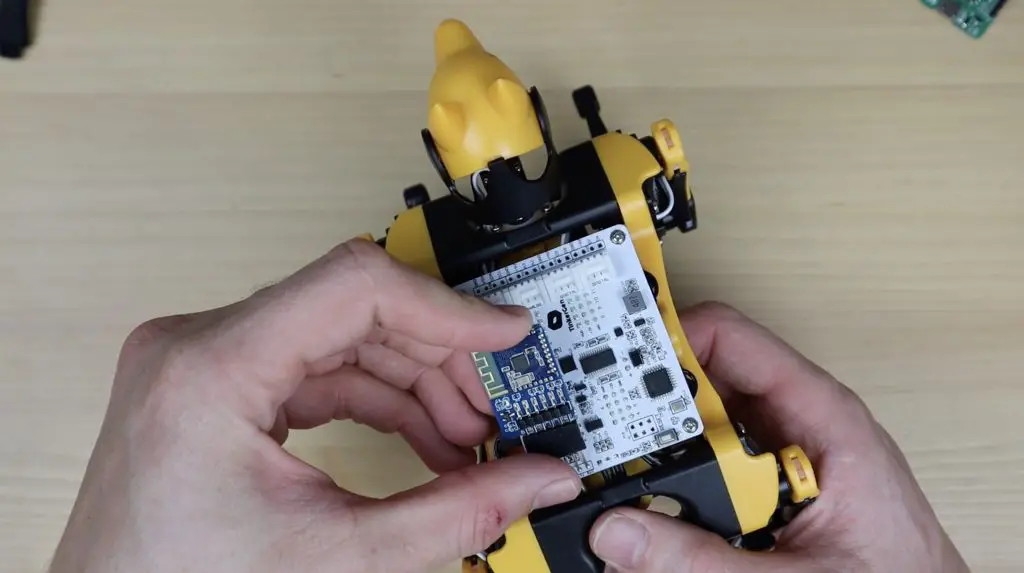
Once you’ve tried out Bittle using the IR remote, you can either dive right in to coding your own skills or you can download the mobile app (for iOS or Android) to unlock some additional functionality, including calibration and customized commands. Either way, you’ll need to remove the black cover on the top to get to the control board to plug in one of the communication modules.
Under the cover is a custom-designed controller called NyBoard with an integrated Atmega328P chip, PCA9685 PWM servo driver, MPU6050 motion sensor, an infrared sensor and a number of ports and interfaces to add sensors and devices to.
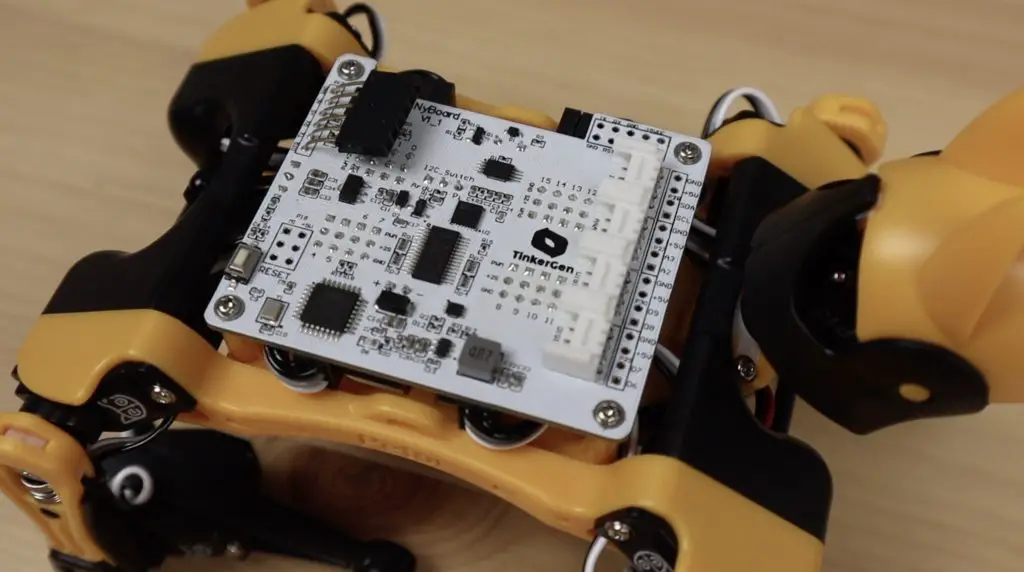
There appears to have been some revisions made to this board as some of the versions I’ve seen online have a row of RGB LEDs along one side. The core functionality however seems to be largely the same.
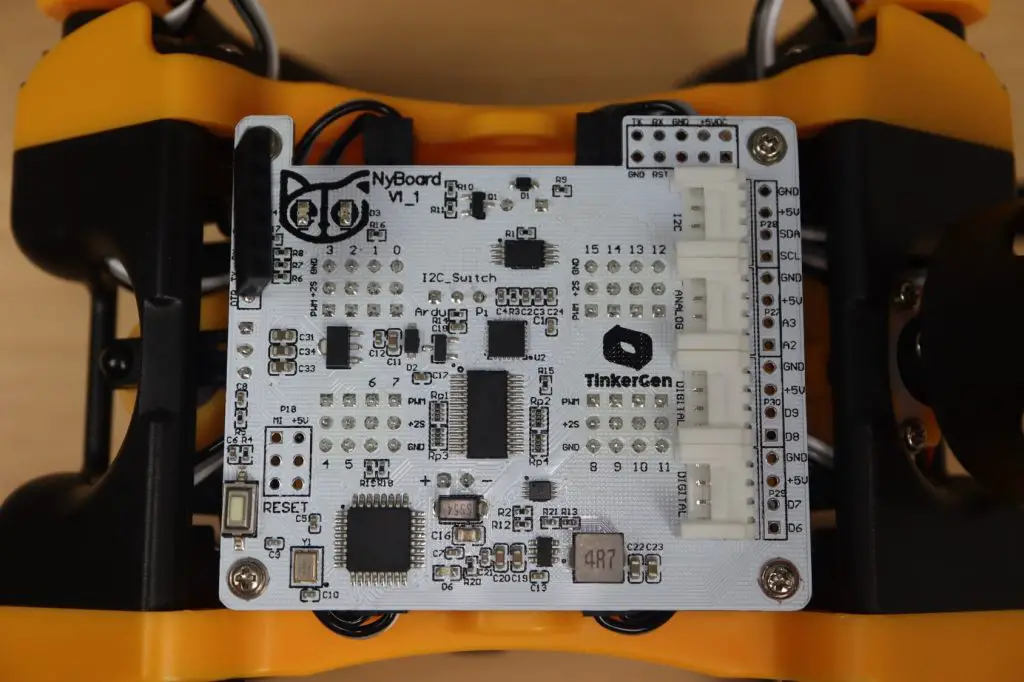
I really like that they haven’t trimmed this board down to only suit the functionality and IO that the standard Bittle configuration requires. Leaving additional servo outputs, I2C interfaces and digital IO ports gives you a lot of options to build upon the basic design and make your own modifications and additions to the robot dog. This along with the open-source software means that you’re getting a development platform to learn on, build upon and explore, rather than just a finished product that you’ll probably get bored with after a couple of weeks. Part of the fun in building your own quadruped or robotic pet is that you never really finish it, there is always something else you can add, tune or modify and Bittle retains this – being a platform to build upon rather than just being a finished product.
Coding Routines, Skills And Features
Coding is best done through the Arduino IDE, and you’ll need to use the included communication module to allow your computer to program Bittle. This allows you to plug Bittle into your computer using the included micro-USB cable.
If you’re not comfortable with the Arduino IDE, you can use Python as an alternative. They even have a drag-and-drop coding interface for beginners. So there really is something for every level of experience.
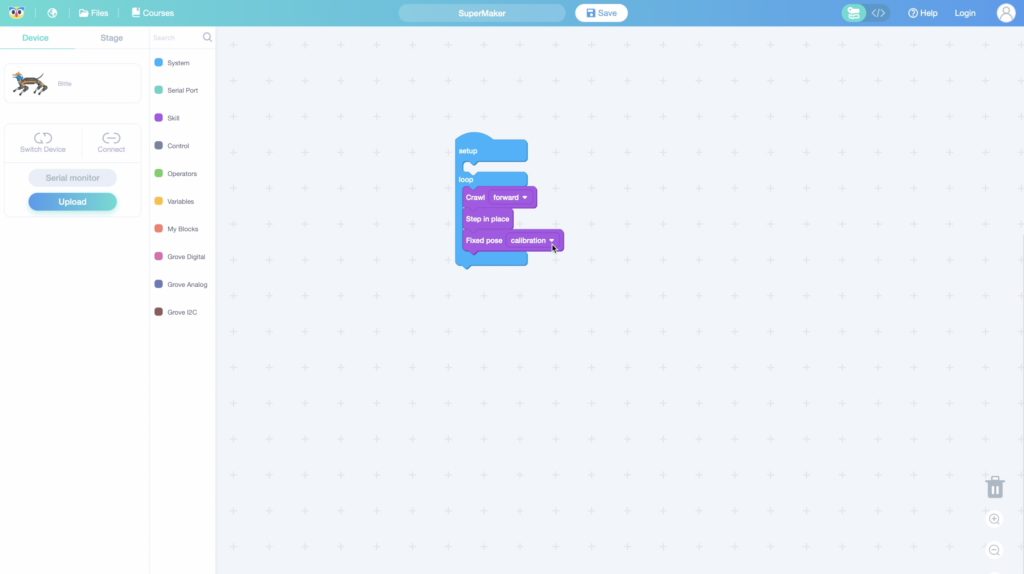
Their documentation is really good and covers everything you may need to do to use and maintain Bittle as well as documentation and instructions for adding your own sensors, skills and features.
Calibrating Bittle’s Leg Positions
In Petoi’s documentation, they mention that the pre-assembled kit is only coarsely tuned. So they recommend running through the calibration process for best results. I’m going to run through the calibration sequence using their iOS app. To use the app, I need to plug in the Bluetooth communication module to allow my phone to communicate with Bittle.
To help out with the calibration process, I also 3D printed their stand with the calibration arms built into it.
We can then open up the app to pair Bittle to the phone and start the calibration process. If you head over to calibration mode, the legs will move to their calibration positions and you can then make adjustments to their positions.
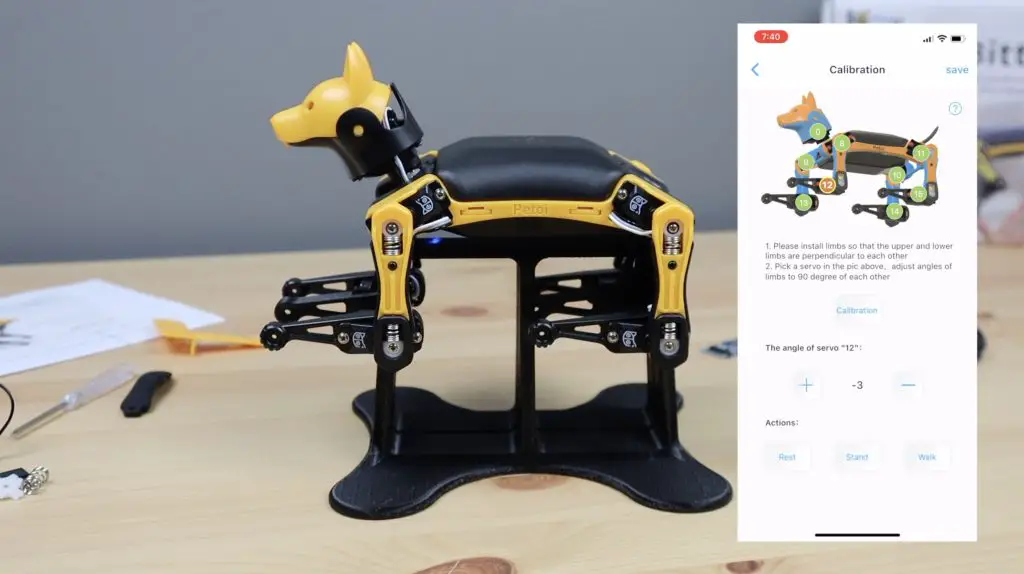
Course adjustment is made by removing the arm from the servo and aligning it as best you can. You’ll need to remove the screw that holds the servo arm to the servo in order to remove it.

Fine adjustment is then done in the app until Bittle’s legs are at perfect 90-degree angles, by aligning the legs with the stand or with the included calibration tool.
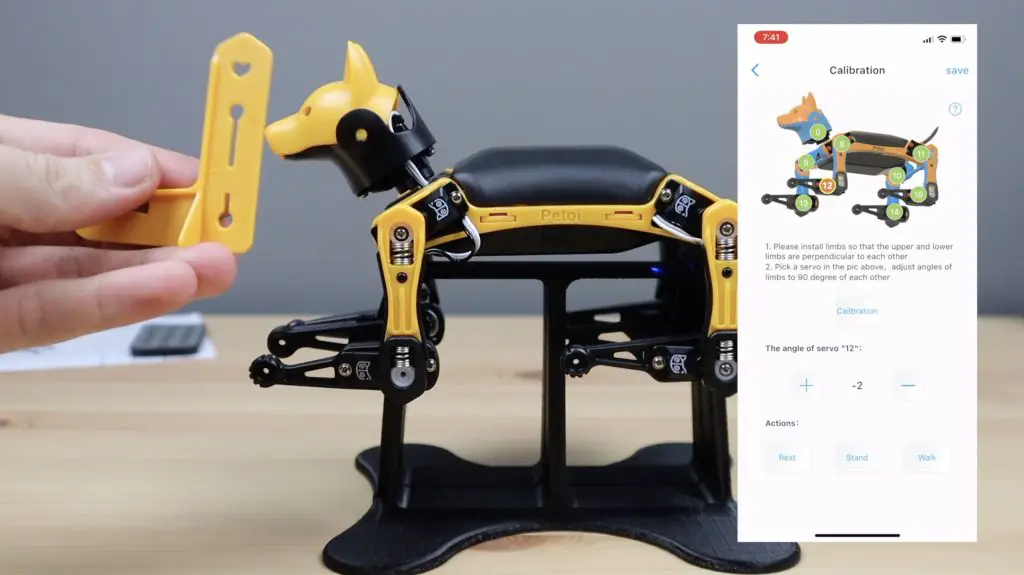
You can select each join in the image at the top of the screen and then make adjustments to it using the + and – signs. It’ll only let you just the servo between an upper and lower limit before asking you to rather make a course adjustment.
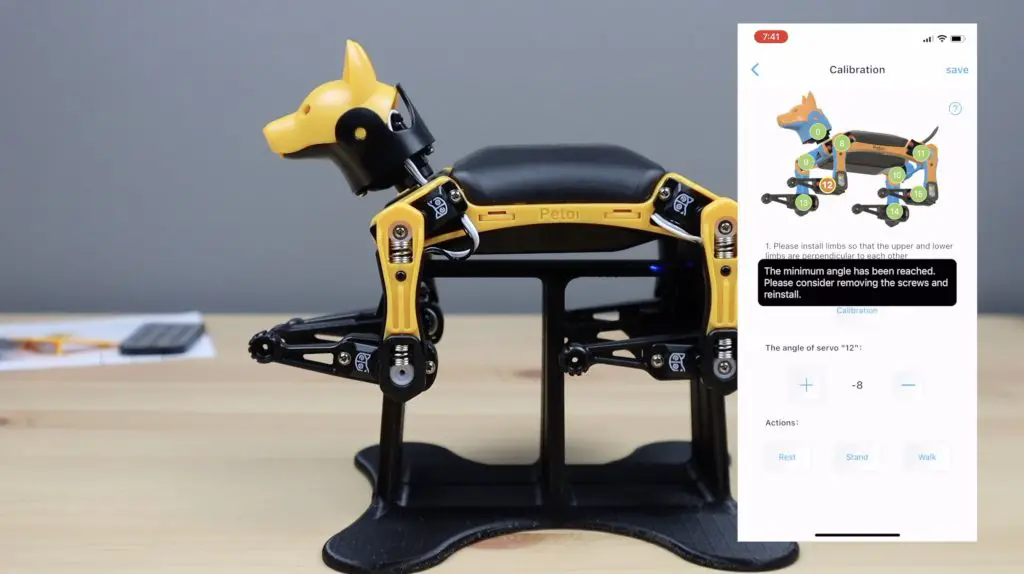
The stand is also useful for trying out new movements and testing commands without having to worry about where Bittle is going or if it’s going to fall off your desk.
Working On Or Repairing Bittle
All of Bittle’s components either screw or snap into place. So it’s super easy to take apart if you need to swap out a servo, change a spring or make changes to the wiring or control board. You just need a screwdriver and you’re good to go.
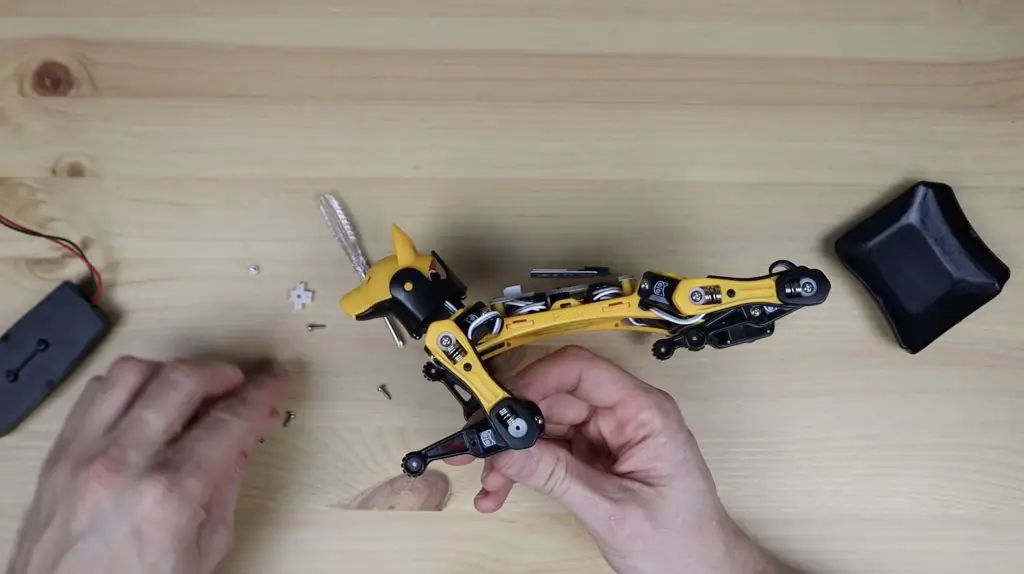
If you’re doing a lot of work on it then you’ll want to get a better screwdriver than what’s included with the kit as it’s a bit small and cumbersome to work with.
The wiring is also all held in place and partially hidden by snap-on covers over the legs. These help ensure that they don’t interfere with the joint movements and also keep Bittle looking neat.
Using The iOS App To Control Bittle
We’ve already paired the app with Bittle in the calibration process, so now let’s try some customized commands. Bittle has a number of controls and skills that are preprogrammed, these can be set up to run individually or as part of routines using text inputs through the app or the Arduino IDE.
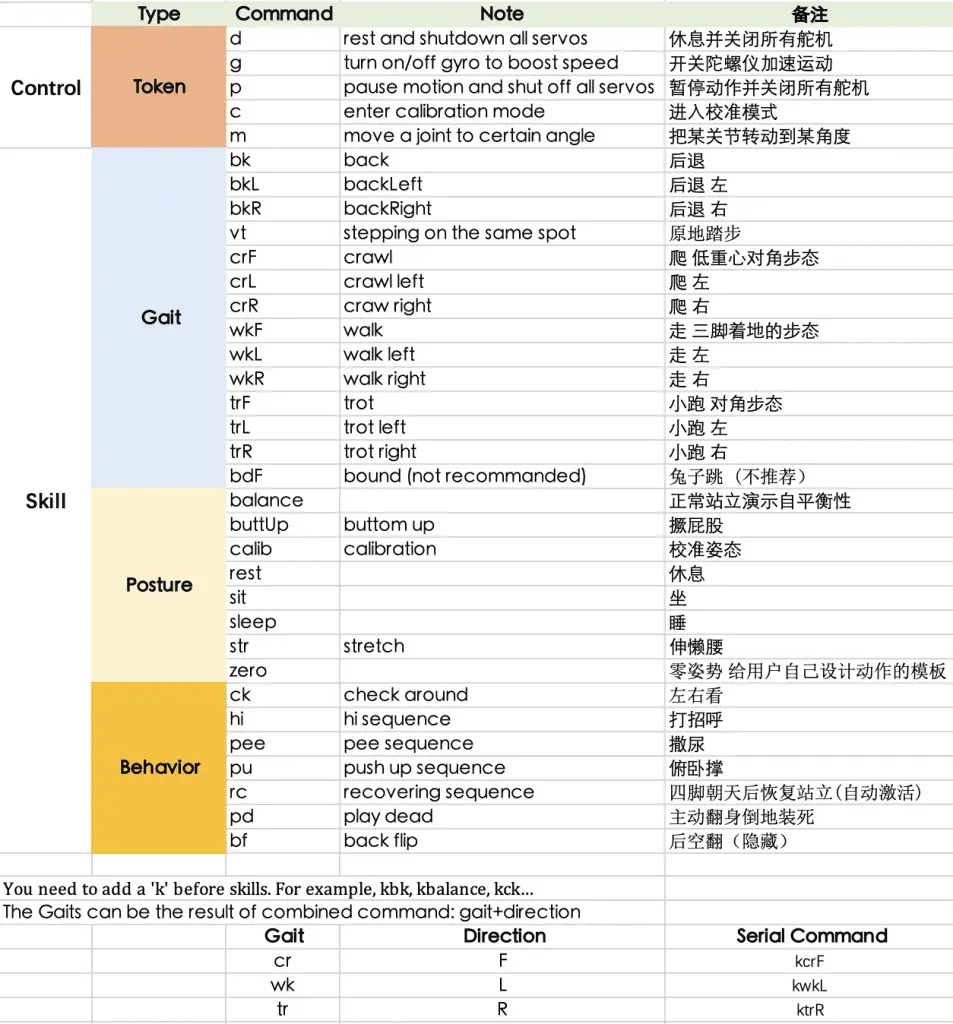
So let’s try one of them. The code to look or check around is ck, so we type in kck to run the command and we can give the quick command a name “Look Around”.
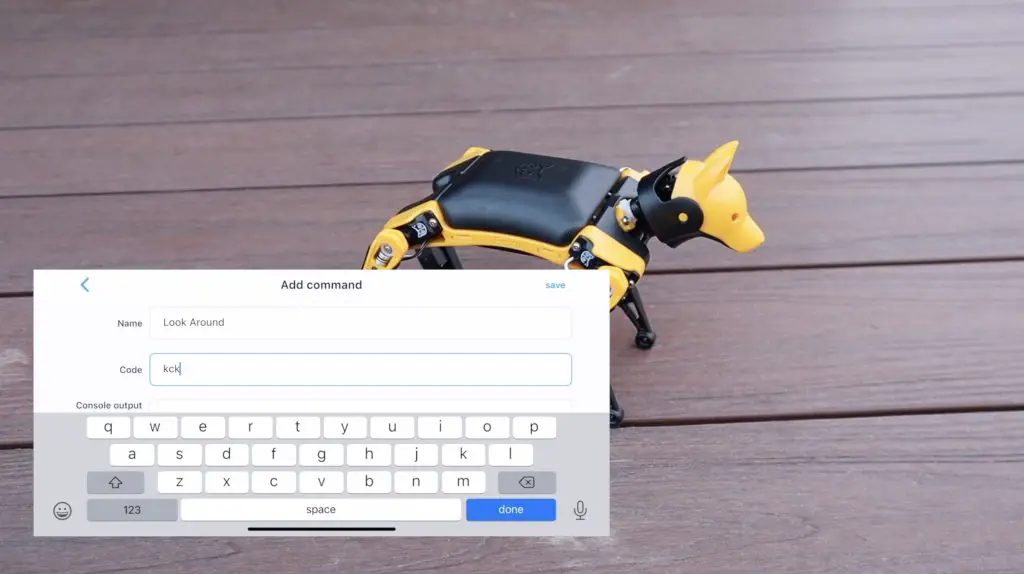
We now have a quick button to look around, which he’ll do each time we push the button.

We can try commands that aren’t available through the infrared remote, like play dead, or march on the spot. We can also string commands together to create routines and behaviour sequences.
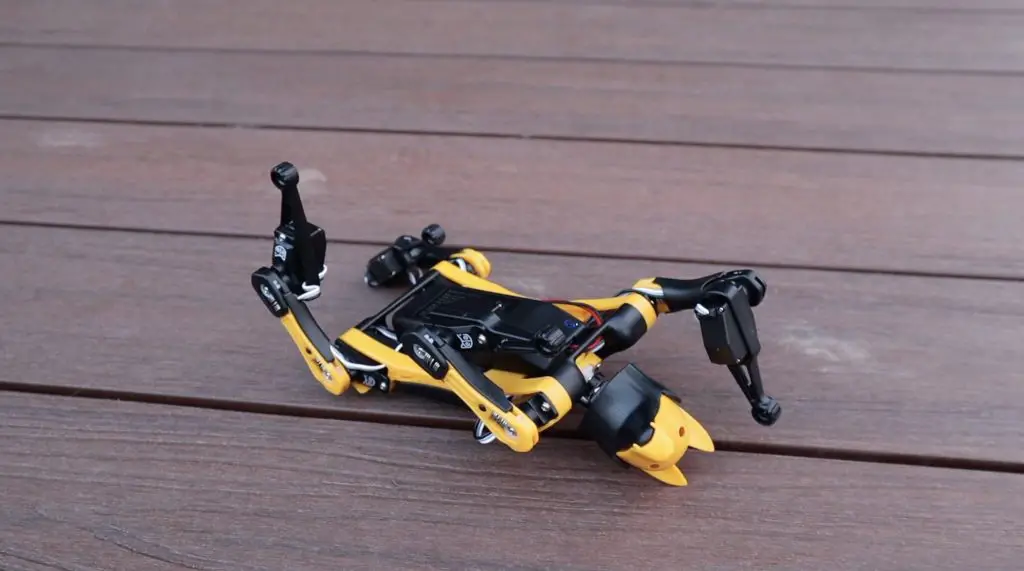
The onboard IMU knows the orientation of Bittle, so if he stumbles or falls over, it will automatically activate a routine to flip him back over and onto his feet.
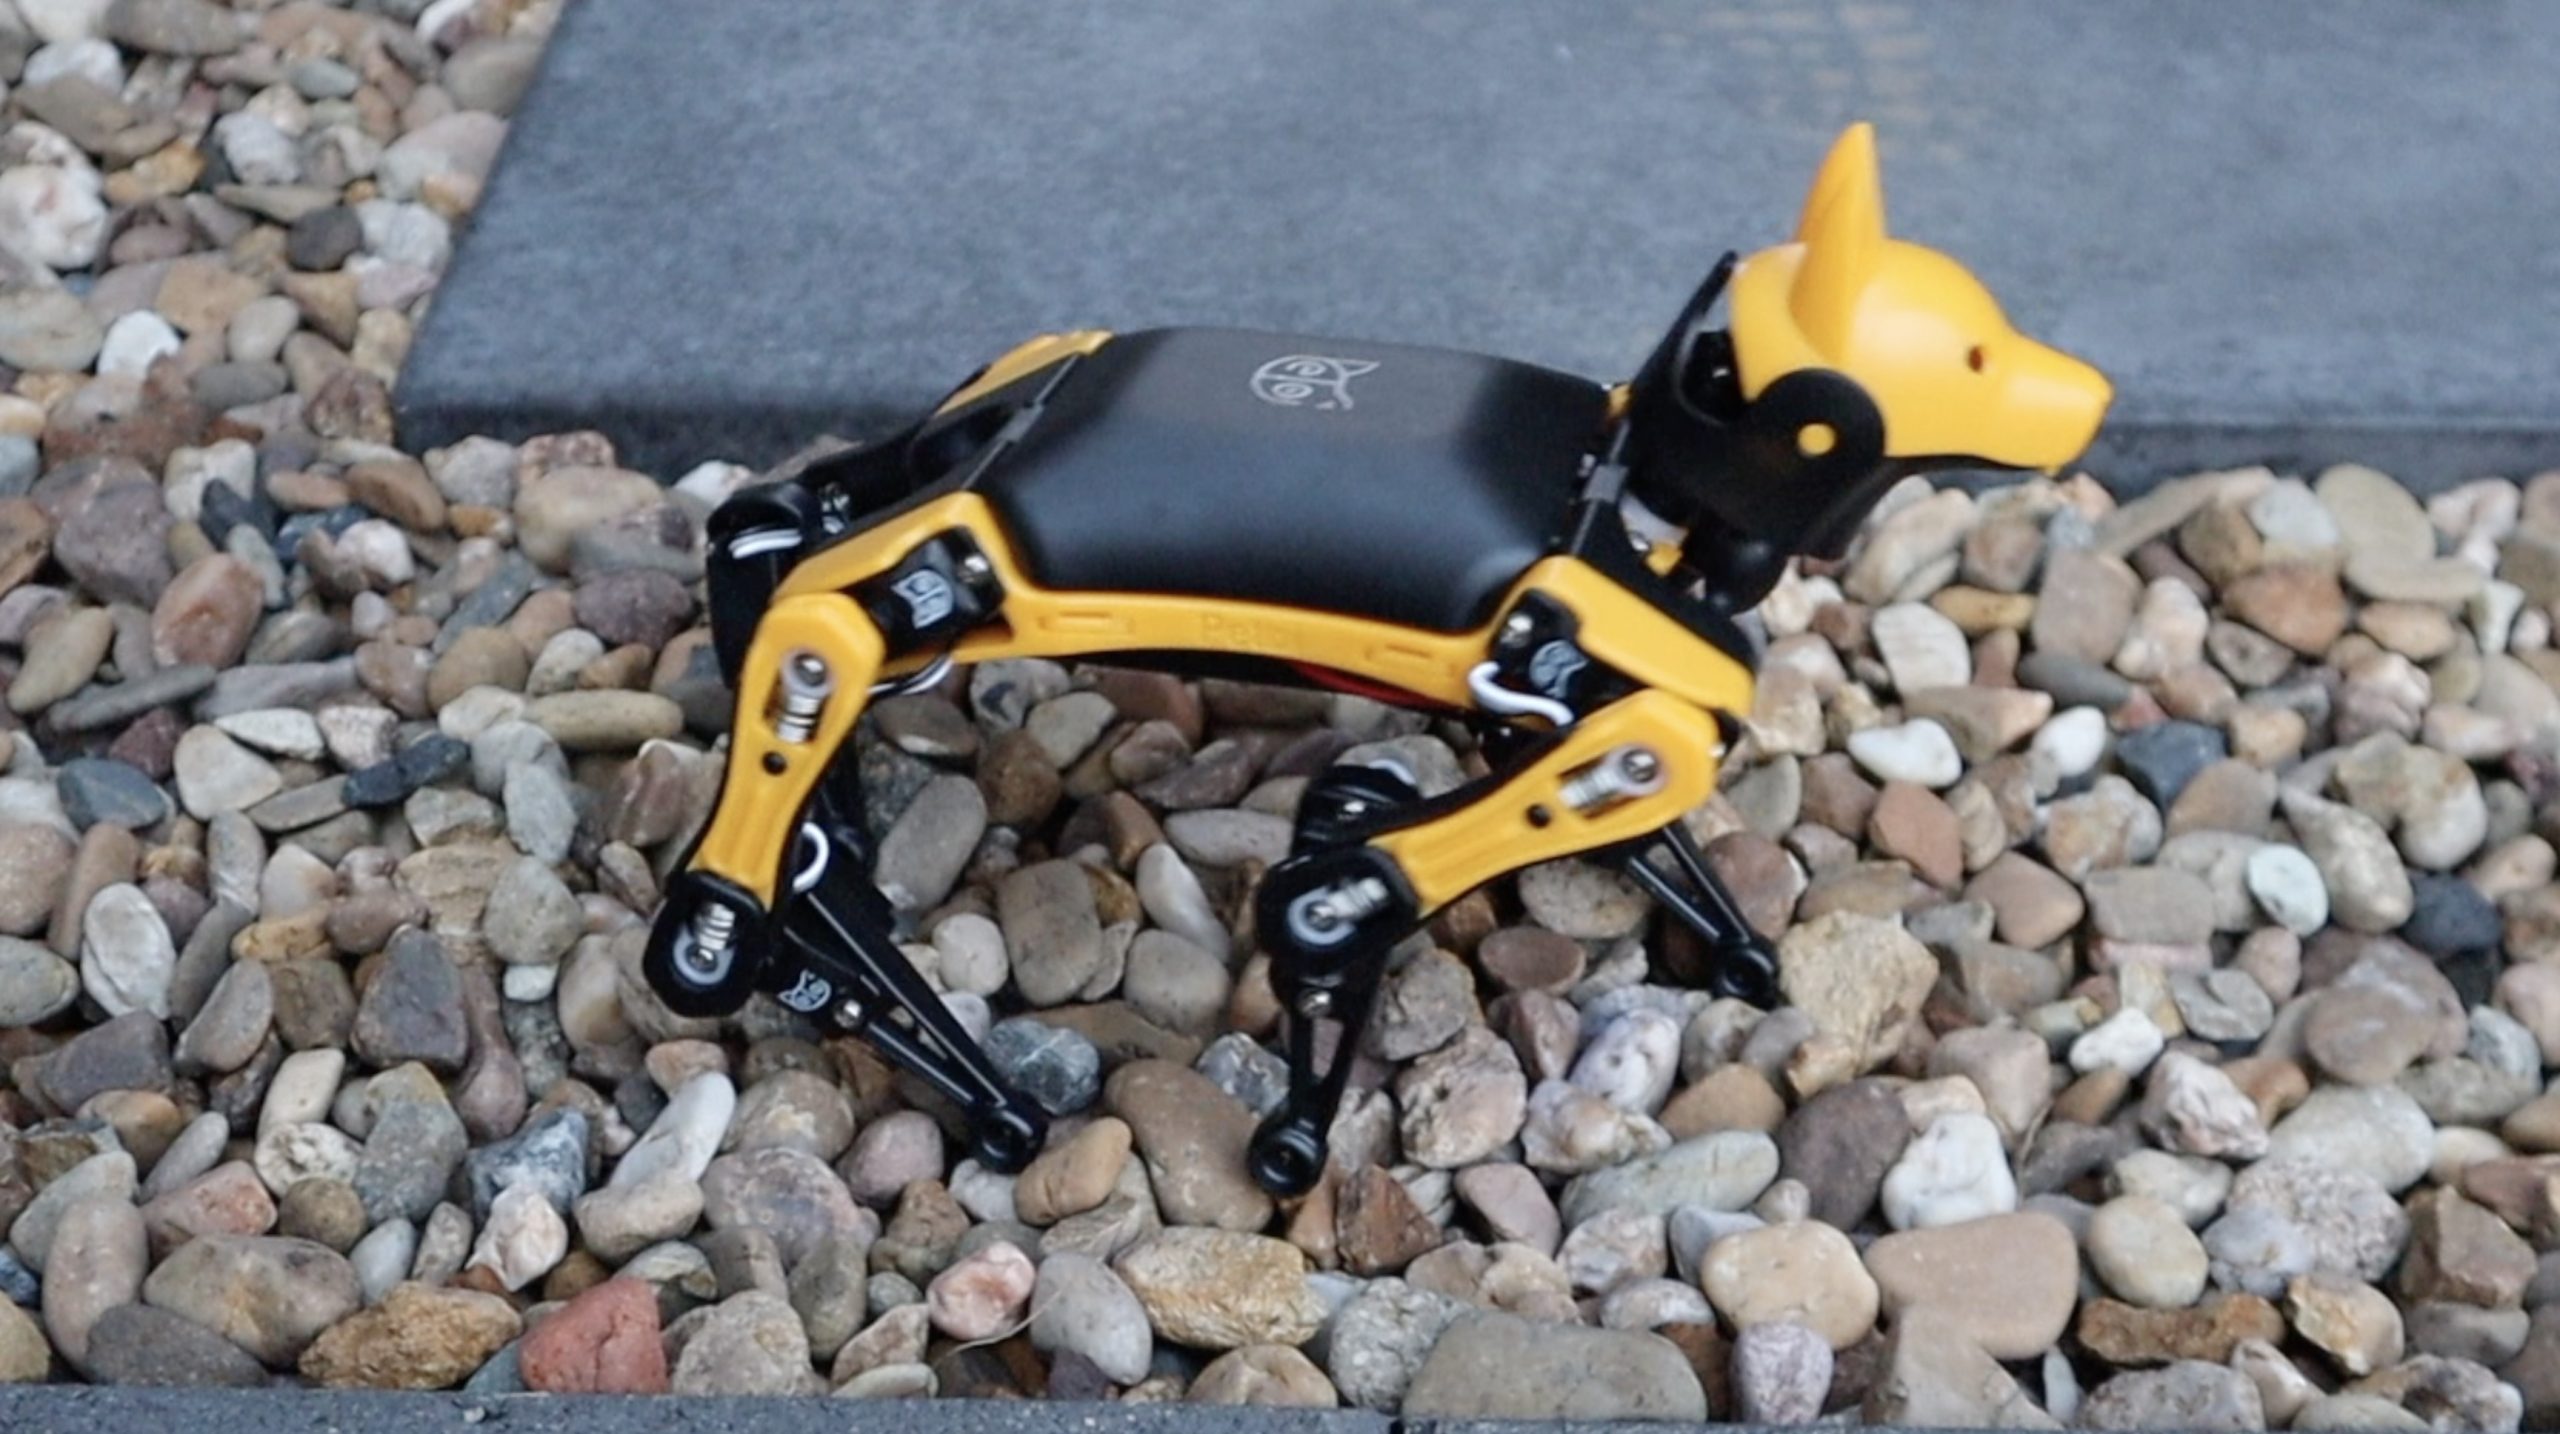
Bittle seems to manage quite well on most flat surfaces. It walks best on surfaces that are a little bit rough, like wood or concrete, but struggles on very uneven or loose surfaces like stones, sand or pebbles.

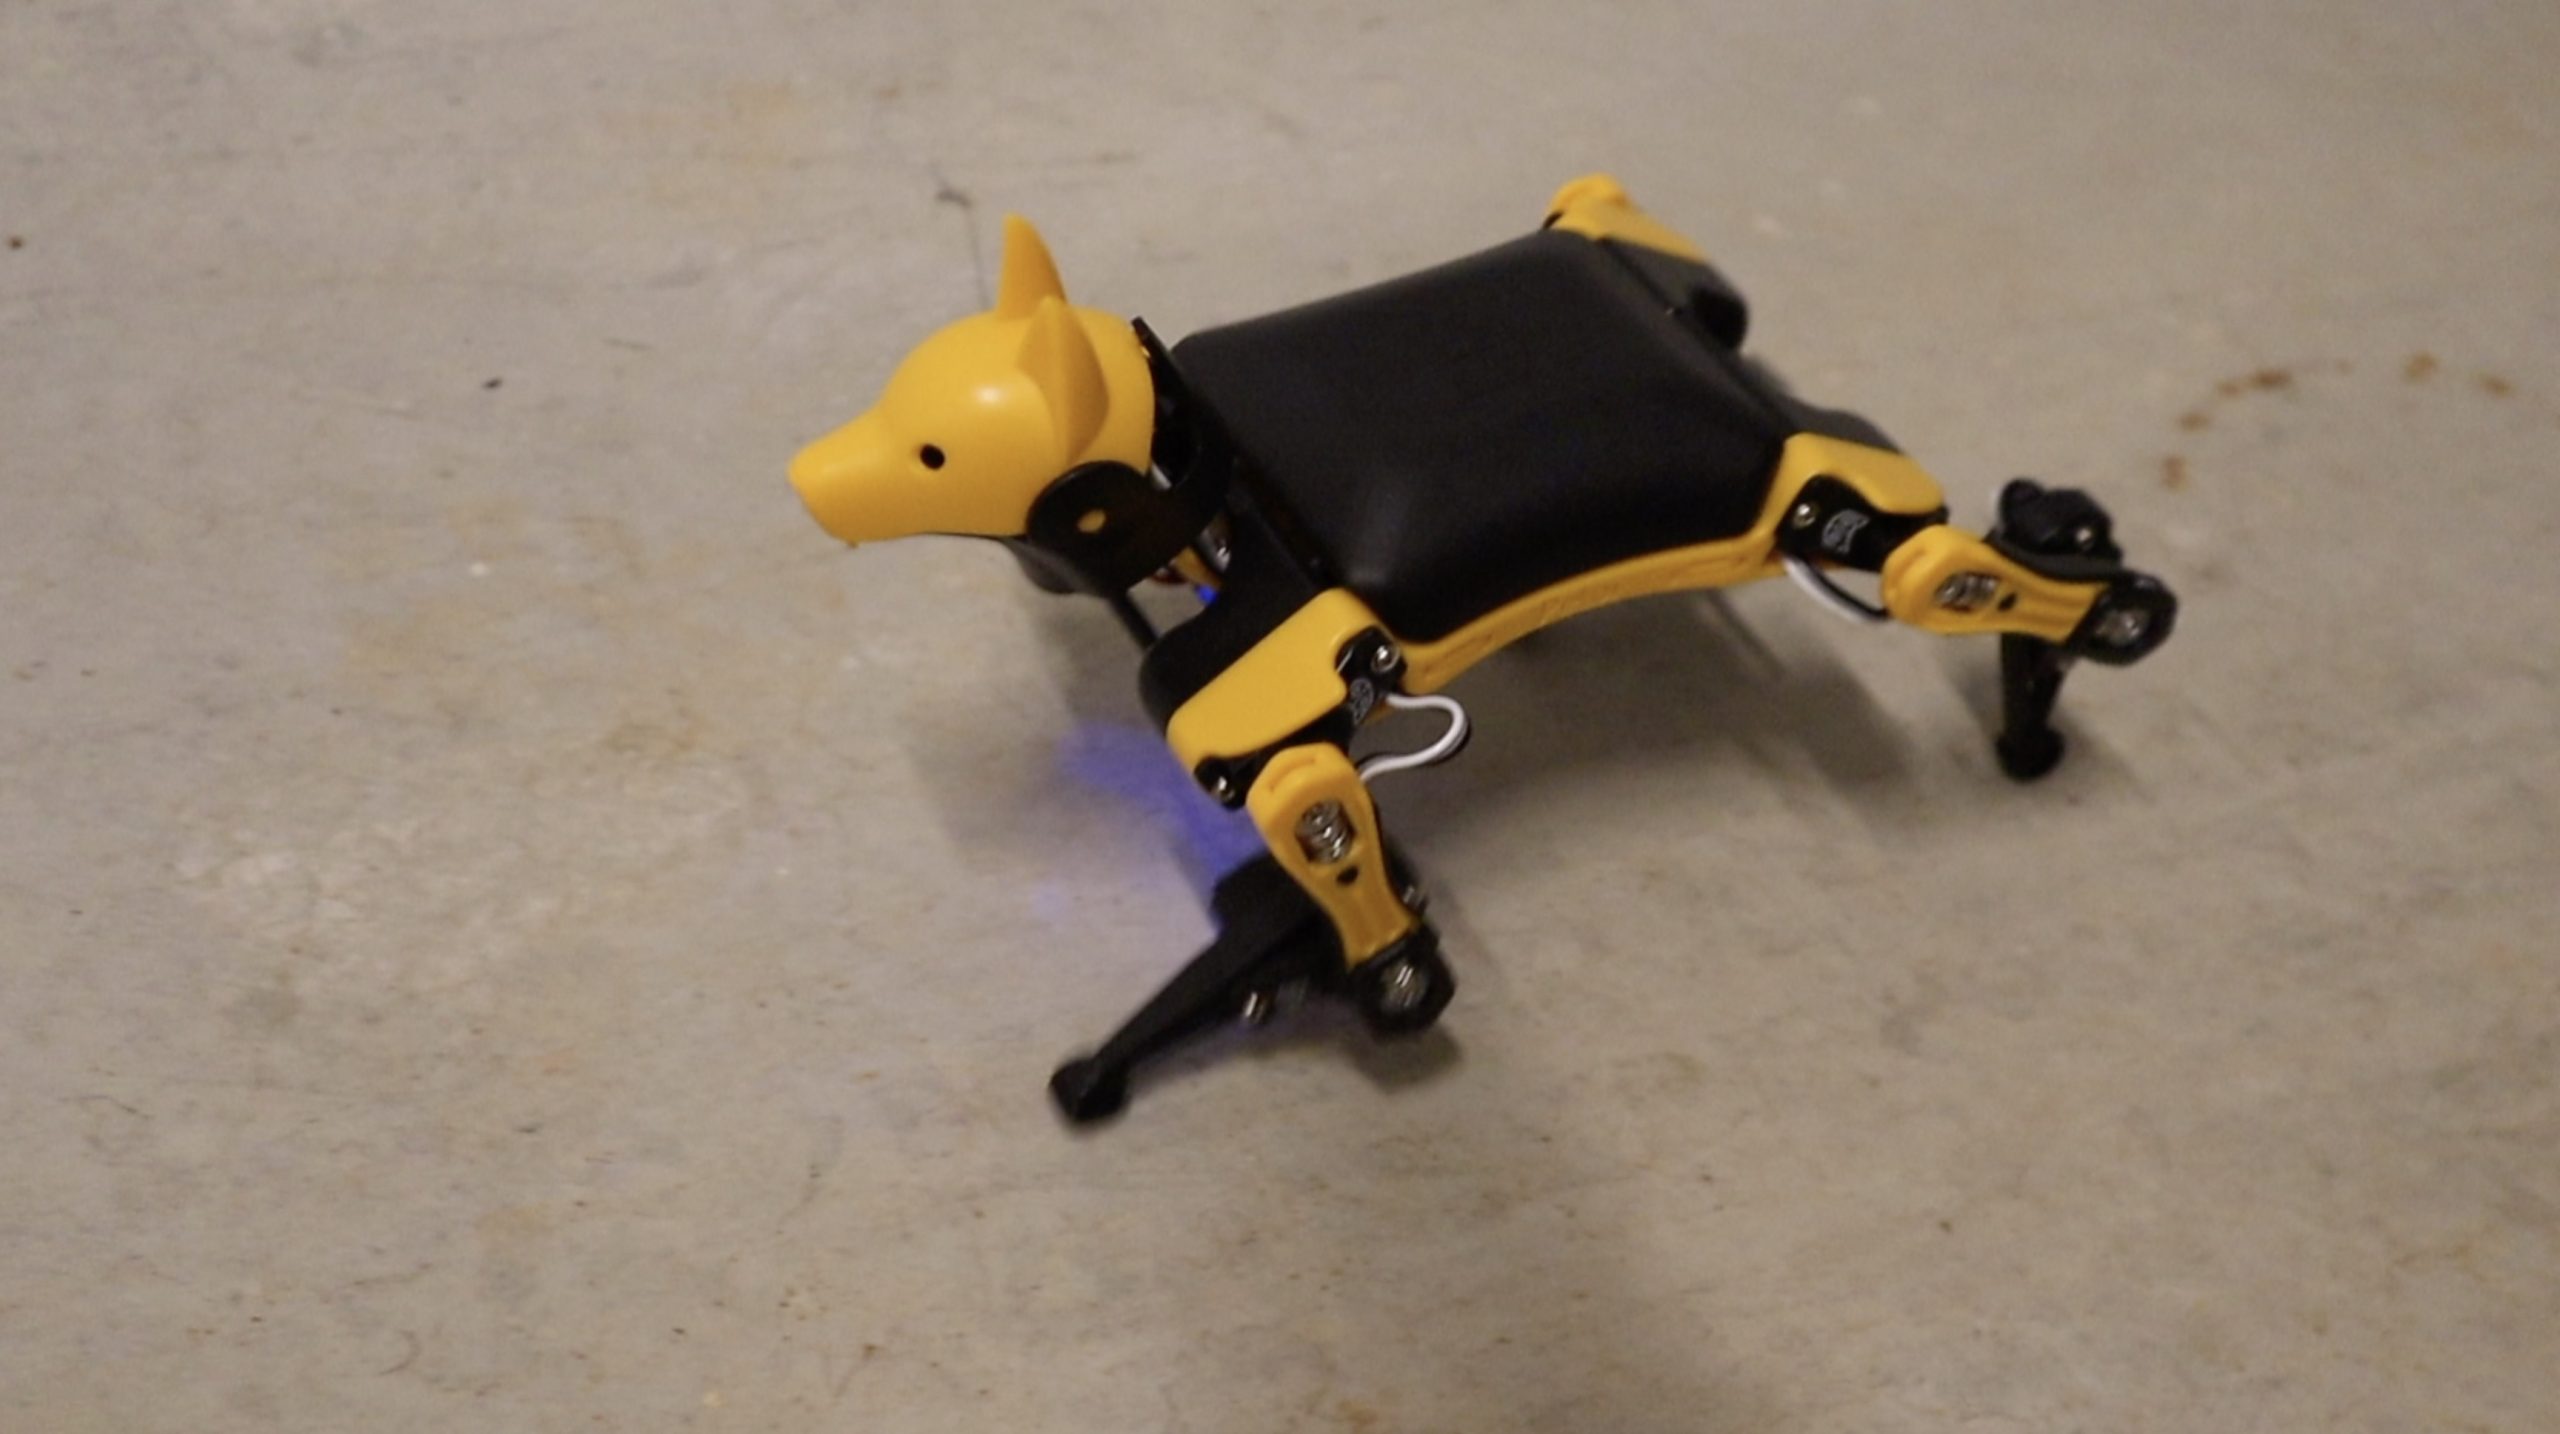
You can also use the IMU to allow Bittle to balance on uneven surfaces or when pushed or bumped.
Final Thoughts on Bittle
Petoi have clearly put a lot of time and effort into creating a good quality product that is great for a range of experience levels. If you’ve never programmed anything in your life, you’ll still be able to get started with the basic drag-and-drop interface, and the open-source code allows experienced programmers to make any changes they’d like to build upon and improve Bittle.
They also have a number of external sensors already available and are working on some additional ones to add functionality to Bittle.
These include sensors like obstacle avoidance and object tracking through a smart camera. So definitely check out the sensors if you’ve already got your own Bittle, and visit their web store if you’d like to get your own robot dog or cat.
Let me know what you think of Bittle in the comments section below and let me know if you have any project ideas that you’d like to see me try out with him.
Very nice! A great look. The bent acrylic really catches the eye. That 3d printer is awesome too!
What will you think up next?? lol
Thanks Bob!
This Bittle sounds like a cool project! I like how it offers different kits for various skill levels. Have you tried programming it yet with those modules? I’m curious if it’s as easy as they make it seem. Can’t wait to hear more about your experience!
I would like to see the tracking and Facial recognition along with Collision Avoidance and Voice Recognition be done with HUSKYLENS modules.