Today we’re going to be looking at the reComputer Jetson-10, a palm-sized AI computer that can recognise people, animals and objects, while still being efficient enough to run on a battery pack.
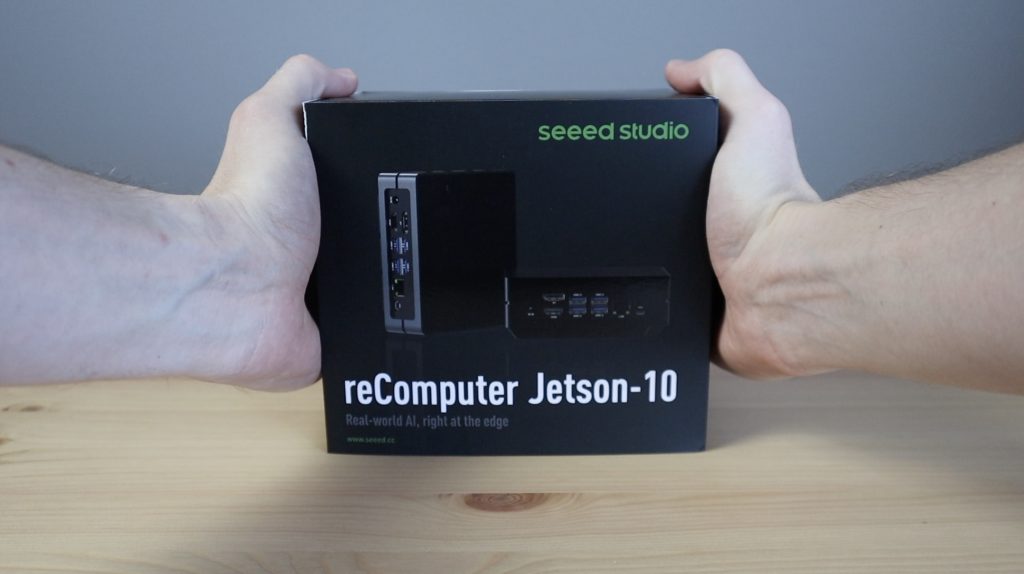
The reComputer Jetson-10 is a new product by Seeed Studios, that consists of a palm-sized aluminium case that houses a passively cooled NVIDIA Jetson module. The module runs on their custom carrier board that is designed for AI application development and deployment. They have sent me their H0 model which runs a Jetson Nano module with 128 NVIDA CUDA cores that can deliver up to 0.5 TFLOPS of computing performance. It’s also got a Quad-core ARM A57 CPU running at 1.43 GHz, 4GBs of LPDDR4 RAM and 16GB of EMMC storage.
Here’s my unboxing and testing video, read on for the write-up:
Unboxing And First Look At The reComputer Jetson-10
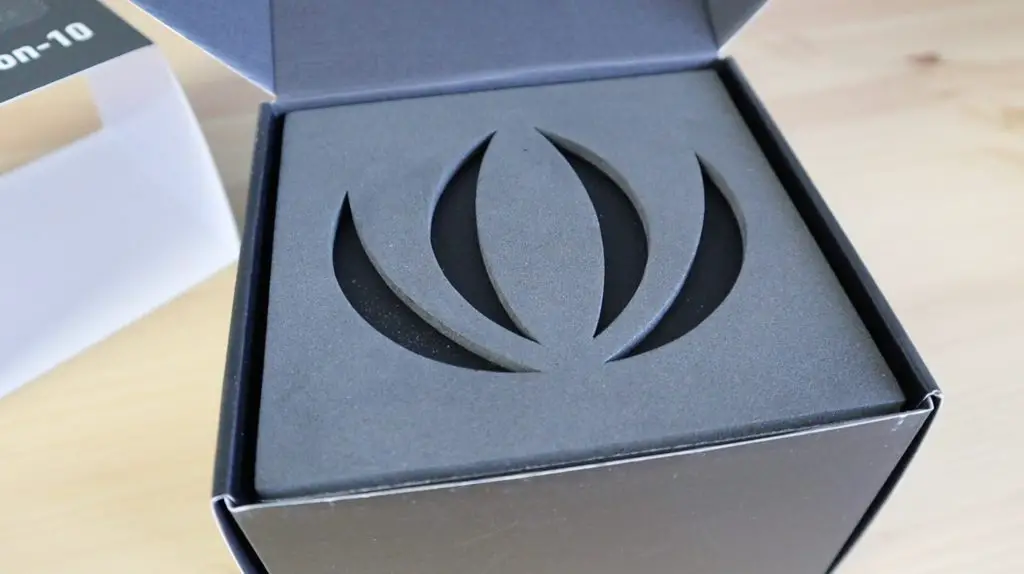
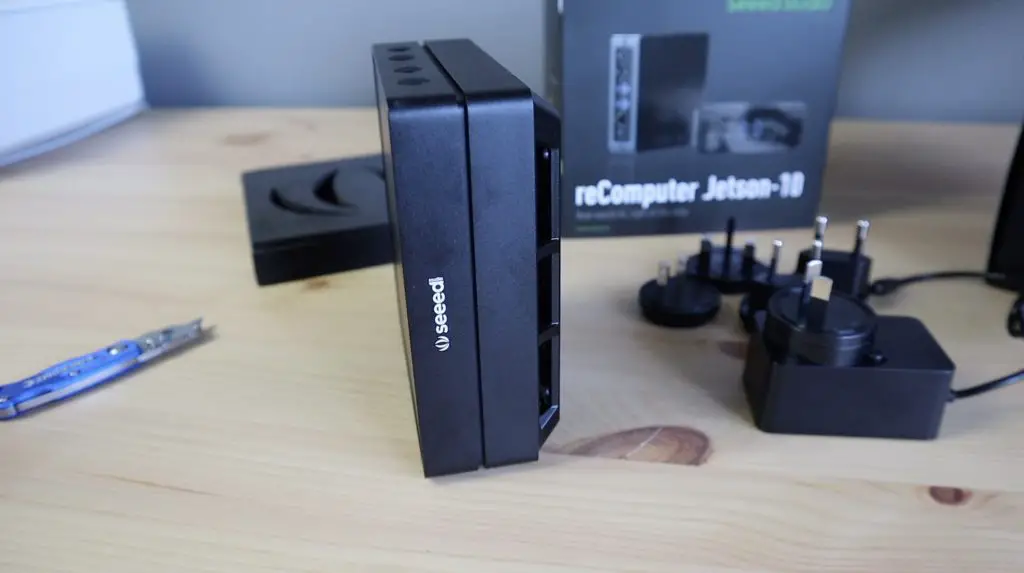
The reComputer Jetson-10 comes in a matt black box within a branded sleeve. The packaging is really good, with branded foam inserts to protect the reComputer and to divide the box into two compartments.
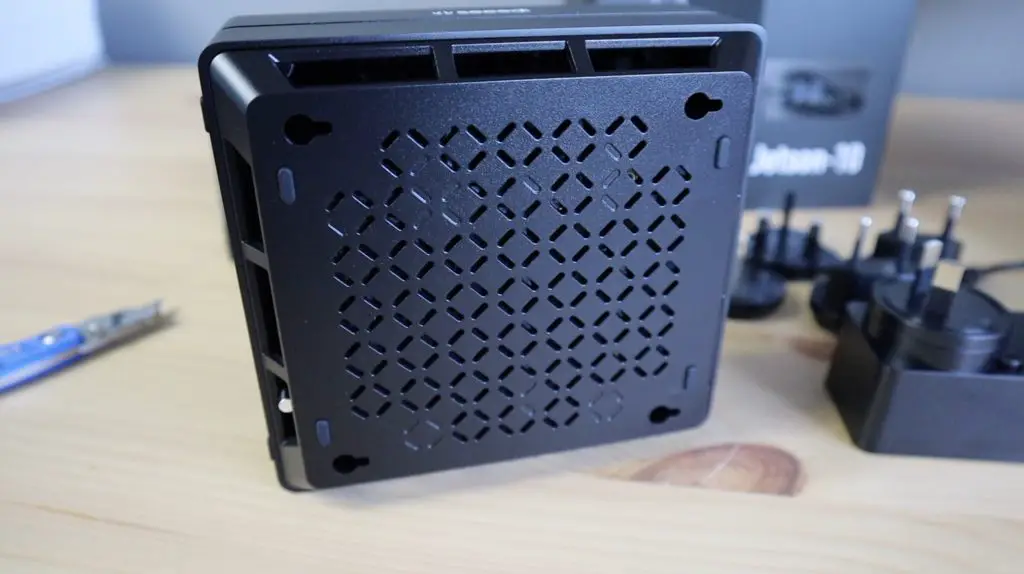
Included in the box along with the reComputer Jetson-10-1-H0 is a 12V, 2A power supply with some options to suit a variety of international power outlets. Mine came with two euro adaptors, which I assume was a packing mistake.

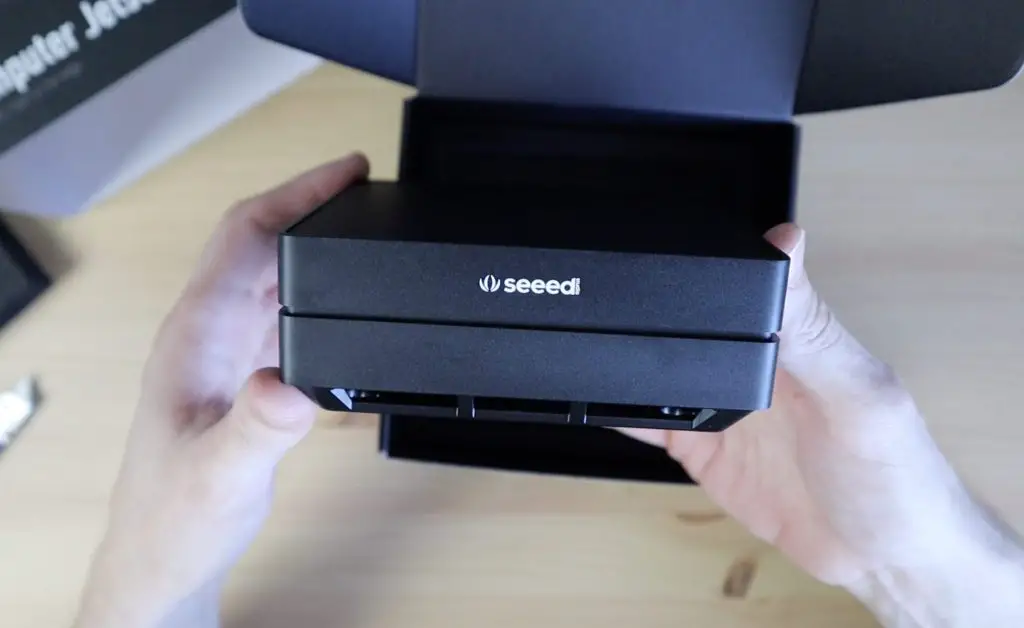
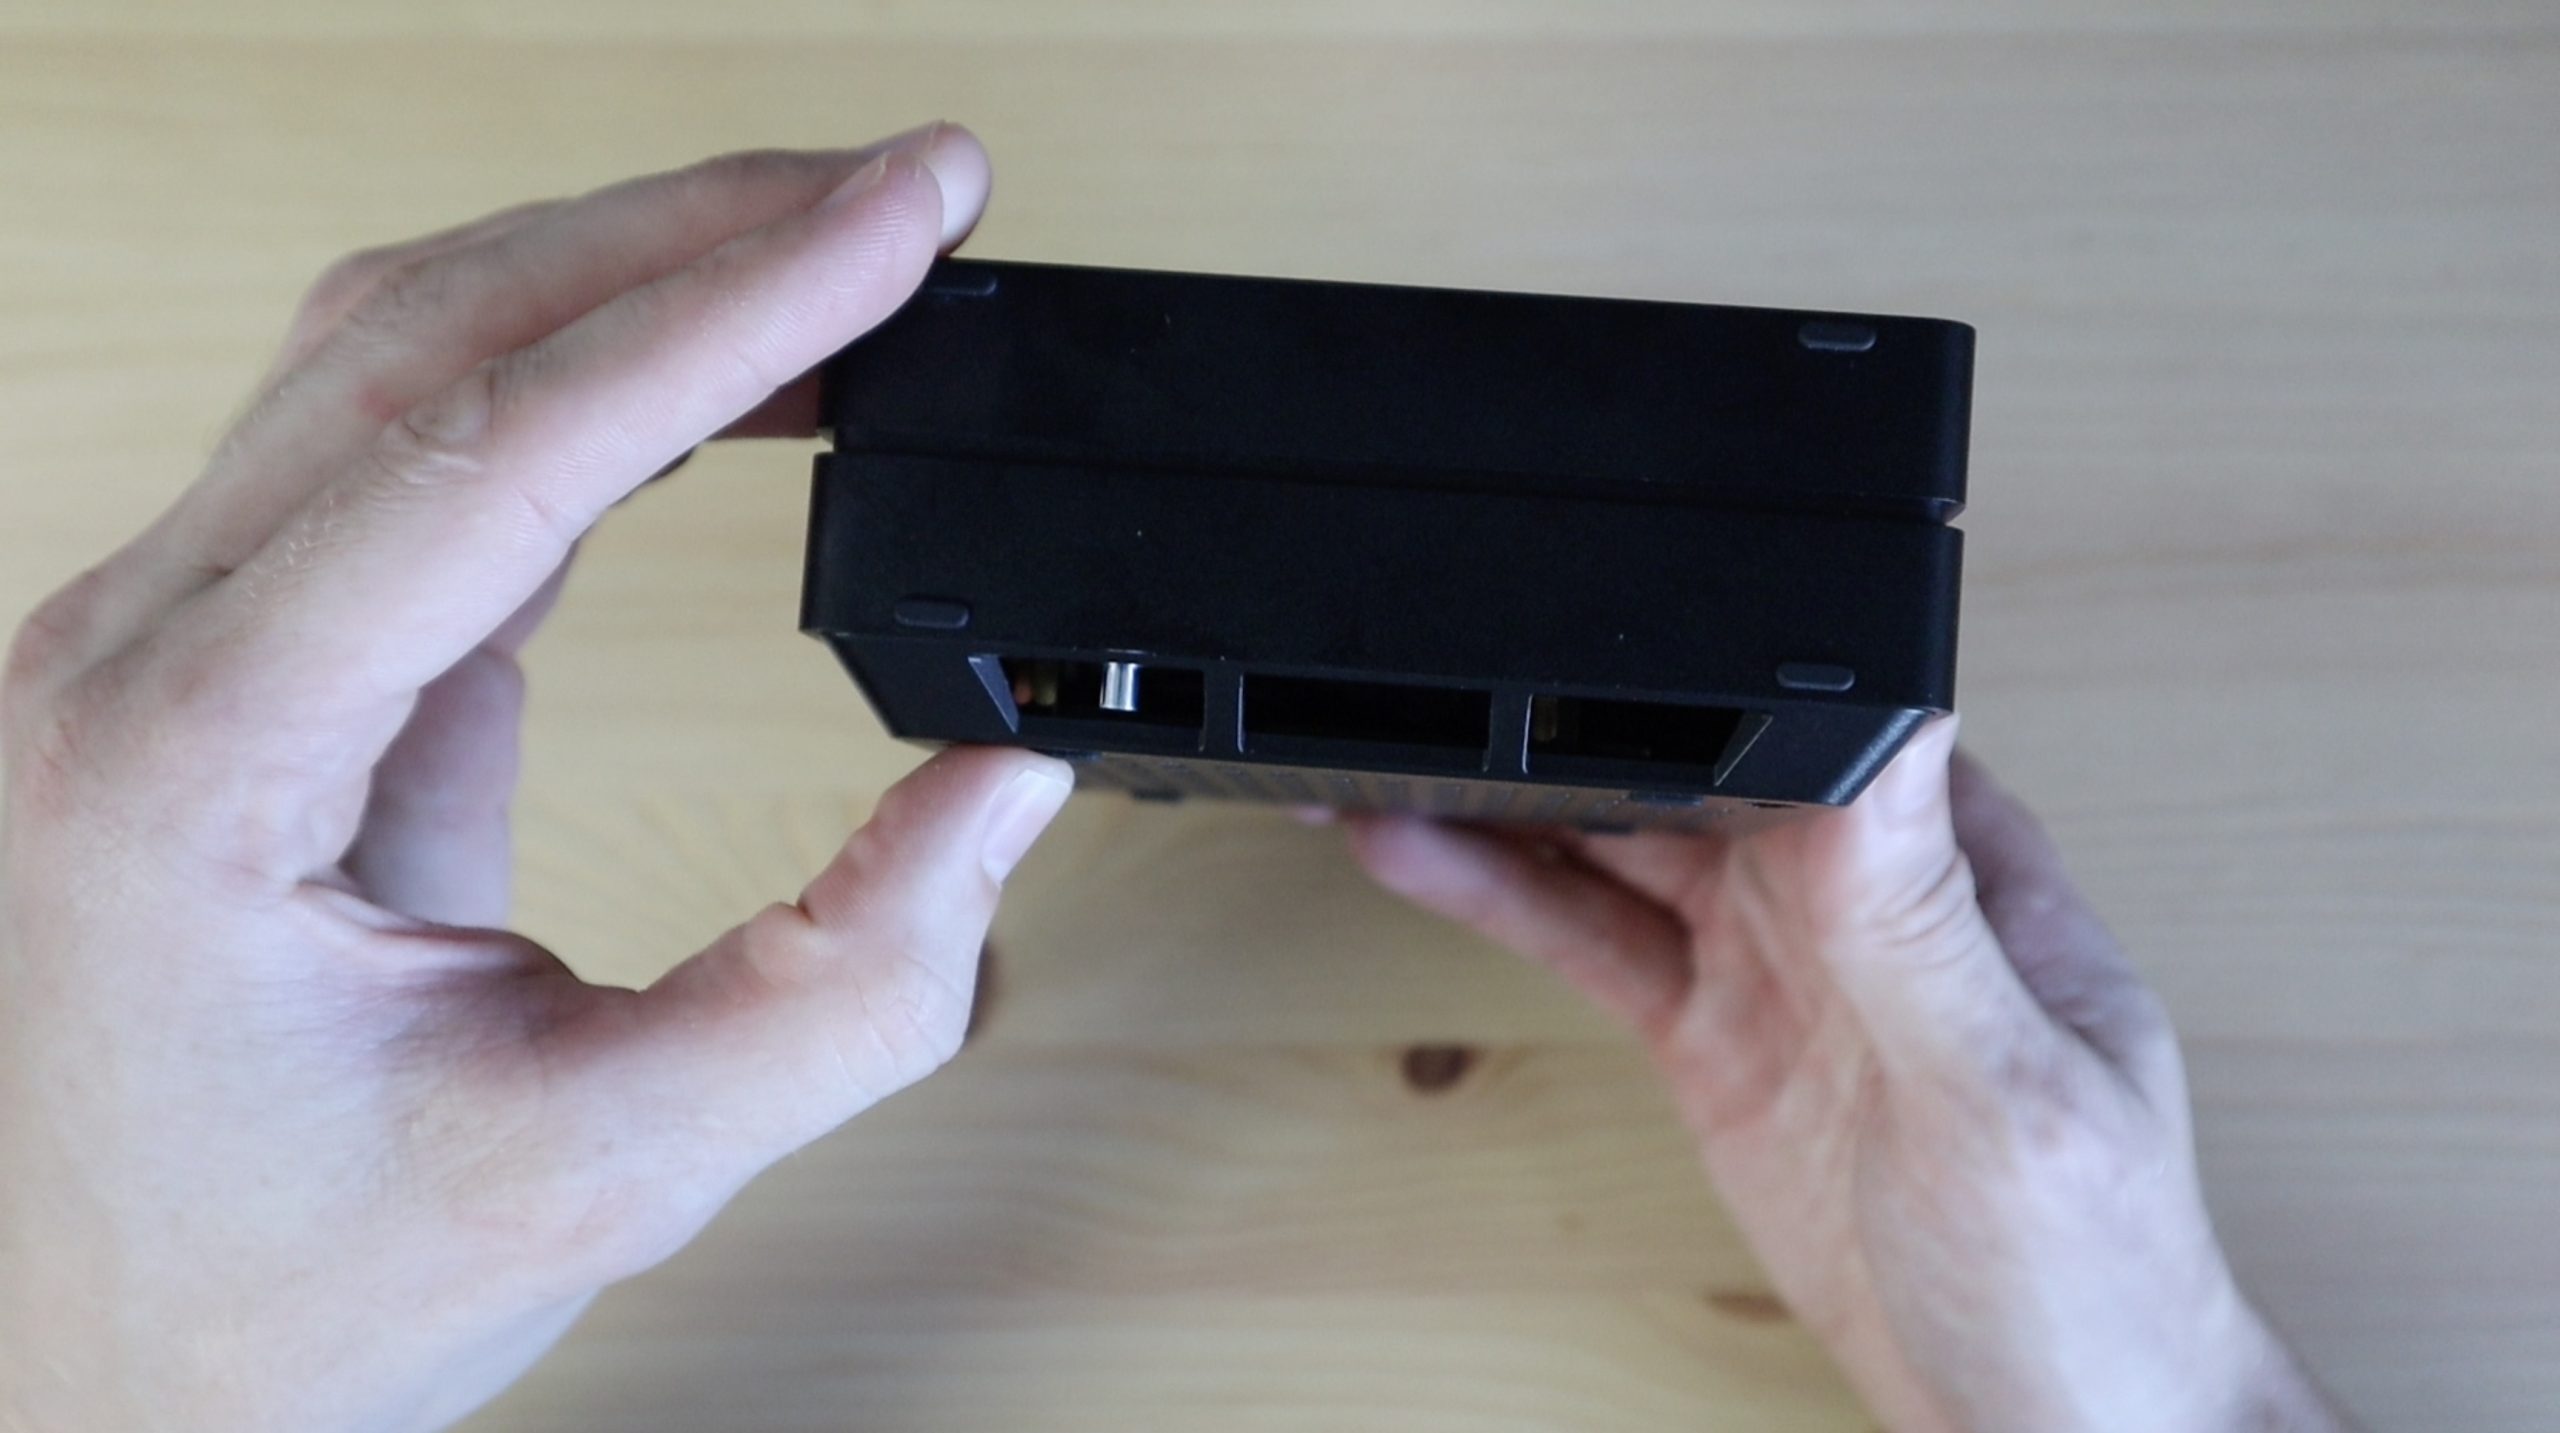
The case is a really minimalistic, aluminium design with three plain sides and all of the ports on the back.
On the bottom it’s got large ventilation holes around the edges and four slotted mounting points so that it can be mounted onto a wall for deployment.
One of the sides features rubber feet so that it can stand horizontally or vertically on a desk or table. If you’re running intensive applications then it’s probably best to position the reComputer on its side as this allows the hot air to rise up through the ventilation holes.
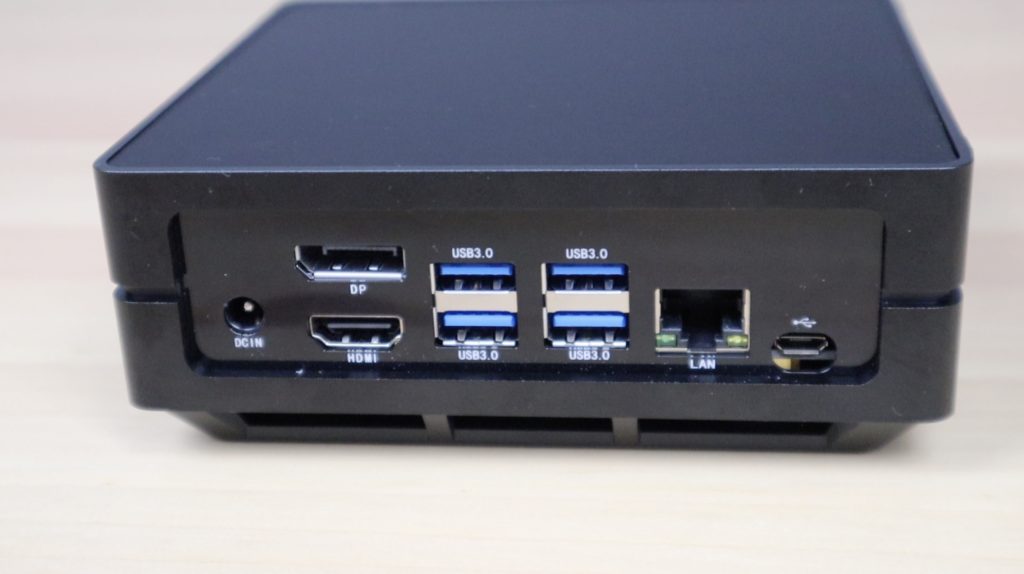
On the back, there is a bit of variation depending on the model, but the Jetson-10-1-H0 has got a 12V power input, HDMI and display ports, 4 USB 3.0 type A ports, gigabit Ethernet and a microUSB port which is for recovery and flashing the onboard storage.
The top is my favourite part of the case design. It’s clean and unsuspecting, but to access the Jetson module, you just push up on this silver rod hidden by one of the vents and this pops the magnetically latched top cover off.
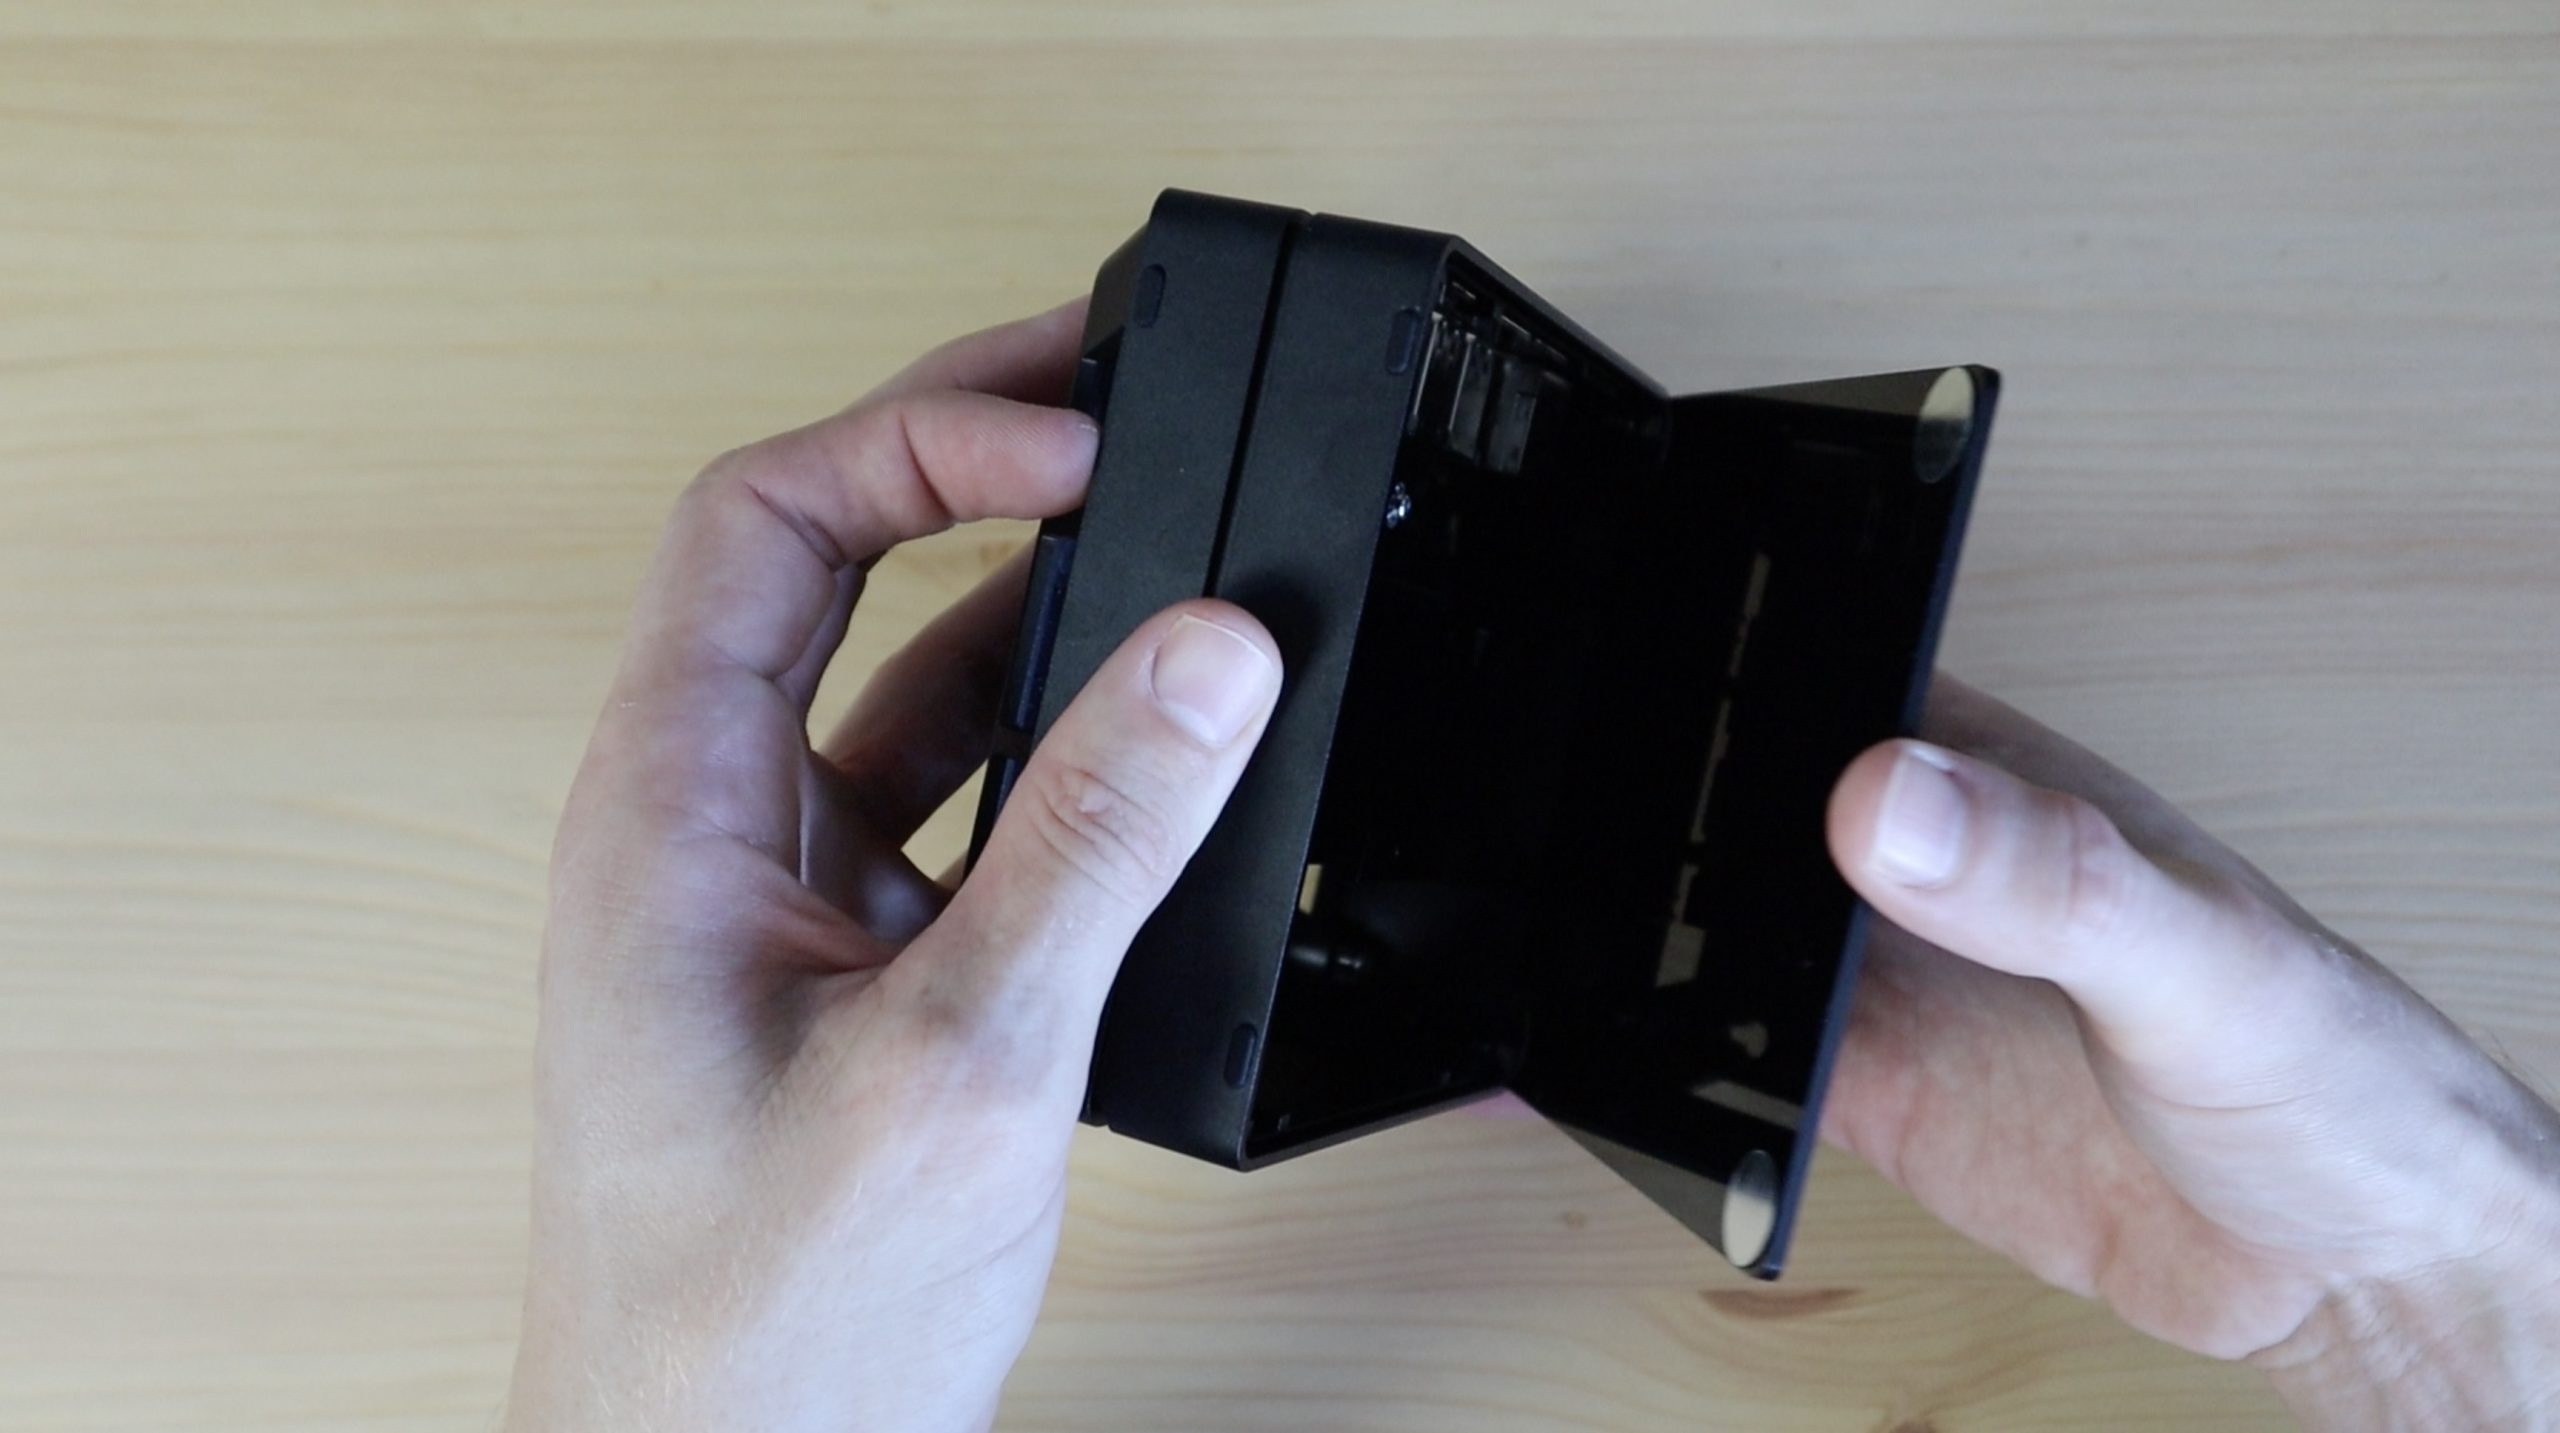
So it’s super easy to access the Jetson module to connect a camera or use the GPIO, you don’t even need to use a screwdriver. The four magnets hold it in place very well, you really can’t tell that the top cover is held in place magnetically and isn’t screwed or snapped into place.
Under the top cover, you’ll see the large passively cooled heatsink on the Jetson Nano module that’s seated in the custom carrier board.
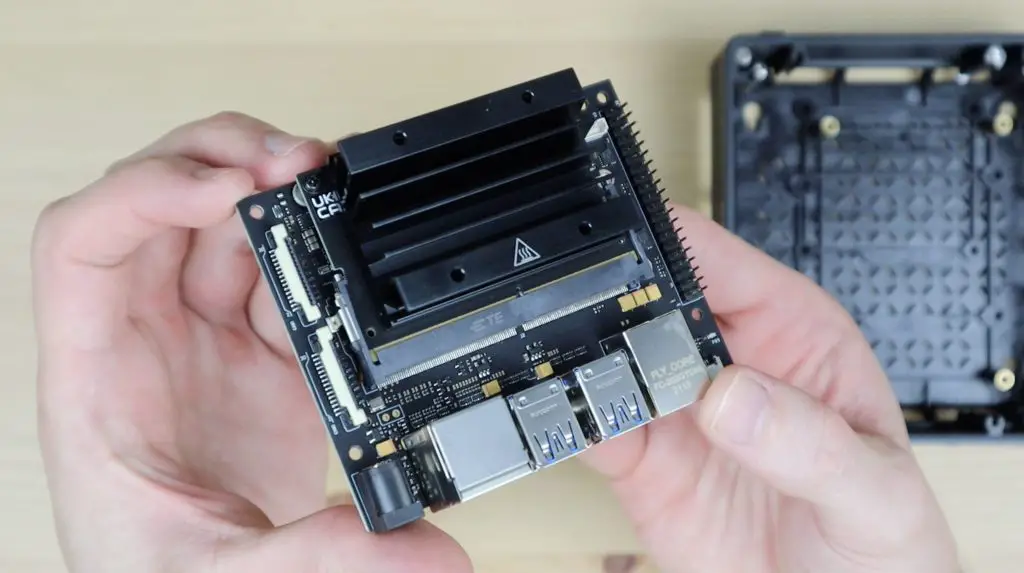
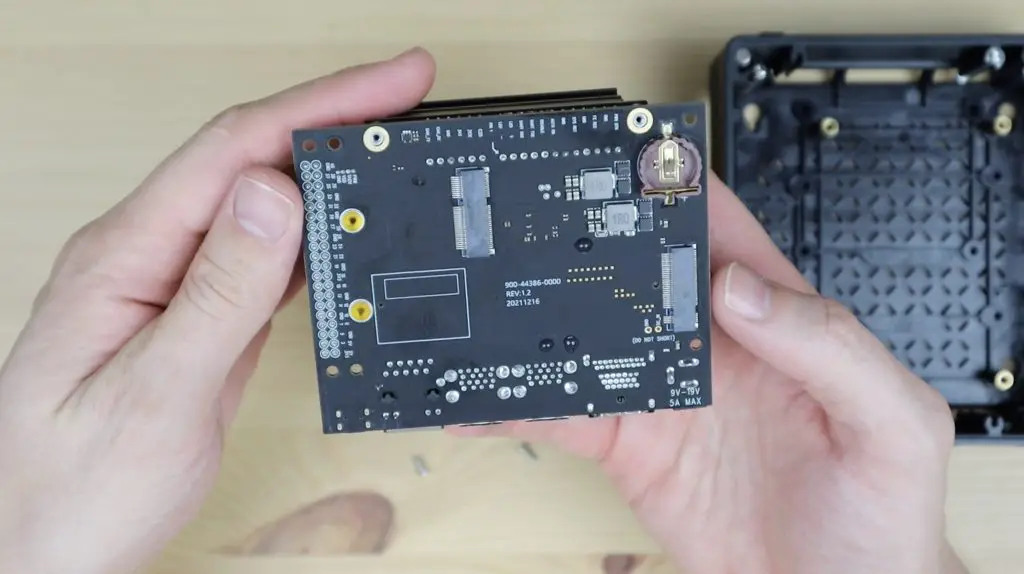
The board has a wide range of IO, some of the nice additions are support for PoE (Power over Ethernet), an optional 4-pin fan plug, control and UART pins. On the bottom of the carrier board, you’ve got a M.2 M Key slot and an optional battery holder to supply the onboard RTC (real-time clock) module.
Preloaded Software On The reComputer
Now that we’ve had a look at the hardware, let’s plug it in and try running some software on it.
It comes preloaded with NVIDIA’s JetPack SDK, so it’s ready to plug in and boot up right away. The JetPack SDK includes the Jetson Linux Driver Package running on a Linux based operating system (Ubuntu) as well as CUDA-X accelerated libraries and APIs for deep learning, computer vision, accelerated computing and multimedia.
Through JetPack, the reComputer can run a wide range of fairly complex AI systems like full native versions of machine learning frameworks like TensorFlow, PyTorch and MXNet. So you can use it for things like people, animal and object recognition, for smart systems like traffic control and vehicle detection and even in manufacturing and logisitics.
Running Neural Networks on the reComputer
NVIDIA have really good documentation and a great introductory series of tutorials to get started with AI and computer vision.
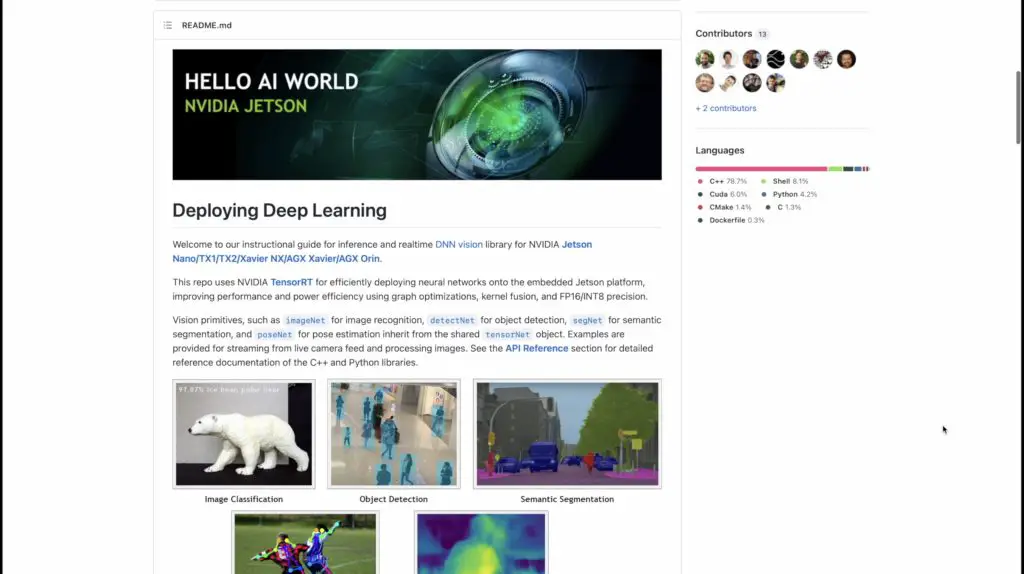
The tutorials use a number of TensorRT-accelerated deep learning neural networks, which you’ll need to build from source code. This process is all explained in detail and in doing so you’ll learn a lot along the way.
I’ll show you some of the cool things that you can do on the reComputer once you’ve worked through them.
Object Recognition Using ImageNet
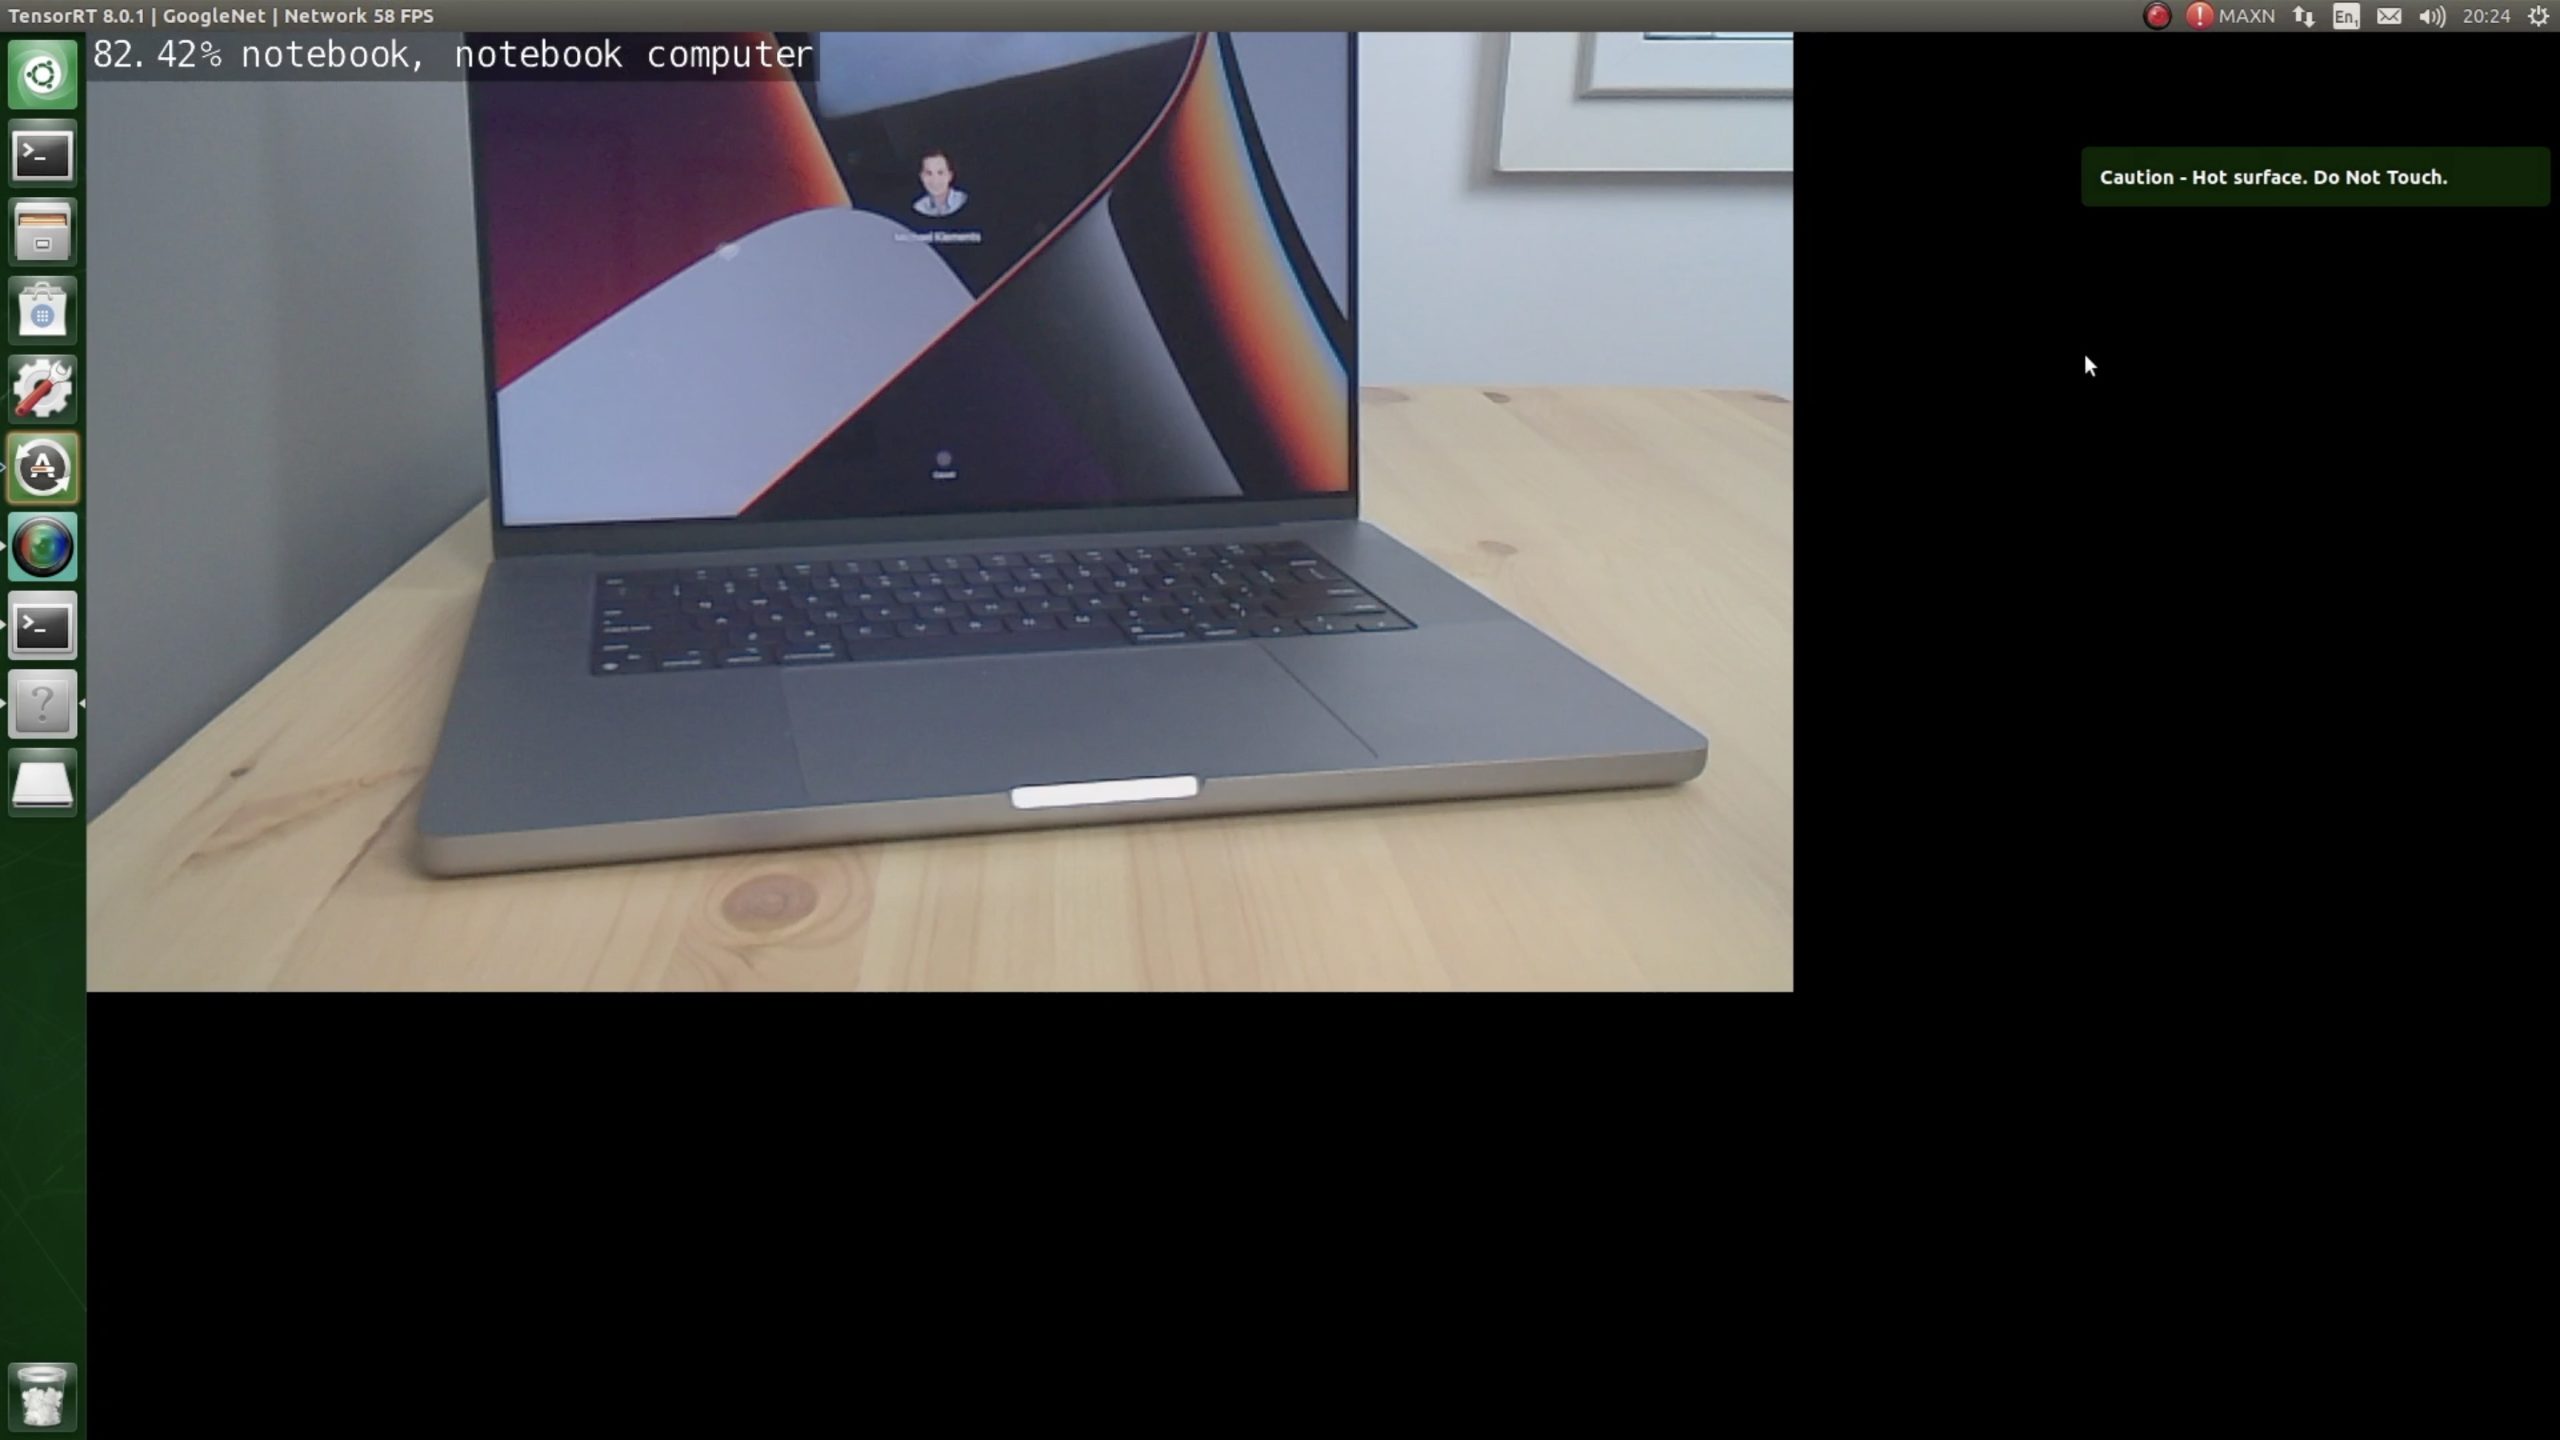
The first neural network that I’m going to show you is one that does object recognition, and we’ll start off with a still image. We’ll send a neural network called ImageNet the still image and it’ll then use TensorRT and the imagenet class to recognise the object in the image. It’ll then overlay the classification result and it’s confidence level for the result onto the image.
The package comes with a few sample images to try out, so if we run this on one of the sample images and then go to the image output folder, we can see that the reComputer is 99% sure that this is a banana.
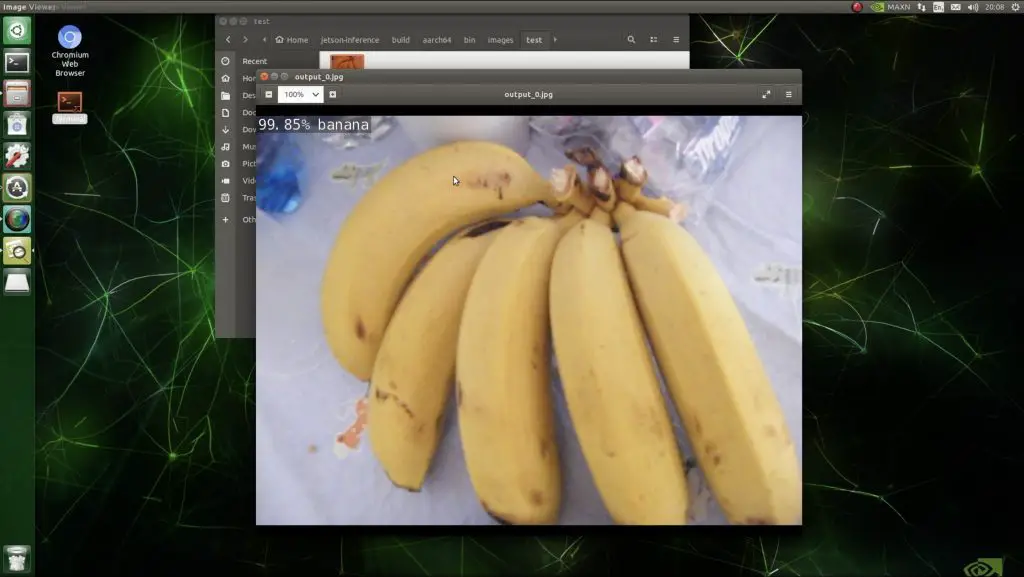
So it’s pretty confident that it’s got this one right.
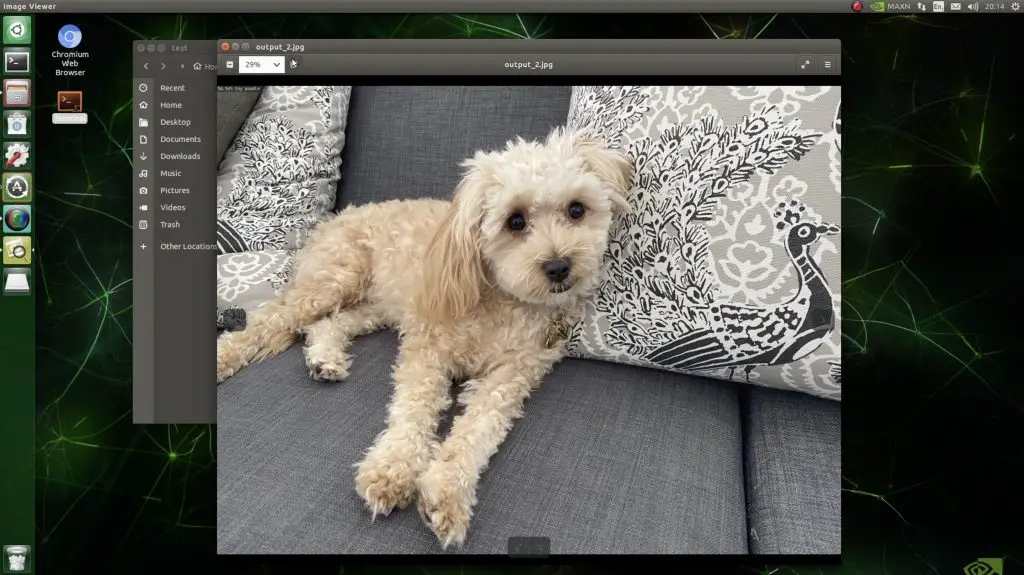
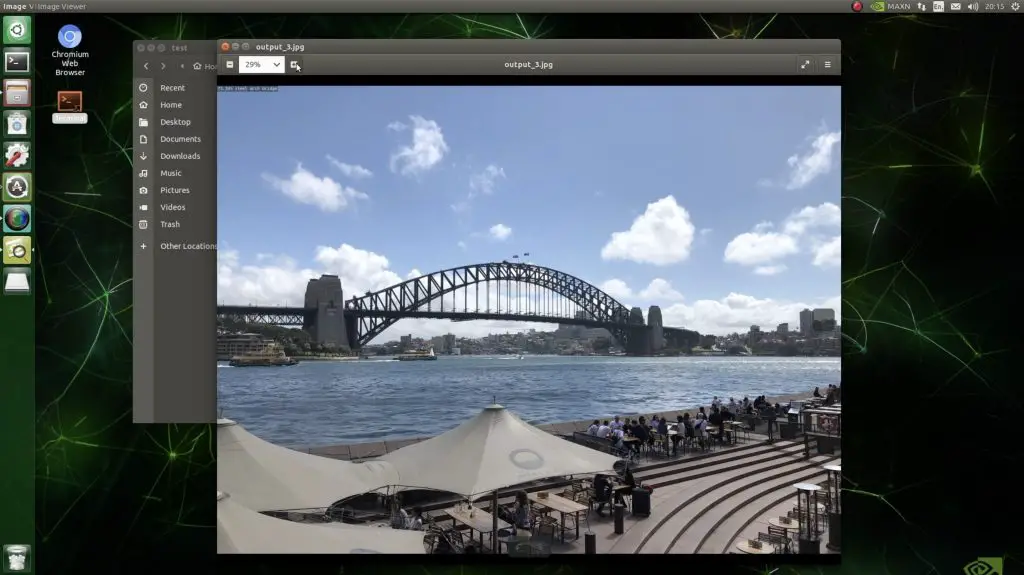
I don’t like using sample images as they’re generally chosen so that the system generates good results, so I also tried this network on three of my own images as well. I used a picture of an elephant, one of my dog and one of the Sydney harbour bridge.

One thing I did notice when running these images is that they were much slower to process. This is because I sent the full-size original images to the program and not reduced resolution images like the sample images. You’ll notice this with the result text size as it’s now much smaller than the image.
So ImageNet is 62% sure that this is a tusker, which is sort of on the right track, although this elephant is missing its tusk on the camera side.

It’s also 56% sure that my dog is a Toy Poodle. I think this confidence is a bit low because there are a few different poodle type dogs that it has been trained to recognise and they’re all quite similar.
And finally, it’s 73% sure that this is a steel arch bridge. So it got all three of the objects correct in the still images.
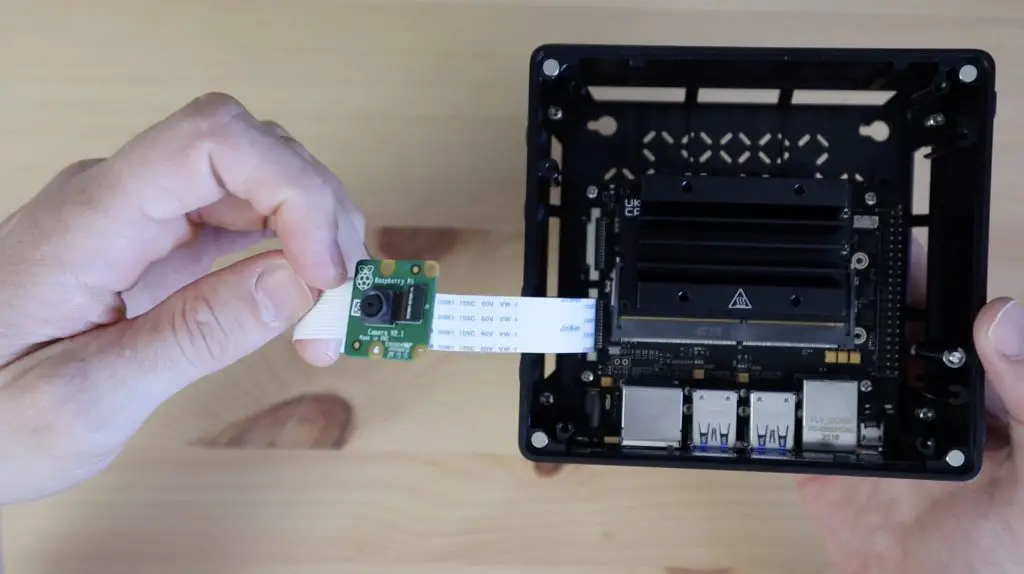
We can also pass the program a saved video or a live video stream and it’ll do the same thing in real-time. To do this we obviously need to add a camera to our reComputer Jetson-10, so let’s plug that in first. You can use a CSI camera like the official Raspberry Pi camera module or use a USB camera. I’m using a CSI camera for this example.
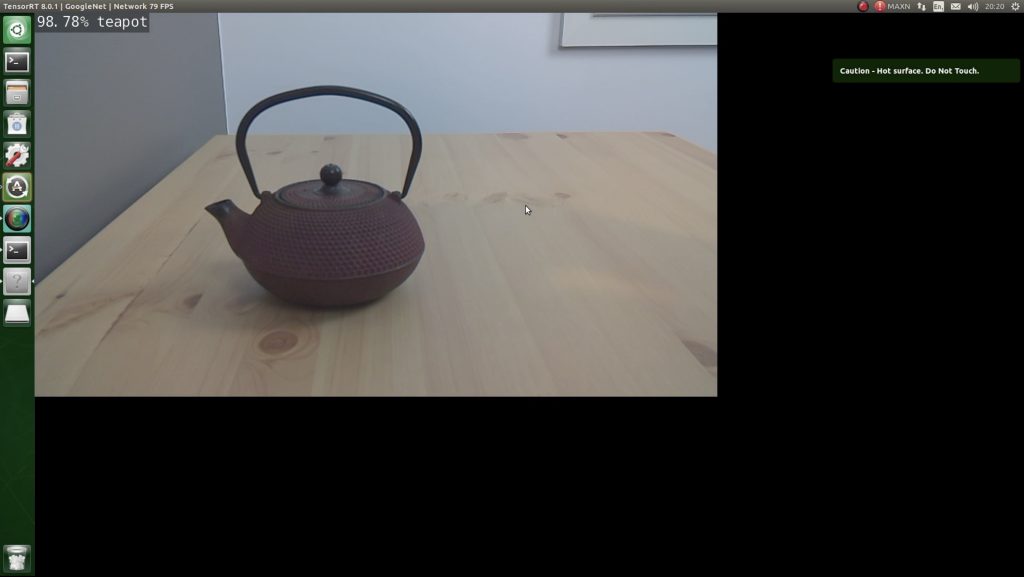
So if we try this out on different objects on my desk, you can see that we’re getting an ImageNet overlay telling us what objects have been detected in the image as well as their certainty. So it’s 98% sure that this is a teapot.
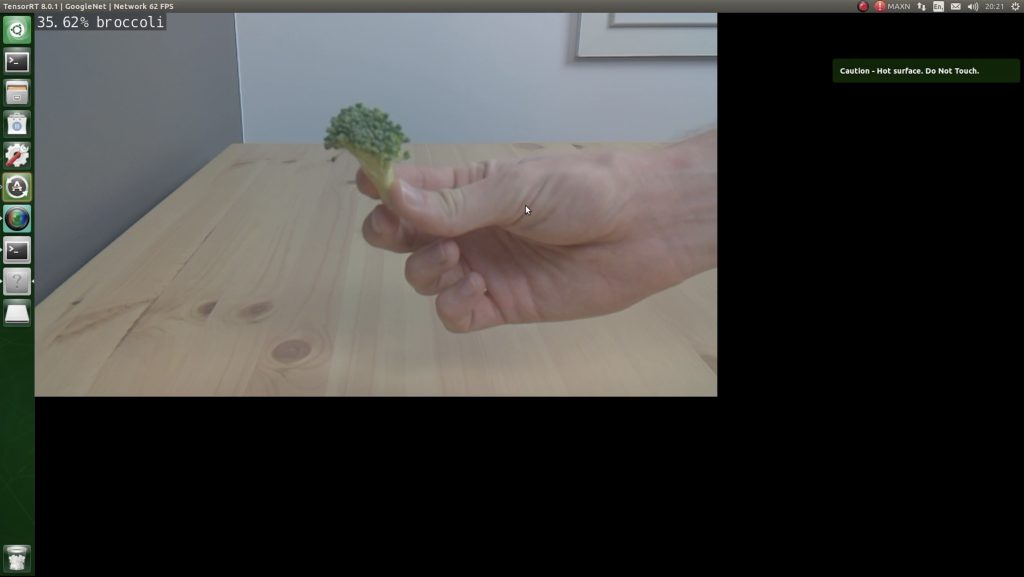
It eventually decided that the broccoli wasn’t a green lizard (better demonstrated in my YouTube video) although it wasn’t very confident in its decision.
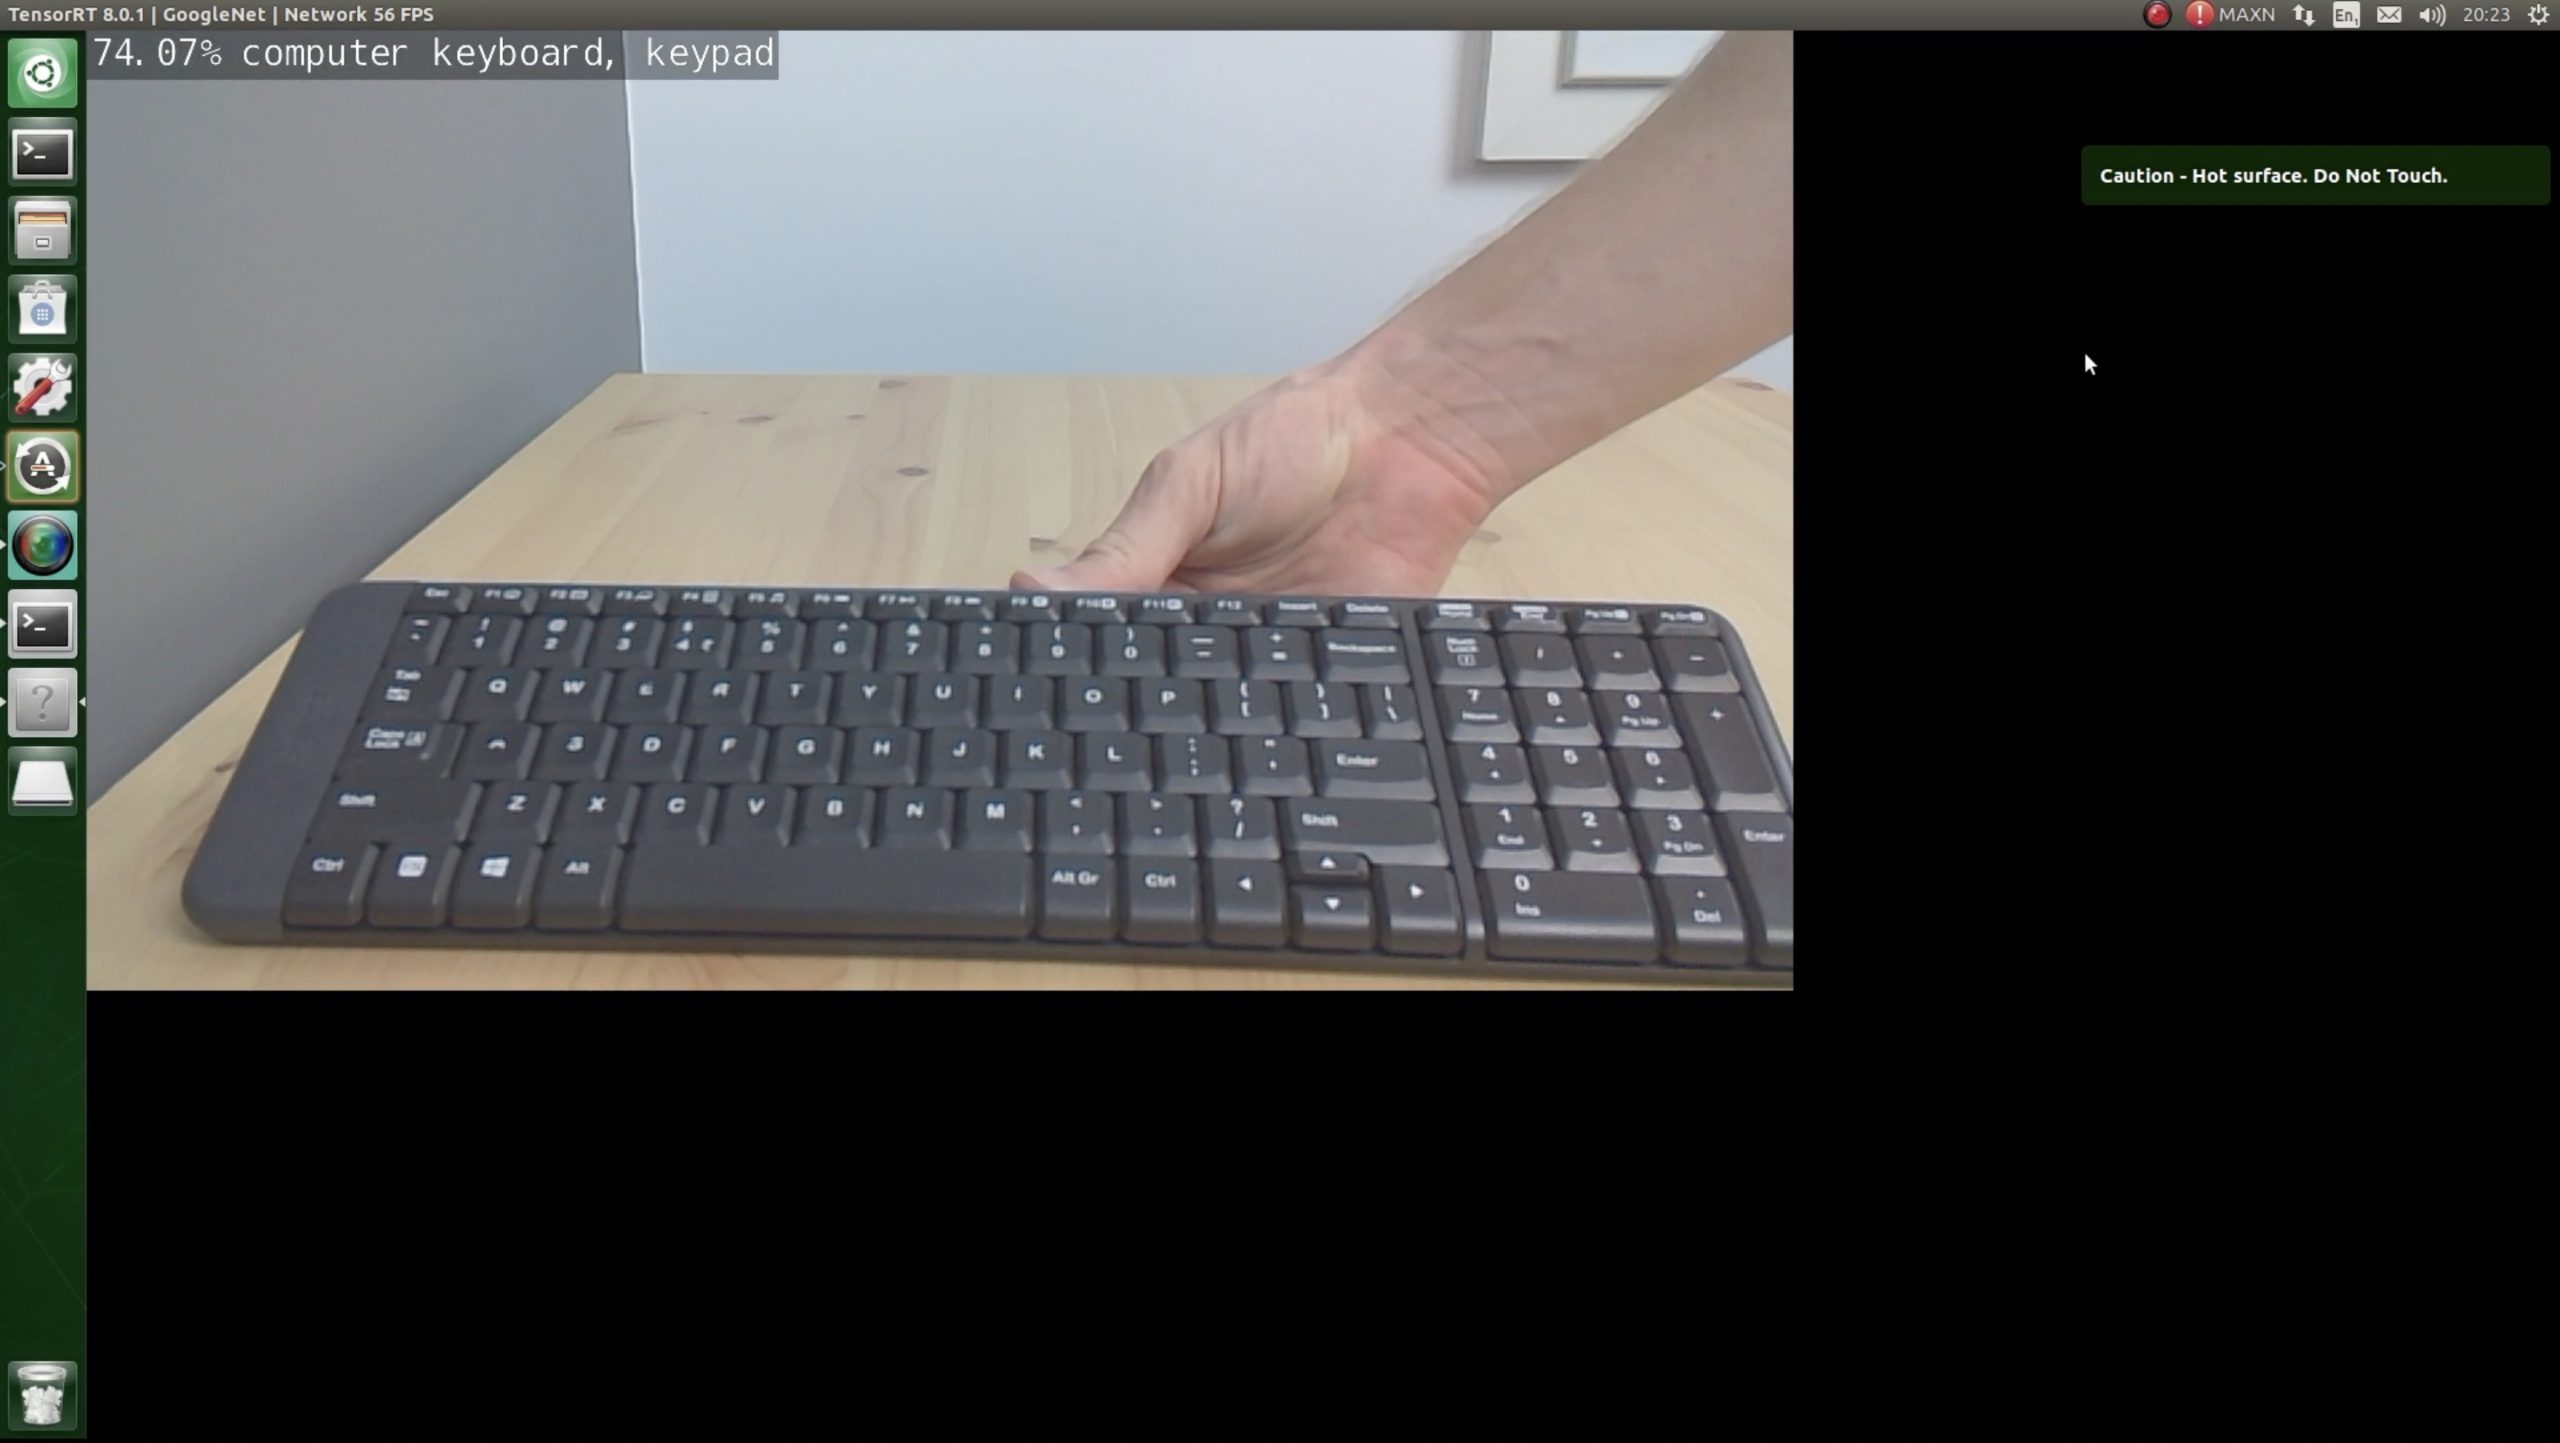
You’ll also notice that a warning popped up when this live feed started saying that the heatsink is hot and shouldn’t be touched. So it was getting quite hot when running this neural network on a live video stream with a screen recording utility running in the background as well. It’s still quite impressive that the Jetson Nano is able to run this neural network at around 50-70 frames per second while also capturing the screen contents.
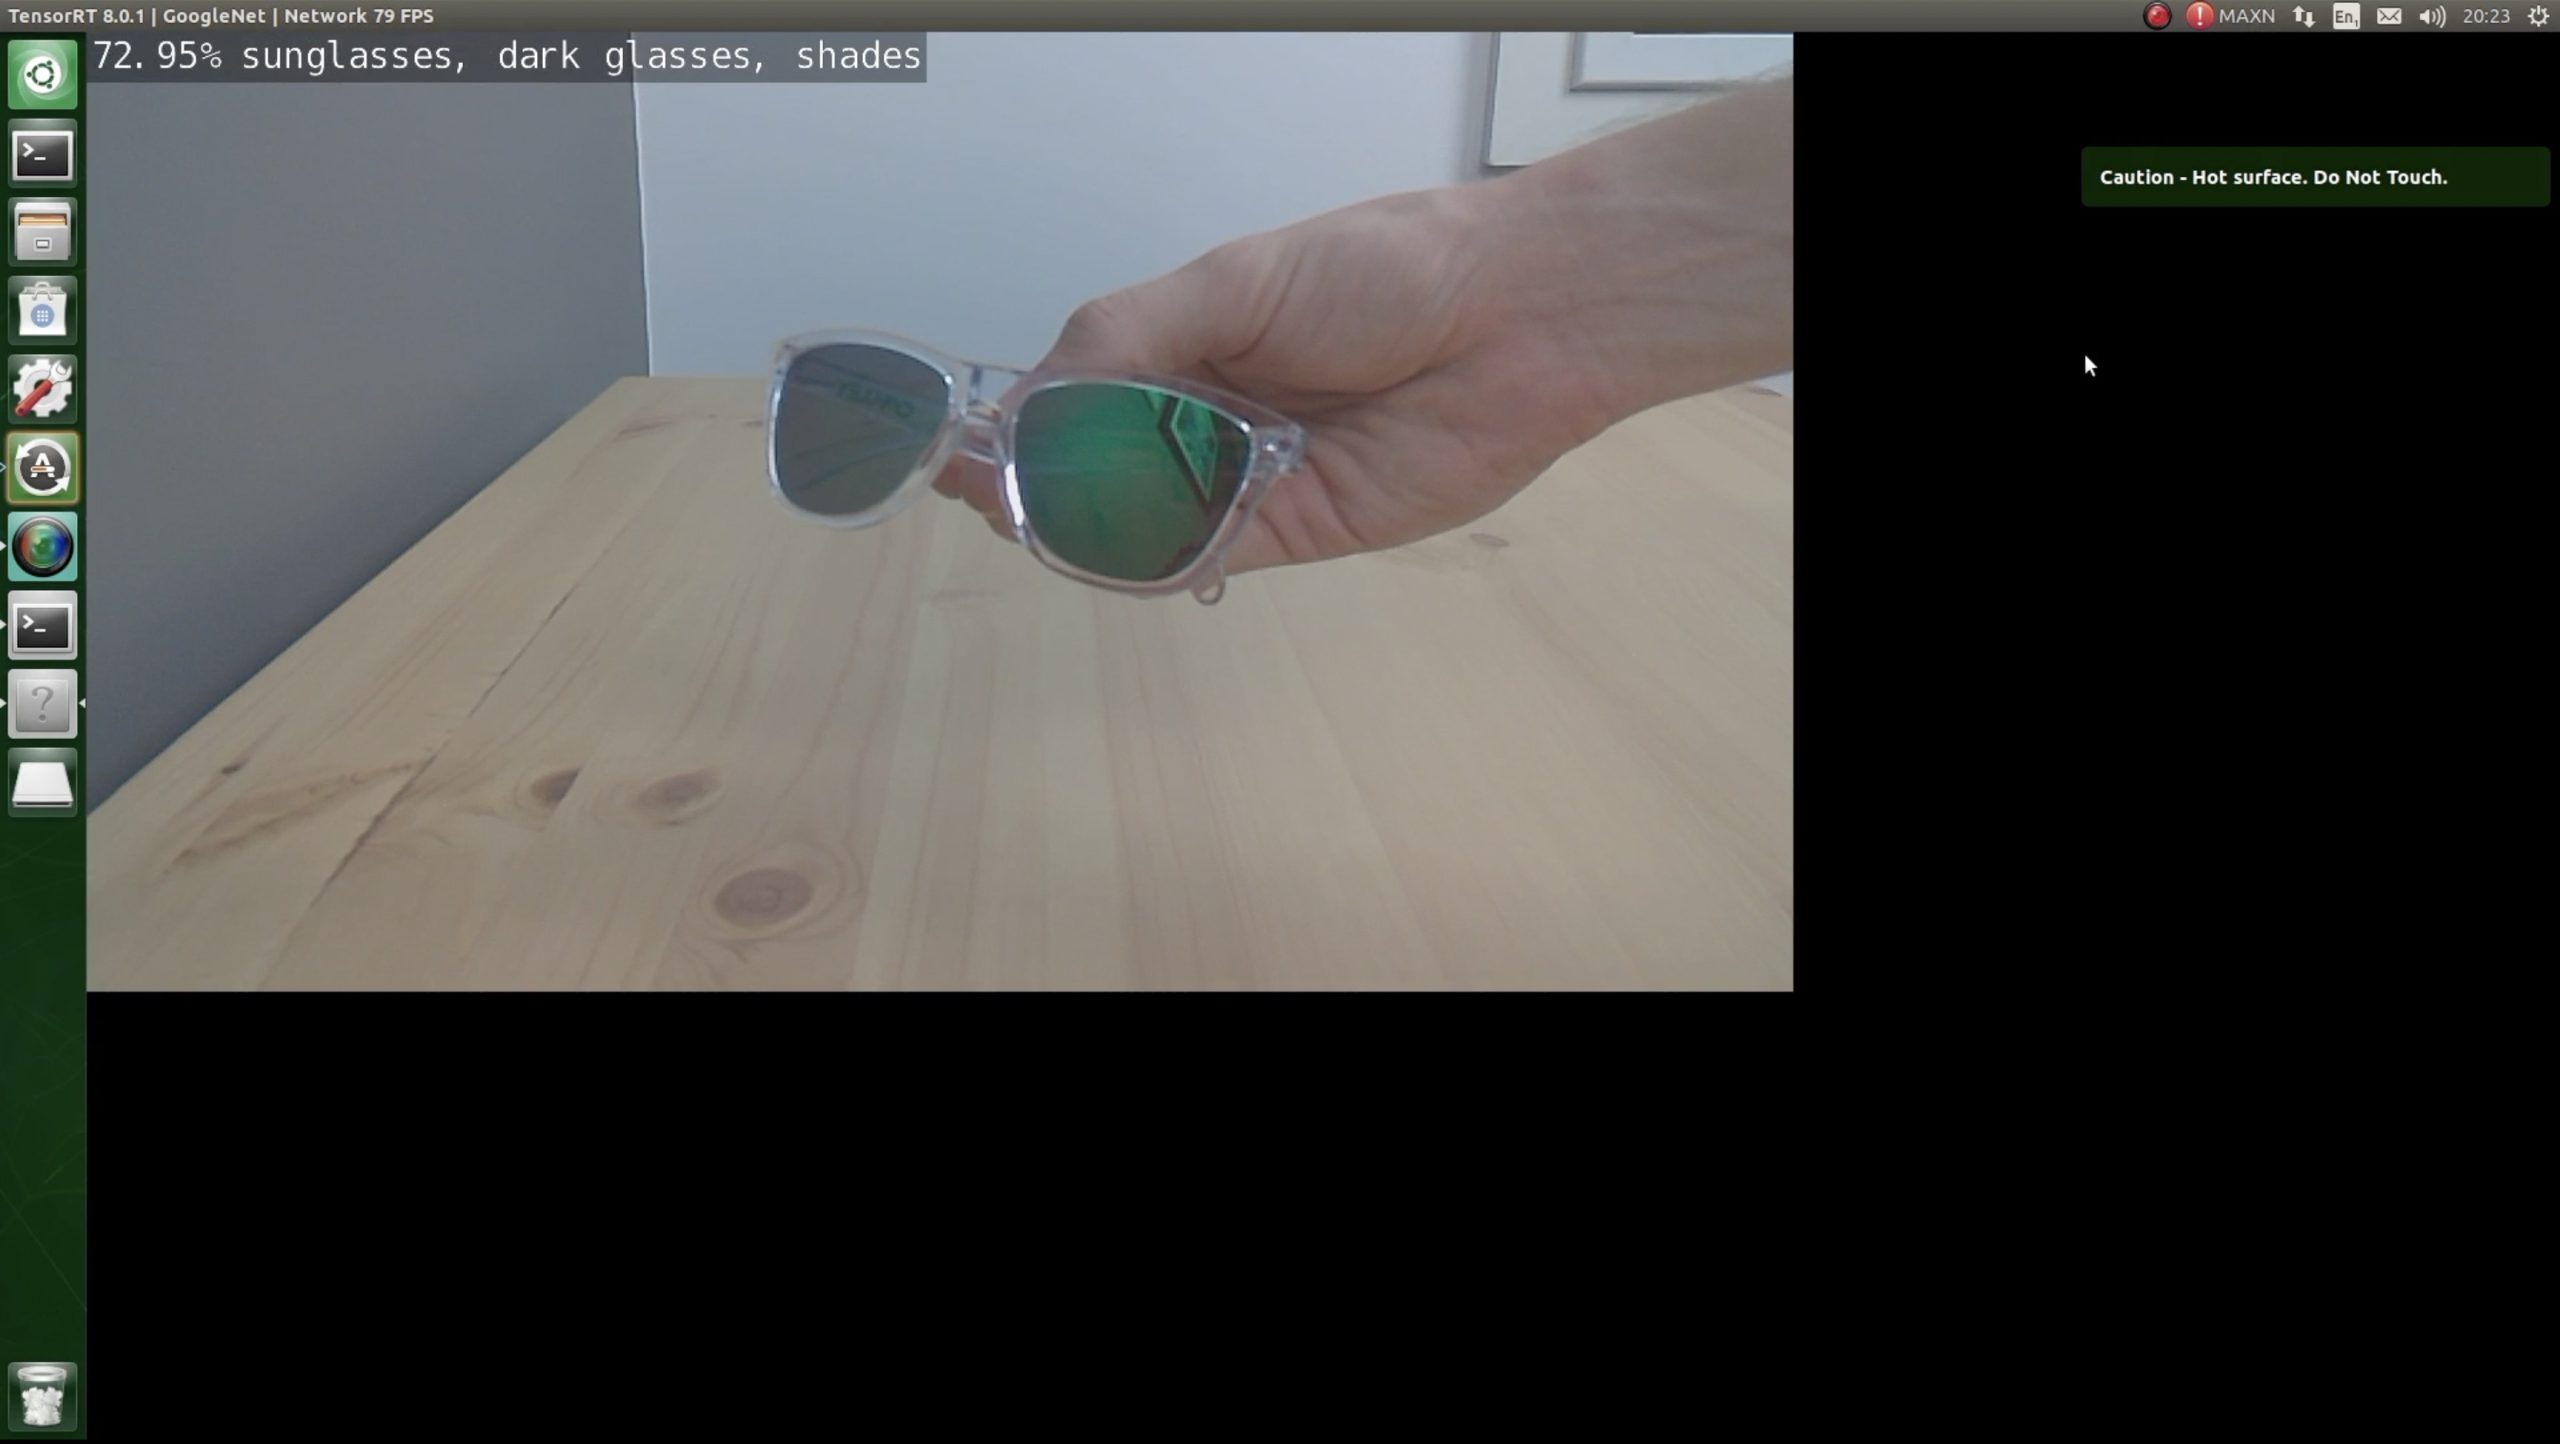
It was also able to recognise a keyboard, a pair of sunglasses and my MacBook.
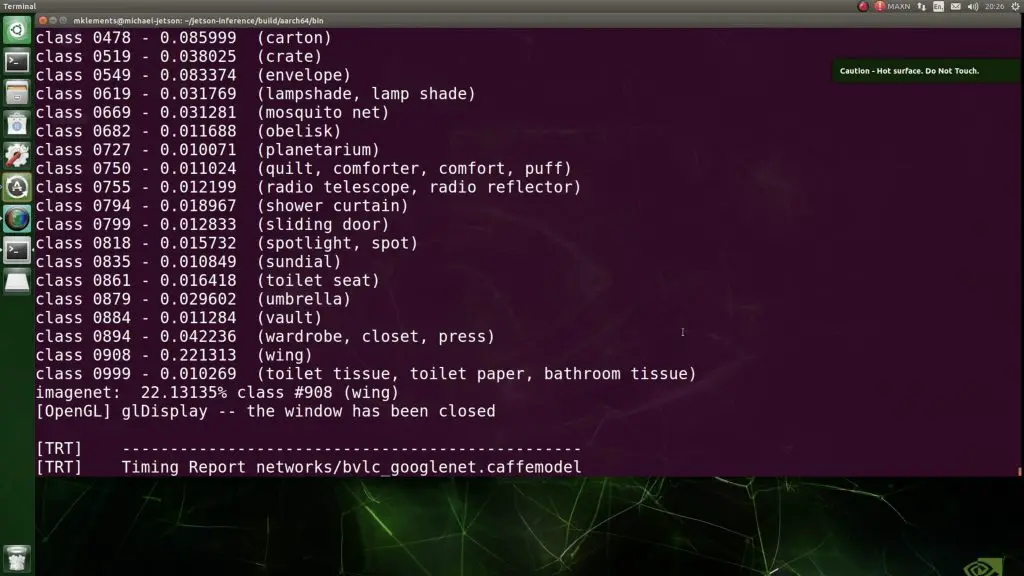
Another interesting thing to look at is the data in the terminal during or after the network has been run. It displays information on the classes that the network thought were most applicable to the sample frame, along with its confidence level in each. It also displays the most likely object and its associated confidence level.
Object Recognition and Location with DetectNet
To actually use this object recognition functionality in a project, there is another network called DetectNet that’ll also give you the location and size of the object detected in the image.
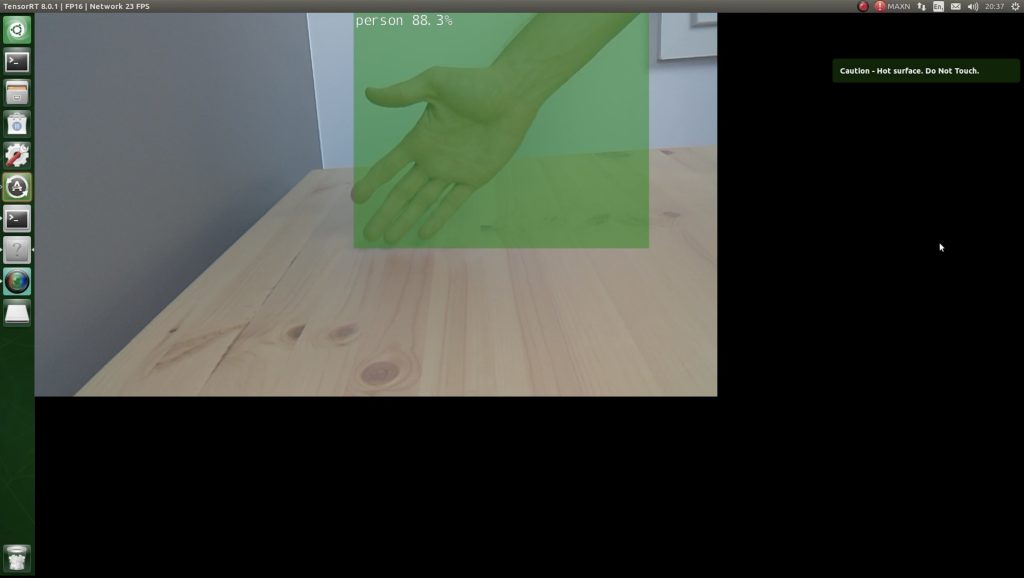
So with this information, you could then build something like a robot car that follows a certain object, like your dog or cat, or a counter that keeps track of birds or certain wildlife visiting your garden etc..
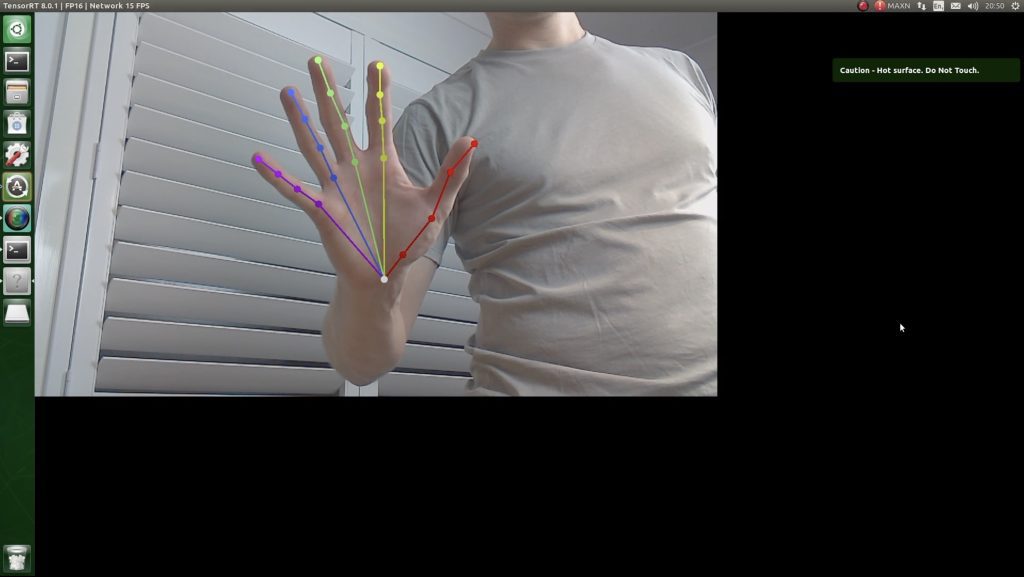
Pose Estimation Using PoseNet
The next network that I had some fun with is one that does pose estimation on people, or just their hands, called PoseNet. This neural network estimates the position of joints and body parts and again can be run on still images, videos or a live video feed.

This is really useful for building robots or machines that accept gestures as inputs, like AR or VR systems or can be use to build systems that monitor human behaviour, like counting people who are sitting or standing or estimate which direction people are walking in.
So there are just some of the basic computer vision systems that you can run on the reComputer Jetson-10, but they should give you a good idea of the capability of the system.
Power Consumption of the reComputer Jetson-10
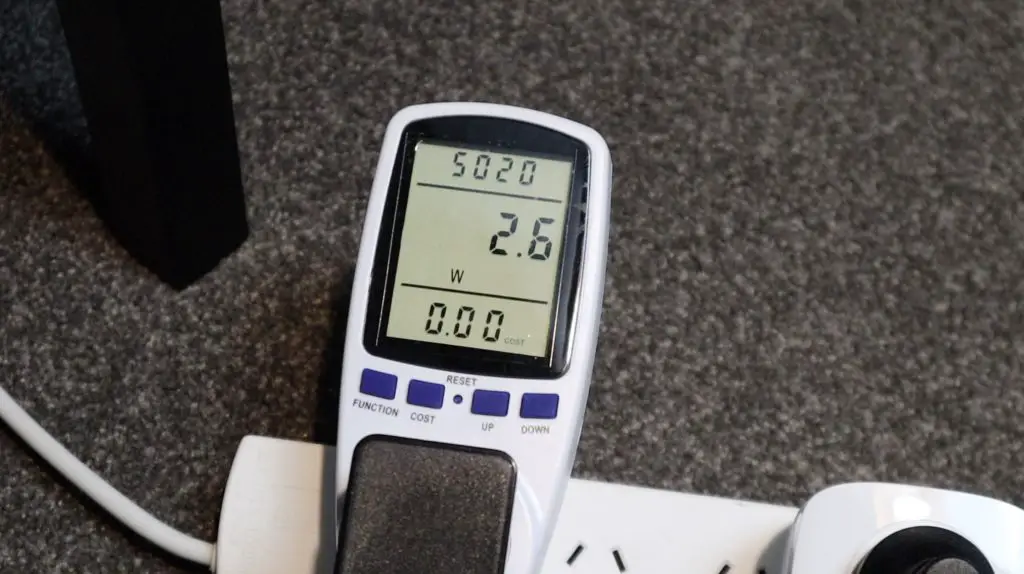
The last thing I wanted to have a look at is the power consumption. The reComputer comes with a 12V, 2A power adaptor that you’d use if you have it plugged into a permanent or non-portable setup.
Running from the power adaptor with its standard configuration, it uses around 2-3 watts when at idle on the desktop with no applications open.
It uses around 8-10 watts when it is heavily loaded – running one of the object recognition models I’ve shown you previously along with a screen recording utility.

8-10 watts is fairly low for a device running on mains power, but at this power consumption, you’d work through a set of batteries quite quickly. This is obviously not ideal for building robots and portable devices, so JetPack has a settings option that allows you to switch the Jetson module to a 5W low-power mode.
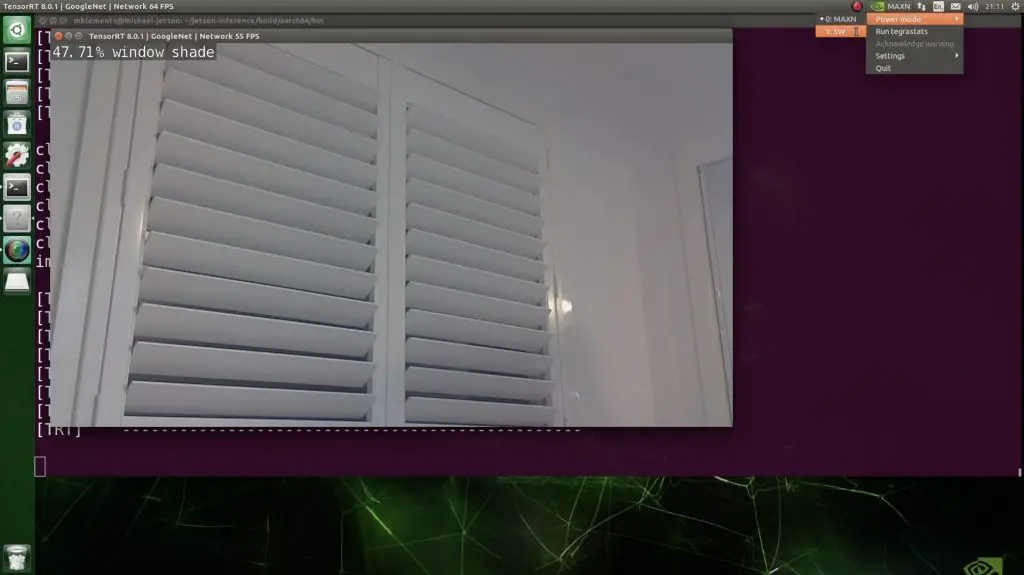
In this mode, the power consumption of the module is limited to a maximum of 5W. So if I turn this on through the toolbar, the power consumption drops.
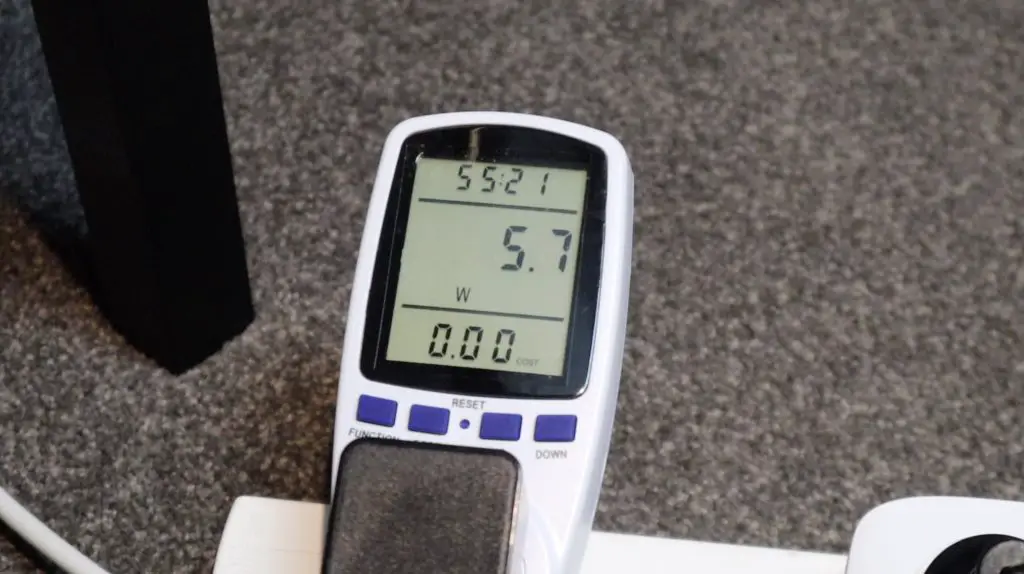
Mine dropped to around 6W. This is probably higher than the 5W stated as I’ve got a keyboard, mouse and flash drive plugged into it as well. If you switch to low-power mode, you’ll also notice that the frames per second drop with the reduction in power. So this power reduction comes at the expense of performance, but still allows about 20-30 fps to be processed and you’ll get an improvement in battery life. So, depending on the project, this might be a suitable option for your application.
Final Thoughts
I’ve really enjoyed trying out the reComputer Jetson-10 over the past two weeks. It’s a neat, ready to run solution that would look right at home on your desk, but still has the versatility to be used in an actual project.
The magnetically latched lid makes tinkering with the carrier board or Jetson Nano a breeze, so it’s definitely one of my favourite features.

I think they could have possibly included an optional fan, as the Jetson Nano did get quite hot during my testing. This was running “flat out” though with a neural network running continuously and a screen recording utility capturing the display contents, so this is probably a worst-case scenario.
The reComputer Jetson-10 is fantastic for getting started with neural networks and deep learning on computers. Be sure to have a look at Seeed Studio’s product page and check out their store for loads of other tech and electronics products and project inspiration.
Let me know what you think of the reComputer Jetson-10 in the comments section below and let me know if there are any computer vision projects that you’d like to see me try out with it.