I’ve been using my Raspberry Pi in this case that I 3D printed almost two years ago. It’s been a great way to protect and cool my Pi and I’ve even made up a few other varients for UPS and SSD shields.
I printed these cases on my original Ender-3 Pro, so when Pergear reached out and said that they’d like me to try out the new Creality Ender-3 S1 Pro, I thought this would be a great opportunity to give my case a refresh.
The Creality Ender series has been my go-to 3D printer for the past three years, I started with an Ender 3 Pro, then got the Ender 3 V2 and then added a second Ender 3 V2. These three printers run for about 10 hours a day and have been doing so for two years now without giving me any significant problems.
I’ve kept them stock for the most part and have found that a well setup Ender-3 prints as capably as other printers that are 3-5 times more expensive. They also have a large online community, a range of upgrades and easily accessible spare parts. So I’m excited to see how the Ender S1 Pro stacks up, as it’s got a number of upgrades and improvements over the original.
Here’s my video of the build, read on for the full write-up:
What You Need To Assemble Your Own
- Raspberry Pi 4B – Buy Here
- Ice Cube Cooler – Buy Here
- 32GB Sandisk Ultra MicroSD Card – Buy Here
- M3x8mm Button Head Screws – Buy Here
- M3 Nuts – Buy Here
- Carbon Fibre Fan Grill (optional) – Buy Here
Equipment Used
- Creality Ender-3 S1 Pro – Buy Here
- K40 Laser Cutter – Buy Here
- Electric Screwdriver – Buy Here
- Acrylic Bender – Buy Here
Designing The New 3D Printed Raspberry Pi Case
Let’s start out by getting the new case designed so that we’ve got something to print. I’m going to use Fusion360 this time around for a more refined finish.
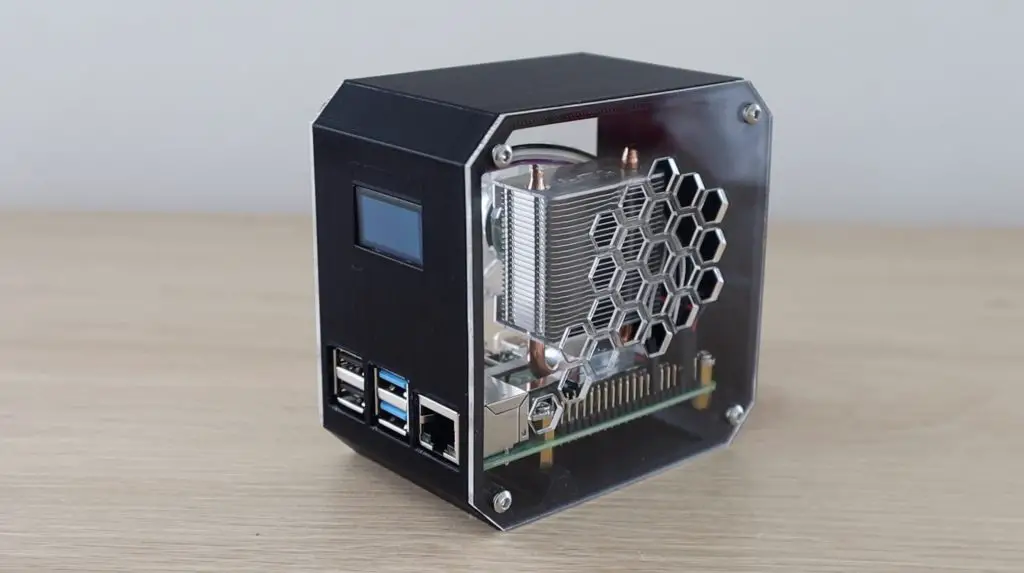
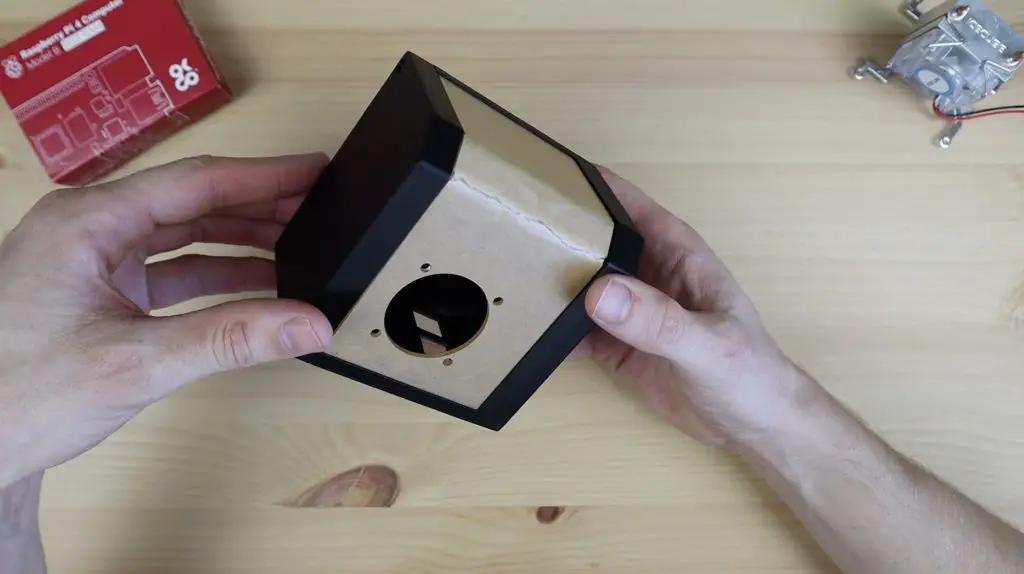
The previous case had a solid body with two clear sides, so I want to mix that up by now having a wrap-around clear panel from the side to the front. A small 45-degree section adds a bit of character to the design and will make the acrylic bends a bit more gradual, rather than a sharp 90-degree.
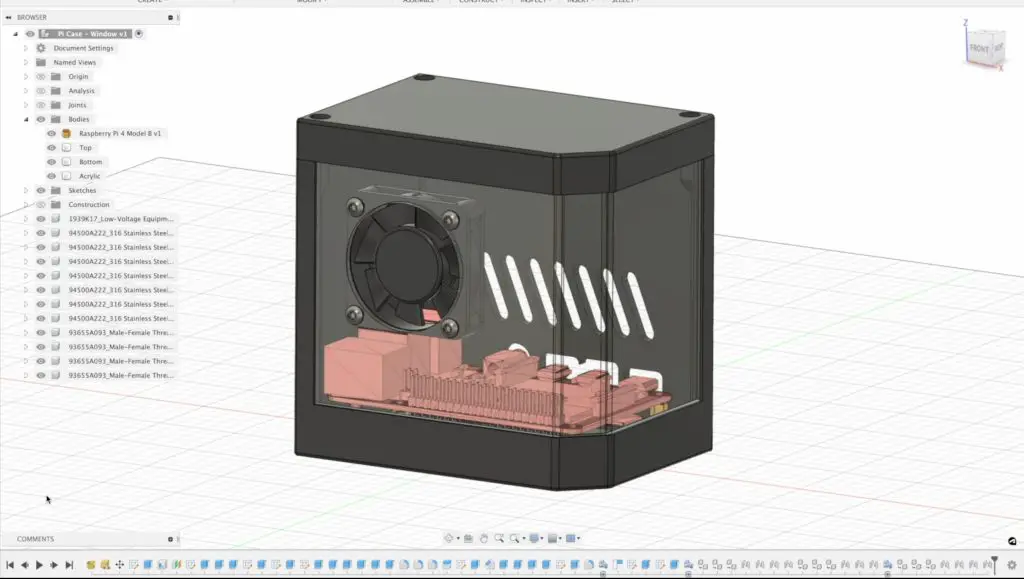
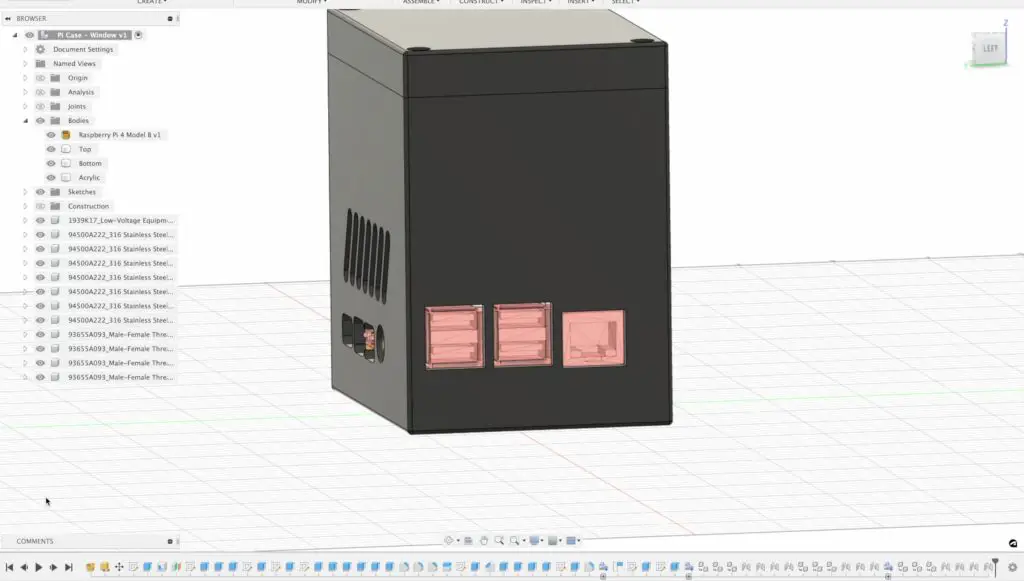
I’ve also put the USB and Ethernet ports on the back and left some headroom to add an Ice Cube cooler and fan. On the other side, we’ve got the power, HDMI and audio ports and I’ve added some vents above them for the exhaust air.
You can download the design from my Etsy store to 3D print your own case or alternately buy a kit that includes the case, bent acrylic side panel and screws so it’s ready to be assembled.
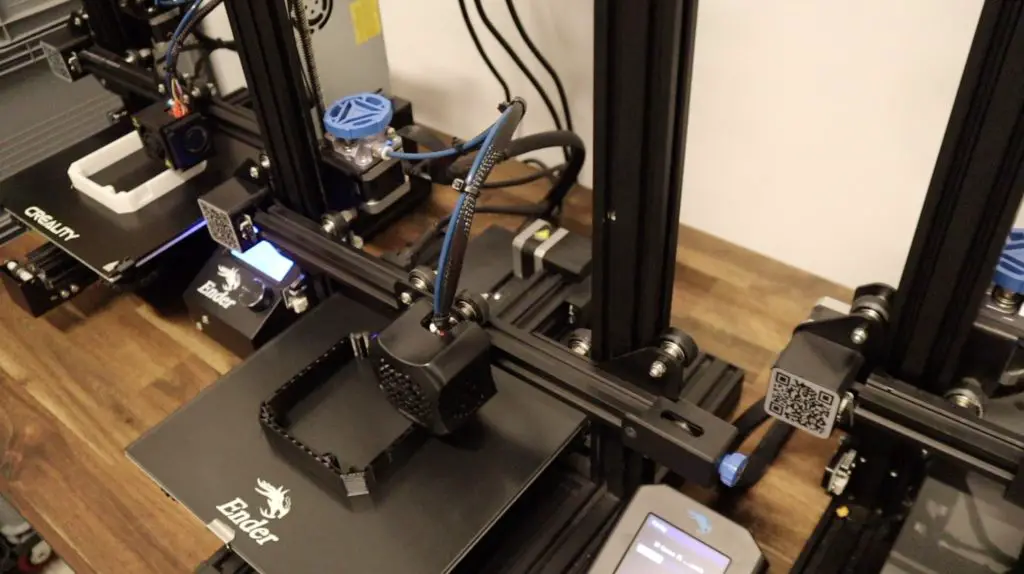
Now, let’s export the parts and get them printed on the Ender 3 S1 Pro. First, we need to get it unboxed and assembled.
Unboxing & Assembling The Ender-3 S1 Pro
Like with all my Enders, the Ender-3 S1 Pro comes well packaged and protected in a sturdy box with foam inserts.
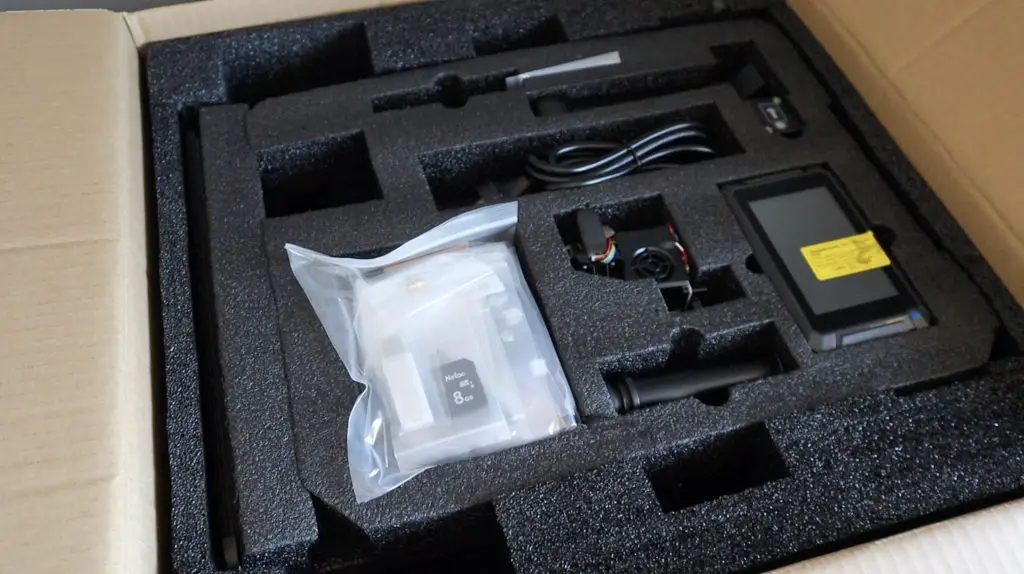
Within the box, the Ender-3 S1 Pro is a lot more pre-assembled than the original. The whole gantry is ready to be mounted onto the base and you then just need to mount the extruder, add the display and add the filament holder.
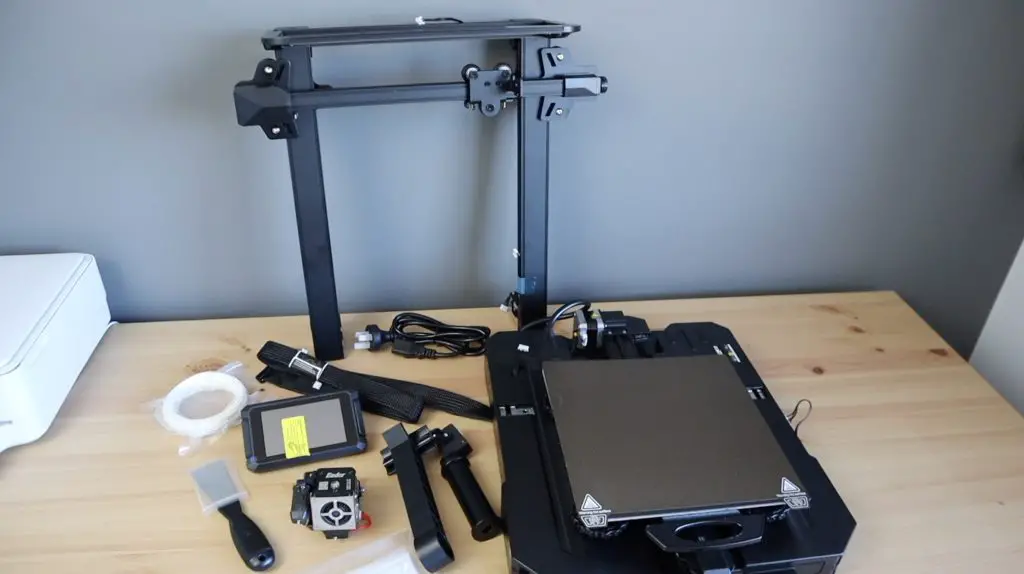
The base is quite a bit bigger than the original Ender-3 and Ender-3 V2, so keep that in mind if you have limited desk space.
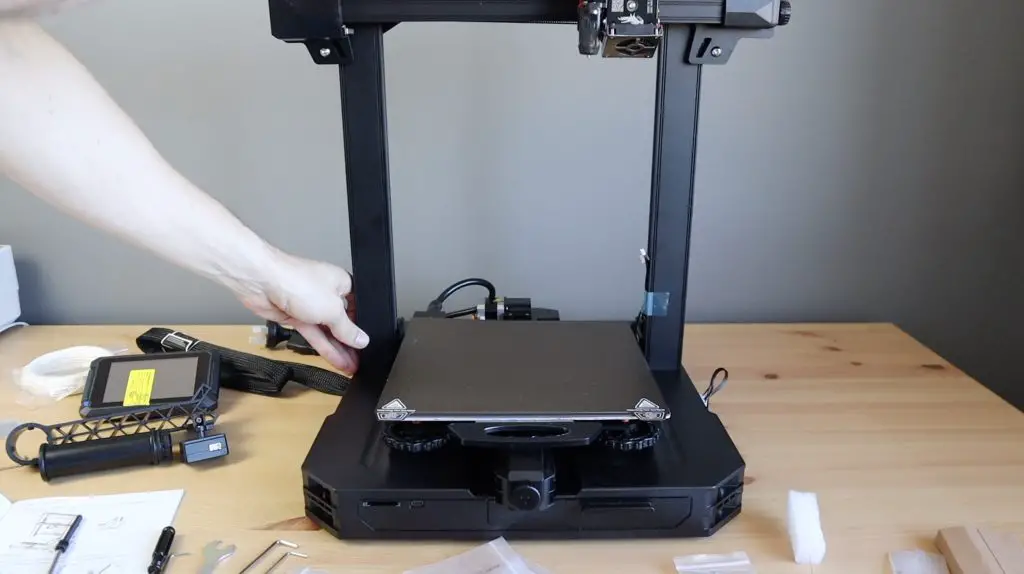
Assembly took around 15 minutes and is really simple with the included step-by-step instructions and tools.
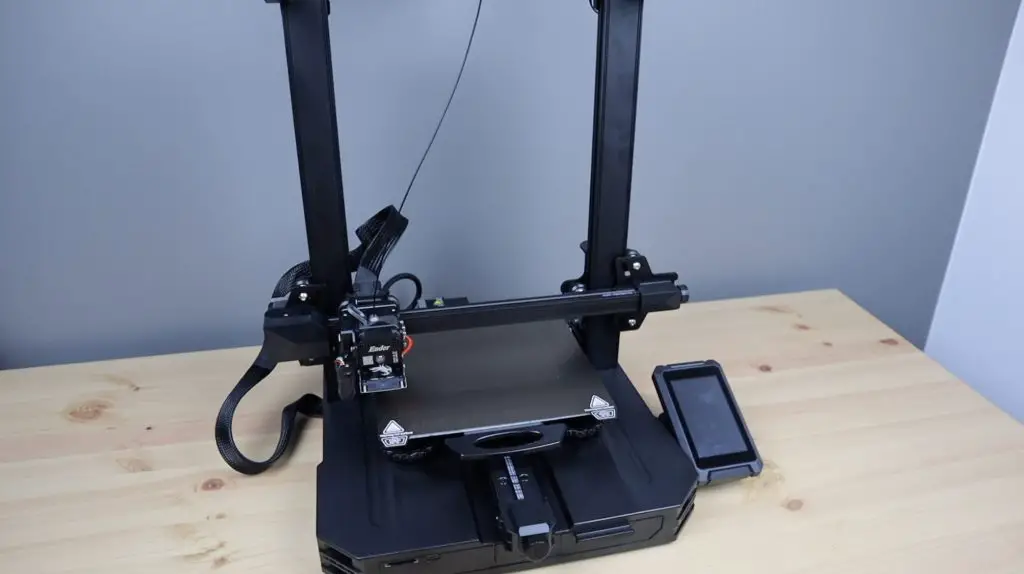
The general shape and layout is similar to the original Ender-3 series, but they’ve made a number of quite significant upgrades with the S1 Pro.
The extruder is now a direct drive, full metal, dual gear design with a hot end that can reach 300C. This opens up the possibility to print with a wider range of filaments, including flexible and high-strength materials.
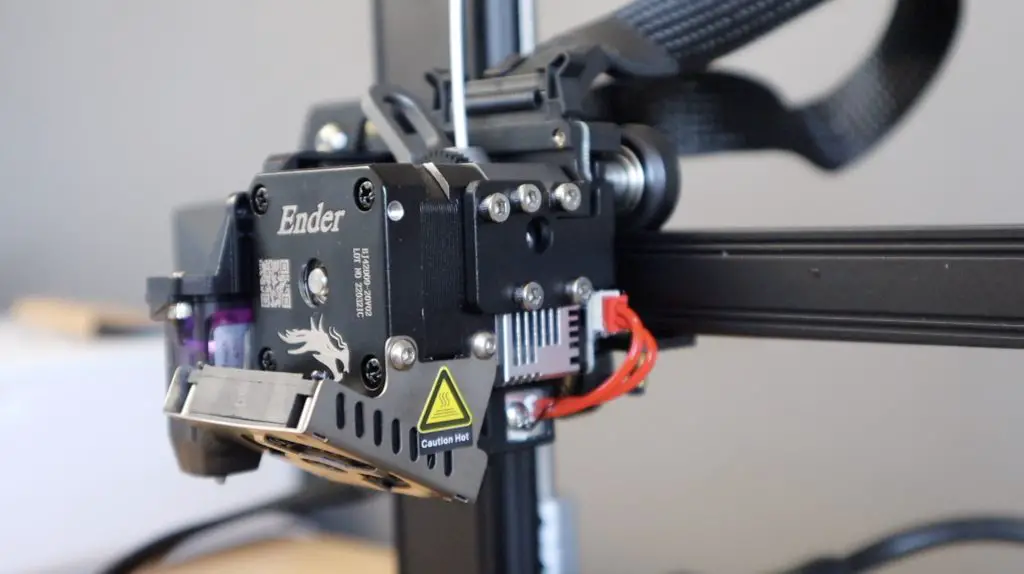
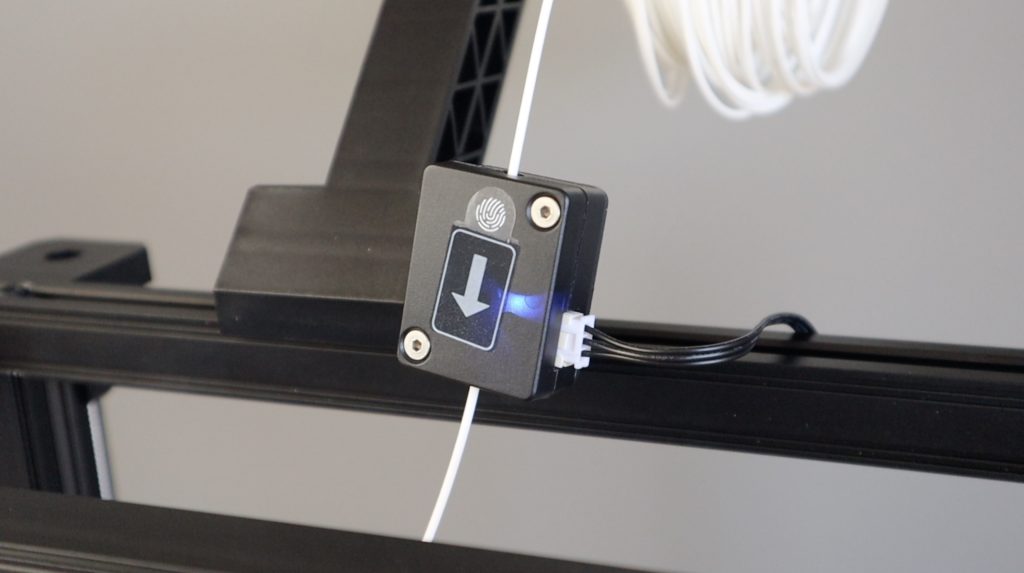
They’ve also added a filament runout sensor that’ll automatically pause the print if your filament runs out mid-print.
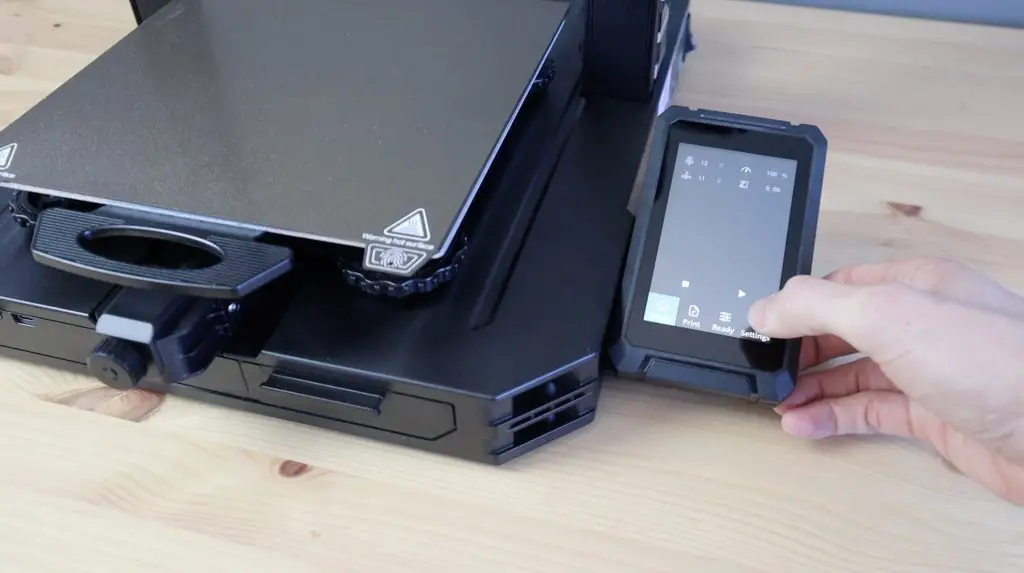
The display has been upgraded to a full-colour touch display, allowing them to do away with the rotary pushbutton on the older models.
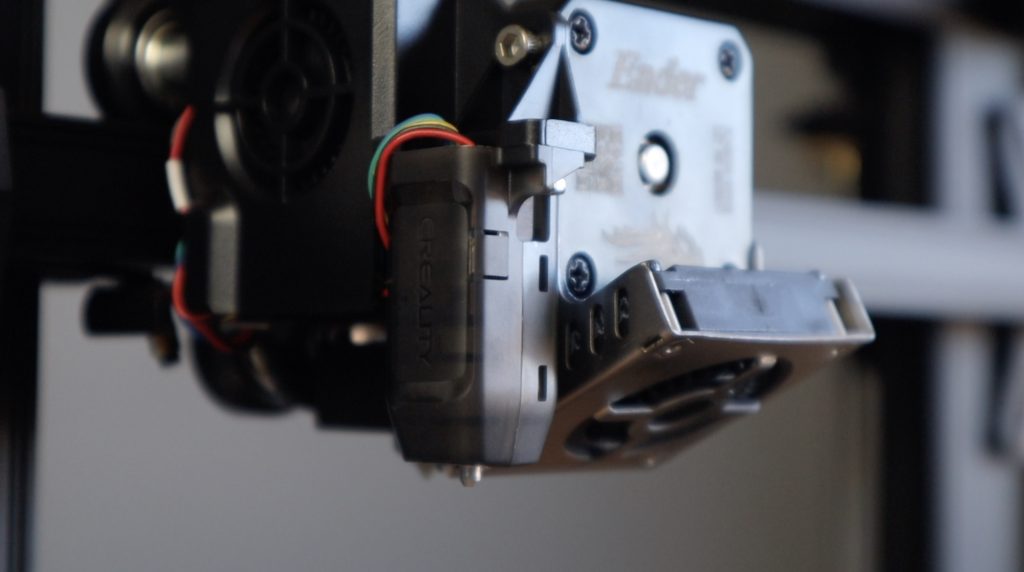
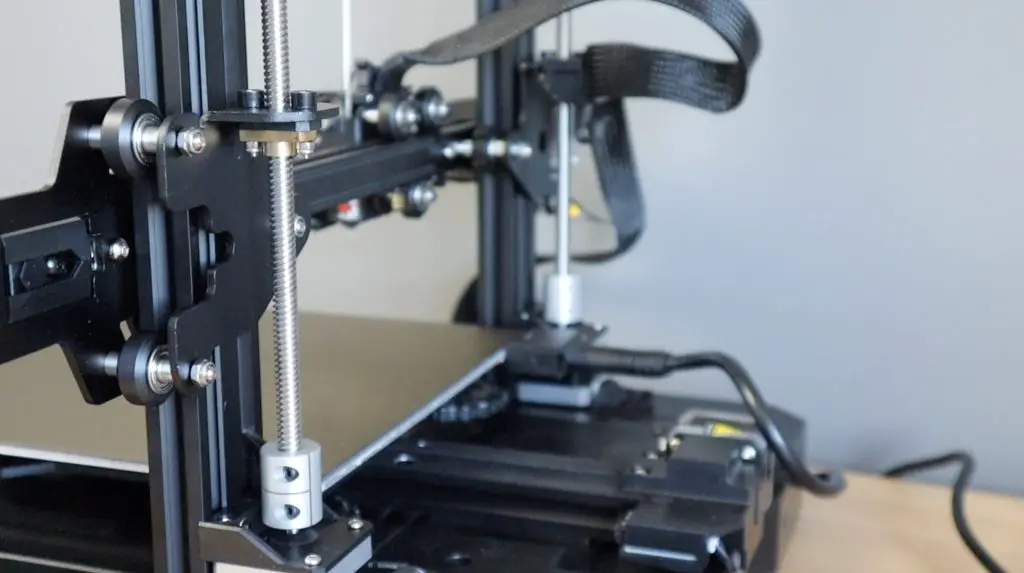
They’ve also done away with a vertical axis limit switch, and have added their own CR Touch automatic bed levelling sensor to compensate for any print bed height differences. They also include a limit switch and cable as an option to add on if you don’t want to use the CR Touch sensor.
A new overhead LED light bar is a great addition for overnight prints and for keeping an eye on your prints remotely using a camera in a dark environment.
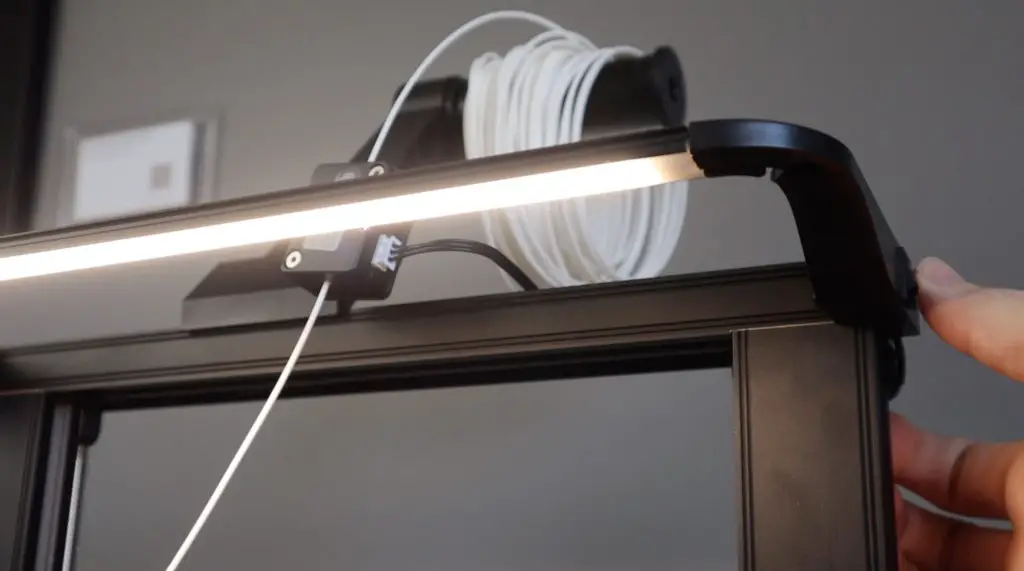
The print bed is now equipt with a spring steel magnetic build plate, and it’s got dual z-axis motors on the back, something that was a common first upgrade on the original ender.
Those are the main upgrades made to the original Ender-3 and Ender-3 V2, it also got a number of now fairly standard features like silent stepper motor drivers, a 32-bit control board and adjustable belt tensioners.
The Ender-3 S1 Pro currently retails for $499 on Pergear’s Amazon store or $480 on their web store. This is quite a bit more than the standard Ender-3 series, but you’re also getting a number of upgrades and features that are typically only available on higher ender printers.
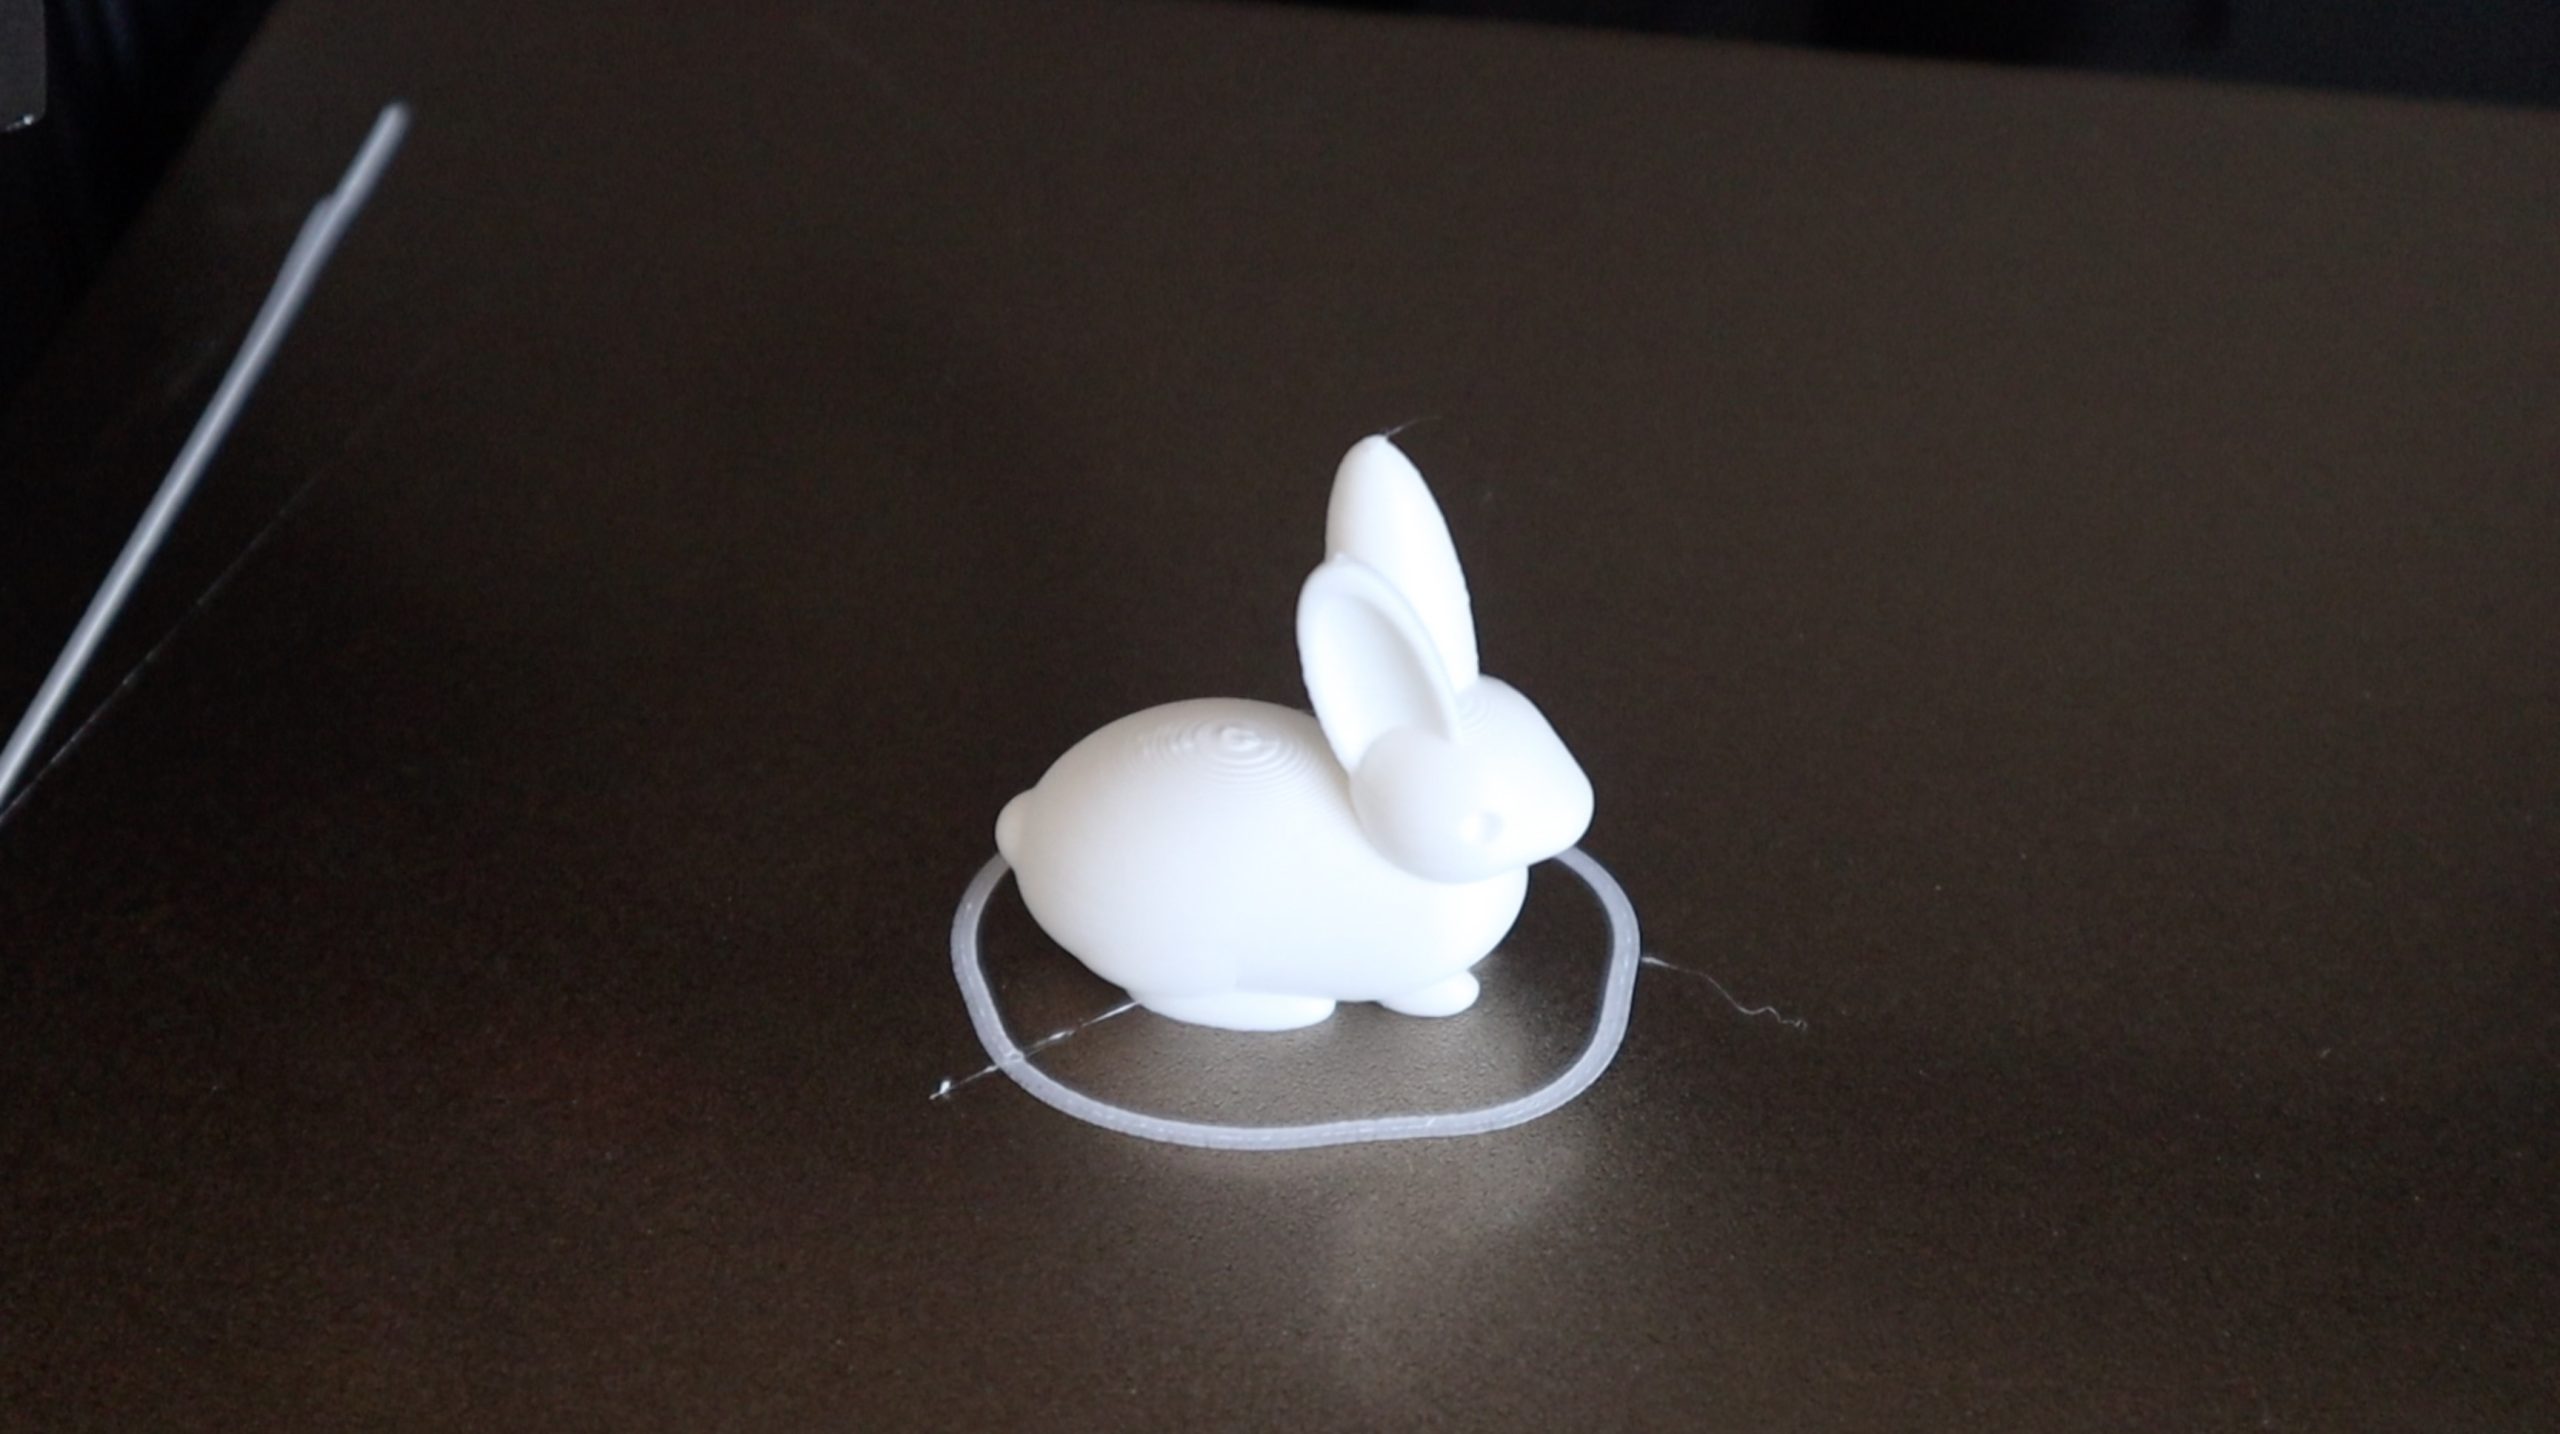
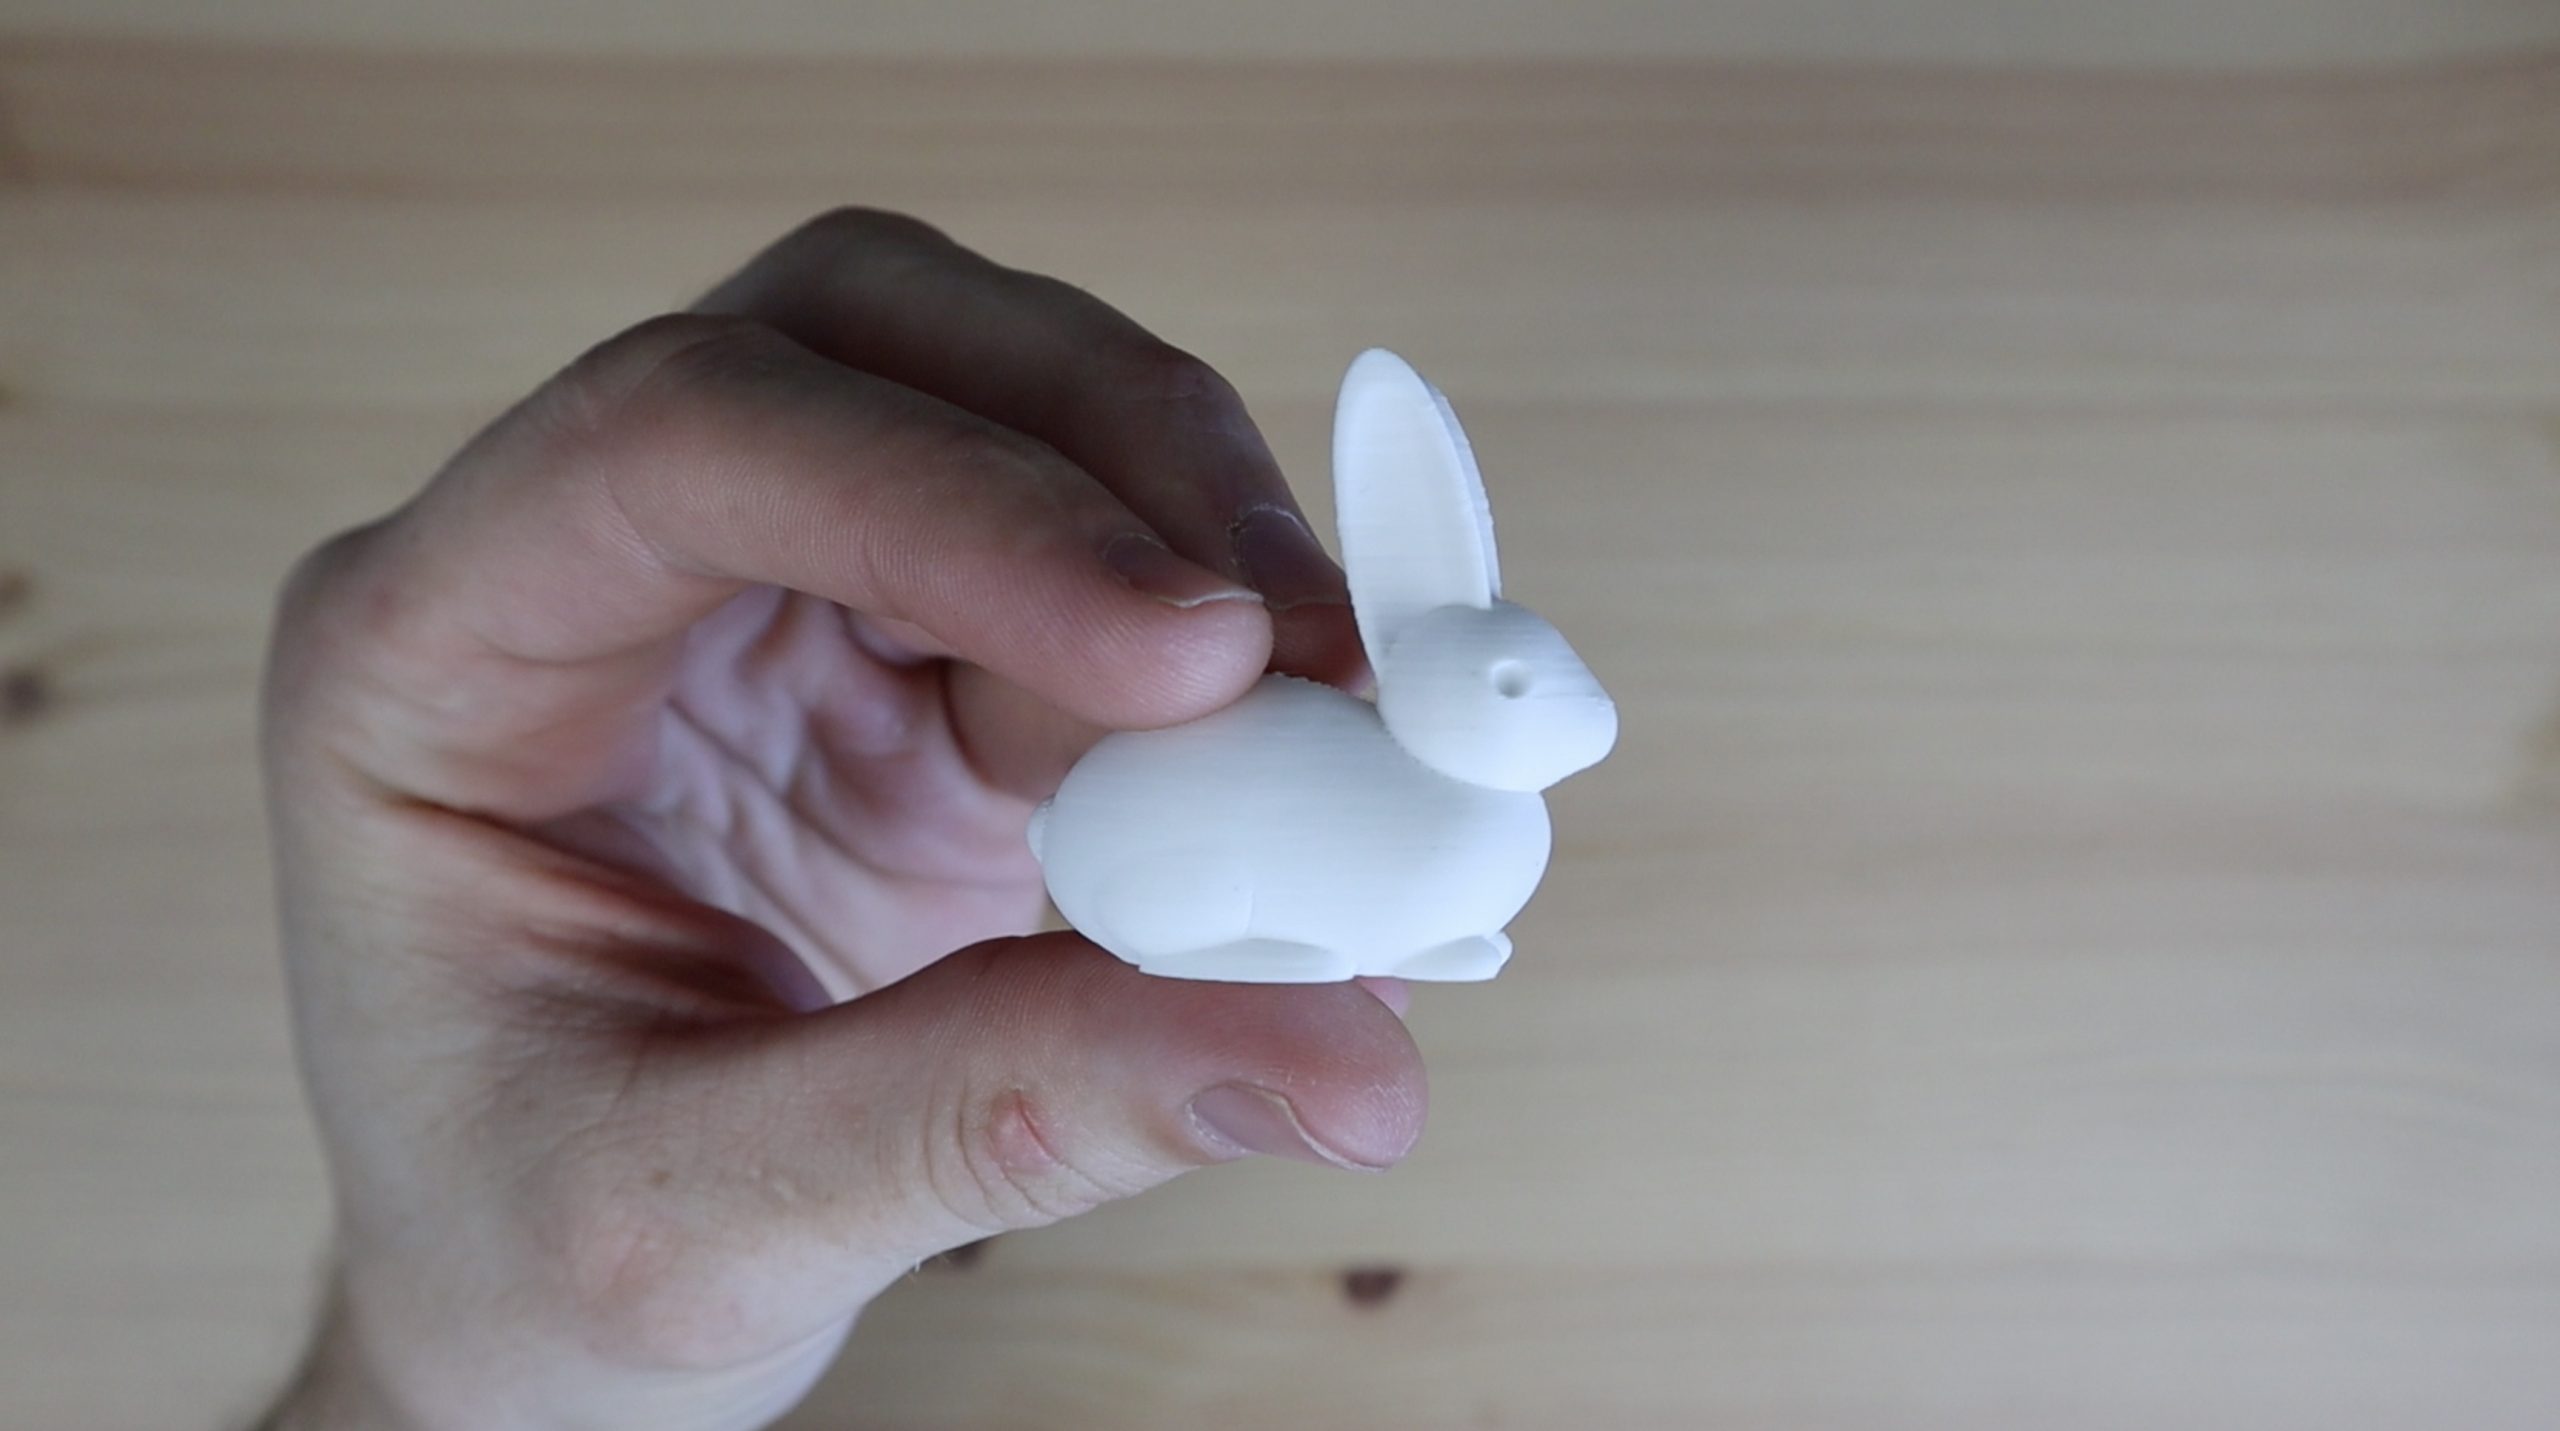
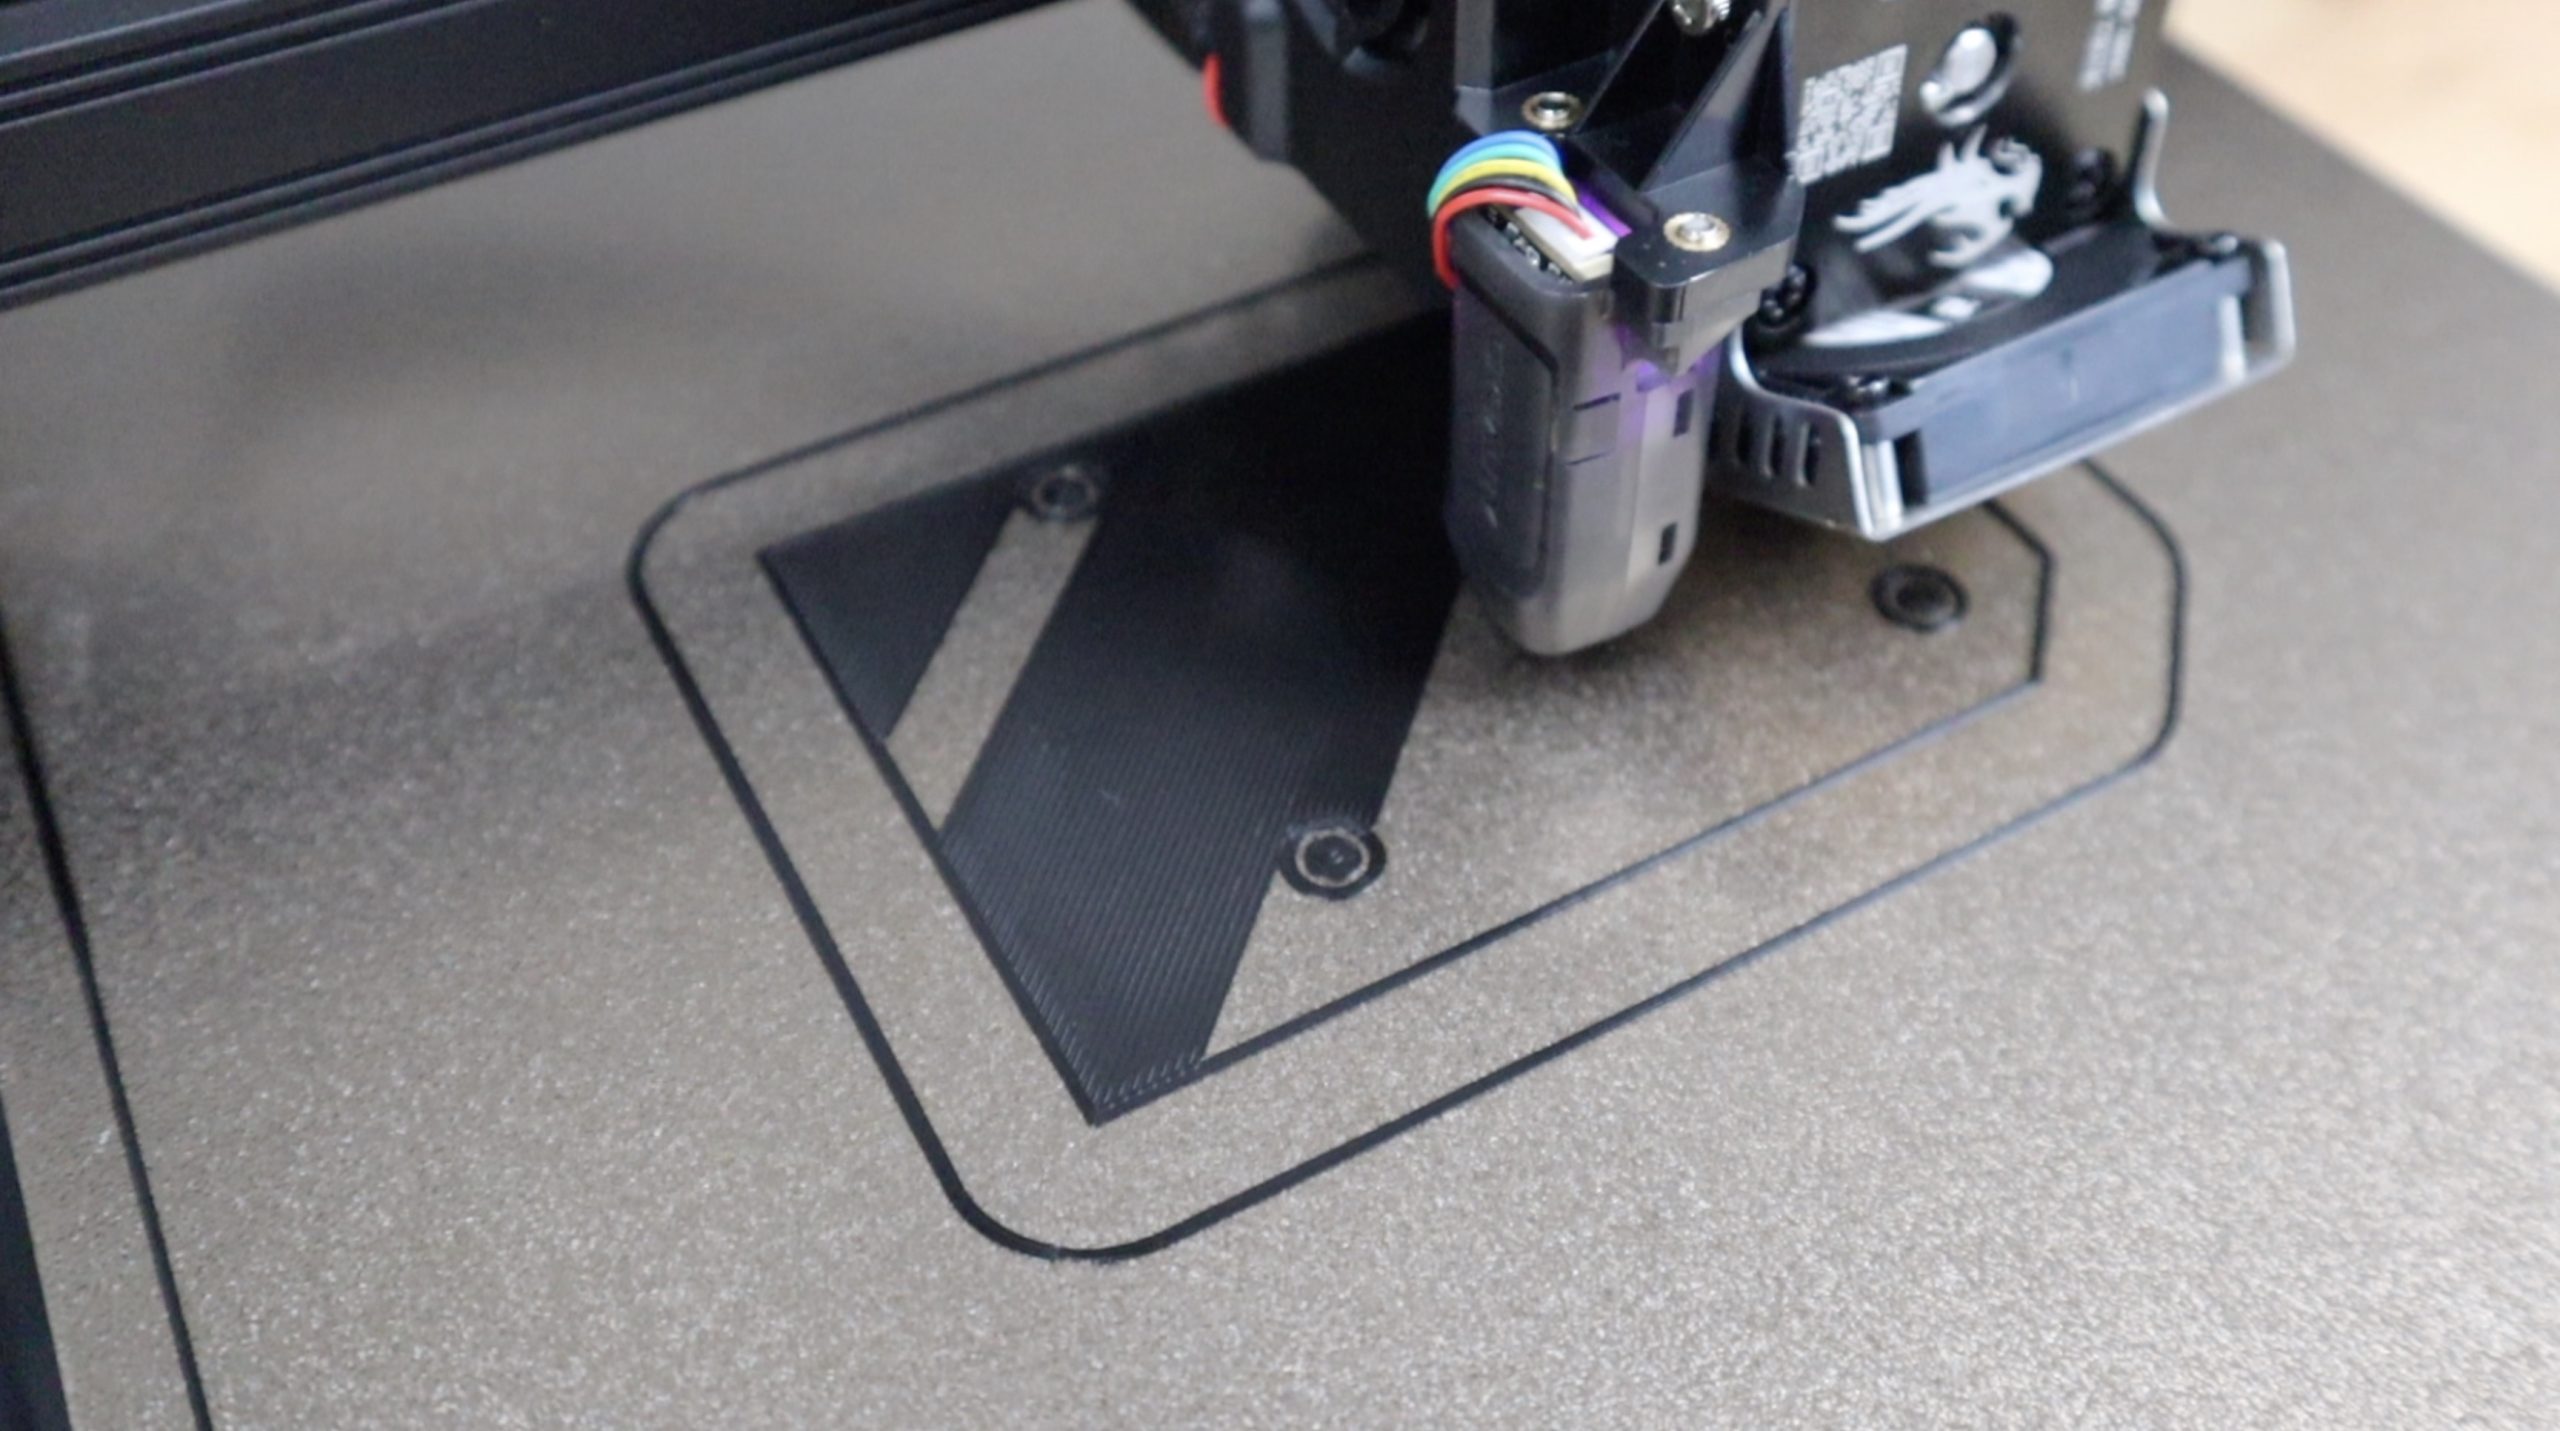
Once assembled, I used the automatic bed levelling, set the nozzle offset and then set the printer to work on the rabbit test print with the included filament.
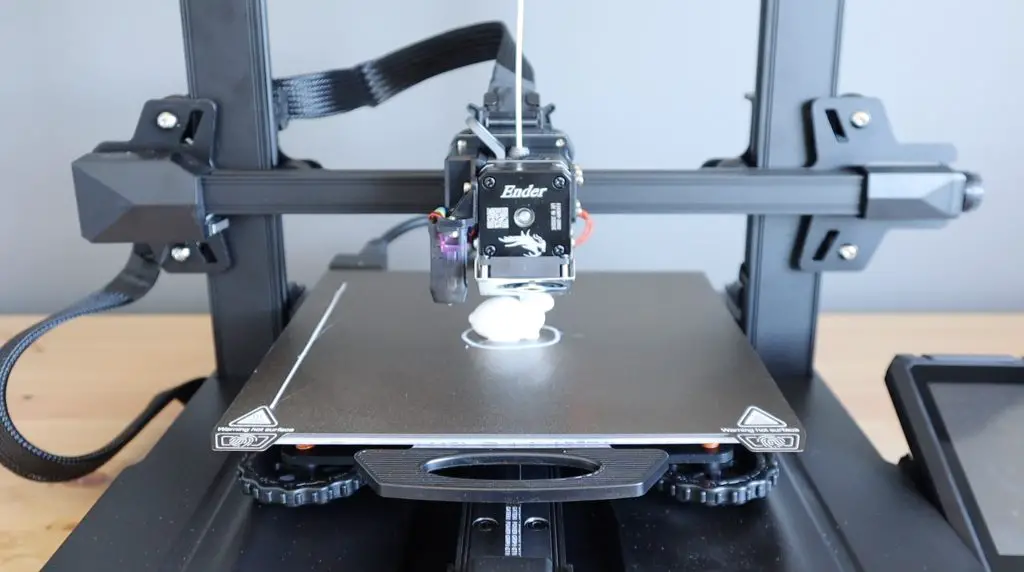
The results were really good – keep in mind that is a print straight out of the box without any adjustments or tinkering with the printer. I didn’t even touch the bed levelling adjustment knobs, I just let the automatic bed levelling take care of it.
Making Up The Case Components
For my case print, I’m going to use black PLA for the print and I’ll use 100% infill as the walls are already quite thin. I used 0.2mm layer height, a wall thickness of 0.8mm and a top and bottom thickness of 1.2mm.
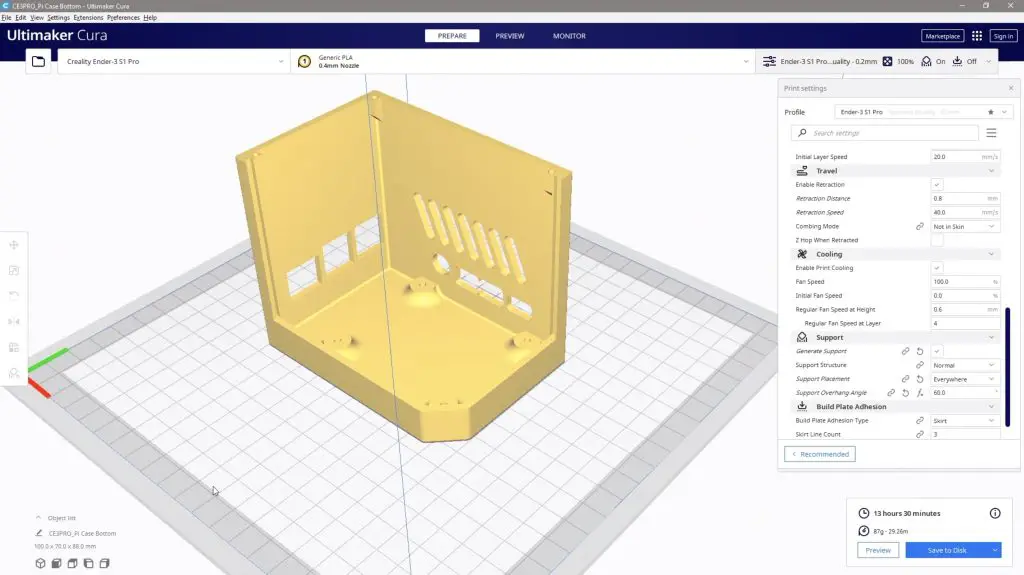
I’m going to print the two parts separately rather than print them at the same time so that there aren’t any imperfections or seams caused when moving between the two parts.
While the 3D print is being printed, let’s make up the acrylic side panel.
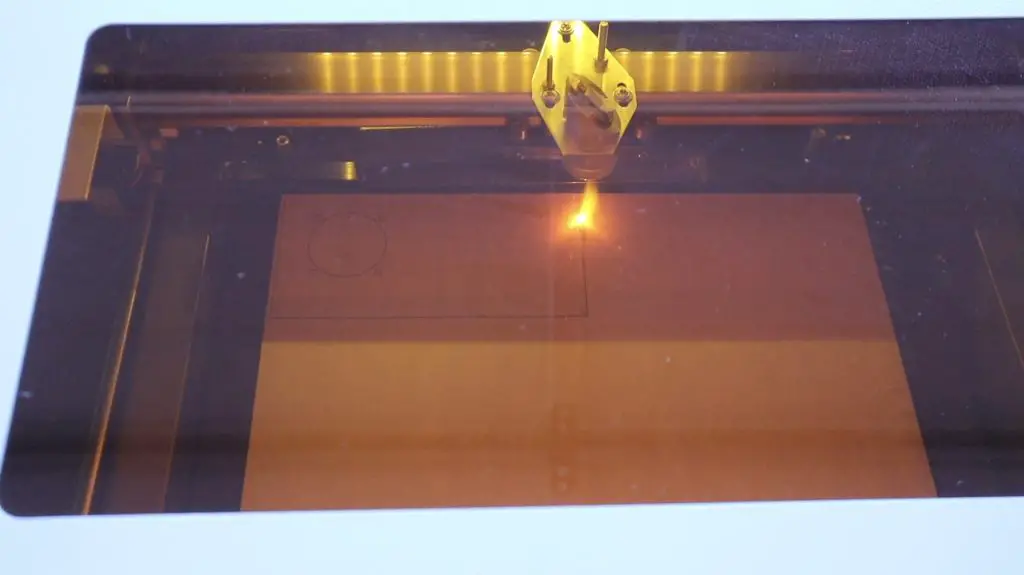
I’m cutting this panel from 2mm clear acrylic and I’ll then use a bending tool to heat up the two edges where we need to make the 45-degree bends. I’ve added a cutout for the fan and some guides for the two bend lines.
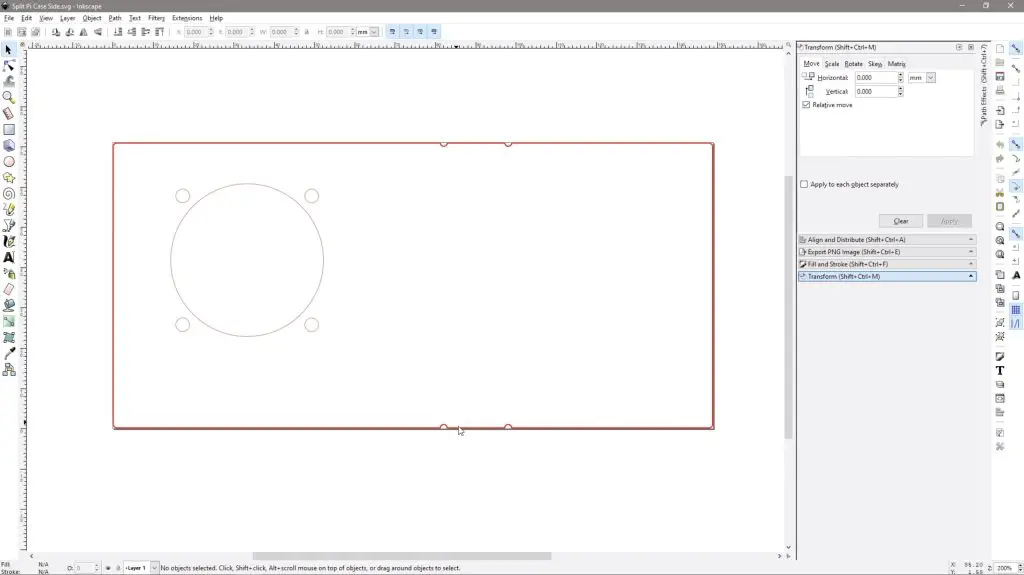
Let’s get the panel cut out on my laser cutter.
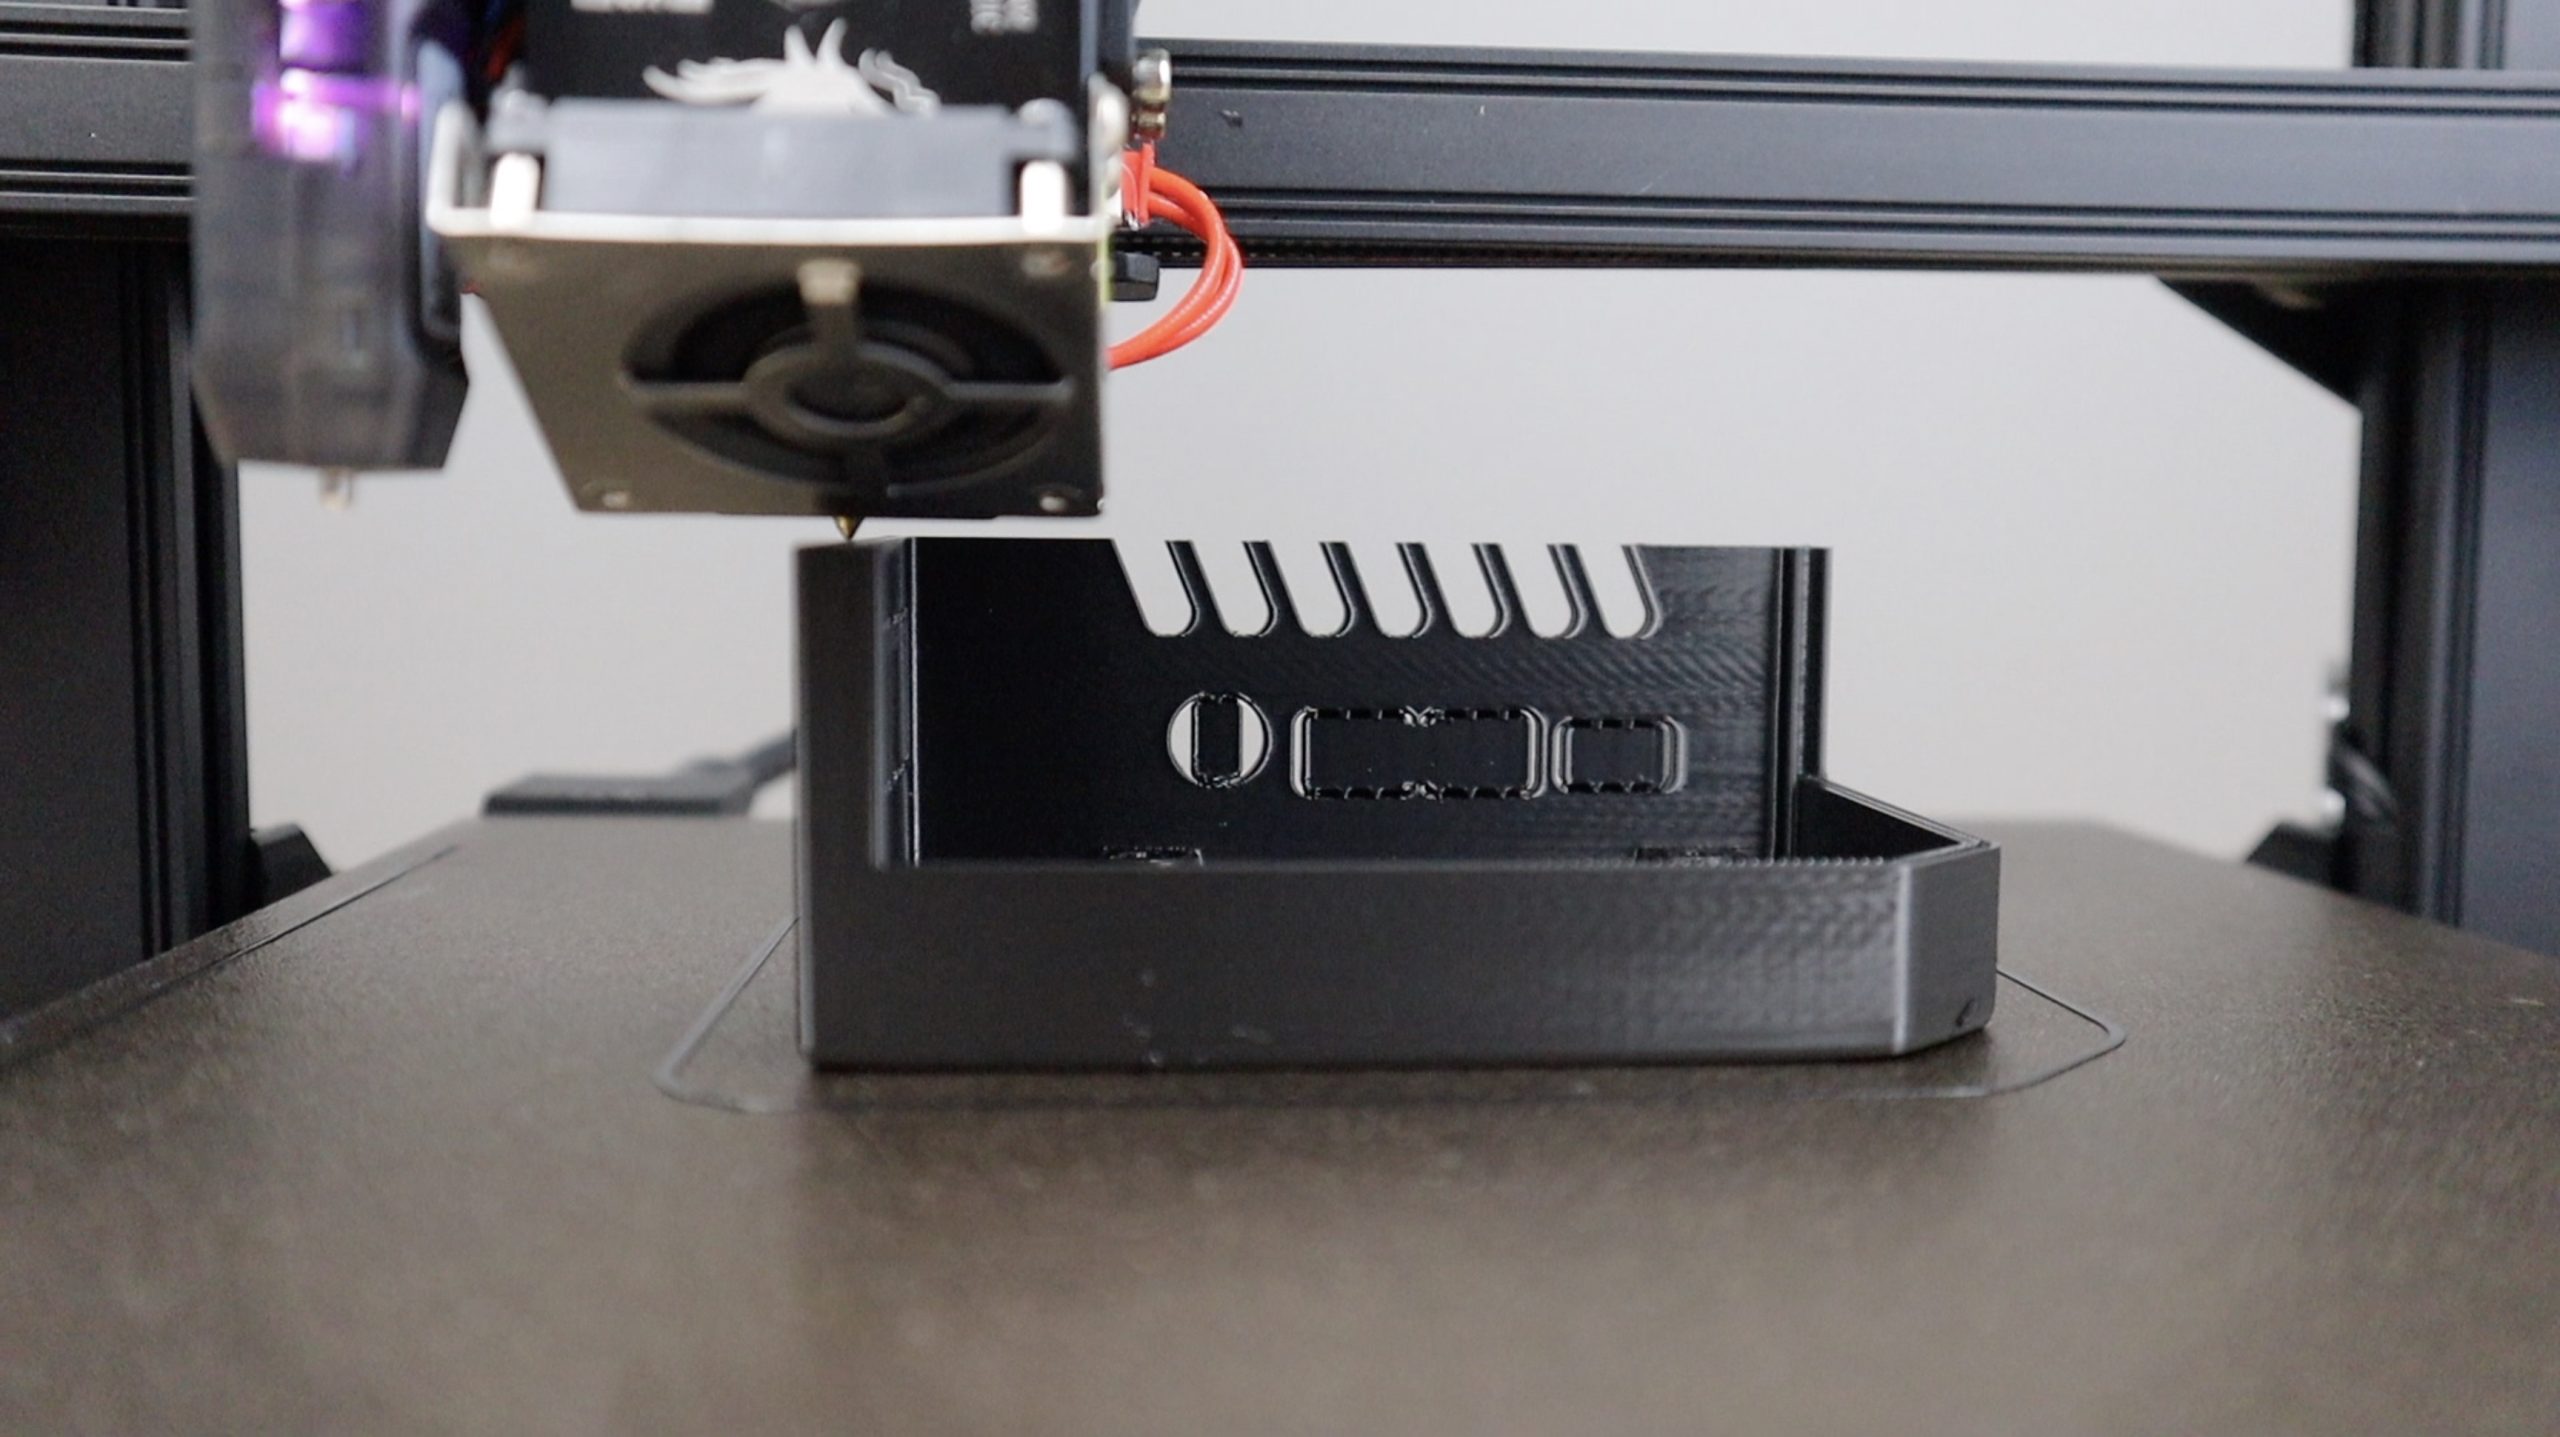
These prints came out really well for one of the first prints I’ve done on the Ender-3 S1 Pro. I’m impressed by the quality of the prints and how smooth the layer lines are, they look quite professional.
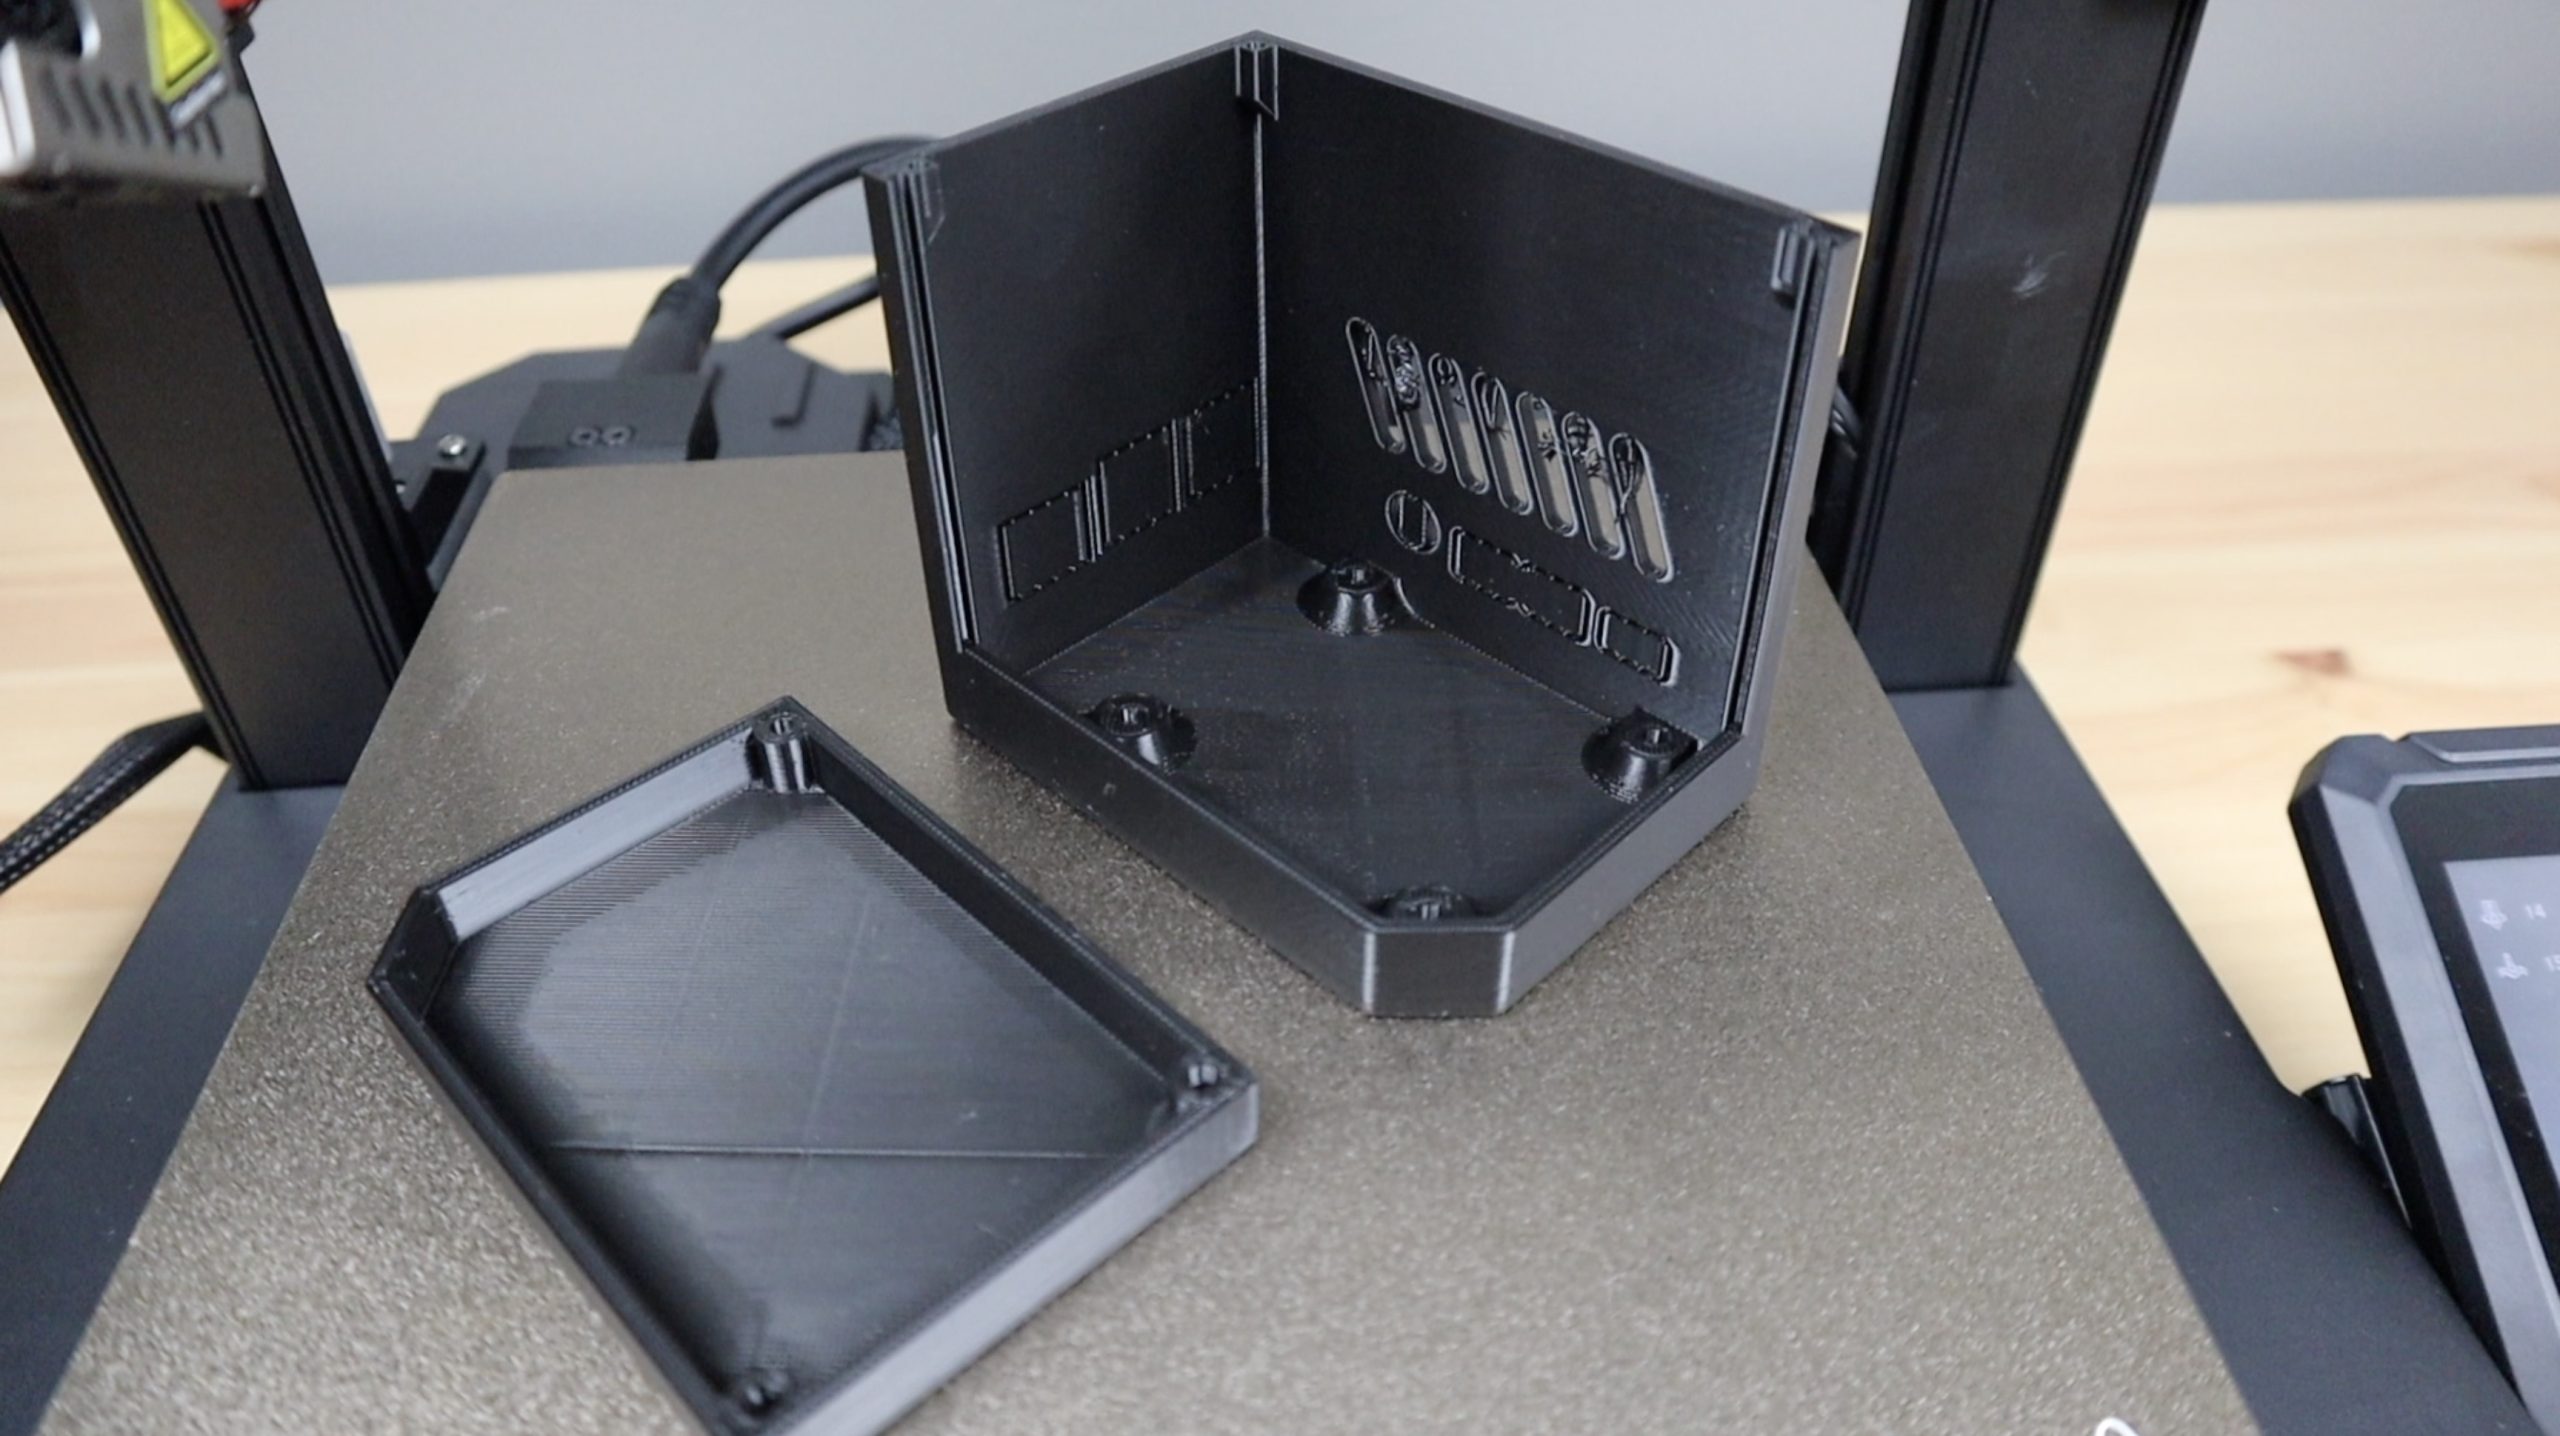
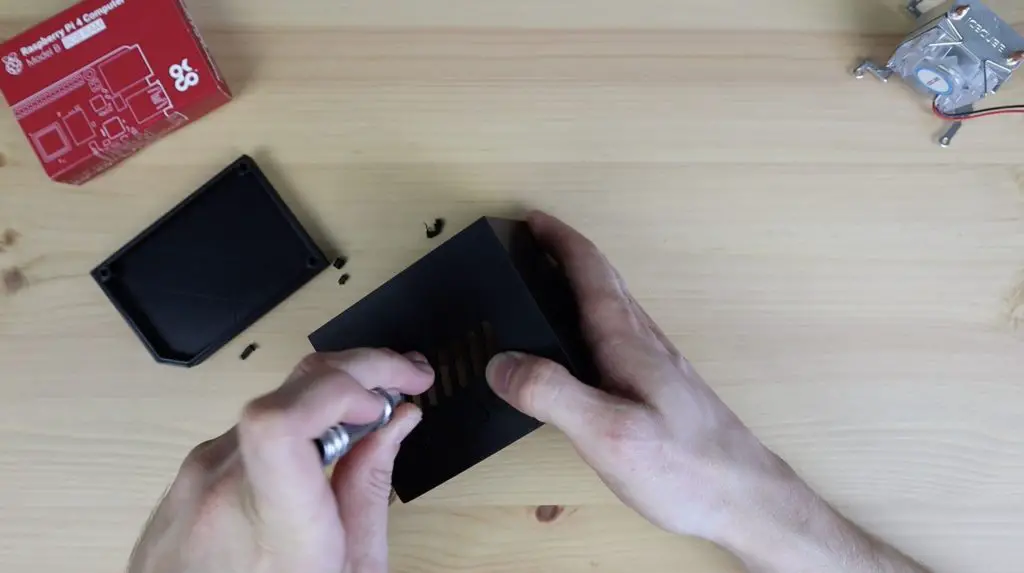
Now that the two halves are printed, we need to clean up the 3D printed parts by removing the print supports.
Next let’s bend the acrylic panel to fit the case. You’ll see the small laser-cut notches along the edges that I’m going to use as guides for my bend lines – so I just need to put the bending tool between these two points and allow it to soften the acrylic.
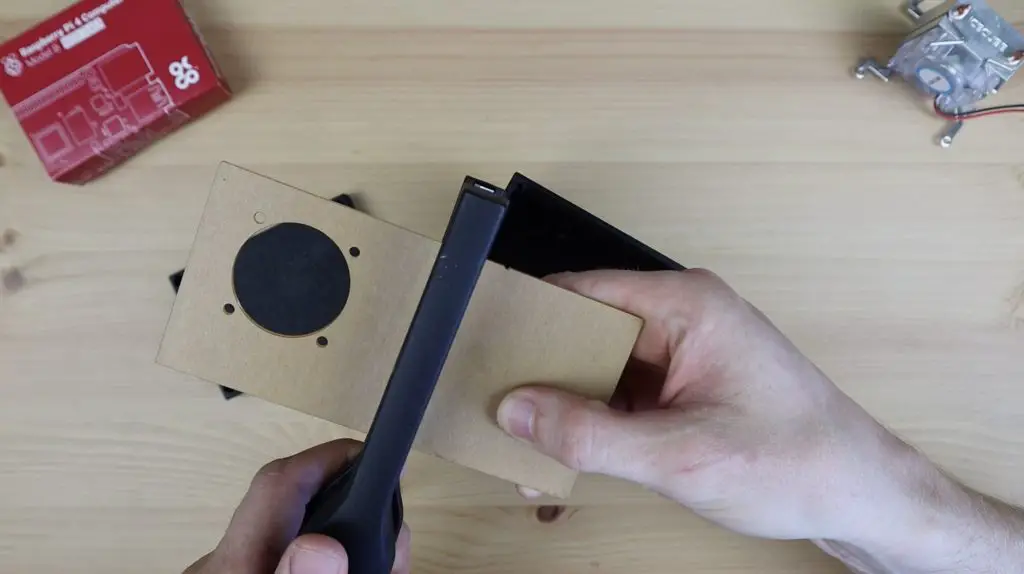
Once the first bend has been heated, I can bend it into place to follow the profile of the case, which I’ll do with the front edge.
Now let’s do the second bend in the same way. This one I’ll need to do in place as I can’t follow the front edge again or it’ll be too big.
I’ve designed guides along the edges to hold the acrylic, so I’ll use those guides to get the final shape right.
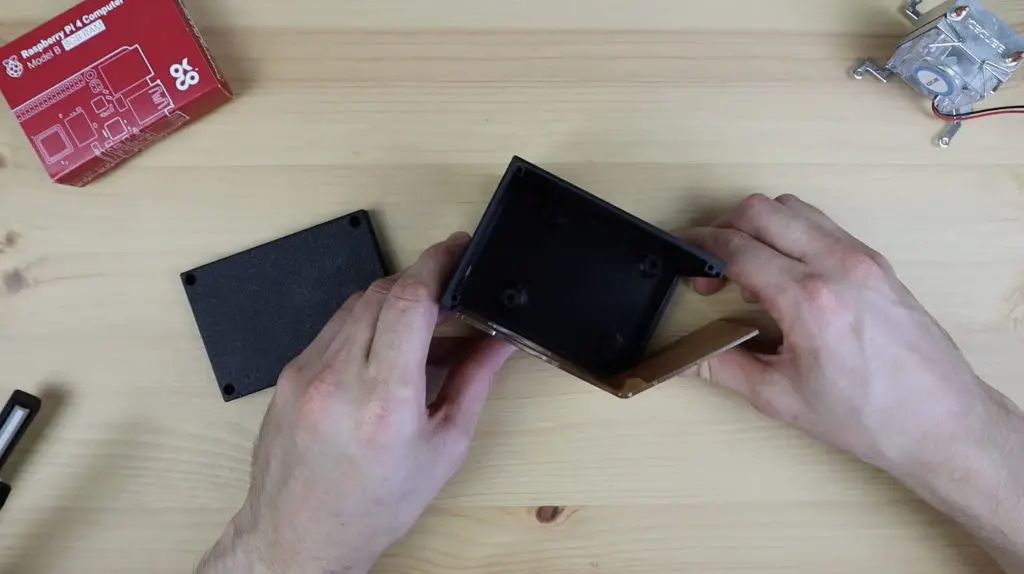
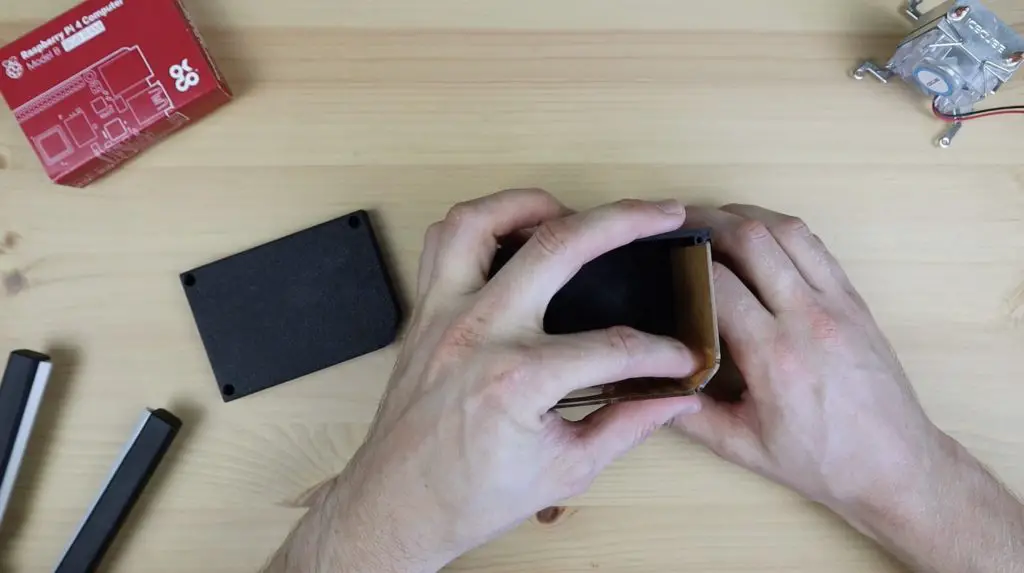
I think that’s come out quite nicely and it looks like the acrylic follows the profile of the case quite well.
Installing The Pi And Cooler Into The Case
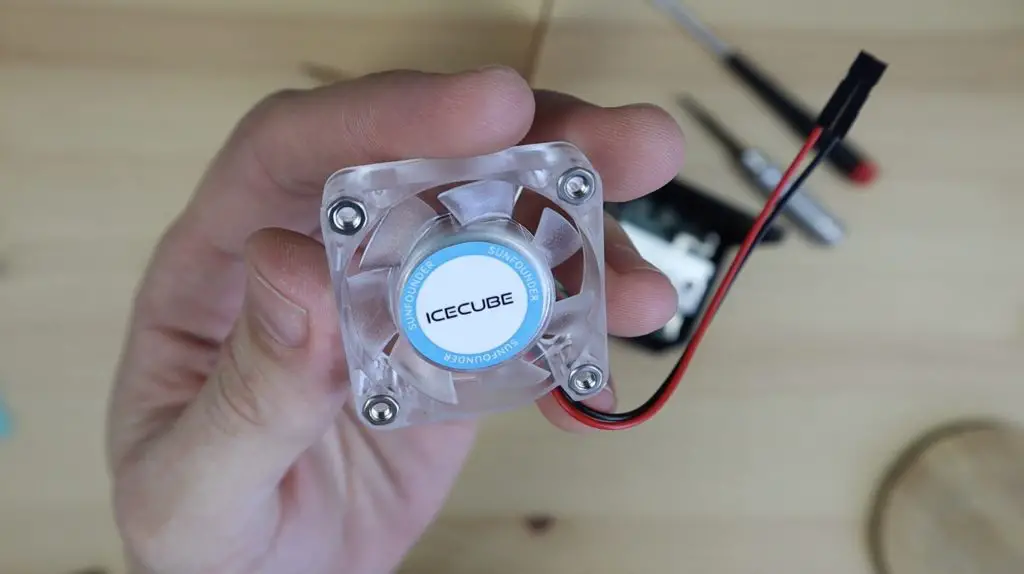
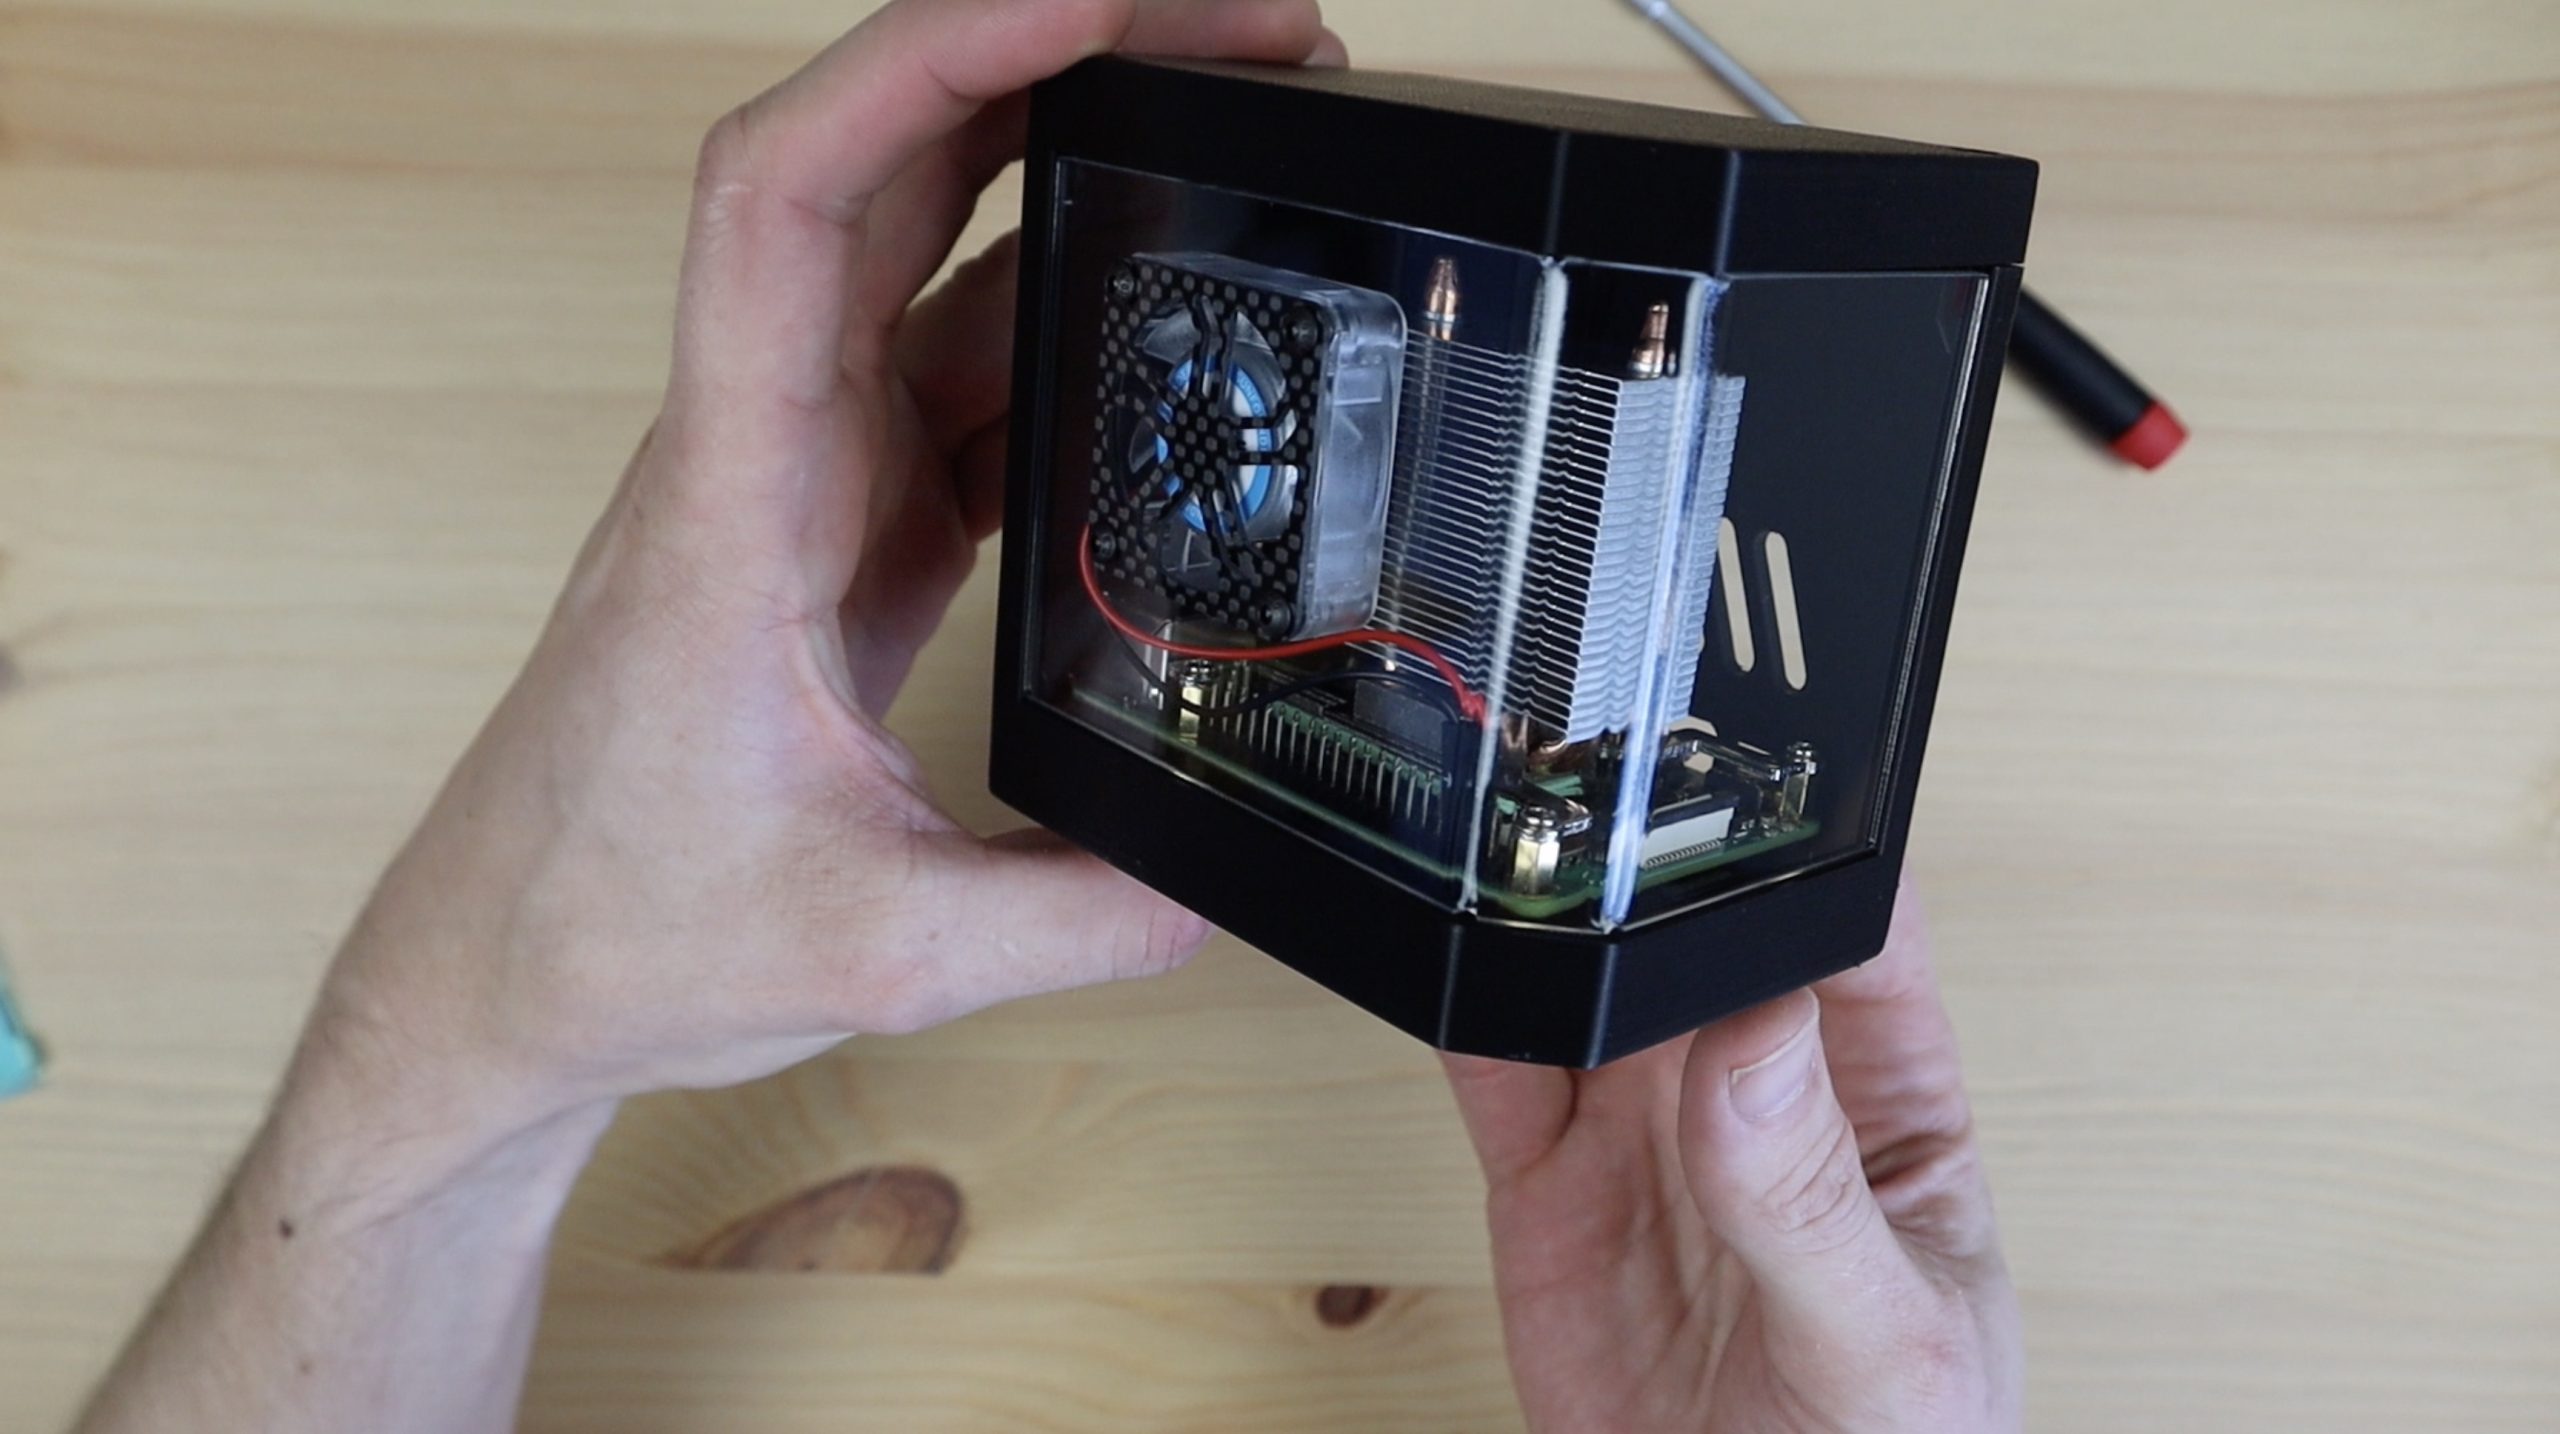
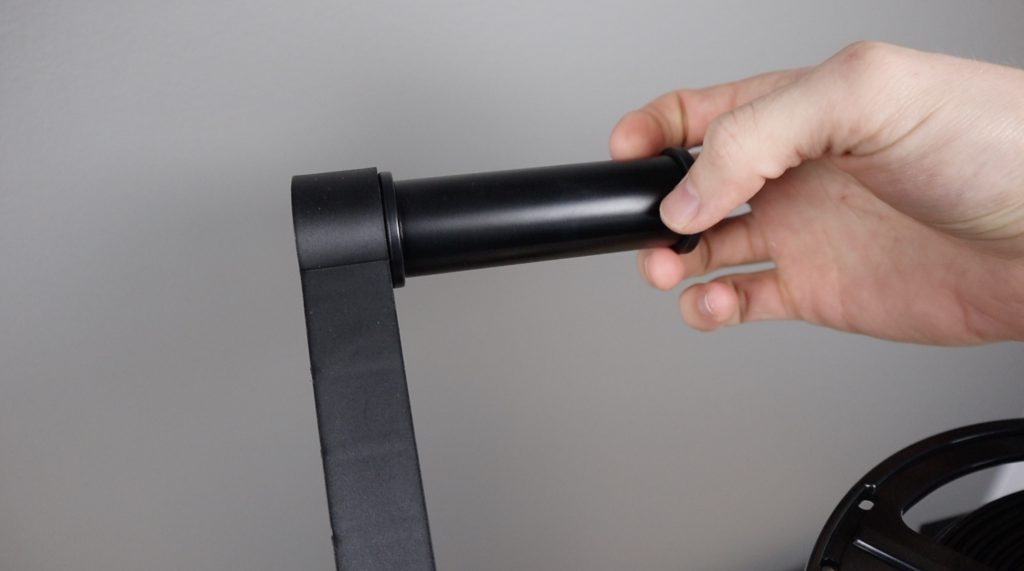
For cooling, I’m going to use an Ice Cube cooler by Sunfounder. This cooler is an improvement over the Ice Tower I used previously as the base has now been designed to cover the CPU, RAM, Ethernet and USB controller chips rather than just the CPU – so this should provide better cooling to the whole board.
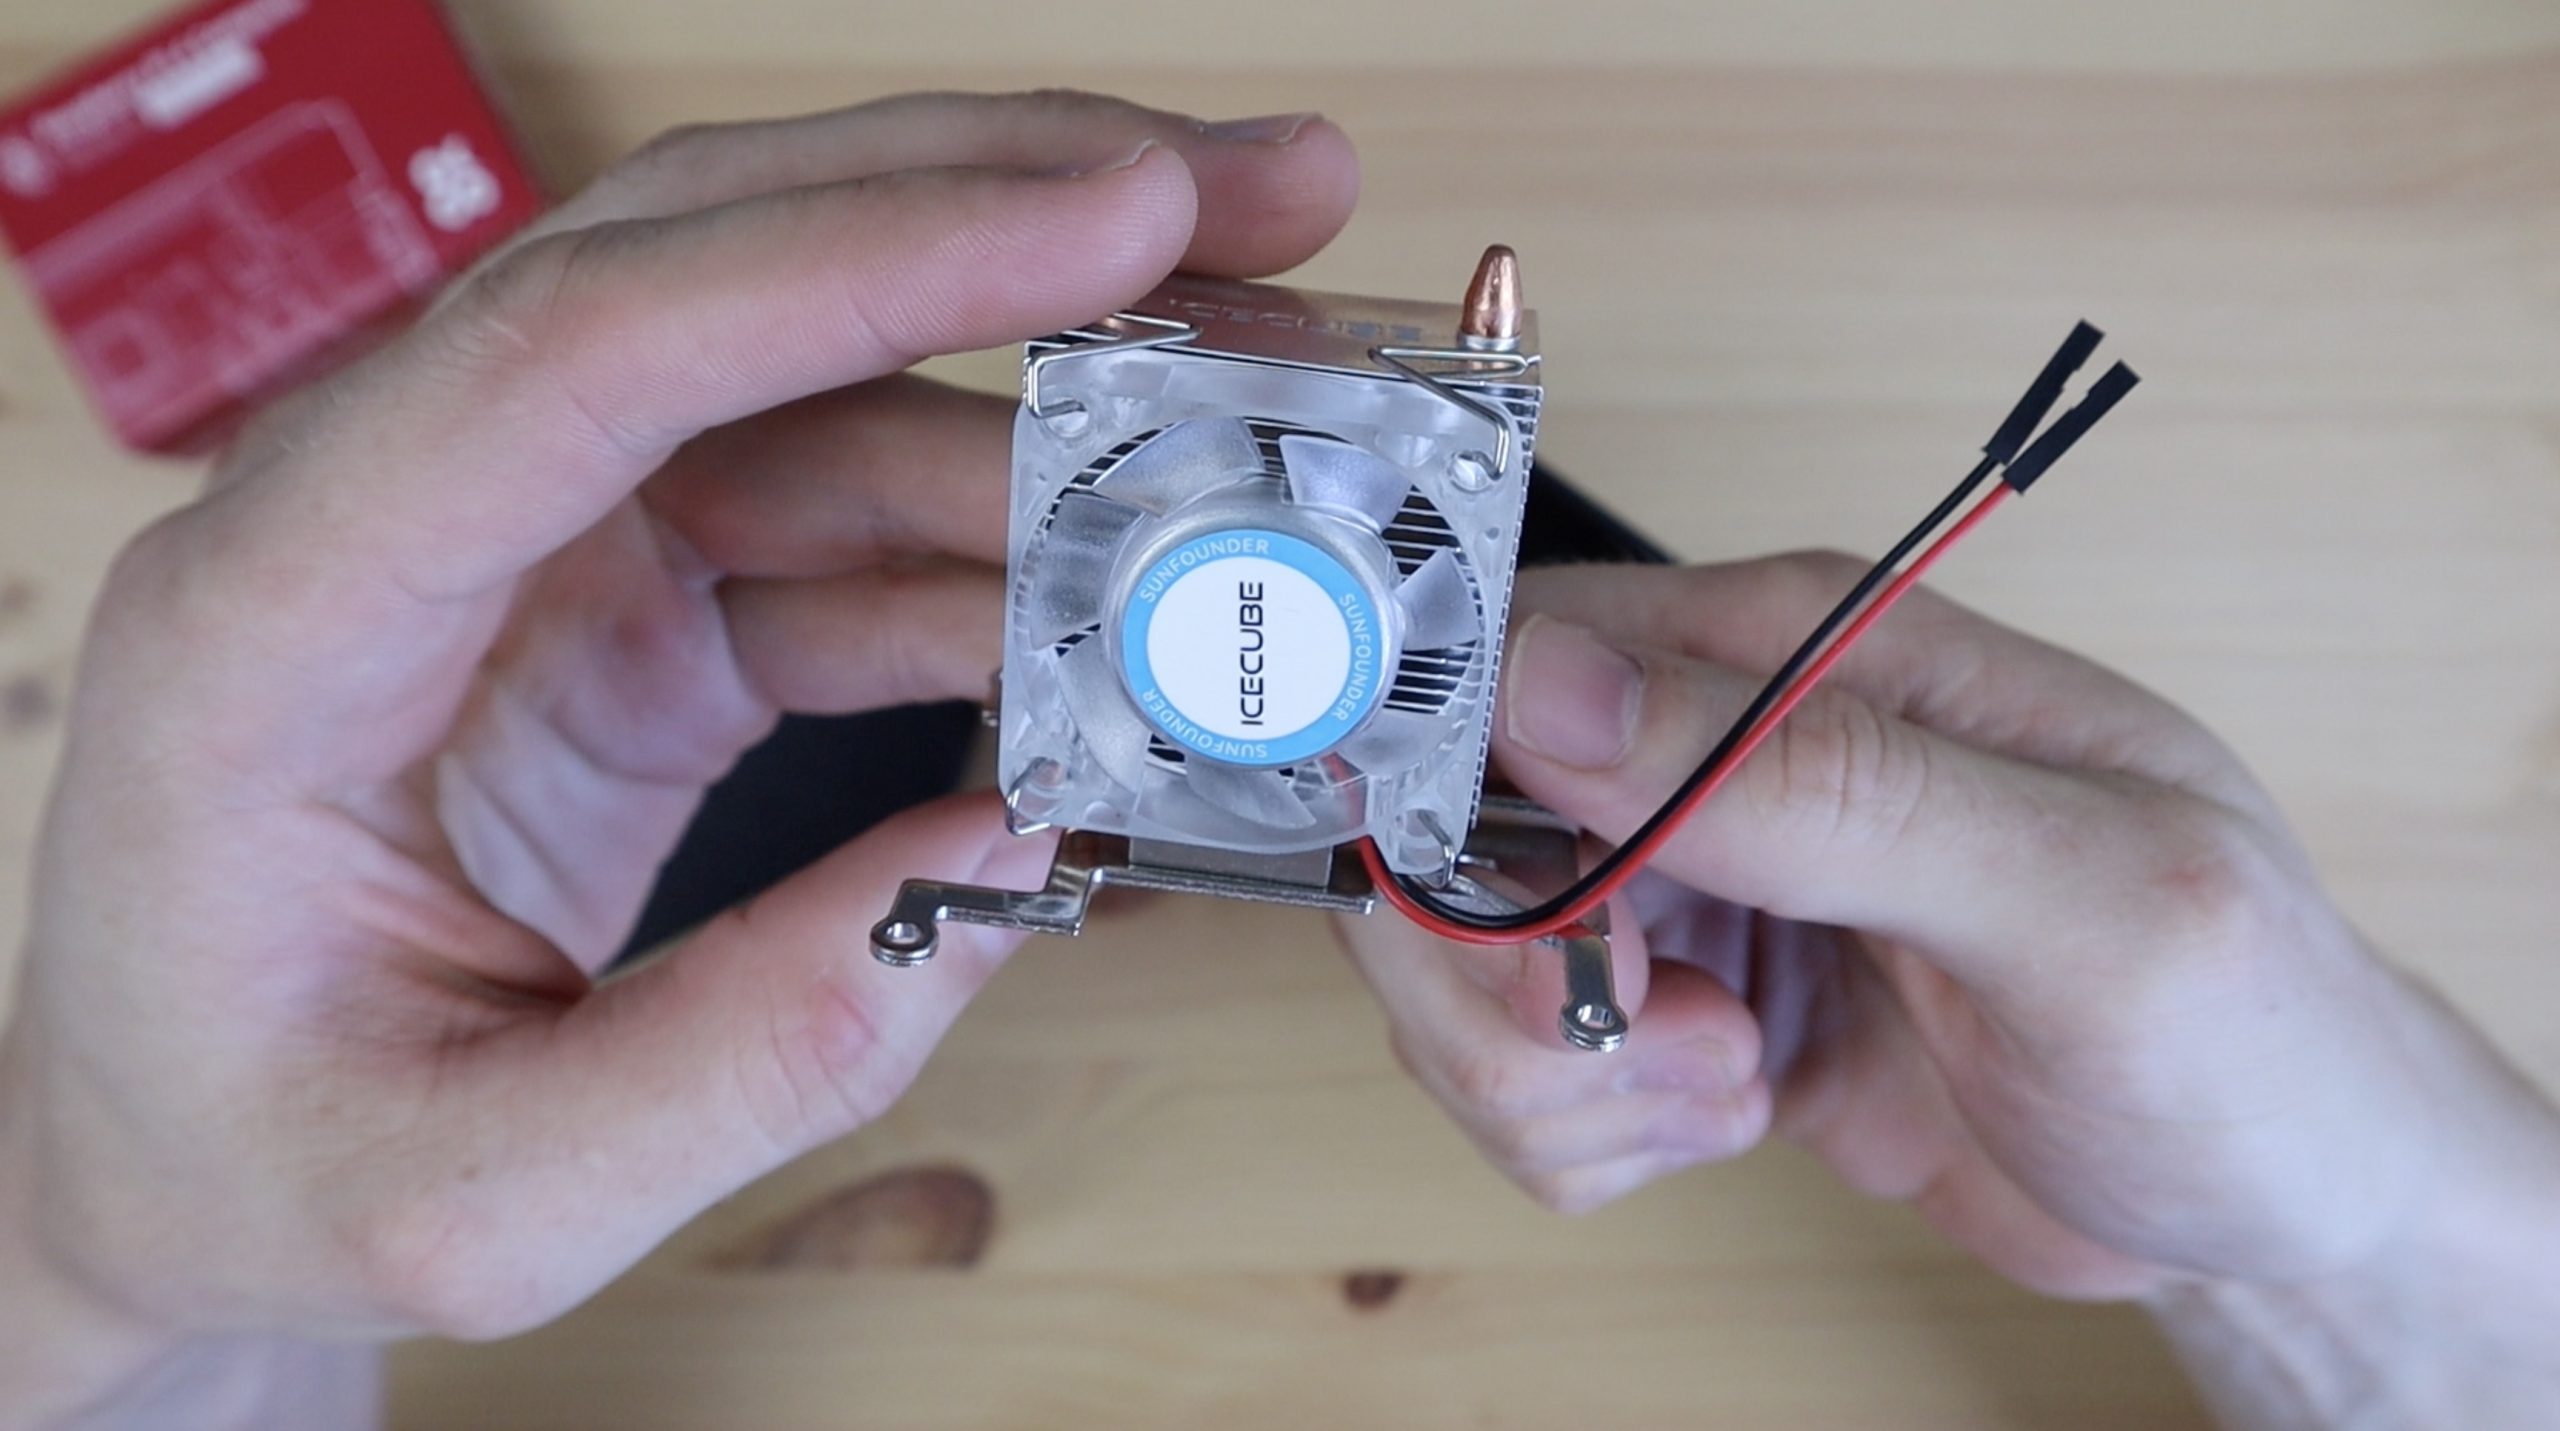
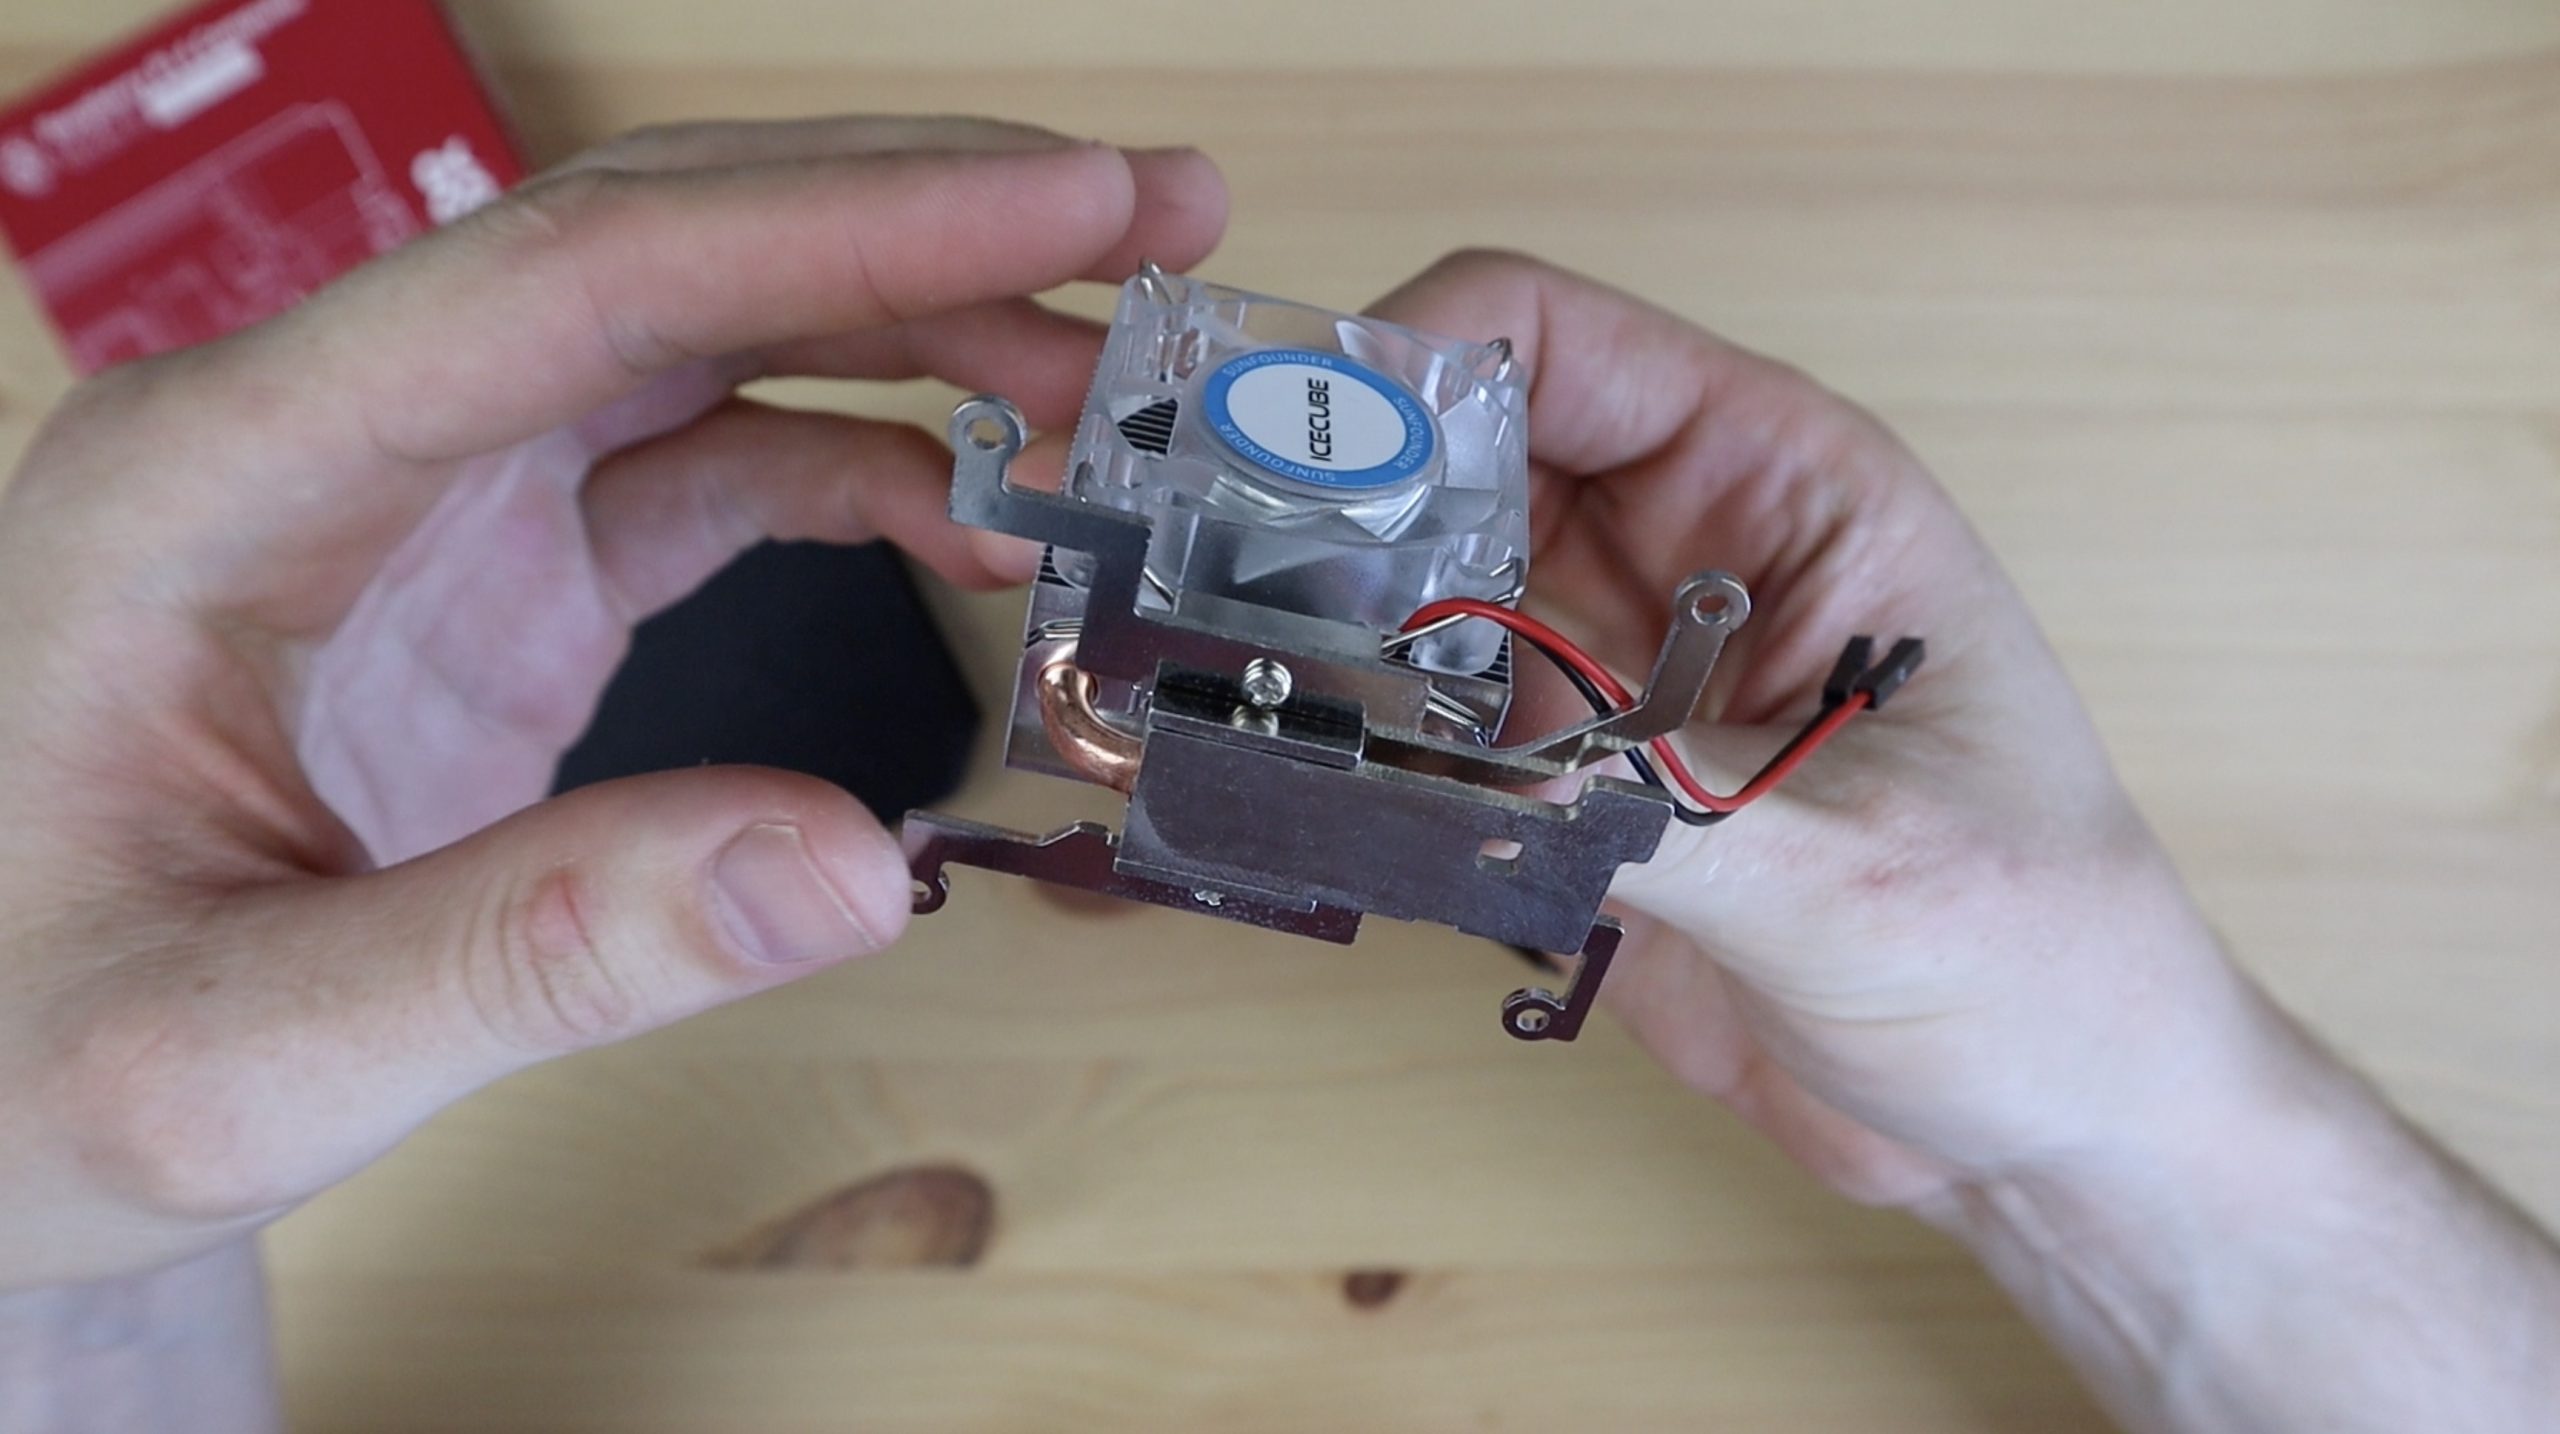
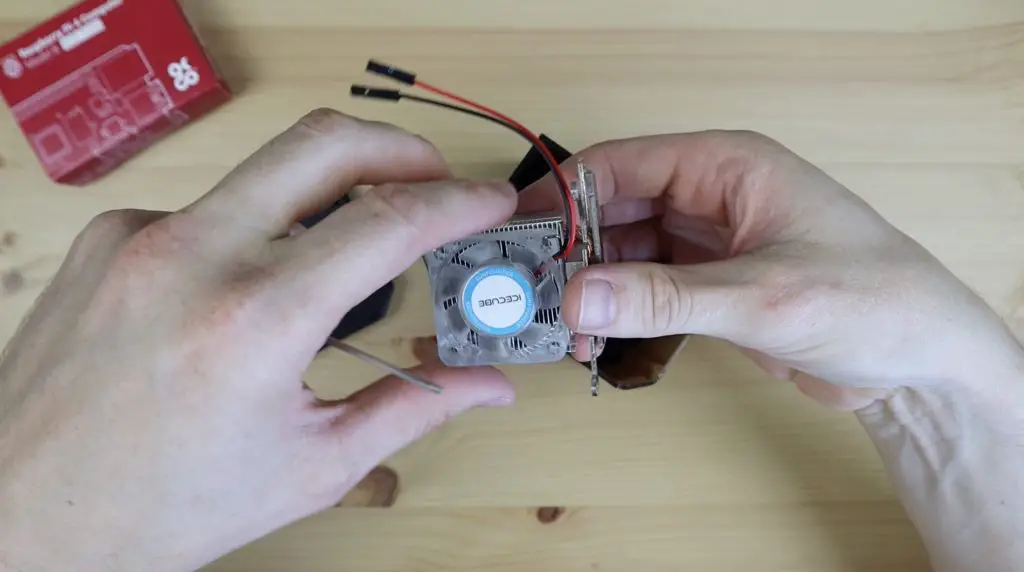
As with my previous design, I’m going to remove the fan from the Ice Cube and move it onto the acrylic side panel rather so that it draws cool air in from outside the case.
I’m going to be installing my 8GB, Rasberry Pi 4b, running from a 32GB Sandisk Extreme microSD card with Raspberry Pi OS Bullseye flashed.
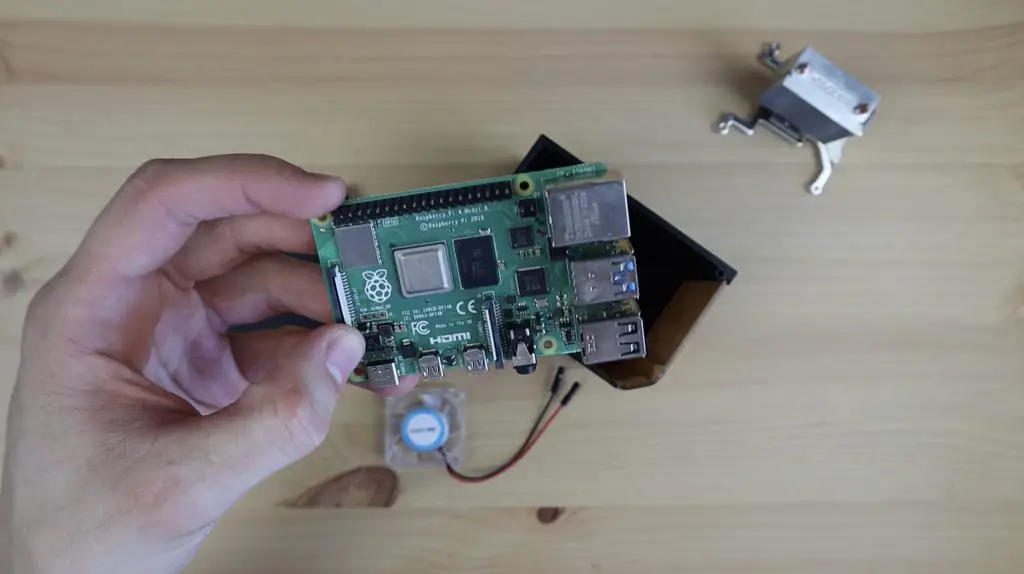
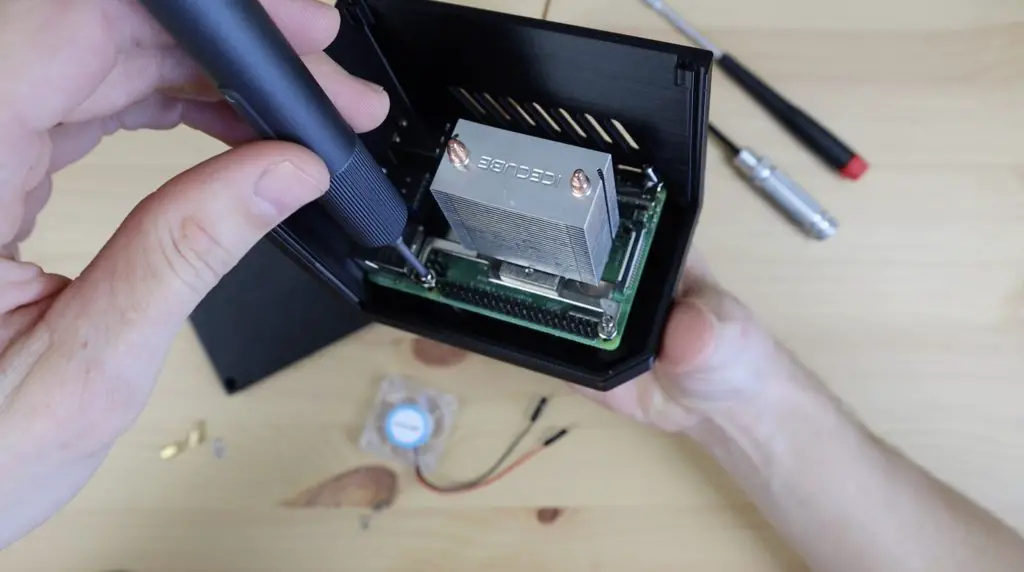
To install the Pi into the case, we need to first secure the brass standoffs in the base of the case. These protrude through the printed standoffs and are held in place with an M2.5 nut on the bottom.
Next we can position our Raspberry Pi on the standoffs and then add a second standoff onto each to hold it in place.
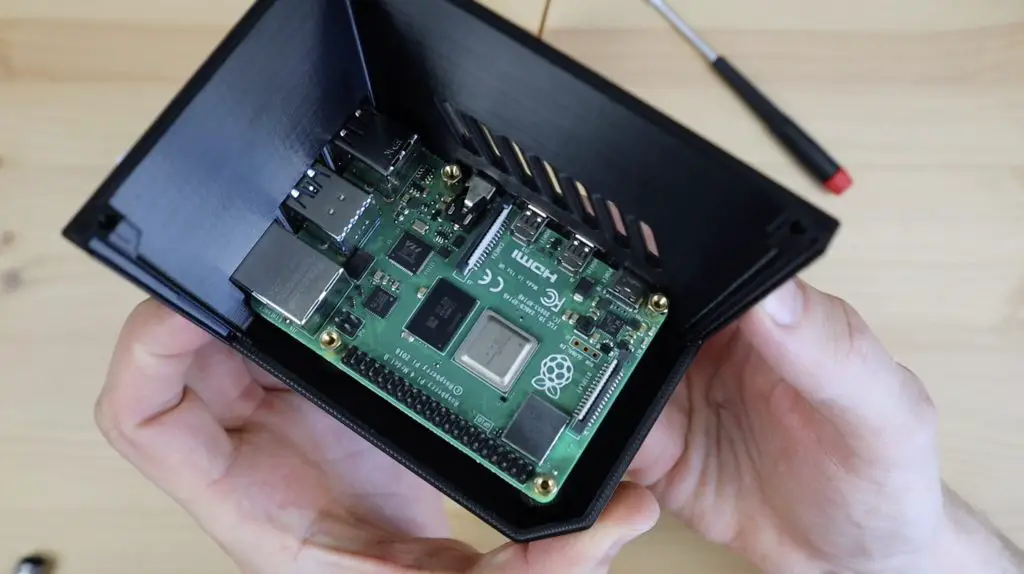
Lastly, we can install the Ice Cube cooler on the Pi. Remember to add the cooling pads to the heat sink before you install it.
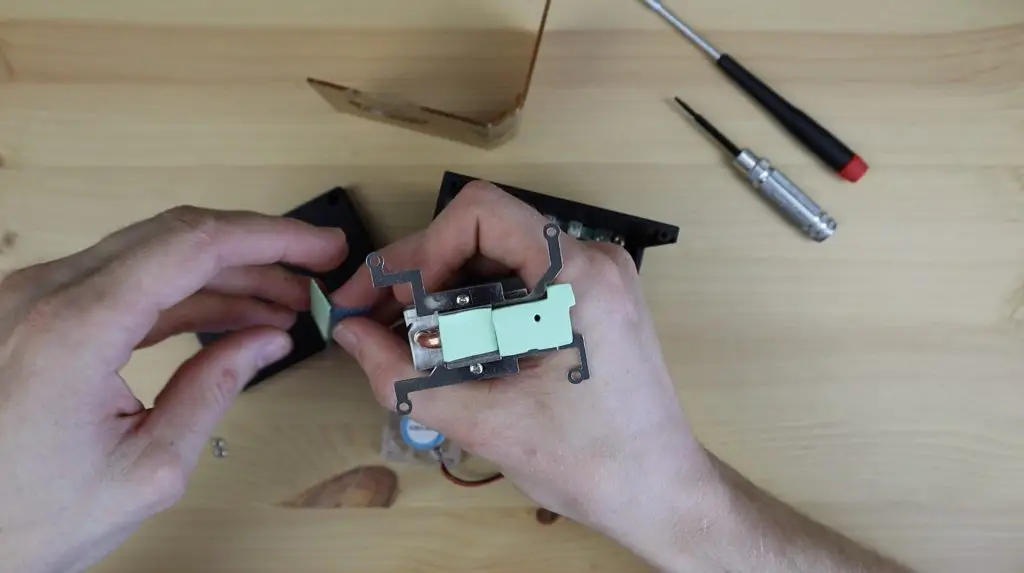
Now we just use the included M2.5 screws to hold the cooler in place.
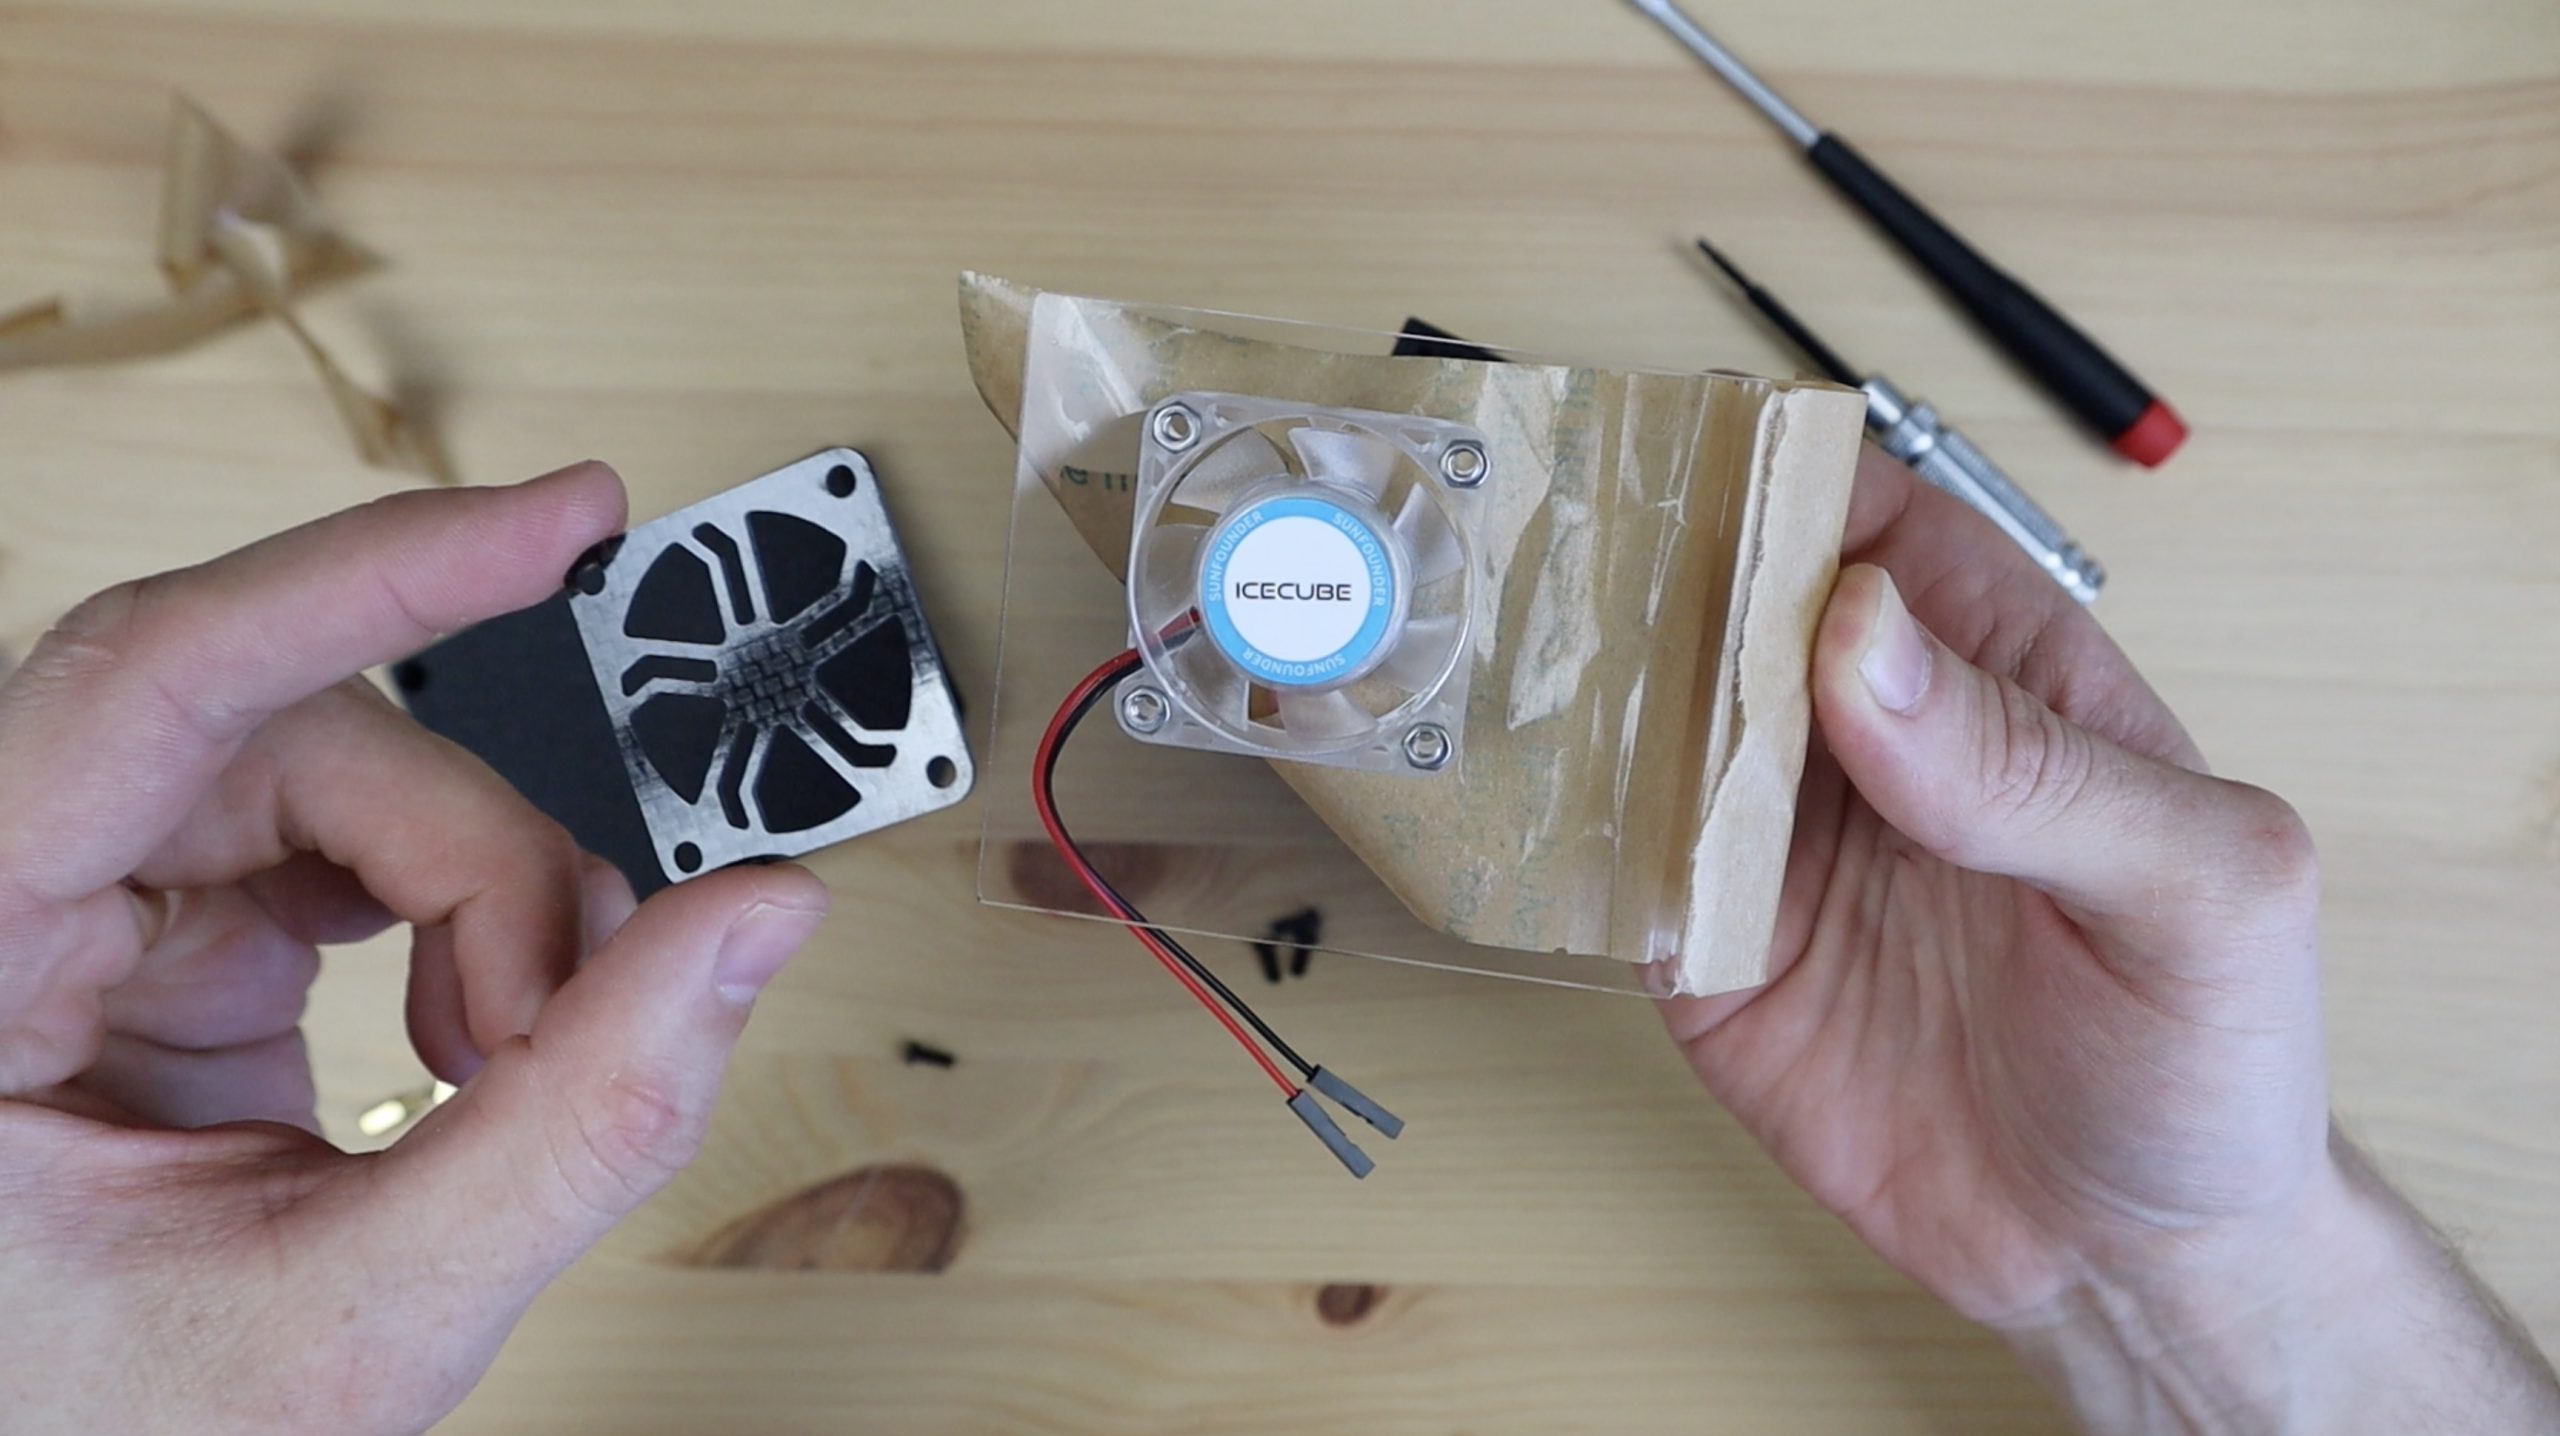
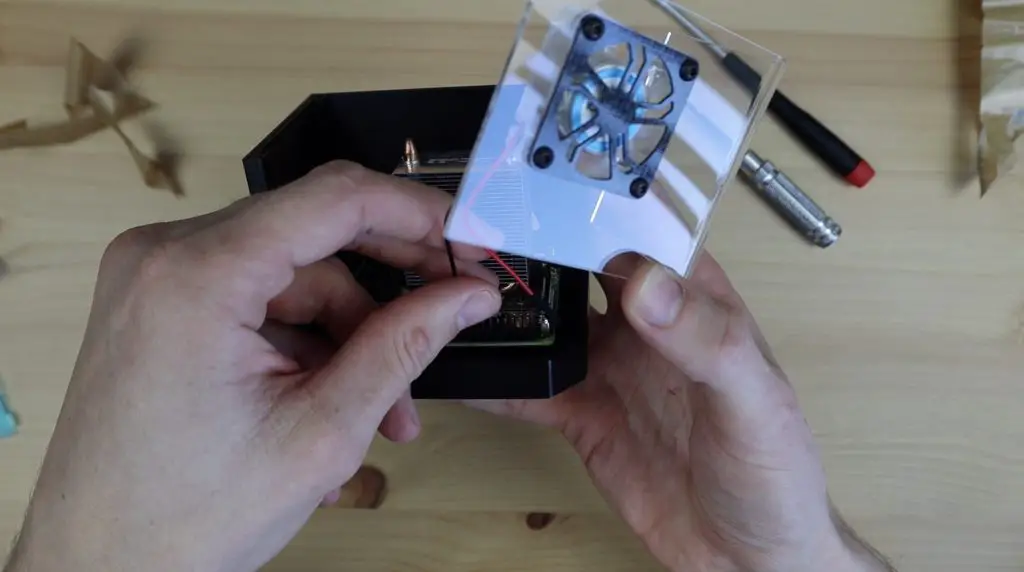
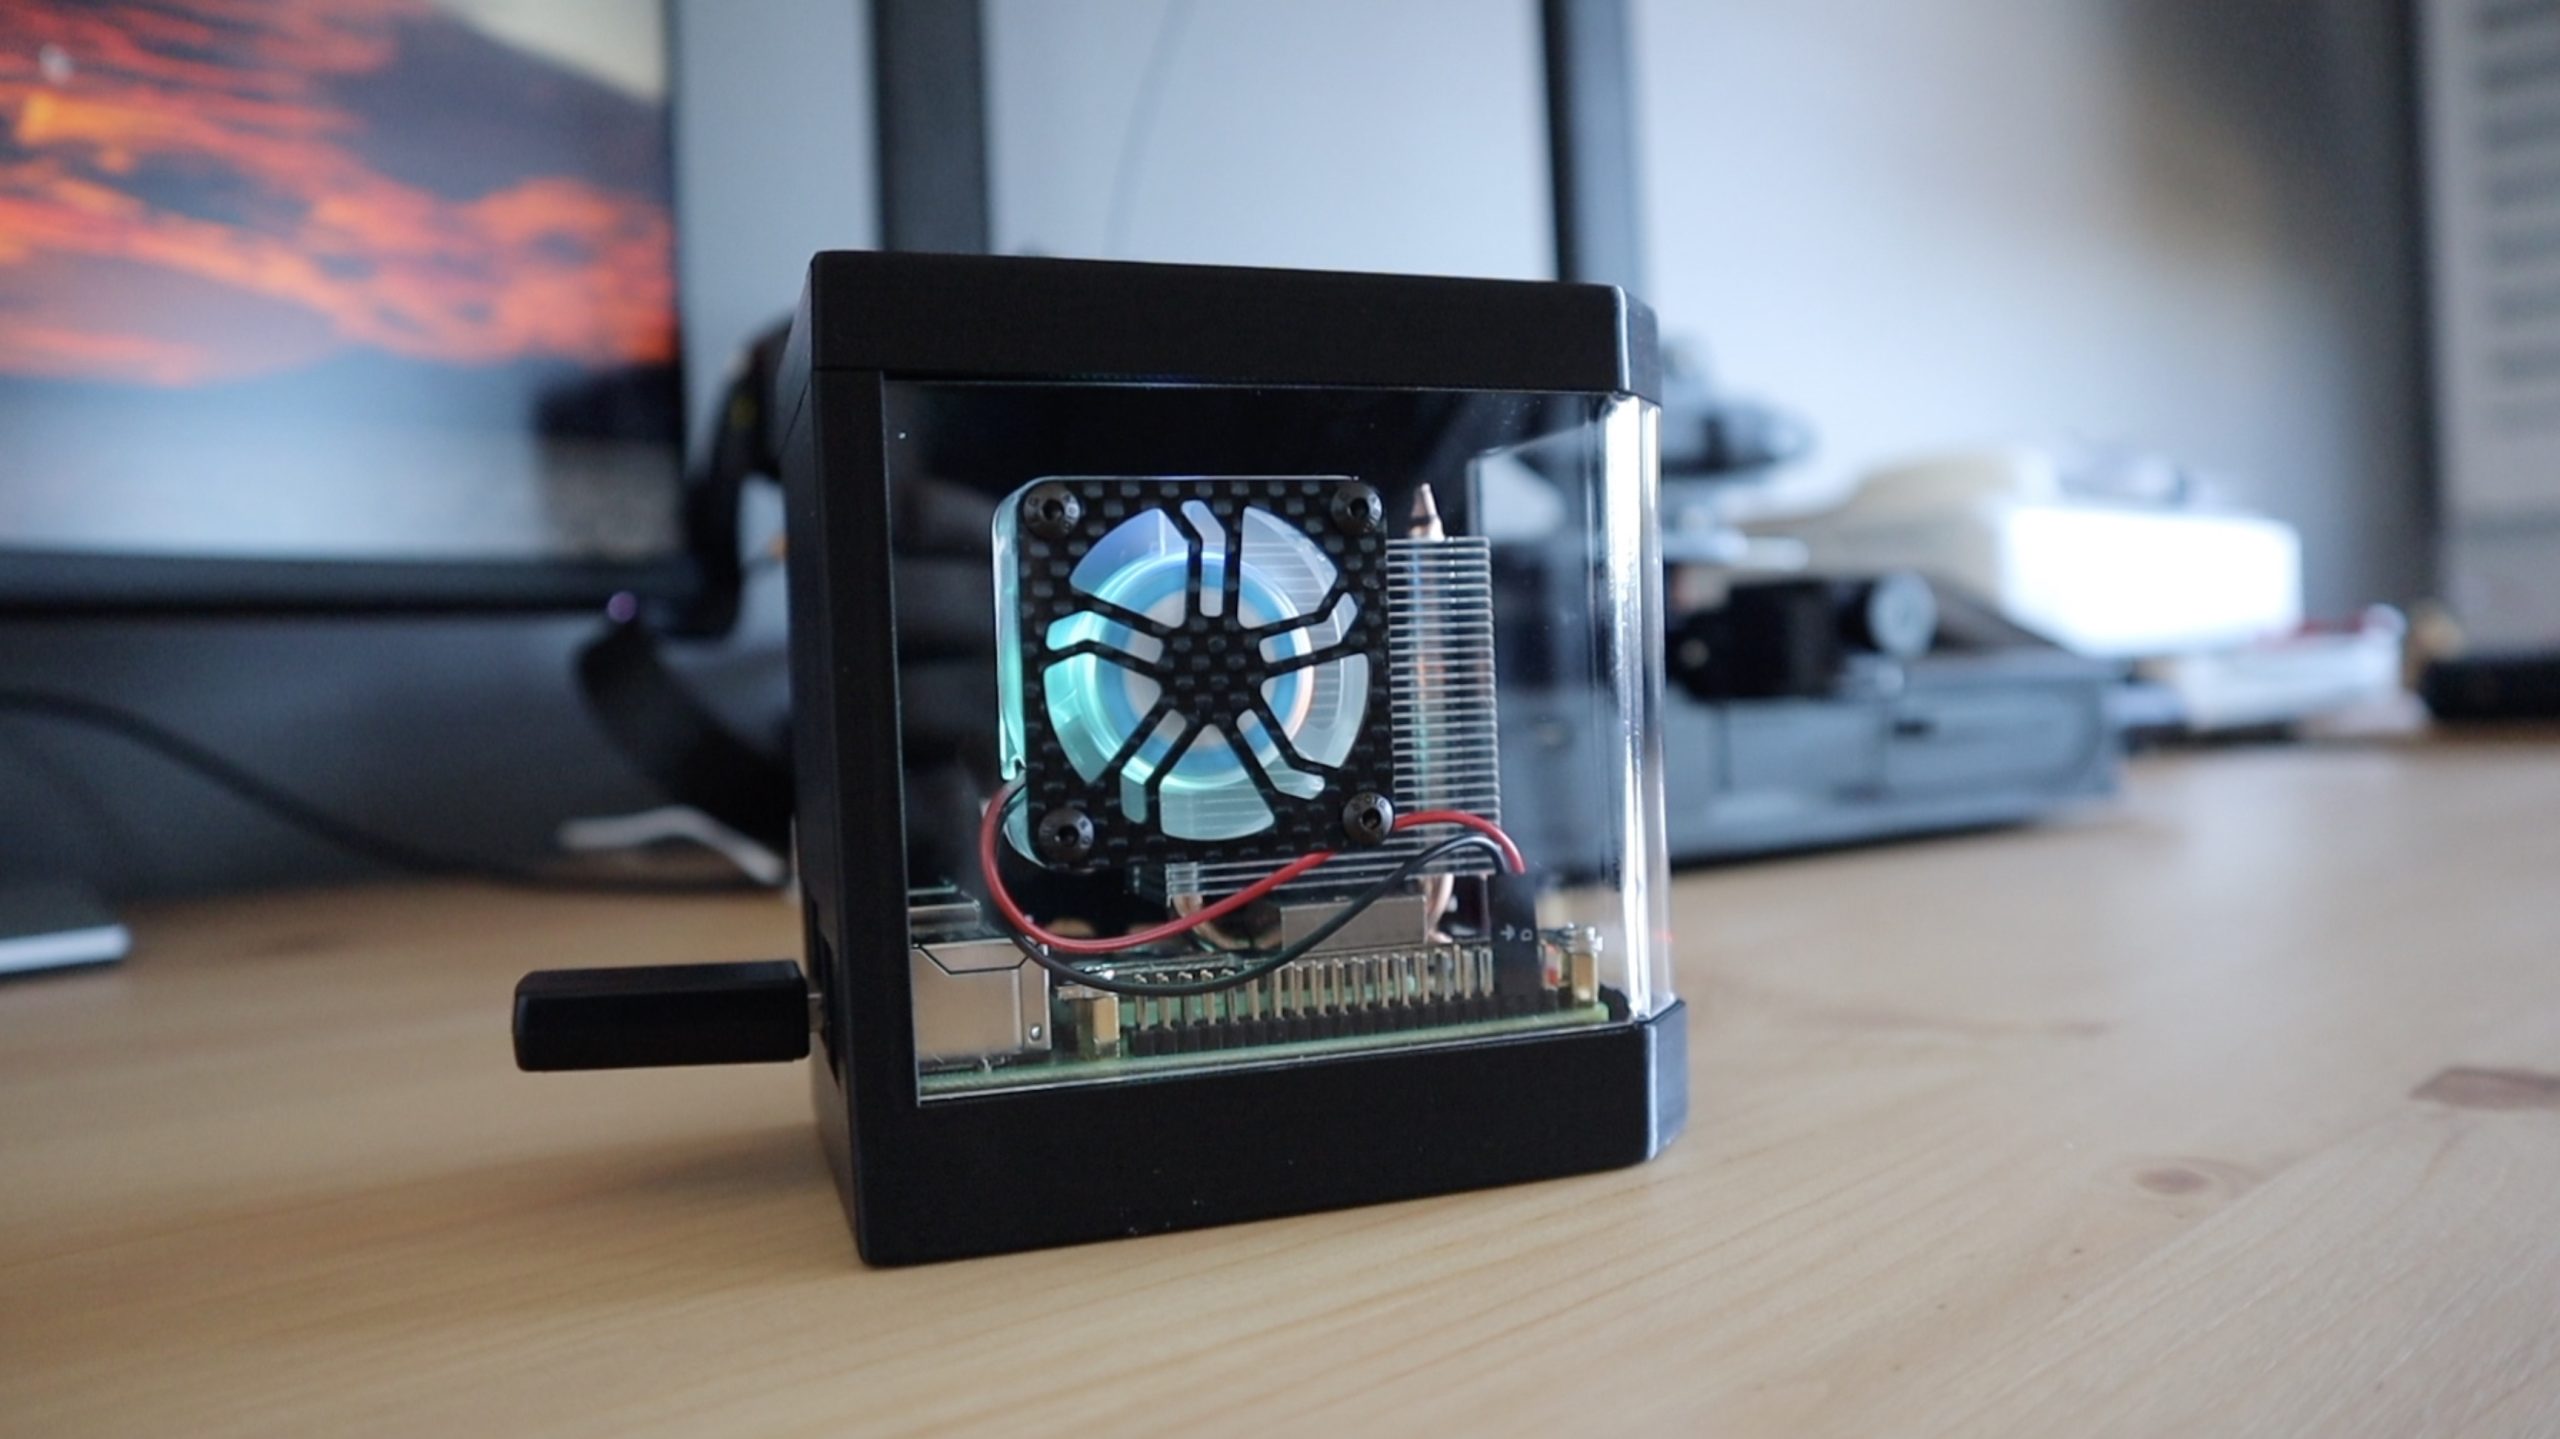
With the acrylic’s shape already formed, let’s mount our fan onto it using four M3x8mm button head screws and nuts. As I’ve done previously, I’m going to press the nuts into the pockets in the fan to screw into. This is easiest done by putting the nut on a flat surface and pressing the fan pocket down onto it.
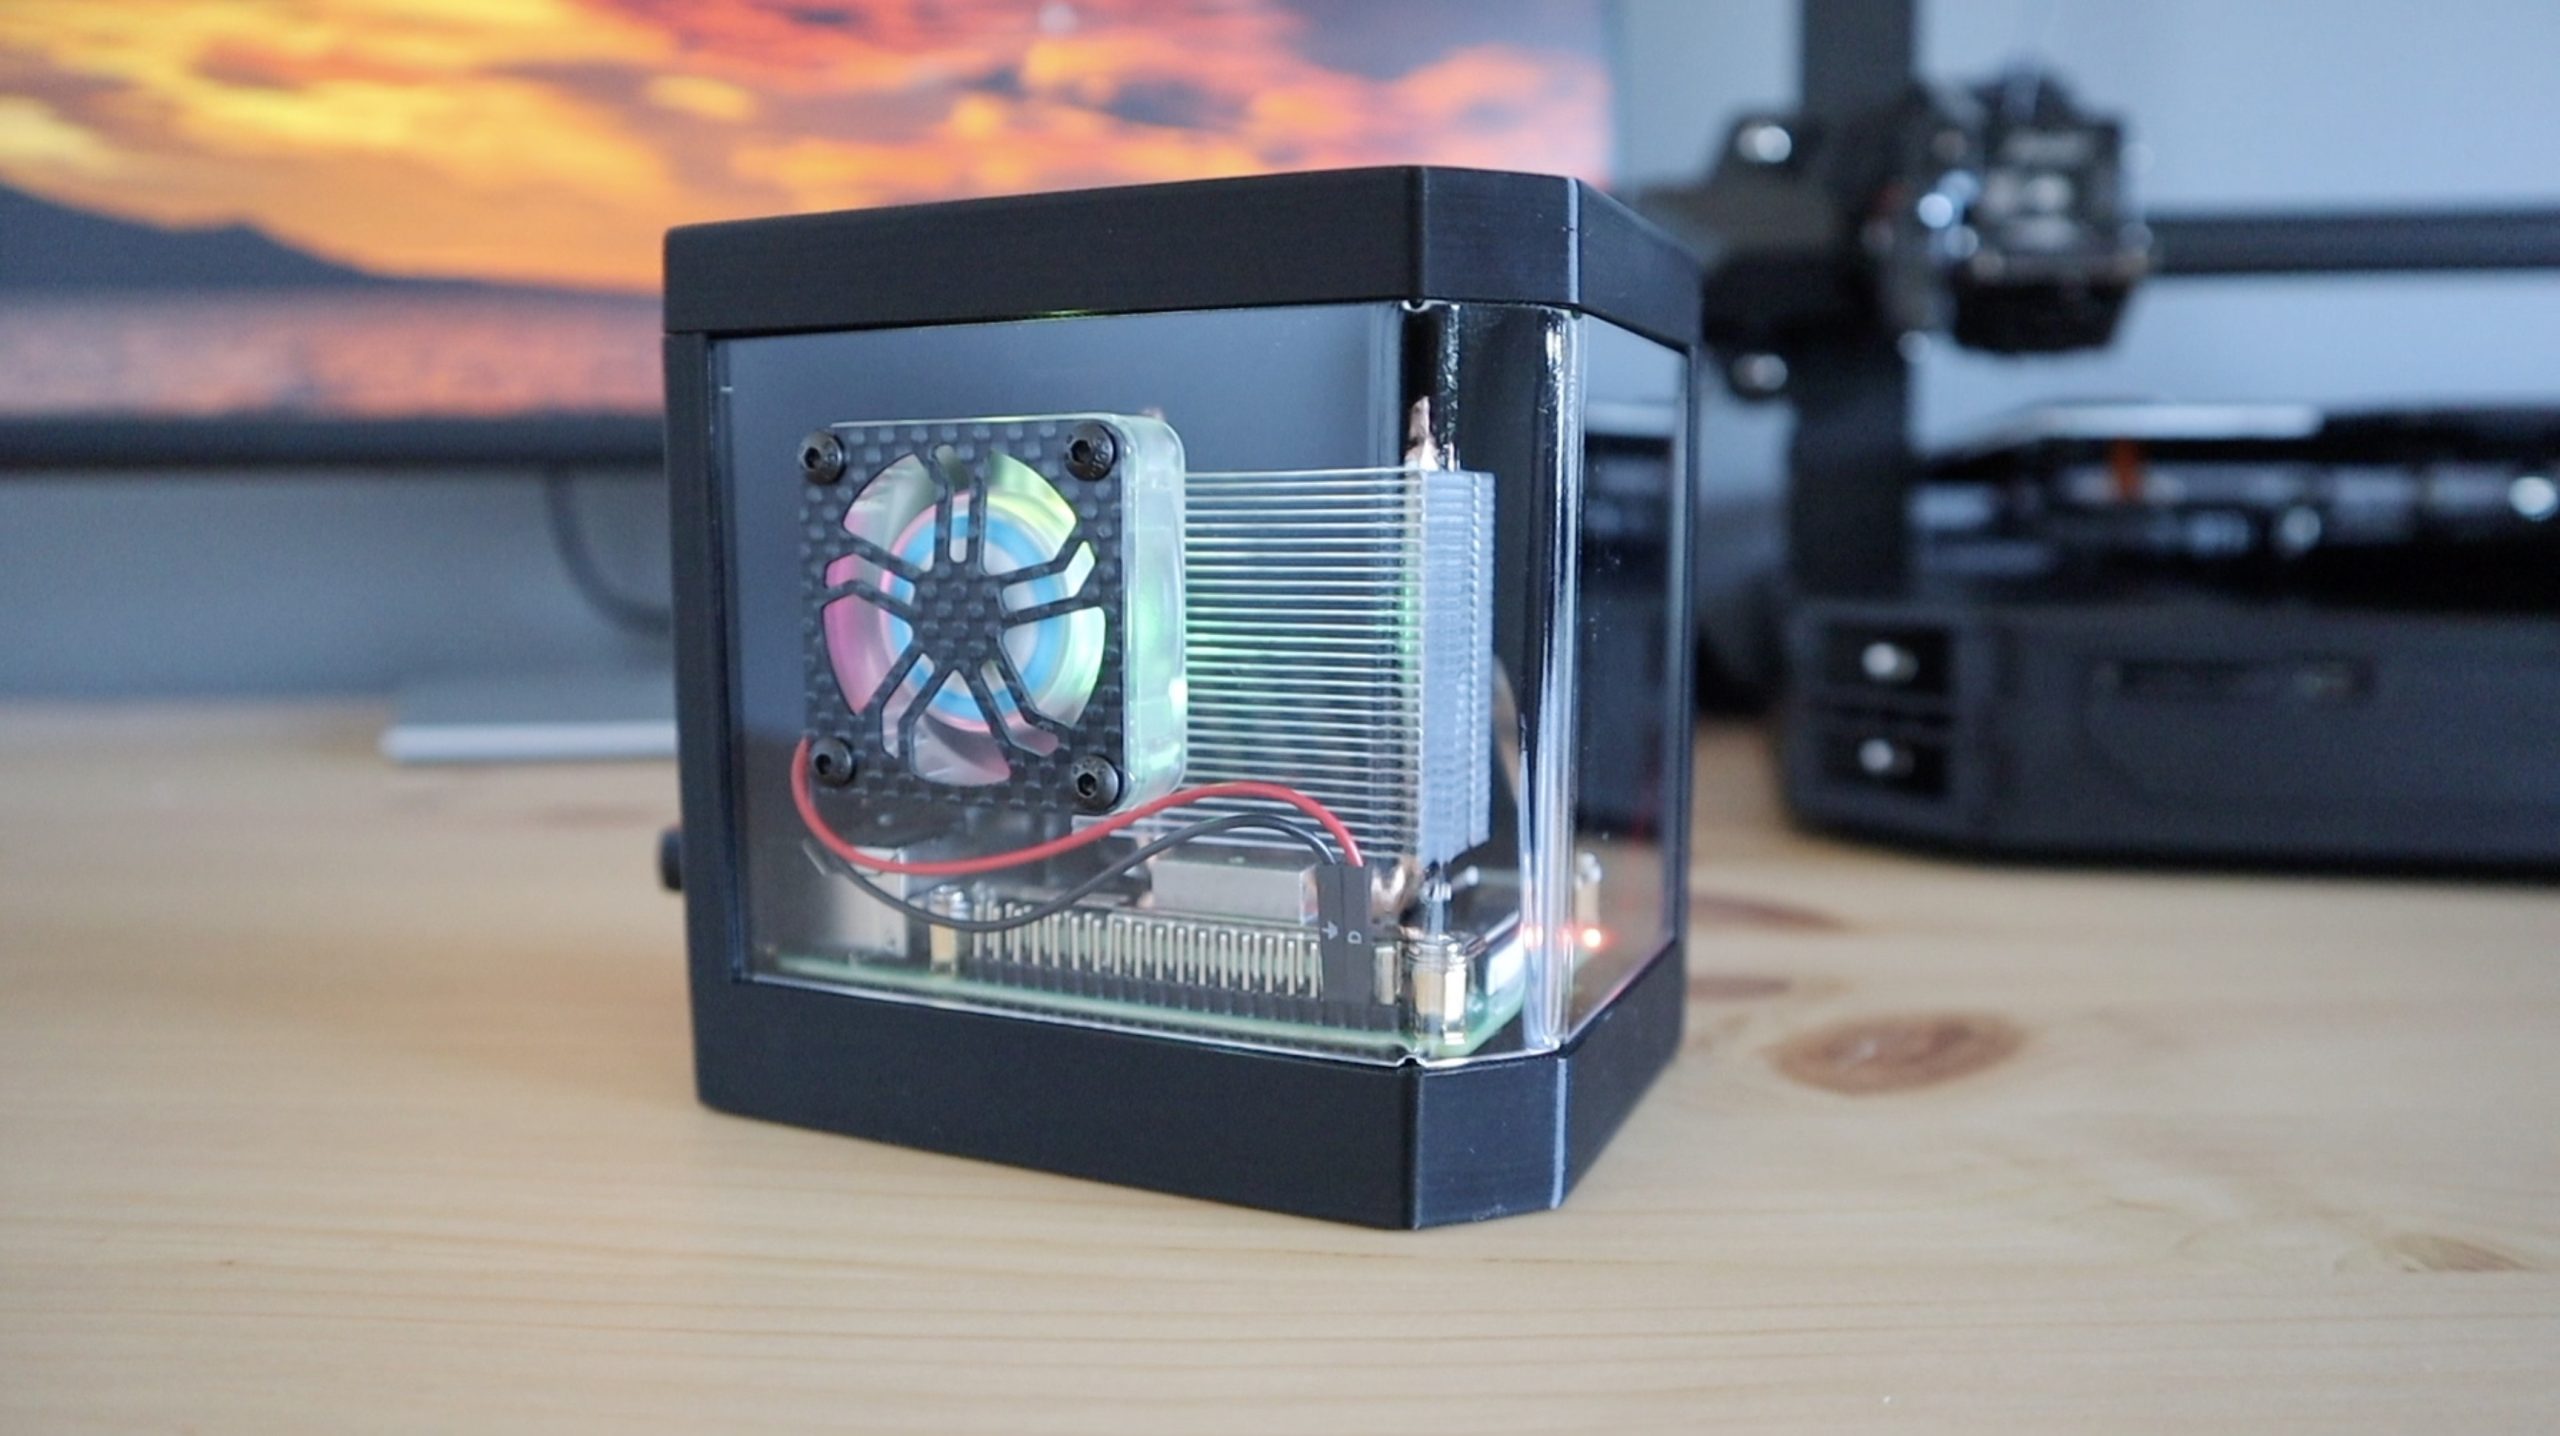
I’ve also got this carbon fibre fan grill I found online that I’m going to install over the fan. You can skip this if you want to see the RGB fan more clearly.
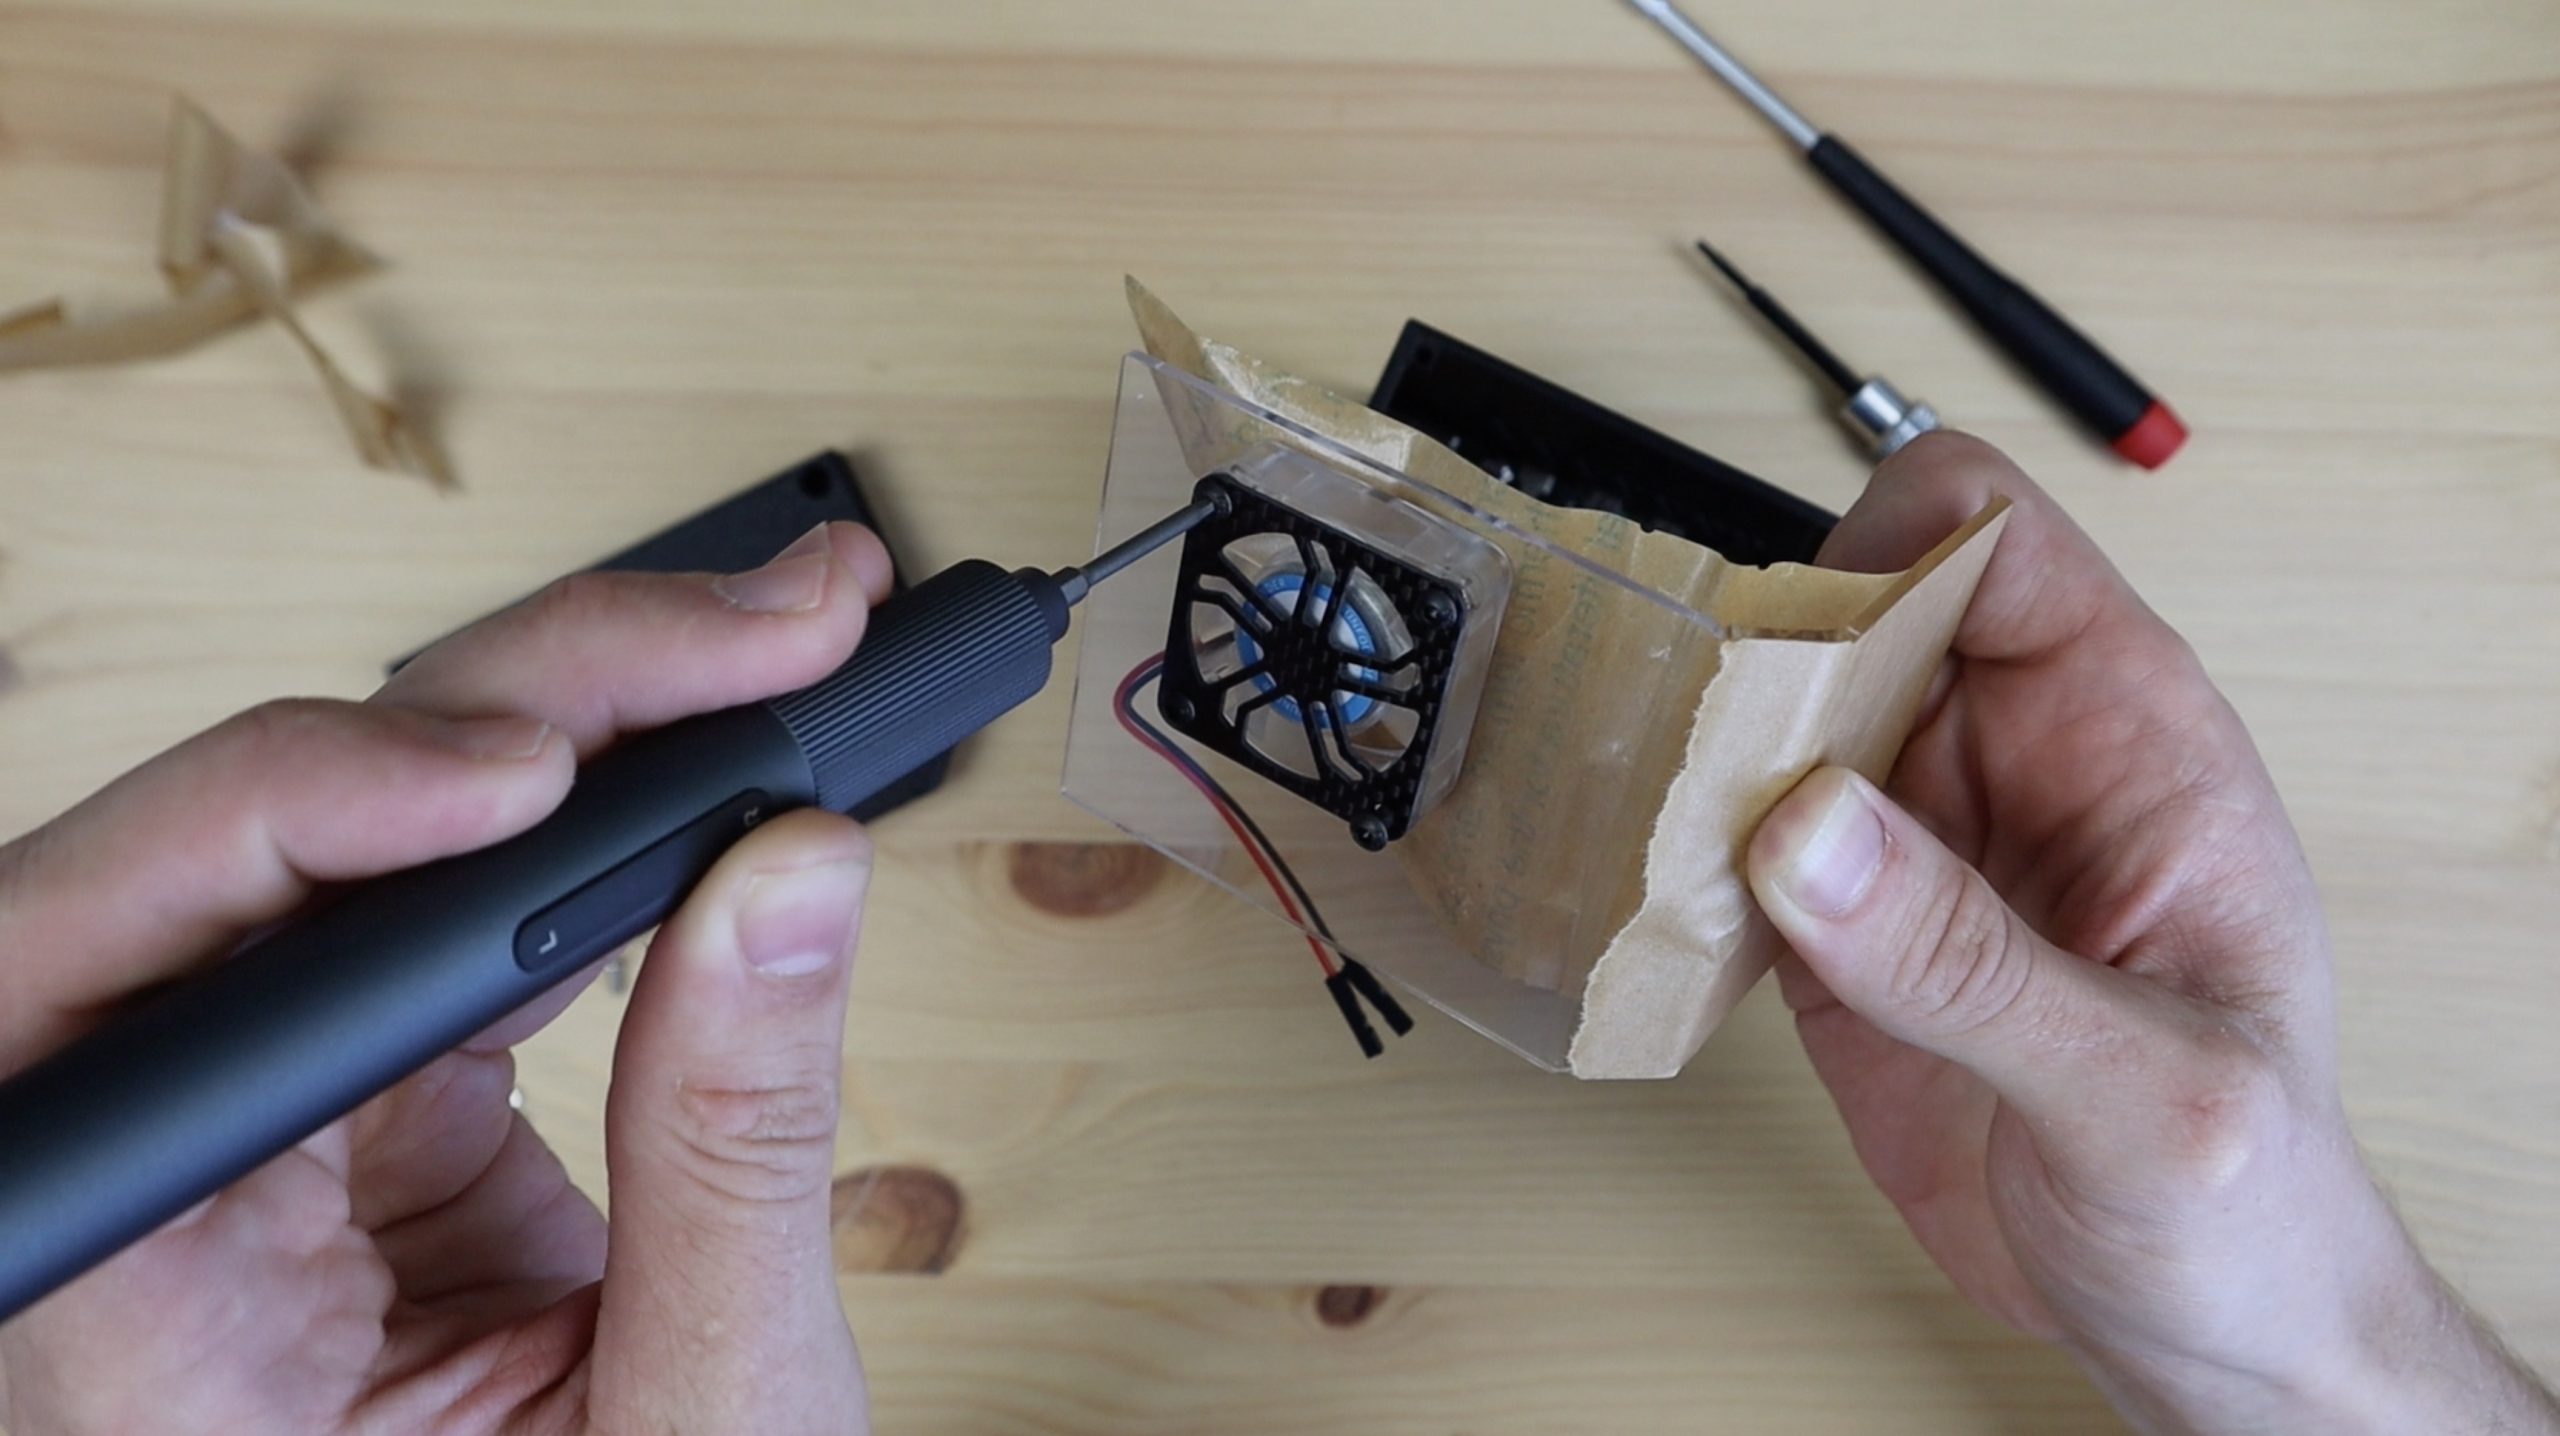
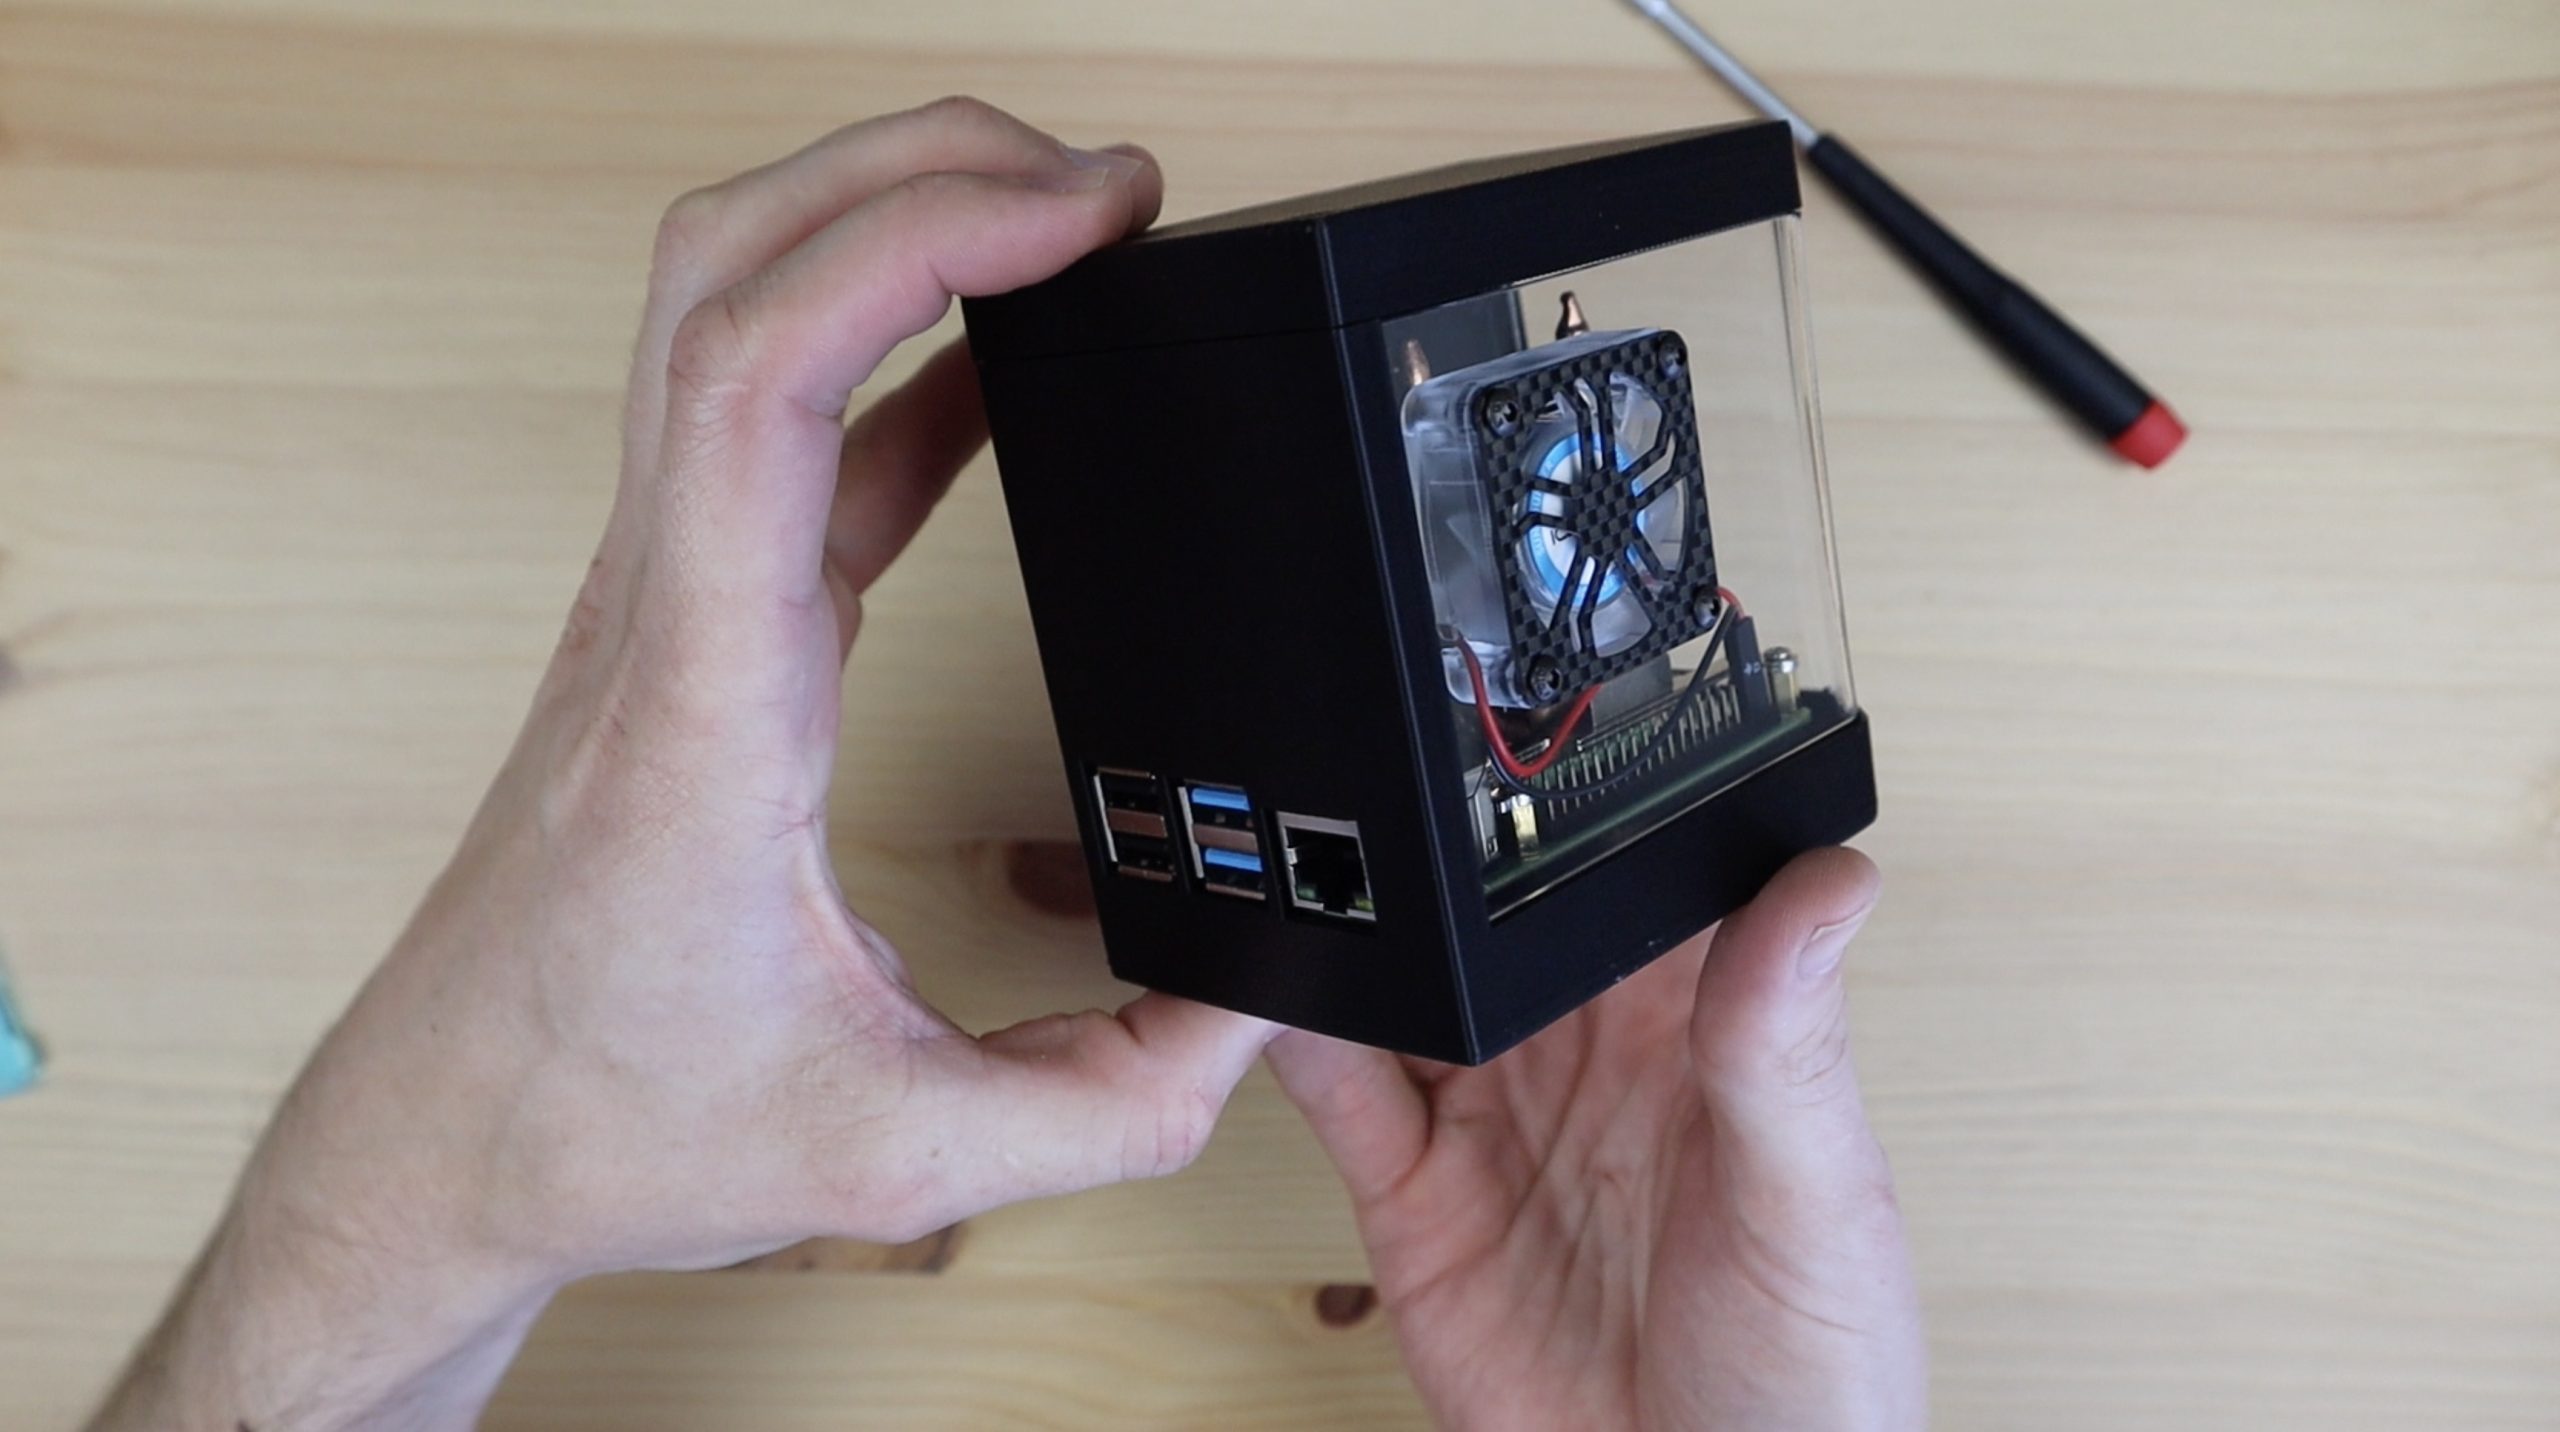
We can then peel off the rest of the protective film and install the clear side panel.
The fan is plugged into the 5V and GND GPIO pins.
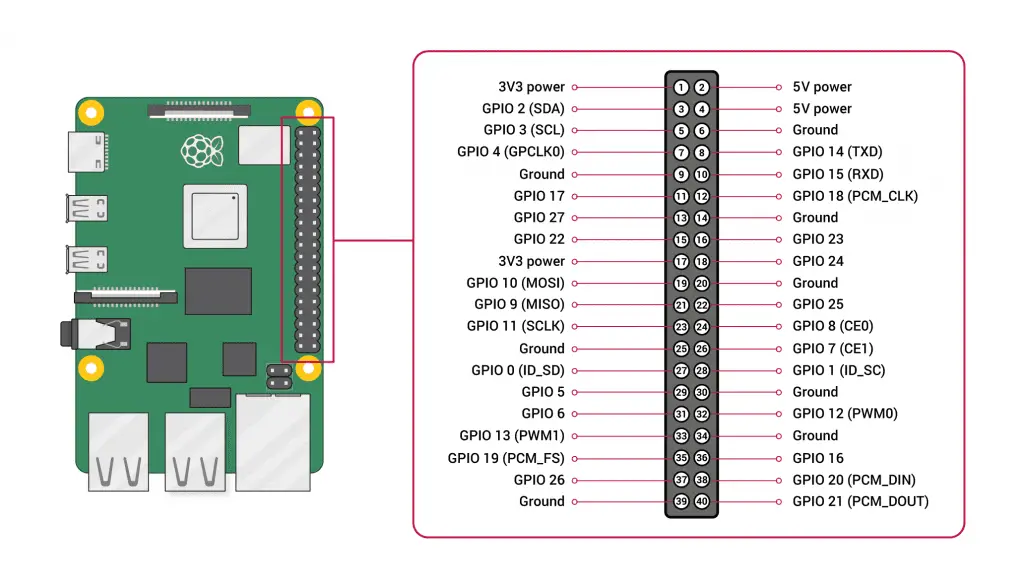
You can also use on of the 3.3V pins if you’d like the fan to run a bit quieter, but it’ll lose a bit of performance too.
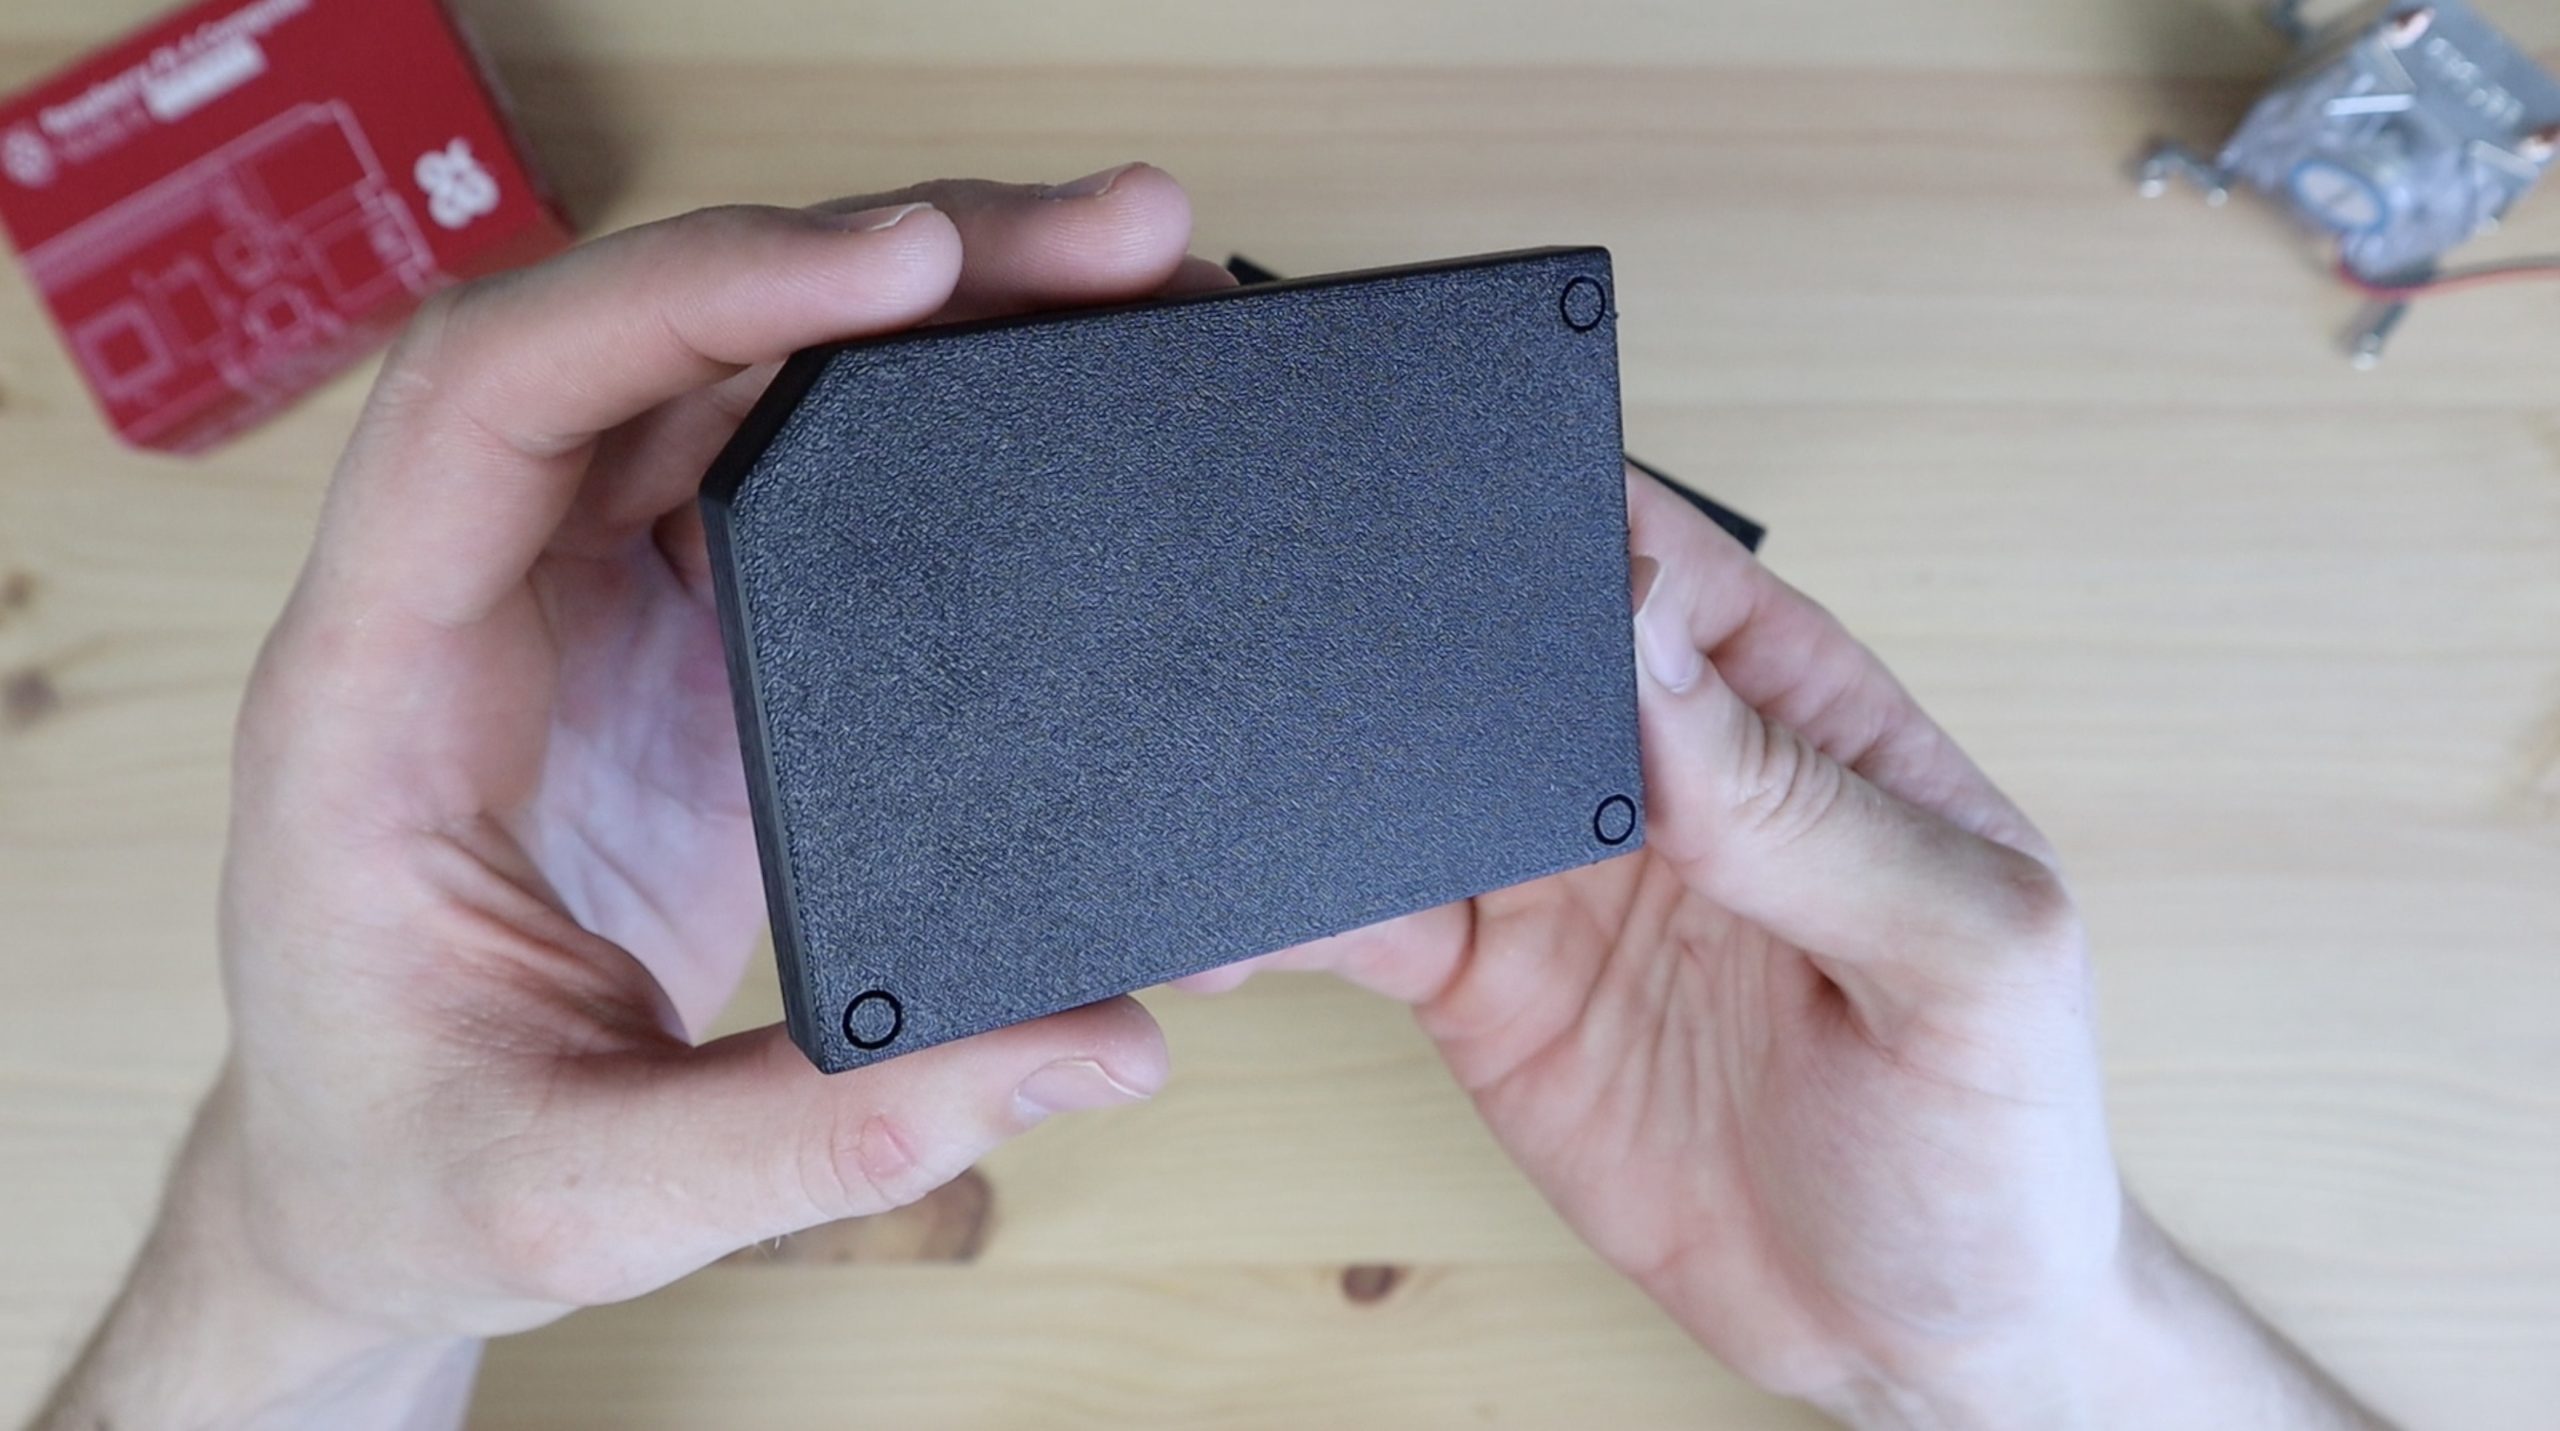
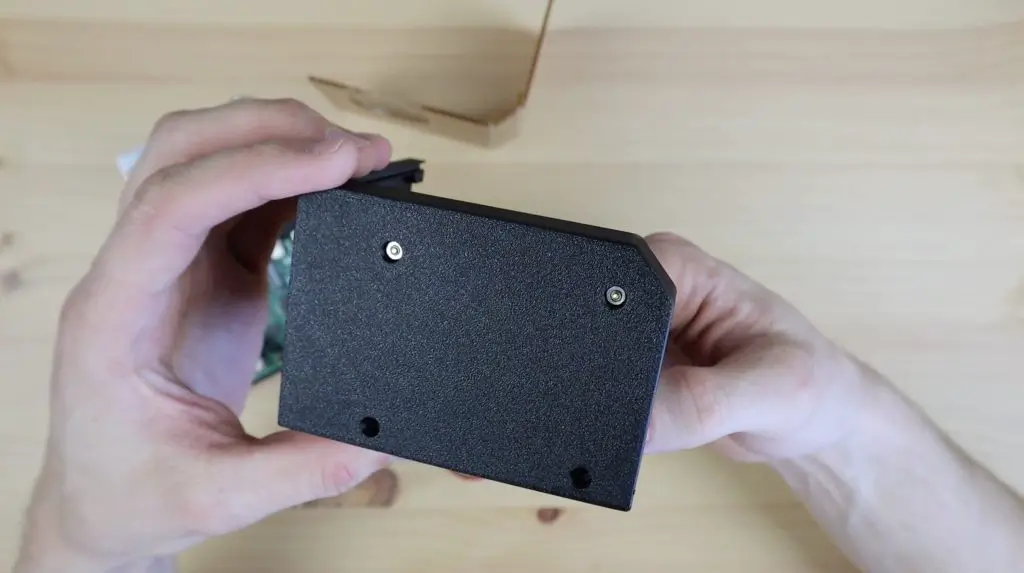
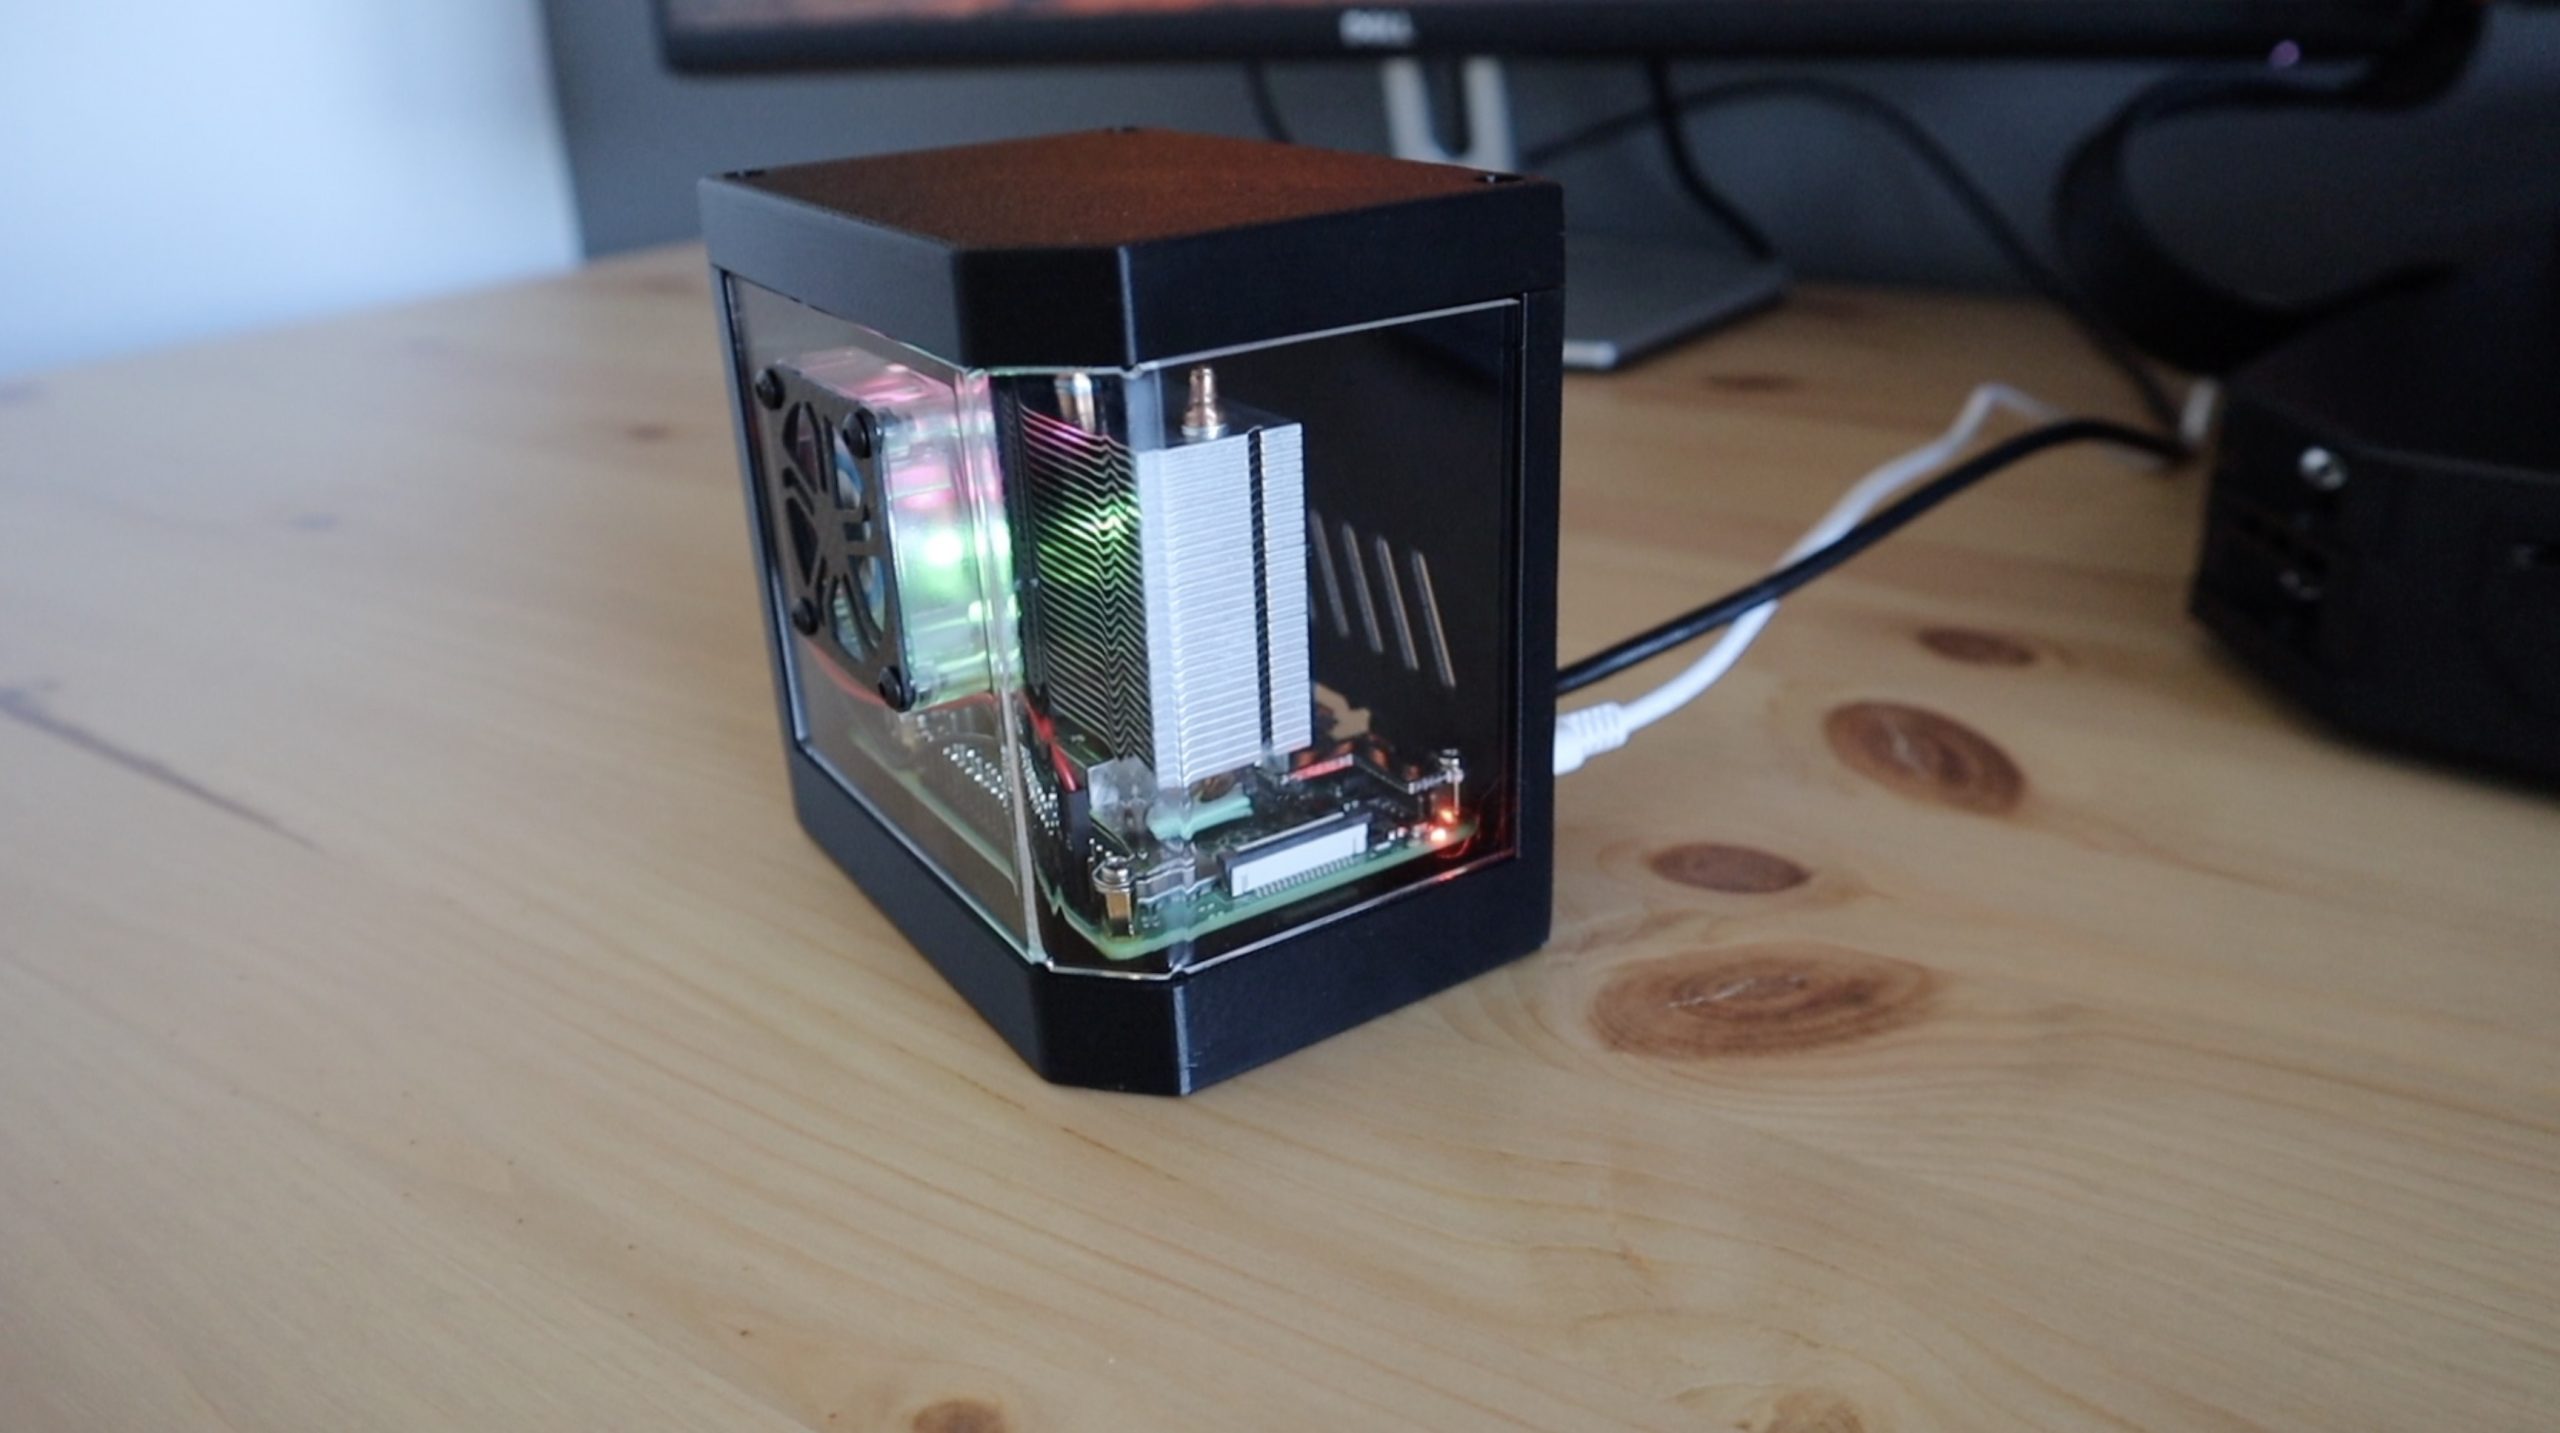
Finally, the lid of the case is held in place with three more M3x8mm screws.
And that’s it, our case is now complete. So let’s boot it up and run a test to see how the Ice Cube cooler handles a full load.
Stress Testing The Raspberry Pi & Cooler
The stress test I’m going to use is called CPU burn. It’s one that I’ve used previously for a couple of thermal tests as it seems to generate the most heat out of the tests I’ve tried.
To download it on your Raspberry Pi, open a new terminal window and enter the following commands:
wget https://raw.githubusercontent.com/ssvb/cpuburn-arm/master/cpuburn-a53.S
gcc -o cpuburn-a53 cpuburn-a53.S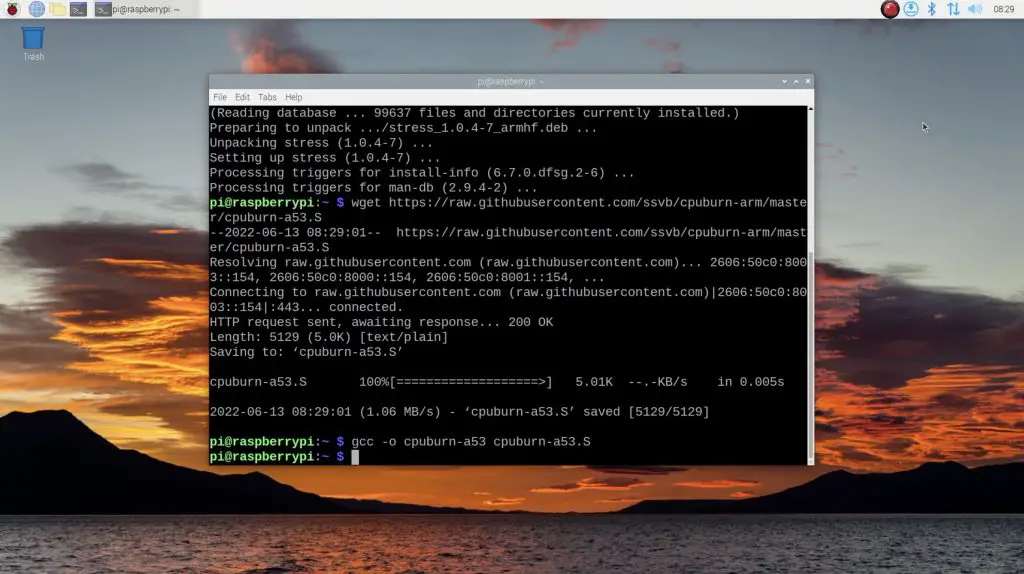
Then CPU Burn can be run using the following command:
while true; do vcgencmd measure_clock arm; vcgencmd measure_temp; sleep 10; done& ./cpuburn-a53
So running at full load on all four cores pushed the temperature up quite quickly from 23 degrees to 26 degrees, and it seems to have stabilised there, which is not much of an increase at all.
Without a cooler, the Pi thermal throttles in a few seconds with this test, so these large coolers work really well.
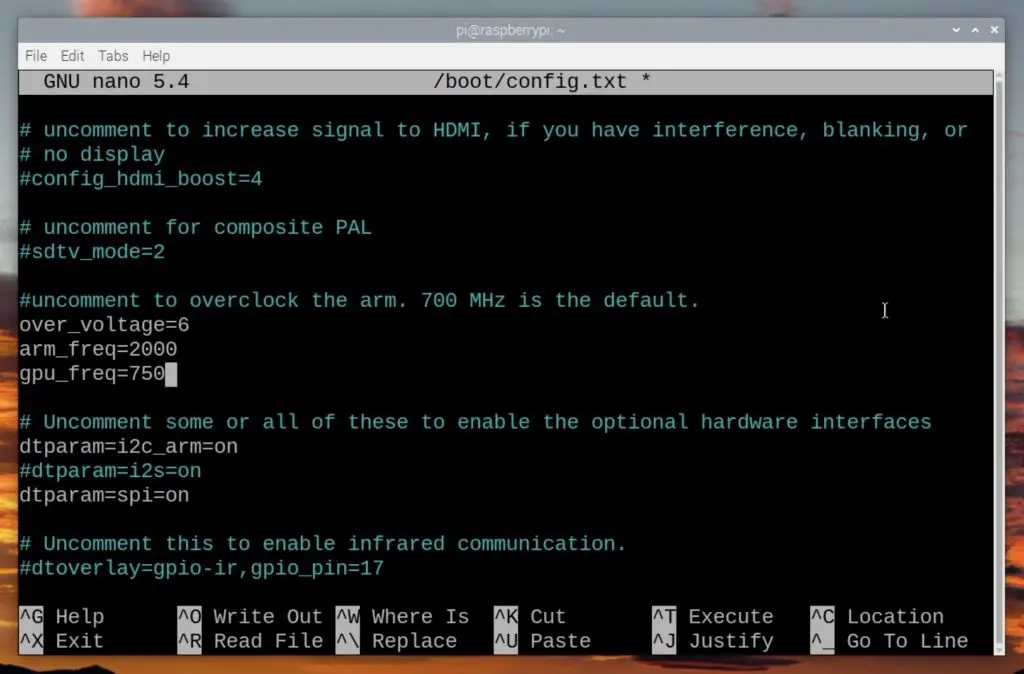
Let’s try overclock the Pi to 2Ghz and see how that does.
After a quick reboot, let’s run the test again.
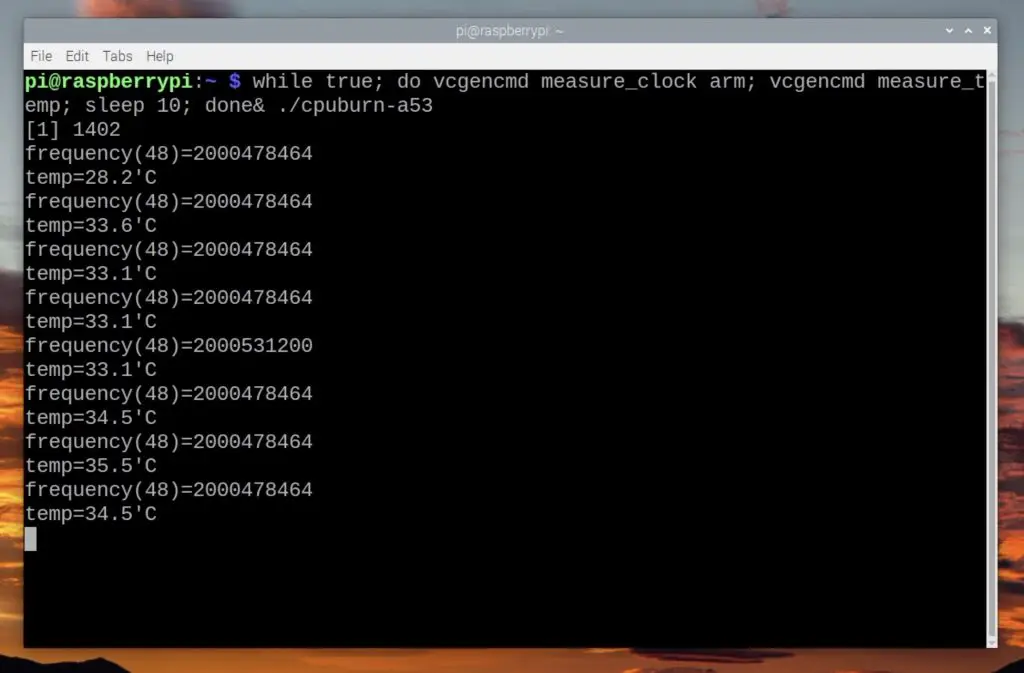
So at 2Ghz it still stabilises at around 35 degrees, so there is probably room to overclock it a bit further if you’d like to try that. But for now, I’m really happy with the results and with how the case has turned out.
Final Thoughts on the Creality Ender-3 S1 Pro
Overall I’m really impressed with the print quality from the Ender-3 S1 Pro and I’m looking forward to trying out some more challenging materials. I’d like to try to print this case in a matt carbon fibre filament to see how that turns out.
I also like that Creality have paid attention to the community’s requests with this design, particularly in addressing the common issues that have been reported on the older models like the dual z-axis and automatic bed levelling. Even relatively minor issues like making the filament roller an actual roller has been taken care of.
As with any 3D printer, I’m sure this one with have a weakness or two and I’ll post some updates here after I’ve used it for a few months. I’m interested in seeing how the fan angled towards the print bed holds up with pulling in strands of filament and dust etc..
Check out Pergear’s Amazon store or their web store to get your own Ender-3 S1 Pro and visit my Etsy store to get your case kit to assemble your own Pi Desktop Case
Let me know what you think of the Creality Ender-3 S1 Pro in the comments section below and let me know what you think of my new case design.
Do you have any thoughts about the Ice Tower Cooler versus the Ice Cube cooler? Also, have you considered adding a cutout on the acrylic panel (either on this latest design or the previous regular case) to add a GPIO adapter to allow access to the pins without having to open the case?
I’ve only been using the Ice Cube cooler for a few weeks now but it definitely provides better cooling to the other chips on the board and it includes a few more accessories than the Ice Tower. Yes, I’m looking at putting together a PCB to rotate the pins 90 degrees as well to make them more easily accessible.