Today we’re going to be taking a look at the Ortur Laser Master 2 Pro which the guys at Ortur have sent through to me to try out and review.
Ortur are a popular CNC laser engraver manufacturer and have been around for a number of years. They are one of the most reputable brands in the space and have shifted their focus towards making better quality and safer laser cutting and engraving systems that are centred around diode lasers, with their core products being these gantry-style engravers.
The Laser Master 2 Pro is their latest upgrade to their popular Laser Master 2 and is available for purchase from the web store, Made The Best, for around $460 at the time of this review.
They also sell a number of accessories and upgrades for the Laser Master 2 Pro, including an offline controller, full metal enclosure, Z-axis height adjuster, and even a Y-axis roller for engraving on cylindrical objects.
Here is my video review, read on for the full written review.
Laser Master 2 Pro Specifications
| Laser Module | LU2-4 24V/2A (Electric Power 20W, Optical Power 5W) |
| Engraving Area | 400mm x 400mm |
| Mechanical Precision | X & Y Axis – 12.5µm |
| Pixel Accuracy | 300 pixels per inch |
| Wavelength | 445+-5nm |
| Focal Length | 50mm Fixed Focus |
| Engraving Speed | 0-10,000mm/min |
| Adaptor Input Voltage | 110V-220V |
| Controller Input Voltage | 24V/2A |
| Gantry Construction | Aluminium & Powder Coated Steel |
| Motors | Nema 17 Stepper Motors |
| Safety Features | Position Protection, Exposure Duration Limitation, Laser Beam Safety Guard, Flame Detector, Emergency Stop |
| Engraving Materials | Wood, Paper, Black Acrylic, Leather, Food, Stainless Steel, Powder Coated Metal |
| Cutting Materials | Wood, Paper, Black Acrylic, Leather, Felt, Dark Plastic |
Unboxing The Laser Master 2 Pro
Shipping from Ortur is really fast. The kit arrived after about 6 days in a relatively large box as it is partially assembled – which is not often the case with cheaper gantry style engravers. Inside the box, the components are really well packed and protected using formed foam inserts. The components are also individually wrapped in plastic for additional protection.
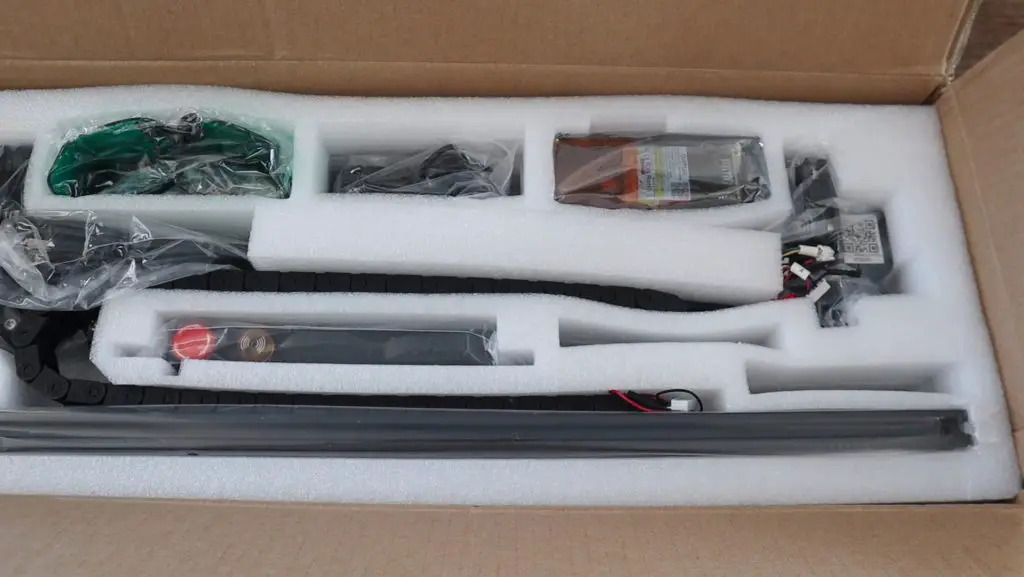
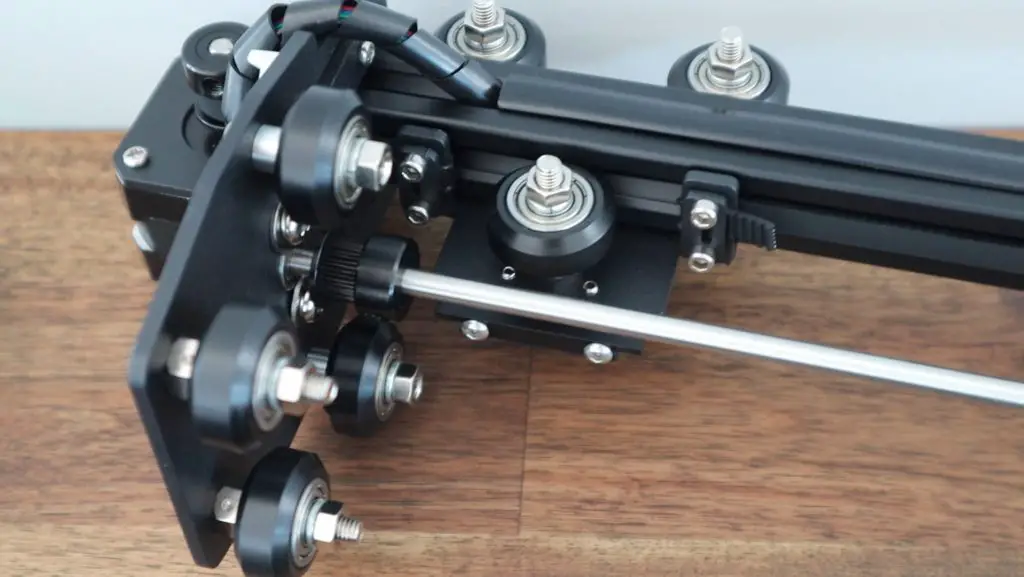
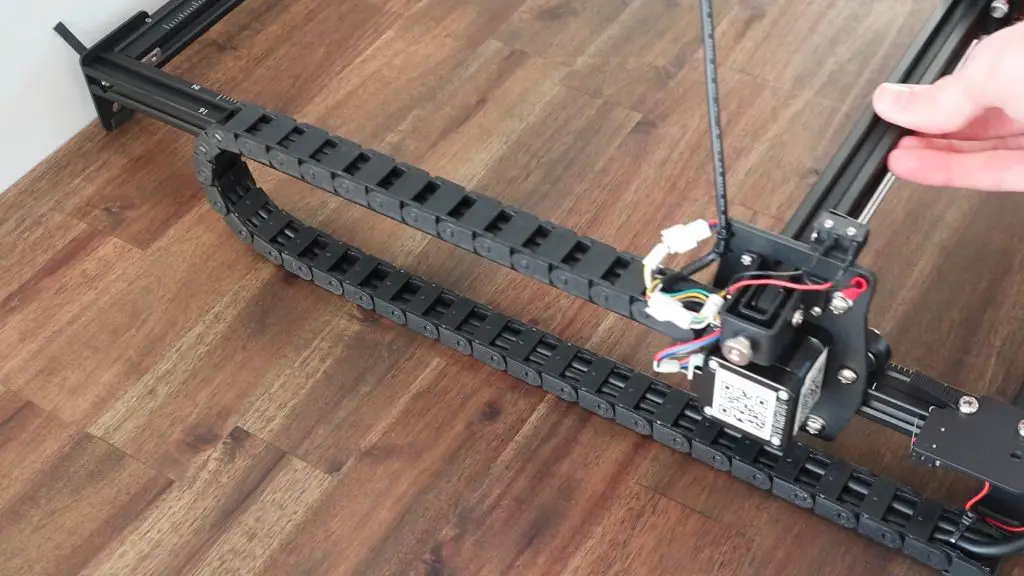
It comes with everything you need to assemble it, including zip ties for cable management, a small tool kit and even some sample pieces of wood and acrylic to experiment with. The x-axis gantry is pre-assembled and the drag chain is also pre-wired with connectors on each end.
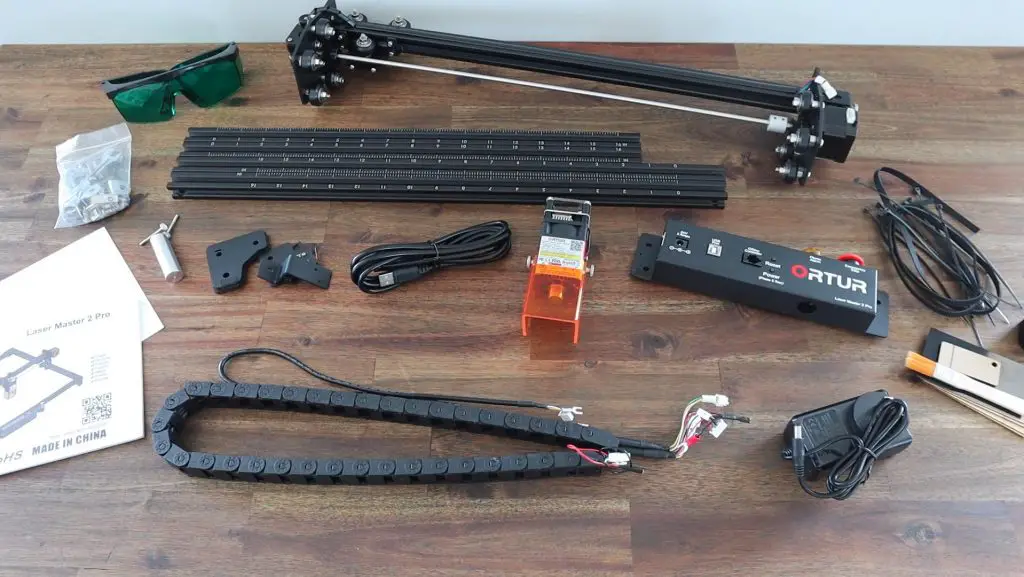
Also included in the box is an assembly manual, power adaptor, USB cable, focus gauge, and some safety glasses.
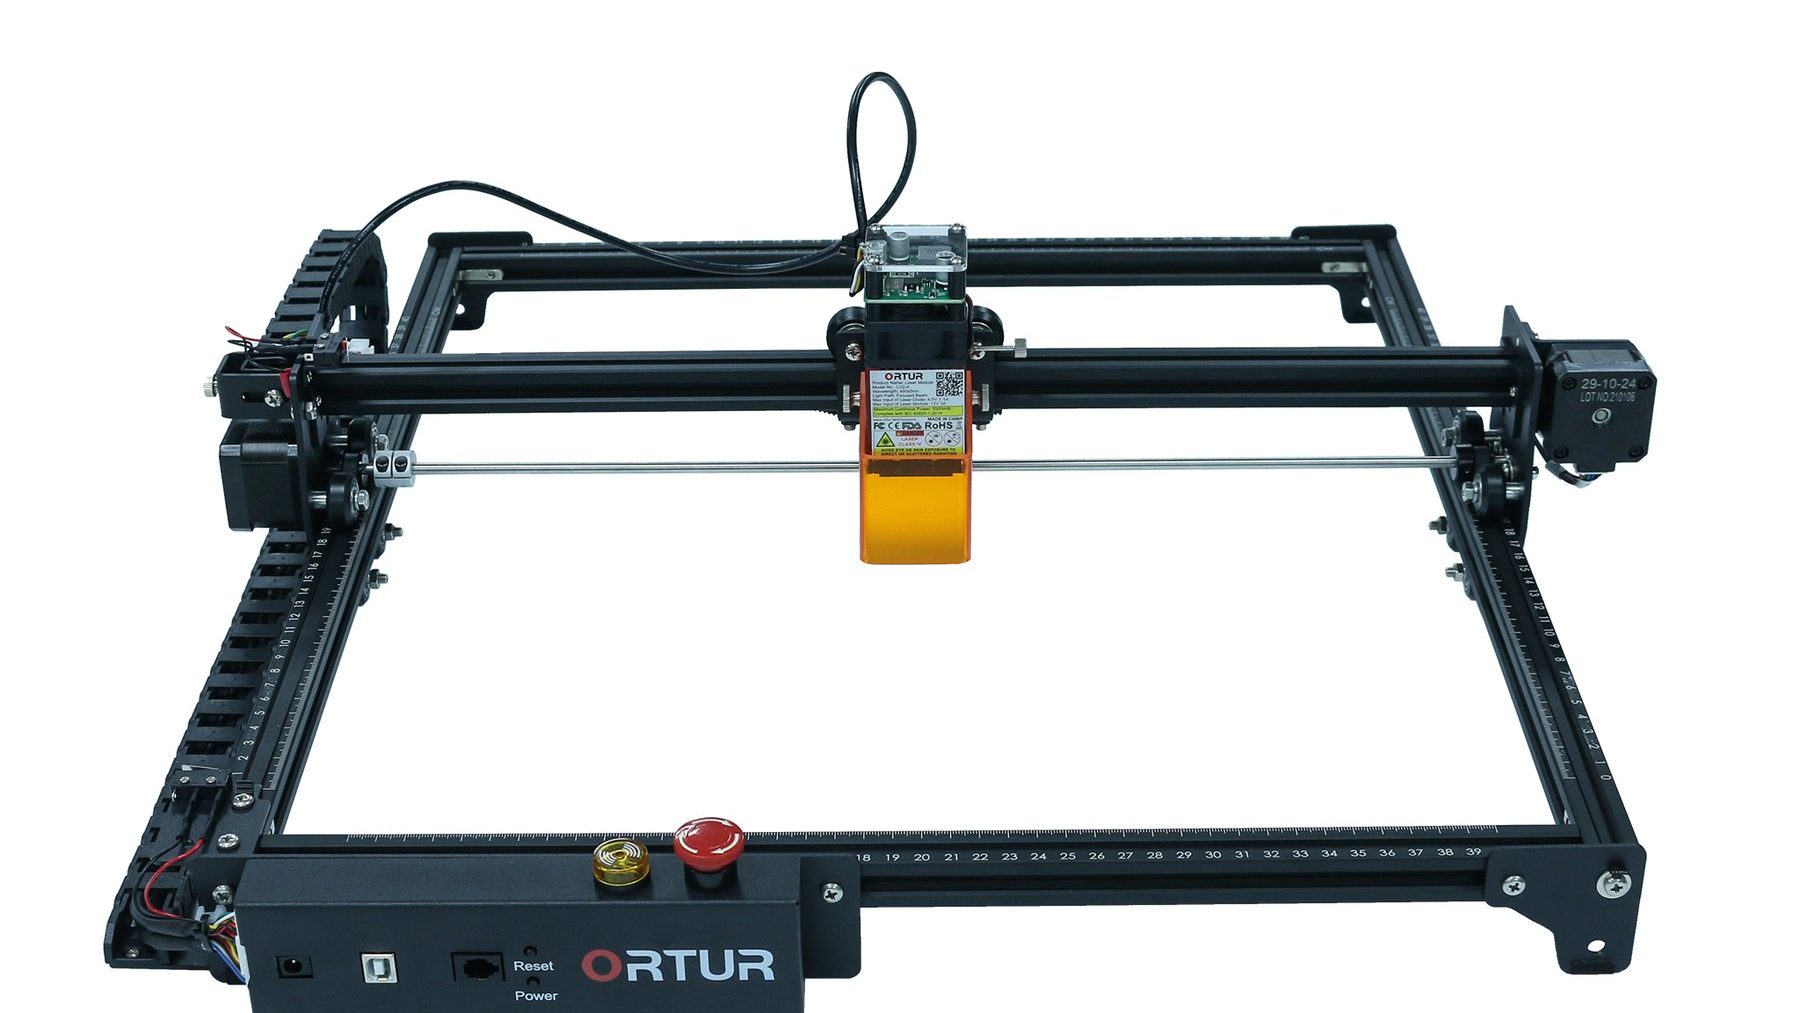
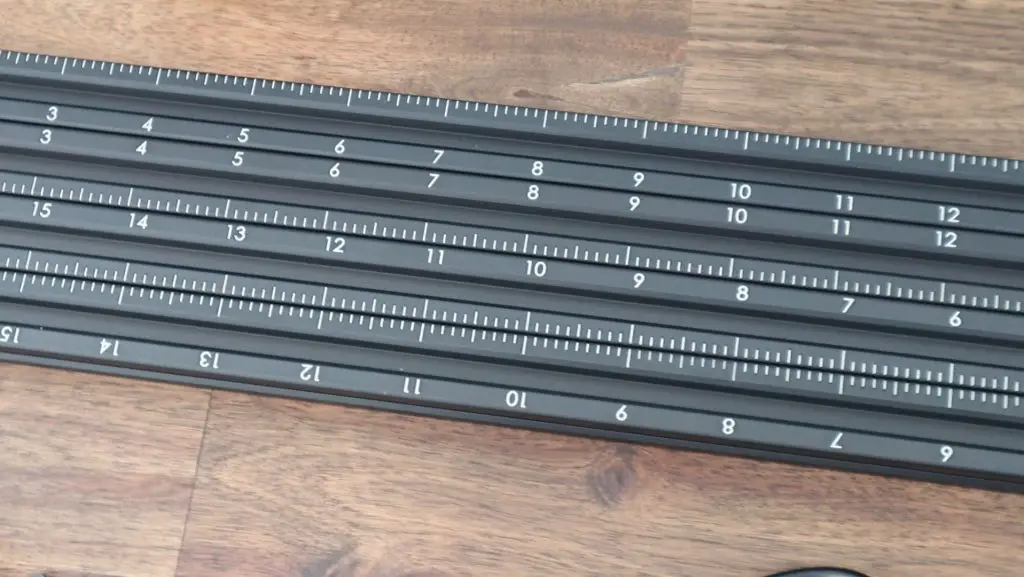
Some nice features that you’ll notice right away are the measurement scales on the aluminium extrusion and the all-metal gantry construction. In fact, aside from the components that really need to be other materials (like belts, clear covers, wheels etc.), almost everything on this laser engraver is metal. You’ll also notice that the metals have been painted or anodized after being drilled, which is also great for a good quality look and feel.
Safety Features
Before we get into the assembly of the Laser Master 2 Pro, let’s have a look at its safety features. The control board is where the Laser Master 2 Pro really stands out from the competition. It’s got a number of safety features built-in, which most others don’t have.
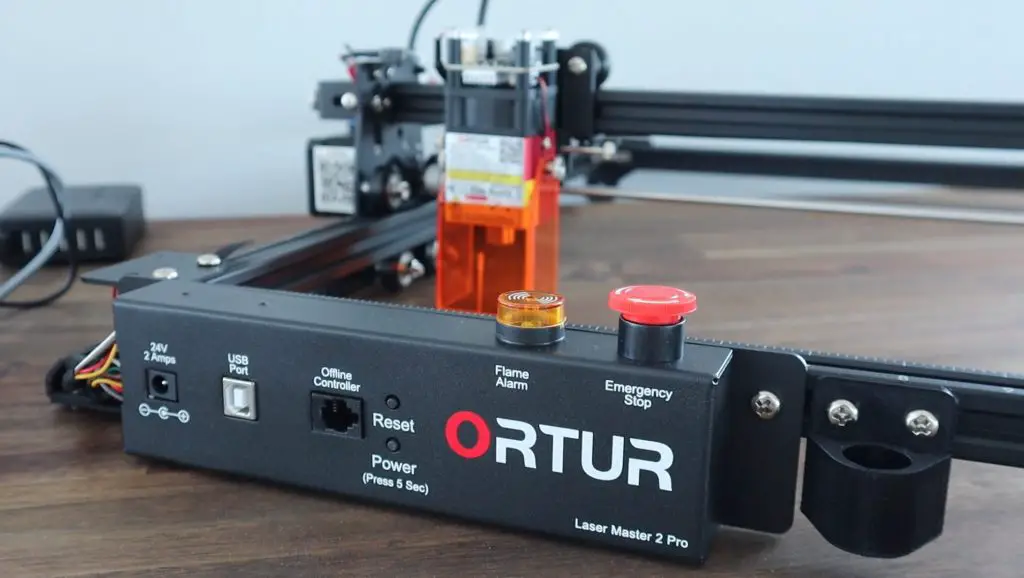
It’s got built-in flame sensing, which stops the laser if it detects that the material has caught on fire and sounds an alarm.
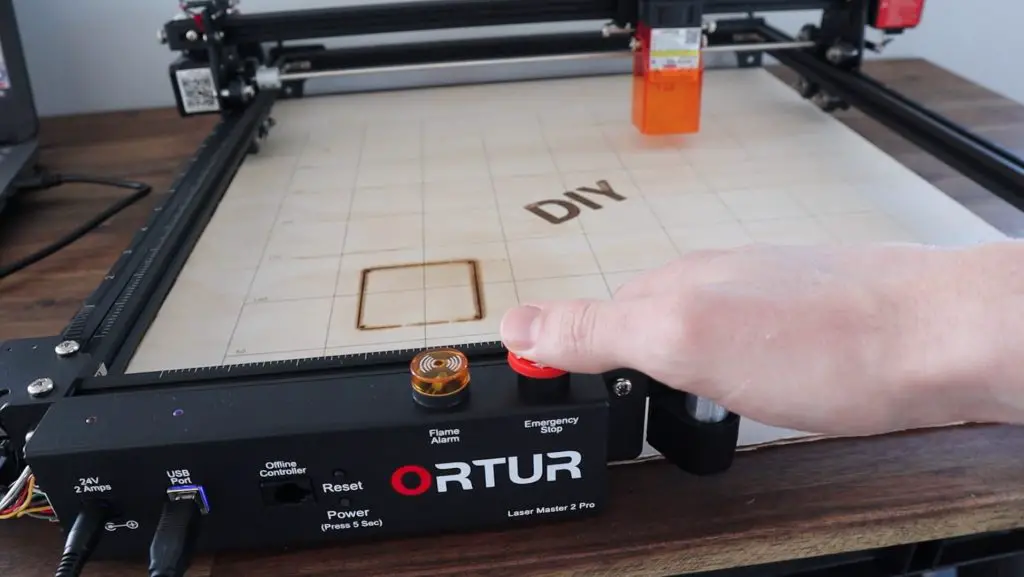
It’s got a tilt sensor to detect if the laser has been bumped or knocked off the desk. It’ll also stop the laser if it has been burning in the same spot without movement for over a minute and it’s got a prominent e-stop on the top.
There is also a protective shroud around the laser beam to prevent the beam from reflecting onto the other surfaces and to protect objects (and fingers) from getting in its path.
Assembling The Laser Master 2 Pro
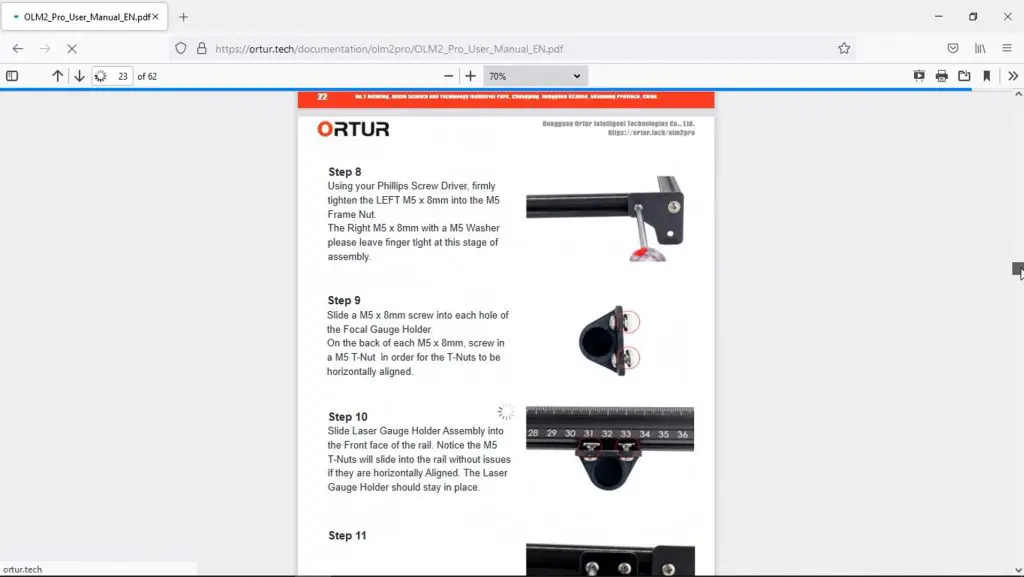
When it comes time to assemble your kit, it’s definitely worth heading over to their technical documentation link to download the pdf version of their manual. It’s much better quality than the included one and is more up to date with better pictures. I put mine together with the included manual and the images are a bit small to really see what is going on. There are a couple of changes that have been made to the construction that haven’t been updated in this printed manual – like the wiring to the limit switches being incorrect.
In any case, it is relatively easy to put together.
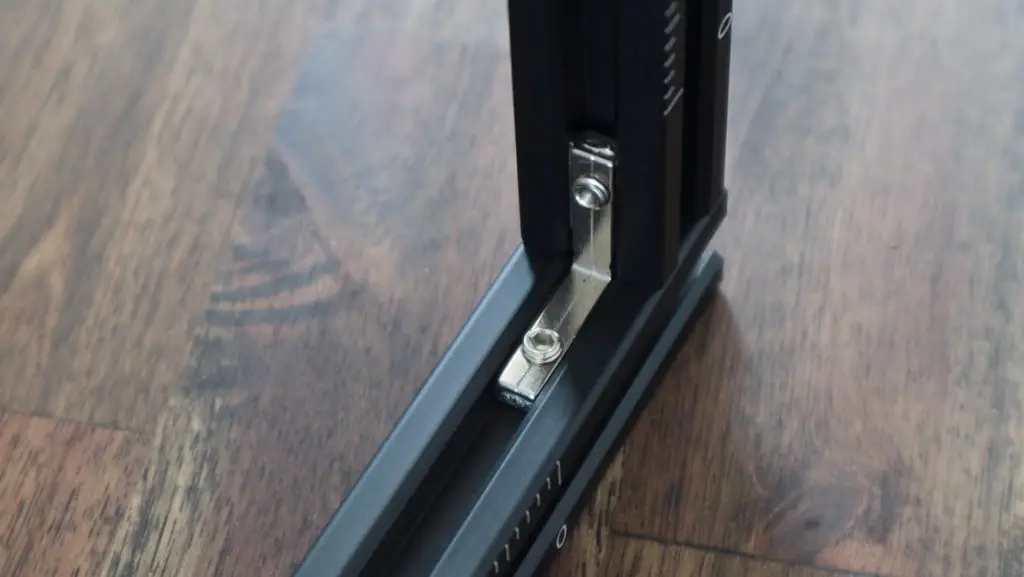
While assembling your laser engraver, you’ll again notice a few extras like these additional L-brackets in the corners – which really go to show that they’re determined to give you a good quality product.
One thing I don’t really like is the belt tensioning on the y axis. You pull the belts through slots in the legs and secure them with a screw and washer. It works fine, but you really need to pull on them to get them tight. They also don’t look good when finished off and you can’t make adjustments to the belt tension very easily. They would have been fine for an anchor point at the back, but it would be nice to have some sort of screw tensioning mechanism on the front ends.
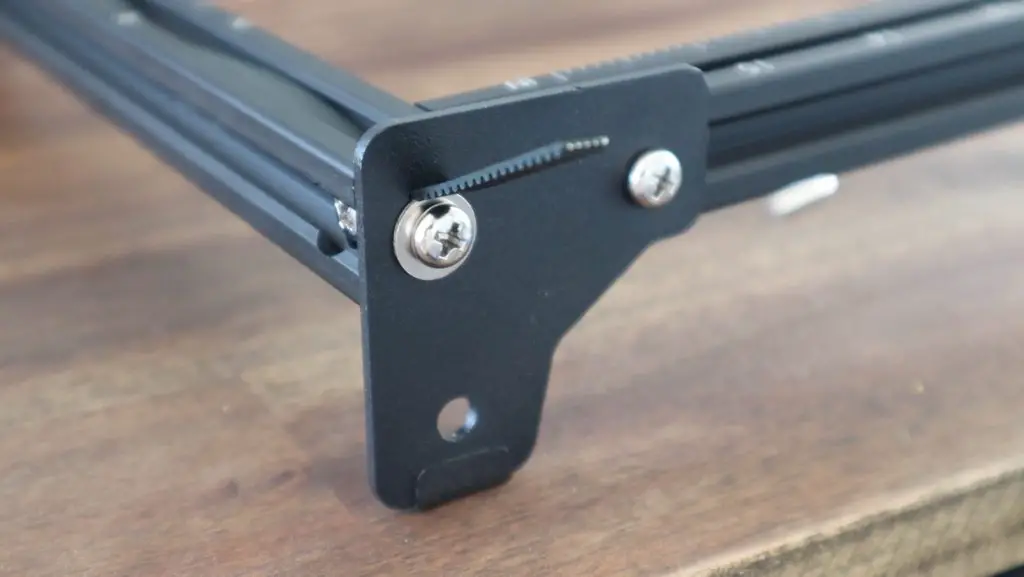
The diode module is mounted onto a dovetail slider and is secured with a thumbscrew on either side. If you land up engraving different thickness materials quite often then you’ll want to get the adjustable z-axis as it can be quite cumbersome to hold the module at a precise height while tightening the two thumbscrews.
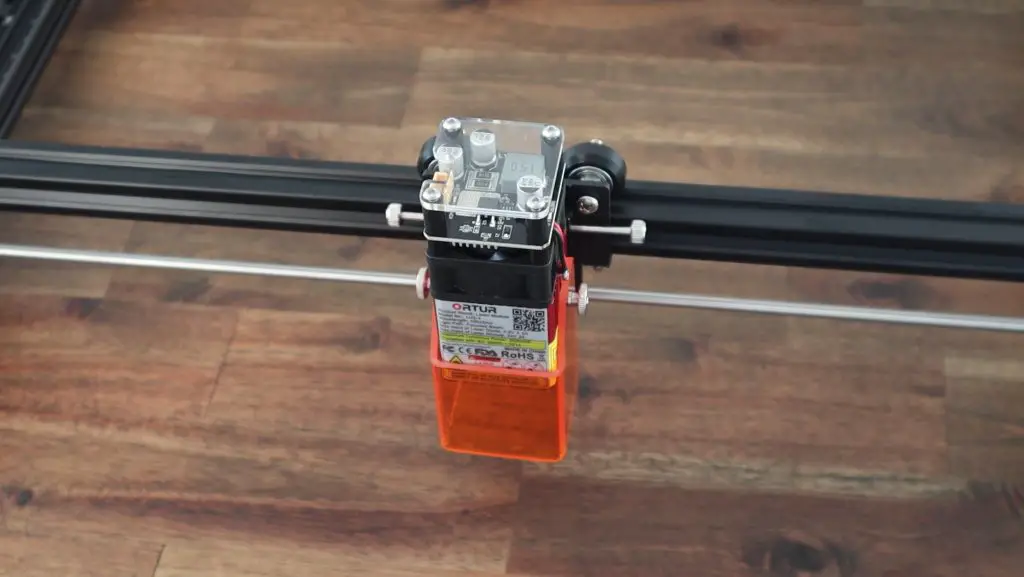
The drag chain is great for cable management to the motors and laser module. Most of these style laser engravers just leave the cables hanging free on one side, which obviously opens up to the risk of getting them caught in the gantry or running the laser over them and melting the insulation.
There isn’t really much to say about the actual assembly process. It is about as simple as it can be made (without arrival completely assembled) and the online manual is really helpful with the more complex parts.
As I mentioned earlier, the only issue I had was with the wiring to the switches – but I have worked with these on numerous 3d printers, I knew they were incorrect and fixed them up before turning it on.
Testing Engraving and Cutting
With the laser engraver assembled, I downloaded LaserGRBL and tried a couple of test engraves and cuts. Having never used LaserGRBL before, I had to do a bit of playing around first in order to familiarize myself with it. LaserGRBL is quite a simple package, which I like, but if you’d like more functionality then you’ll probably want to rather use Lightburn – which you need to pay for. I tend to use Inkscape for all of my 2d design work, so only having the laser functionality without the drawing tools is fine for me.
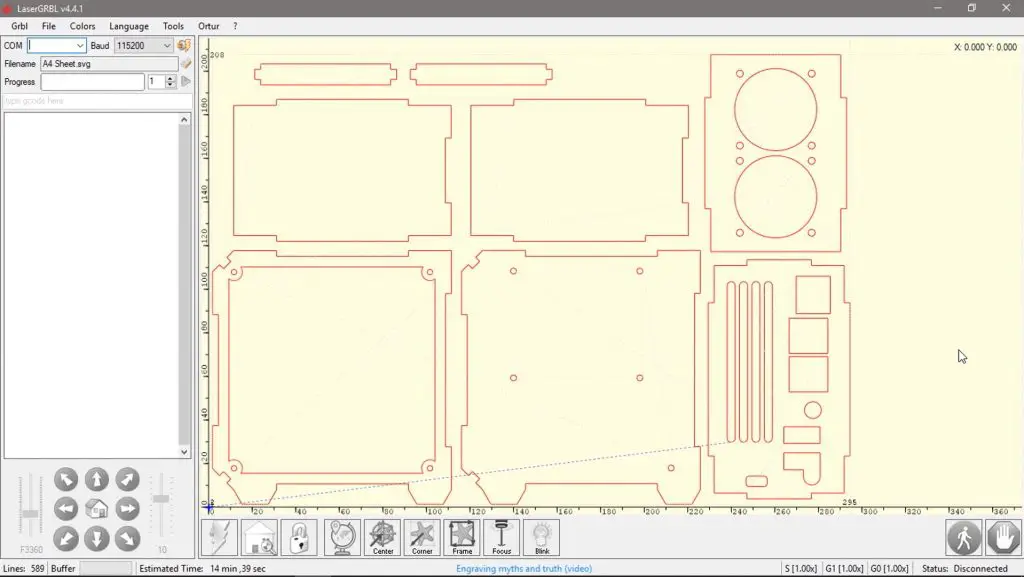
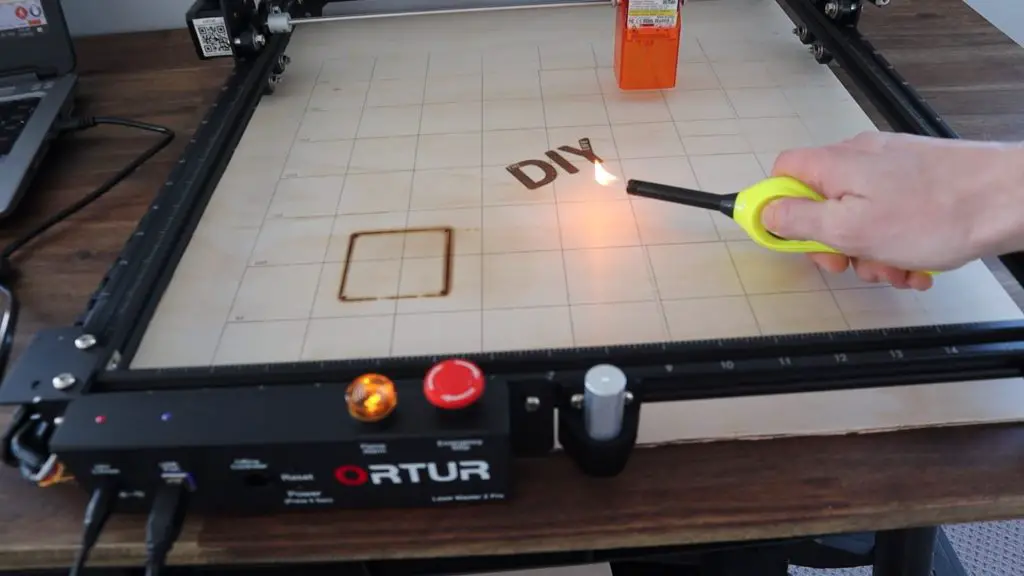
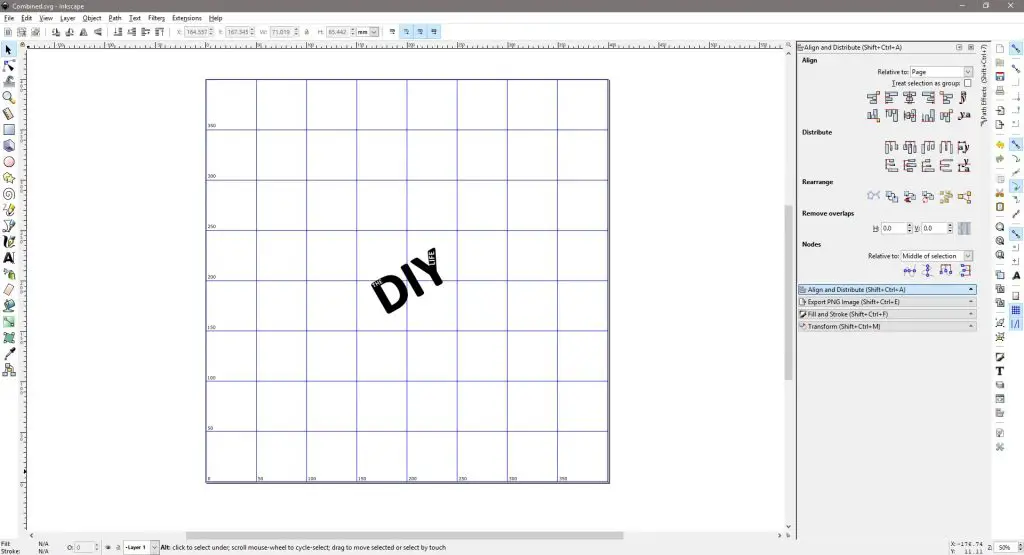
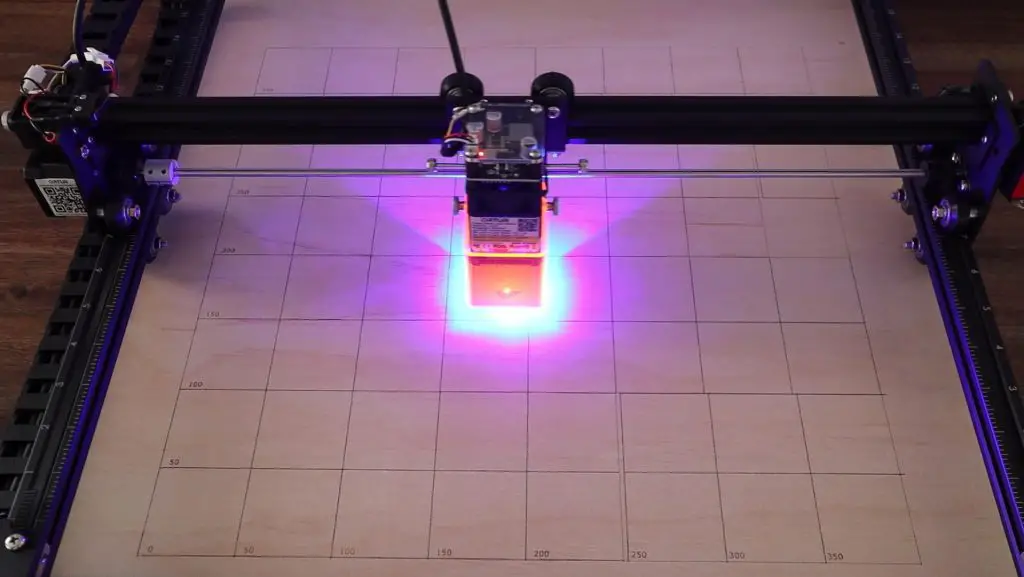
To start off, I drew up a cutting area grid with some dimensional markings along the two axis and The DIY Life logo in the centre.
This came out really well with the sample speeds and powers that Ortur suggests in the software.
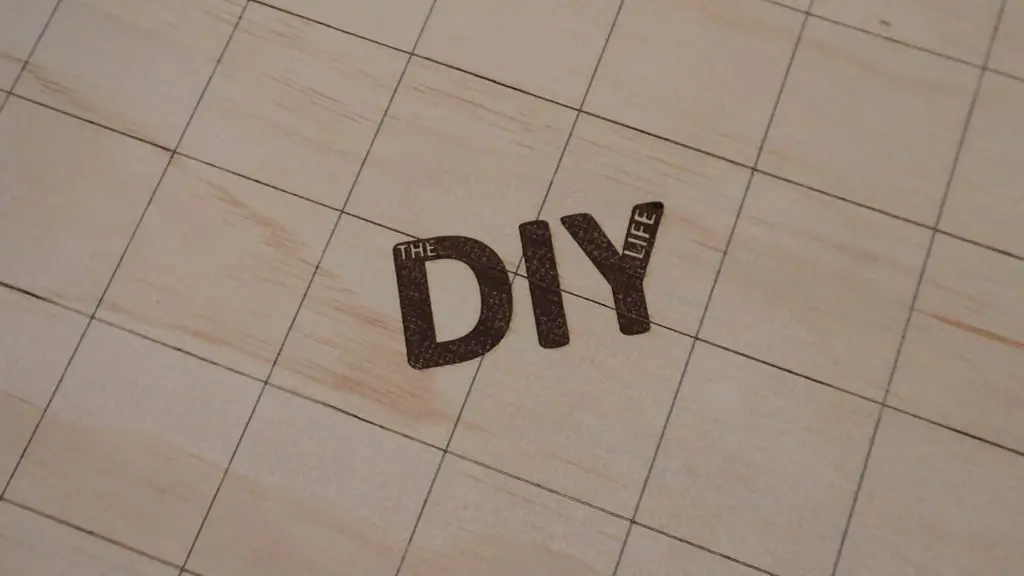
I didn’t have any issues with engraving during my first few tests, although I did accidentally stop the laser while engraving the grid when I was familiarising myself with the software. When I restarted it, the laser homed to a slightly different position so you’ll notice some of the squares engraved in the second half are off by a few millimetres along the x-axis. But for the most part I was really impressed with the results.
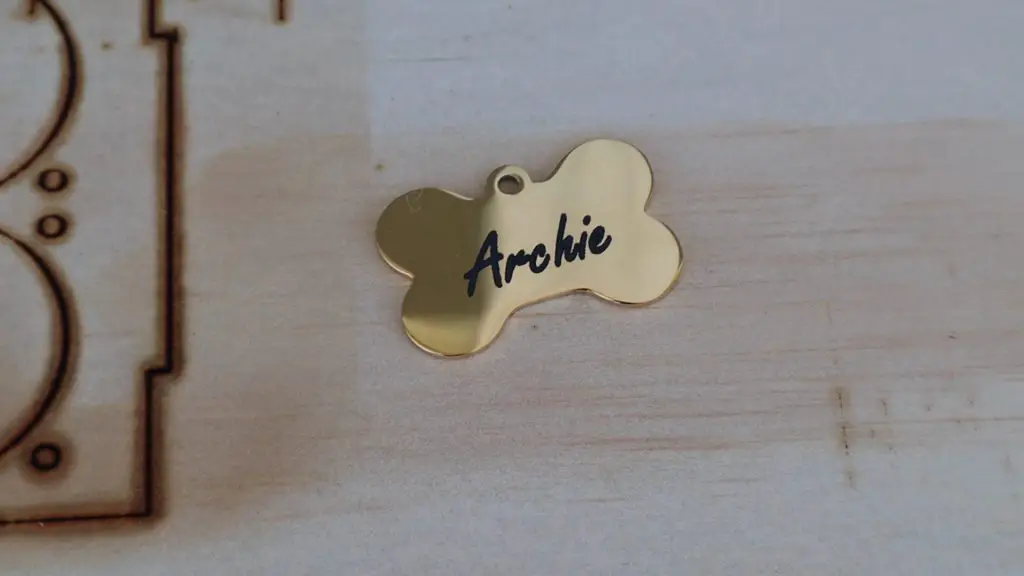
I then also tried engraving on some metal. You can’t actually etch the surface of metals, but I’ve used this product called CerMark to engrave on metals. You spray it onto the surface to be engraved, then engrave over it, and then wash it off with water. It leaves a durable black marking that works on a range of metals and glass.
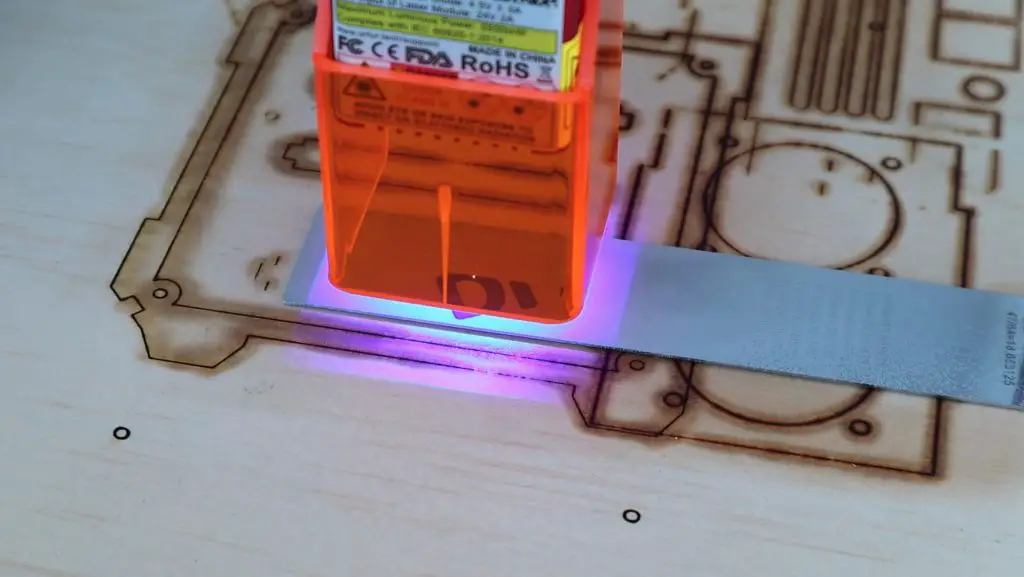
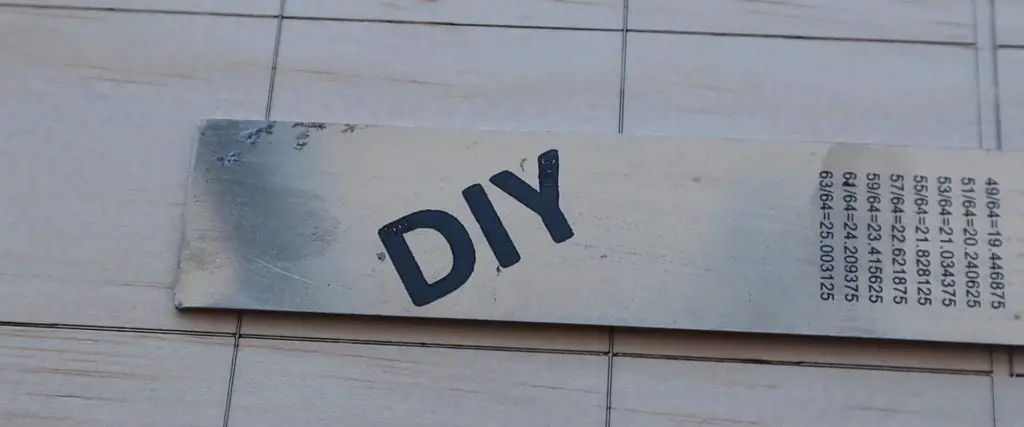
This worked quite well on a stainless steel ruler and even on a dog tag. It’s worth mentioning that CerMark is quite sensitive to using the correct laser power and speed. If you don’t use enough then the marking washes off afterward or wears out quickly and if you use too much then you lose resolution. The ruler engraving was probably a little overdone.
The dog tag below is gold plated, so it can’t just be engraved like painted ones.
I then tried cutting some 3mm plywood and that worked quite well too. I’ve seen a lot of complaints about diode lasers not being powerful enough to cut wood, but this laser had no trouble cutting through 3mm plywood in just two passes. As with the engraving, it took a bit of experimenting to get right, but once the settings were dialed in it cut effortlessly.
You can’t really see in the photos or video, but cutting produces a lot of smoke. You’ll definitely need to use an extractor or ventilation fan to remove it or cut in a covered outdoor area. Just be careful outdoors as the flame sensor can be set off by the sun’s UV rays which will then stop the laser and potentially ruin your cut.
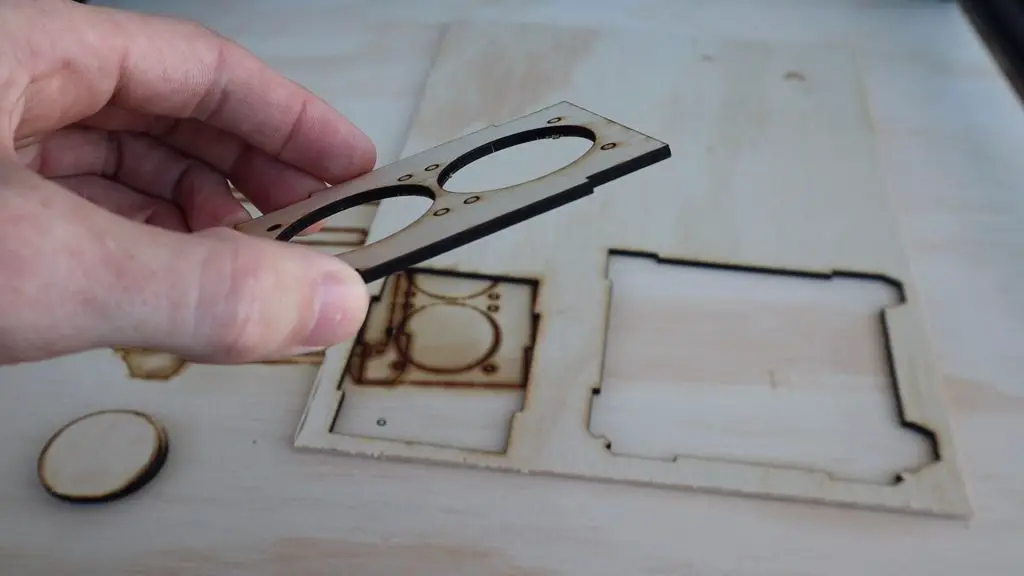
I then decided to try to make up a new plywood case for my Raspberry Pi, so if you’re interested in following that project, head over to the build post – Plywood Raspberry Pi Case.

Final Thoughts On The Ortur Laser Master 2 Pro
Being around as long as they have, Ortur have had the time and resources to put a lot of effort into making a good quality and reliable product. They have taken a lot of the safety concerns people have had with diode laser engravers and have tried to address them. I say tried because there are still inherent safety risks with using a laser that is not entirely enclosed. It doesn’t take much to not tighten one of the thumbscrews properly and have the laser module fall off the gantry during a burn and you’ve got a rogue laser traveling around your workshop. If you’re looking to do a lot of work with your laser then I’d definitely recommend buying or building an enclosure for it. At the very least you’ll want to always use your safety glasses when working with the Laser Master 2 Pro.
This brings me to a point about the glasses that I raised in my video. I haven’t done a lot of research on these (so I might be completely wrong), but I suspect that they’re not the correct ones for this particular laser. In order to block certain wavelengths, the colour of the lenses is usually the complementary colour of the laser. This is a blue laser, so the complementary colour is orange. This explains why the shroud around the laser is orange. The glasses included with the kit are green, so are actually best for red light. They’re probably better than nothing, but I’d be looking to replace them with some better-quality ones quite soon.
At $460, the Laser Master 2 Pro is certainly not cheap, but you do get what you pay for. This engraver is a substantial upgrade over the cheaper ones available online, and the power 20W diode laser has no trouble engraving and cutting a wide range of materials. That being said, if you do intend to do more cutting than engraving then you’ll probably want to look at getting a CO2 laser rather than a diode laser – they’re just better suited to the application.
Overall I think the Laser Master 2 Pro is about as good as it gets for a diode laser setup. There are a couple of areas that could still be improved upon, like belt tensioners and the included manual, but these are really looking for faults. I have no doubt that you’d be happy with your purchase of the Laser Master 2 Pro