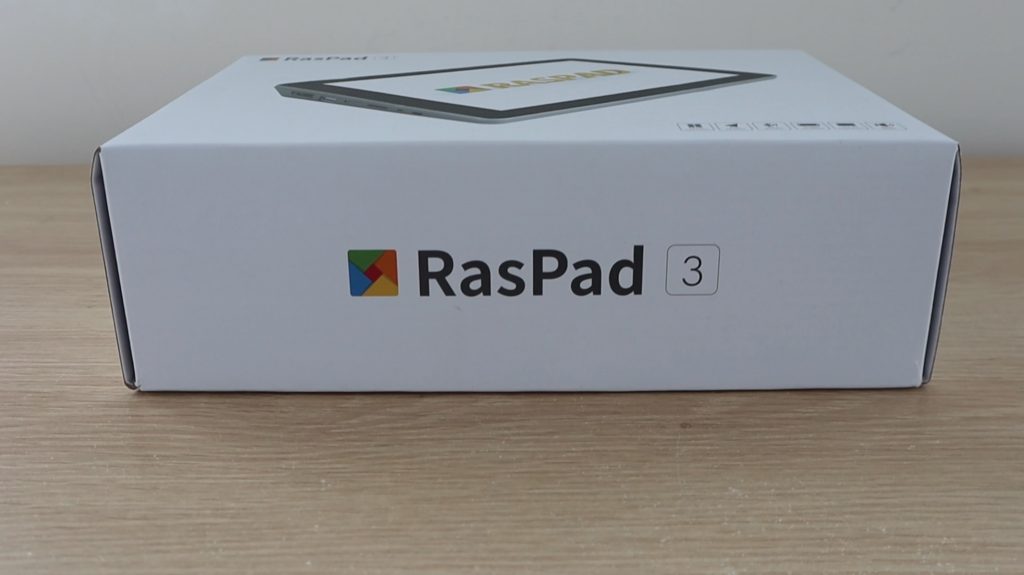
Today we’re going to be taking a look at the RasPad 3, an all-in-one tablet-style device designed around the Raspberry Pi 4B that Sunfounder have sent me to review and share with you.
The RasPad 3 was brought to life through a successful Kickstarter campaign in October 2020 which saw almost 2000 backers pledge over $300,000, so it definitely gathered a lot of early interest.
Watch my unboxing and review video below, or read on for my write-up.
Where To Get Your Own RasPad 3
The RasPad 3 sells for around $250 on Amazon or $220 from their web store, each often having discounts of $10 to $40. I’ll talk about the price a bit more once we’ve had a look at what is included and what it does.
Amazon – Buy Here
Sunfounder – Buy Here
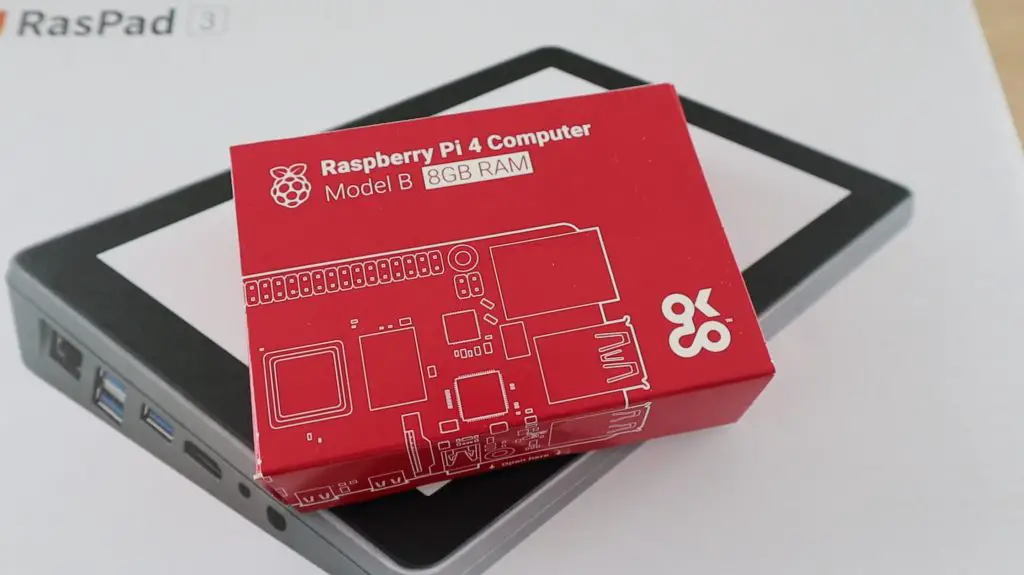
In addition to the RasPad, you’ll also need to get yourself a Raspberry Pi 4B and an SD card to complete the build. I’m going to be using an 8GB version in this review as this is one that I’ve got available at the moment, but you can use a 2GB or 4GB version as well.
Raspberry Pi 4B 8GB – Buy Here
Raspberry Pi 4B 4GB – Buy Here
Raspberry Pi 4B 2GB – Buy Here
Sandisk Extreme MicroSD Card 32GB – Buy Here
RasPad 3 Specifications
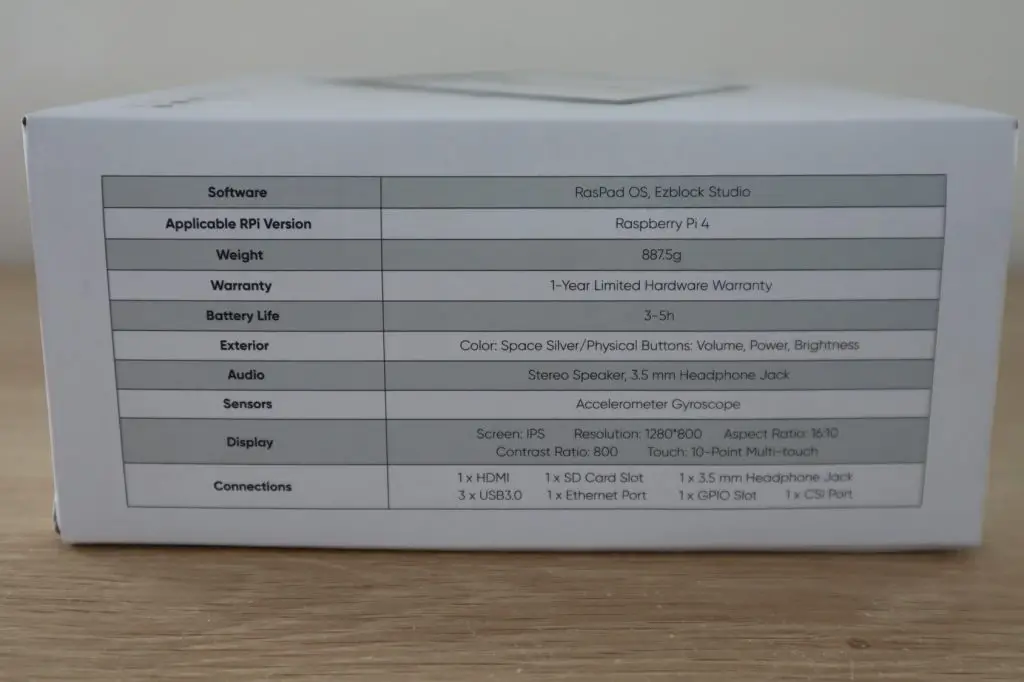
Sunfounder doesn’t really have a specification list or table on their product page for the RasPad, so I’ve summarized some of the key information below:
| Dimensions | 260 x 170 x 50mm |
| Weight | 890g |
| Display | 10.1″ Touch Display – 1280 x 800 Pixels 16:10 Aspect Ratio |
| Software | RasPad OS, Raspberry Pi OS, RetroPie, Raspbian Ubuntu Desktop, Chromium OS, Android |
| Compatible Boards | Raspberry Pi 4B |
| Battery | 3 Cell 11.1V Lithium-Ion 3200mAh |
| Battery Life | 3-5 Hrs |
| Ports | Ethernet, 3 x USB 3.0, HDMI, 3.5mm Headphone Jack 5.5mm Barrel Power Jack, MicroSD Card Slot |
| Functions | Power, Volume, Brightness, Auto-rotate Display |
| Built-In Sensors | Accelerometer Gyroscope |
Unboxing The RasPad 3
Let’s open it up and take a look at what’s included in the box.
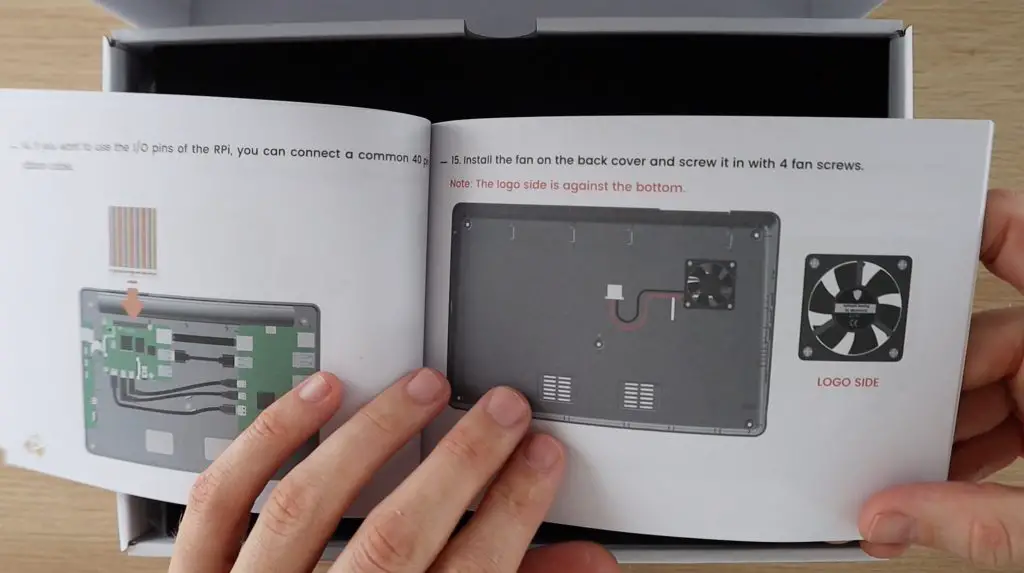
First up is the user manual.
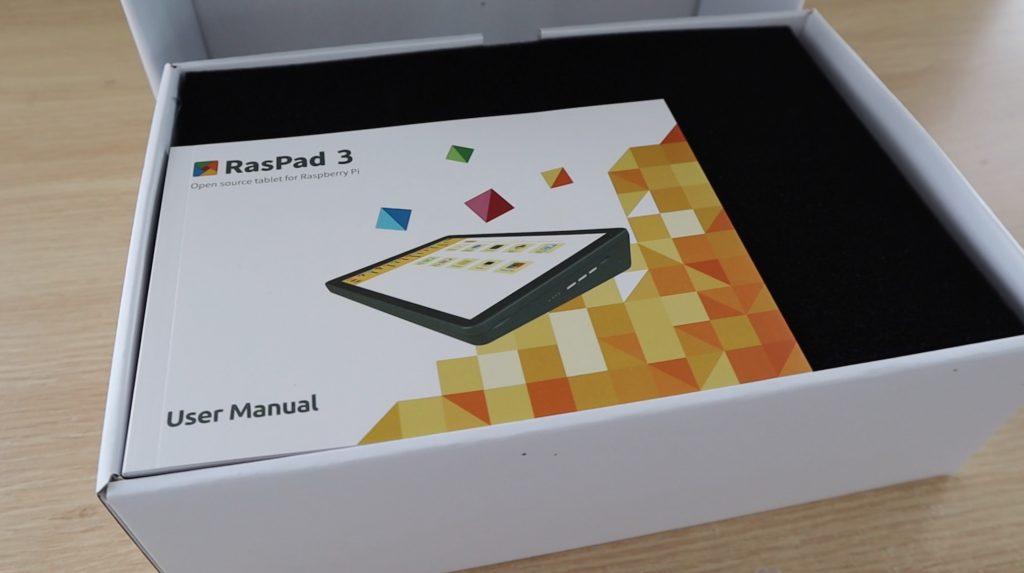
It’s is one of the better ones I’ve seen for these types of kits. It is very well presented, with illustrations for each step, and I’m pretty sure that even a child of around 10 years old wouldn’t have much trouble following the instructions to put it together. The English is also pretty good for the most part, but there are a few gems along the way.
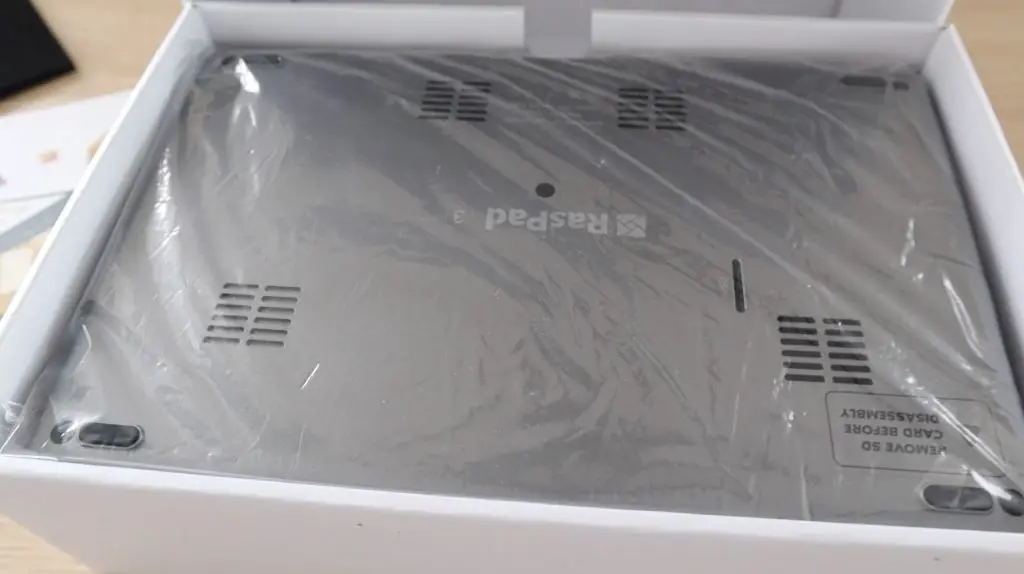
Underneath the sponge protector, we’ve got the RasPad in a plastic sleeve.
And under that, we’ve got a compartment with the power cable, internal cables, and accessories and even a screwdriver to put it together with.
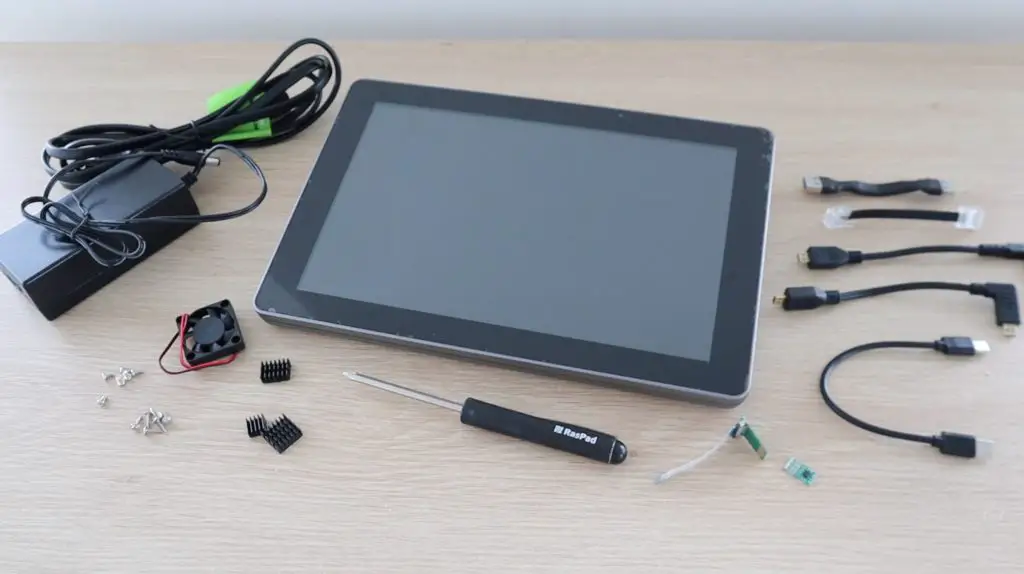
So the RasPad includes everything you need to get it running, even the heatsinks for your Pi. You literally just need to your Raspberry Pi and an SD card.
From the manual (on flashing the image) it looks like there is a version available with a pre-flashed microSD card included but I couldn’t find an option for this on their website or on Amazon, so this is possibly a carryover from a previous version.
So that’s what’s included in the box, now let’s take a look at the device.
RasPad 3 First Impressions
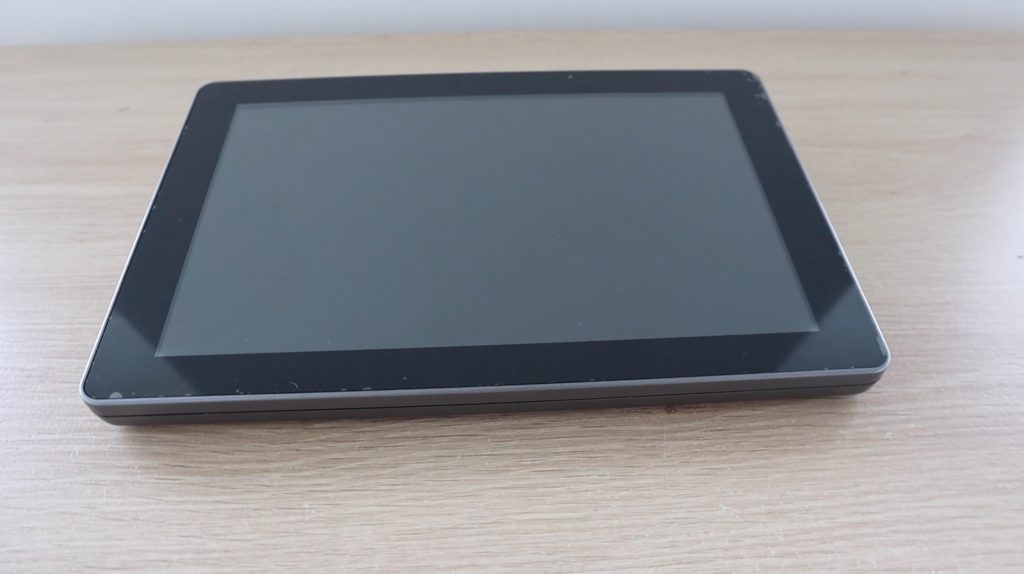
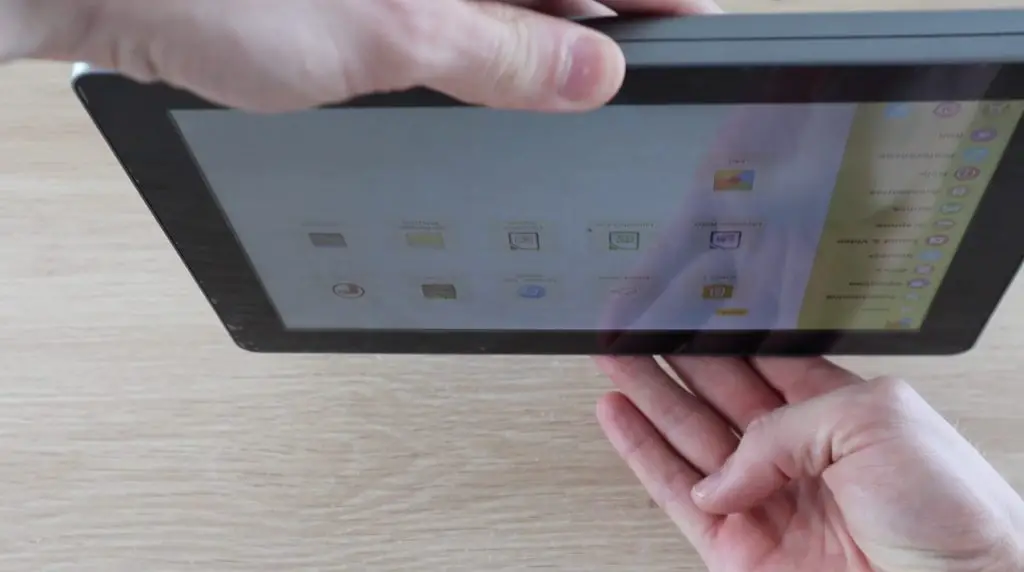
Taking a look at the RasPad device, on the front we’ve got the large 10.1” touch display. It’s surrounded by a prominent black bezel, similar to other 10″ tablets. There are no additional buttons, no camera lens, or mic or speaker holes on the front.
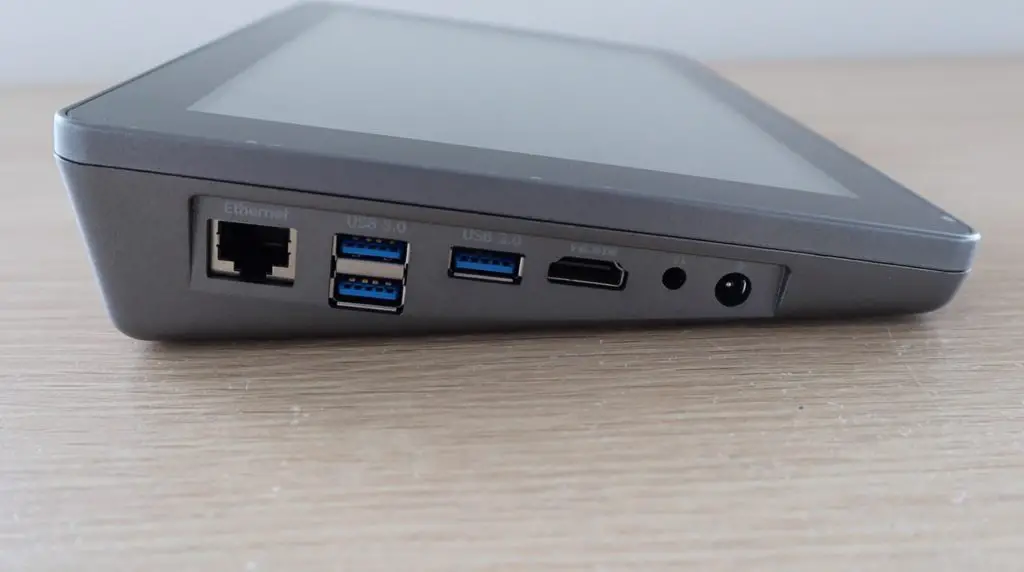
On the left side, we’ve got an Ethernet port, 3 x USB 3.0 ports, a full-size HMDI port, a 3.5mm headphone jack, and a 5.5mm barrel power socket. You’ll notice side-on that the tablet is much thicker on the back than it is on the front and that it sits on the table with the display tilted at an angle.
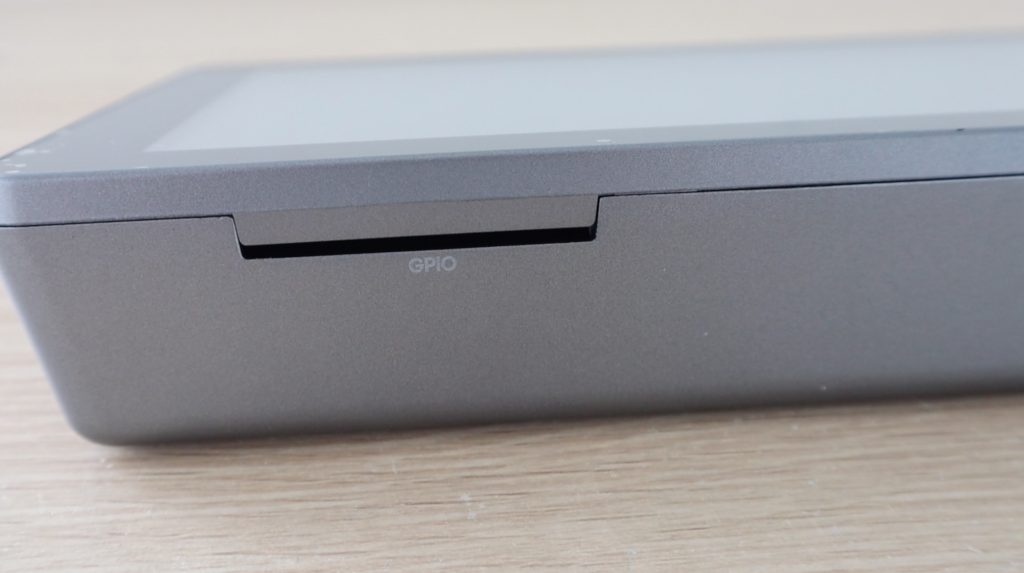
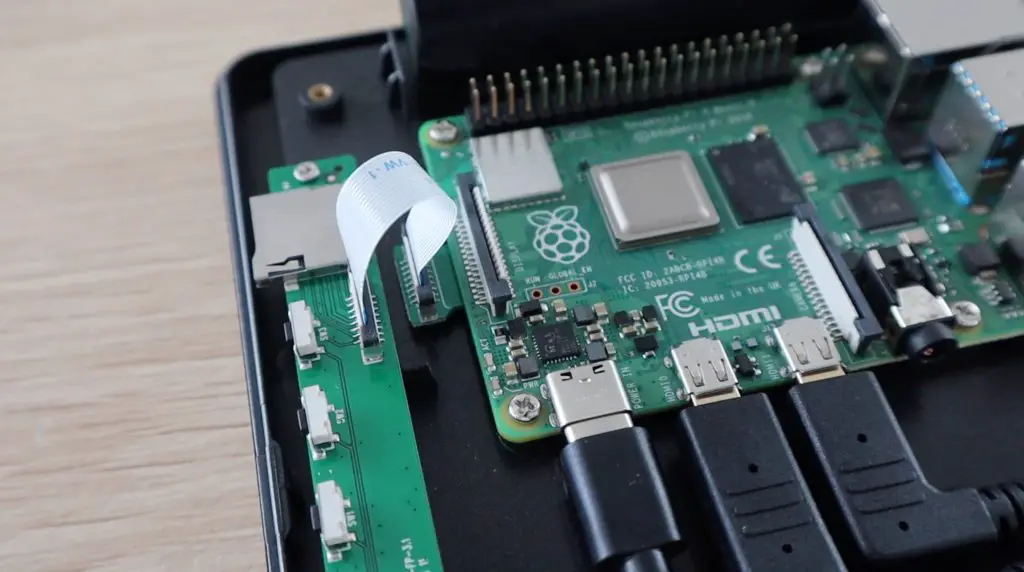
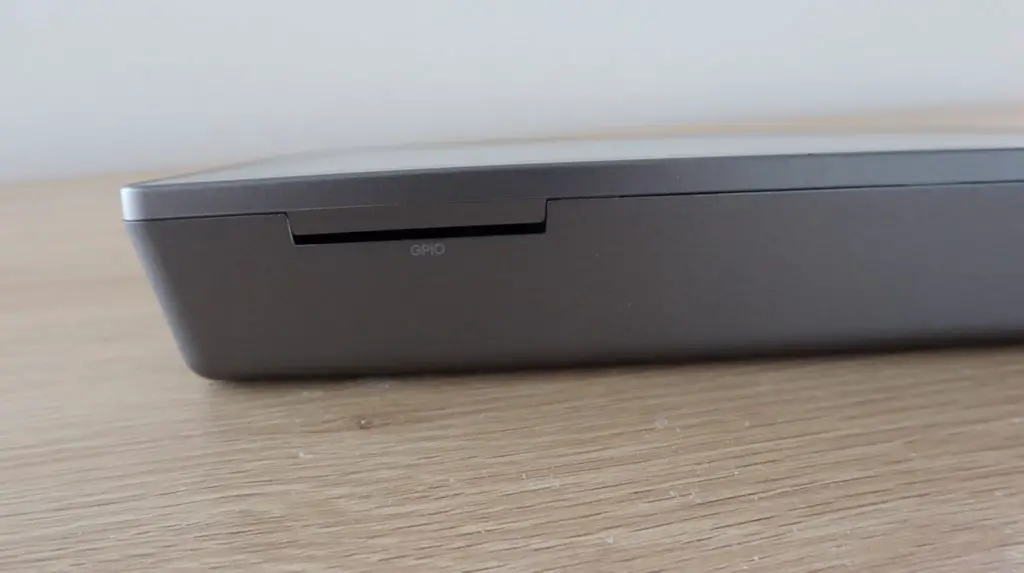
On the back is just a thin slot to pass a GPIO ribbon cable through so that you can access the Pi’s GPIO pins.
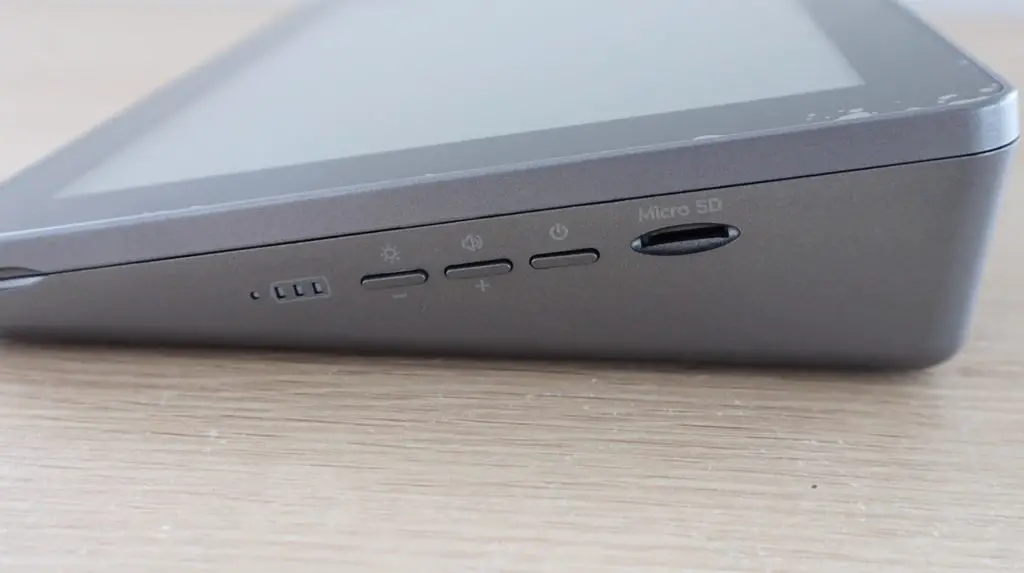
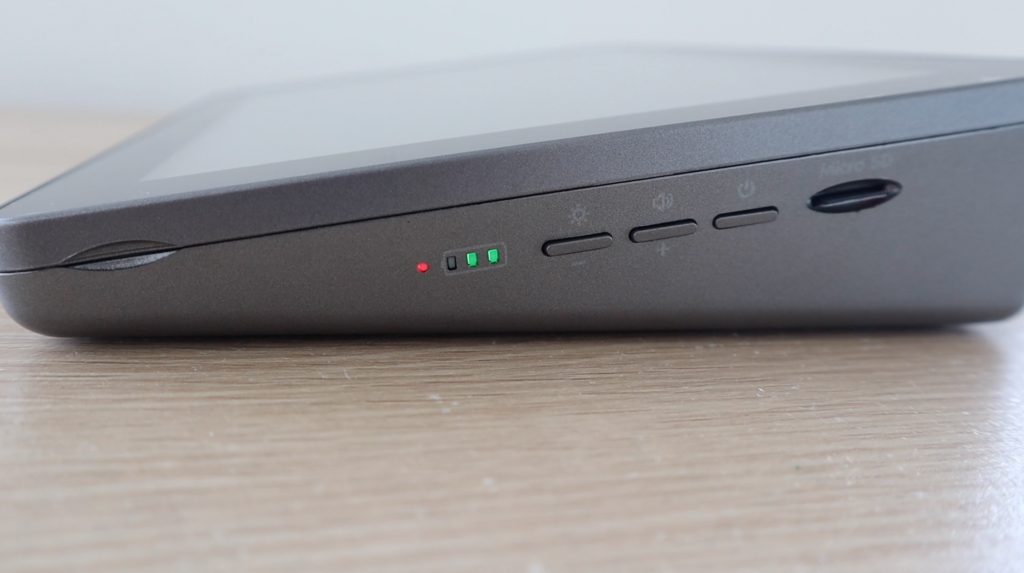
And on the right side, we’ve got a battery indicator, buttons to control the volume and brightness, a power button, and a microSD card slot.
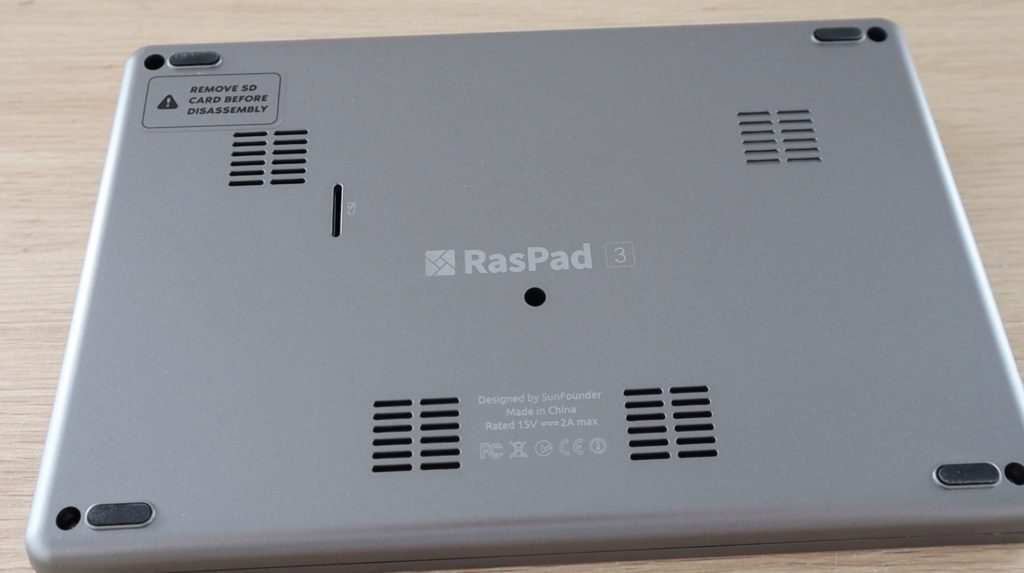
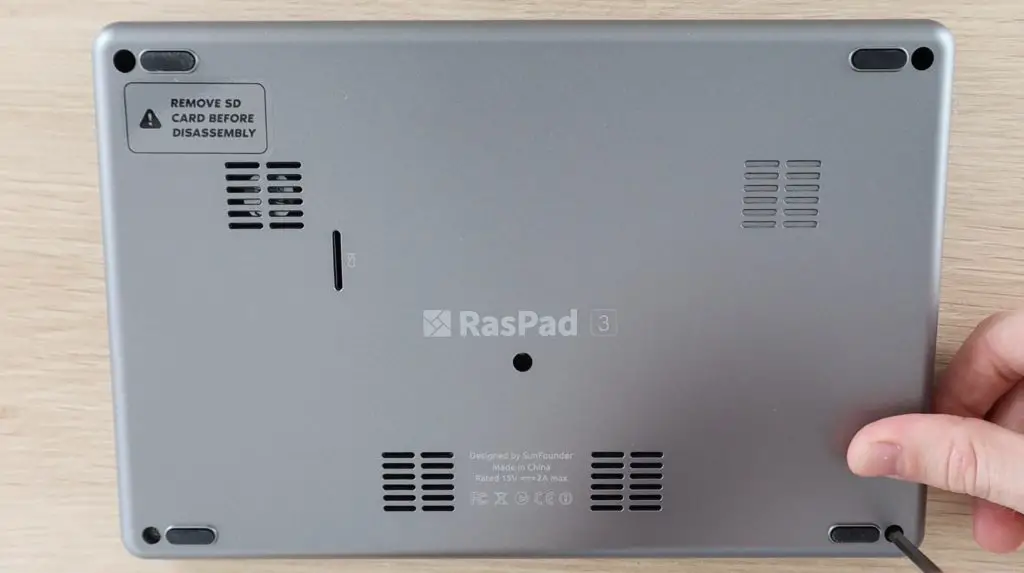
There isn’t really much on the bottom. We’ve just got 5 screw holes which hold the bottom cover in place as well as some ventilation holes and speaker grills. It’s also got rubber feet on each corner to rest on to elevate it slightly for ventilation.
The RasPad is roughly the same size as the 10.2” iPad although it is obviously quite a bit thicker, especially along the back edge.
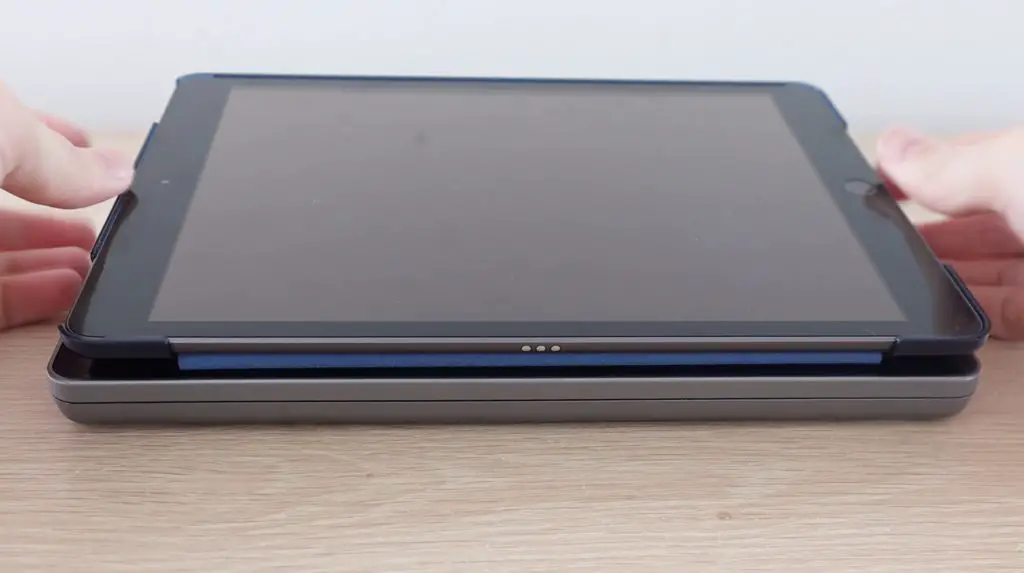
Overall, the RasPad feels like a reasonably well-built, good-quality product. The glass touch display looks and feels like a higher-end tablet and the plastic case is sturdy and sits perfectly flat on the desk. There is a prominent join line around the edge between the bottom and top halves, but this is to be expected on a device that is intended to be taken apart and re-assembled.
Assembling The RasPad and Raspberry Pi 4
Now that we’ve had a look at the outside, let’s use the included screwdriver and put the Raspad together.
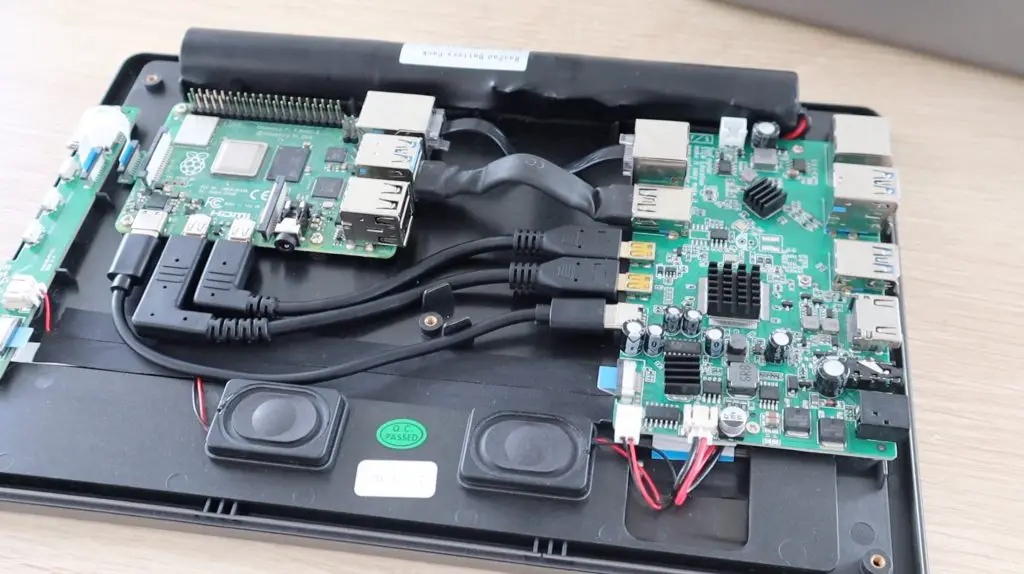
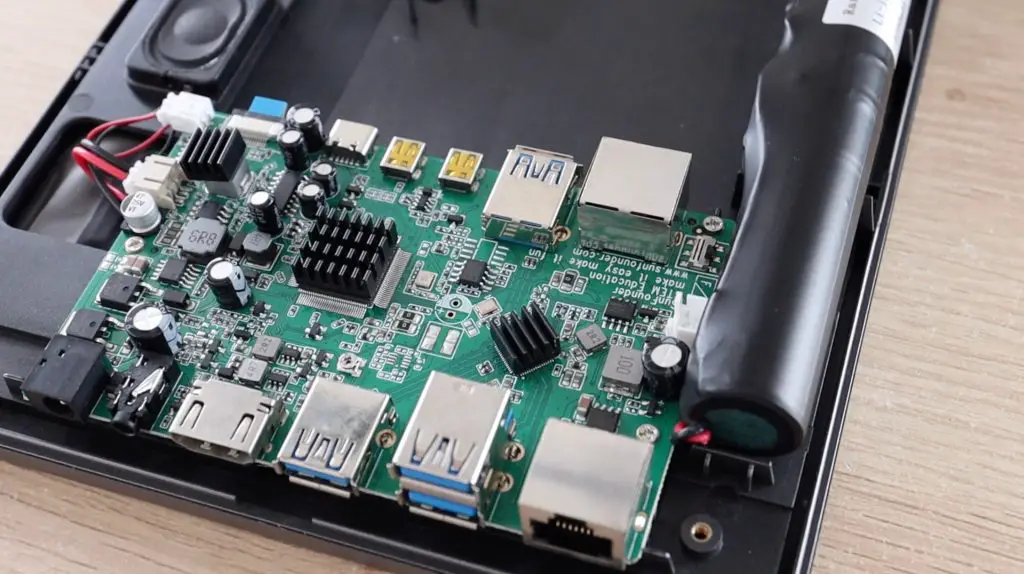
Underneath the back cover, you’ll see the relatively large breakout board on the right side, a pair of speakers on the bottom, a second smaller breakout board on the left side, and a 3-cell 3200mAh battery pack along the top.
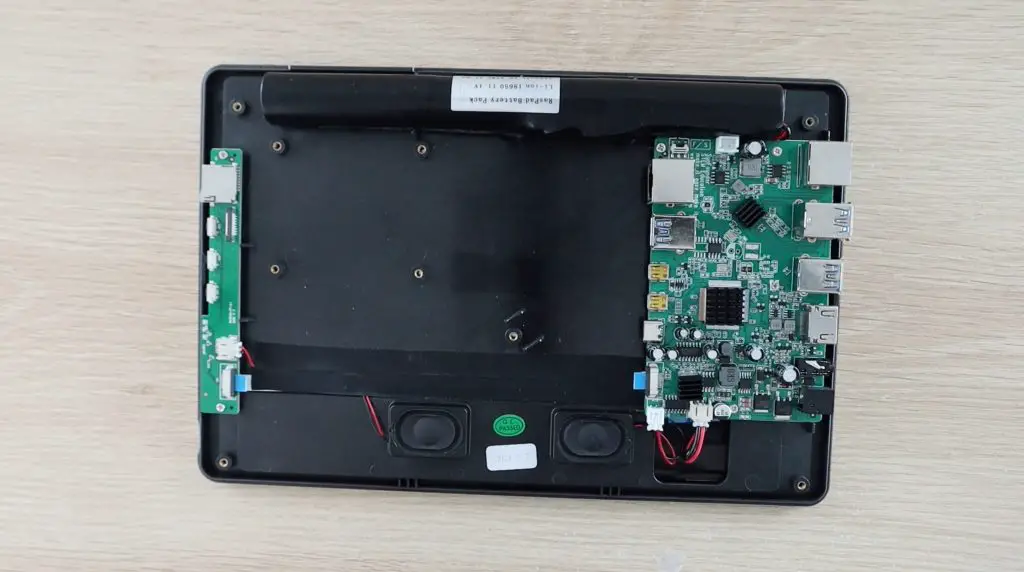
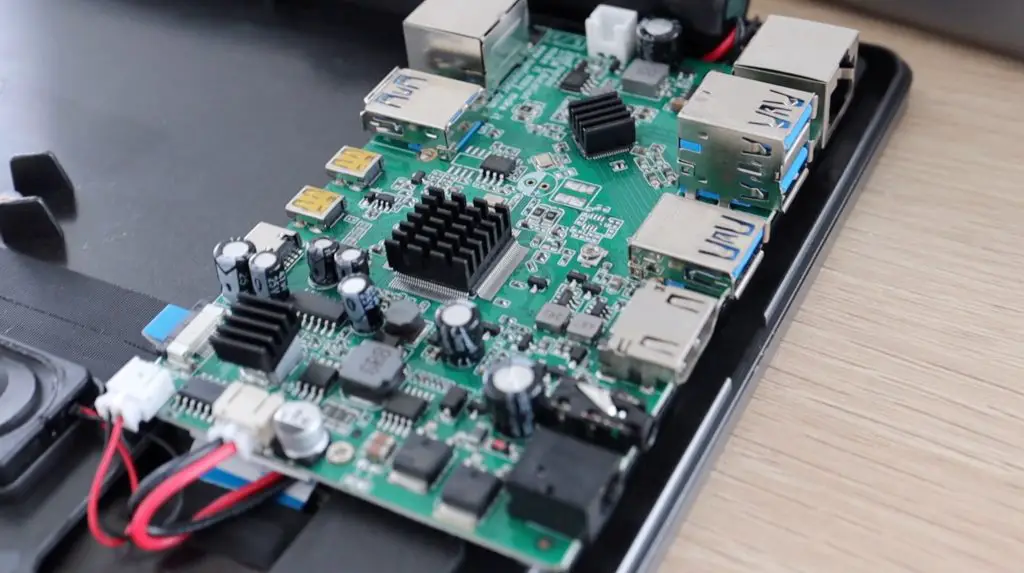
The main breakout board on the right is responsible for power management, sound, control of the fan, management of the touch display, and the control buttons.
We start off by plugging the USB and Ethernet cables into the Pi, then add the HDMI and power cables. These fit really well between the Pi and the control board and there are even small tabs for cable management to prevent the cables from covering the center screw hole. We then add the SD card adapter and screw the Pi down.
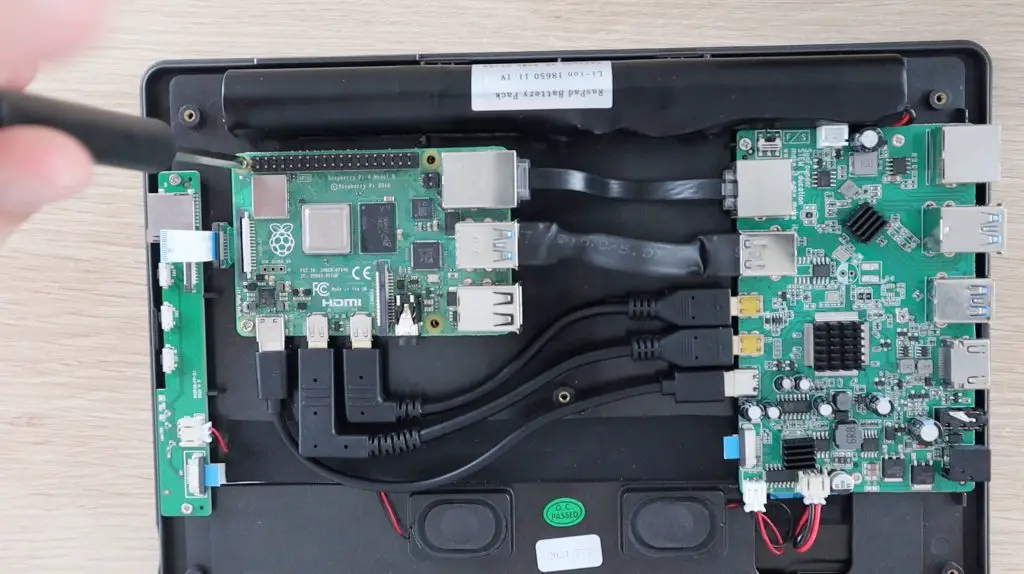
The SD card adaptor plugs into the Pi’s SD card slot and brings the slot out to the side of the case so that you can change or modify the operating system without having to take the back cover off.
We then stick the three heatsinks onto the Pi.
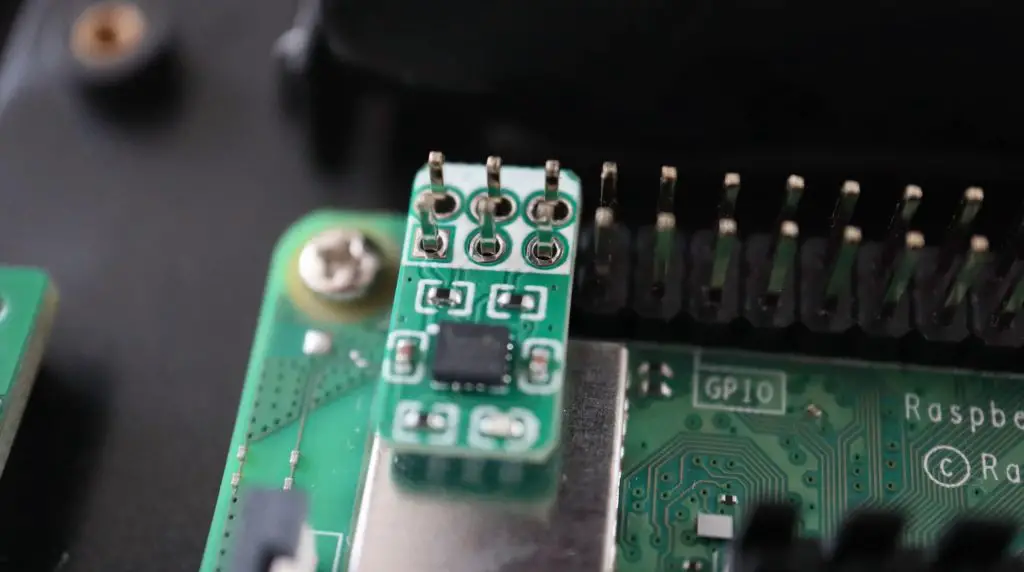
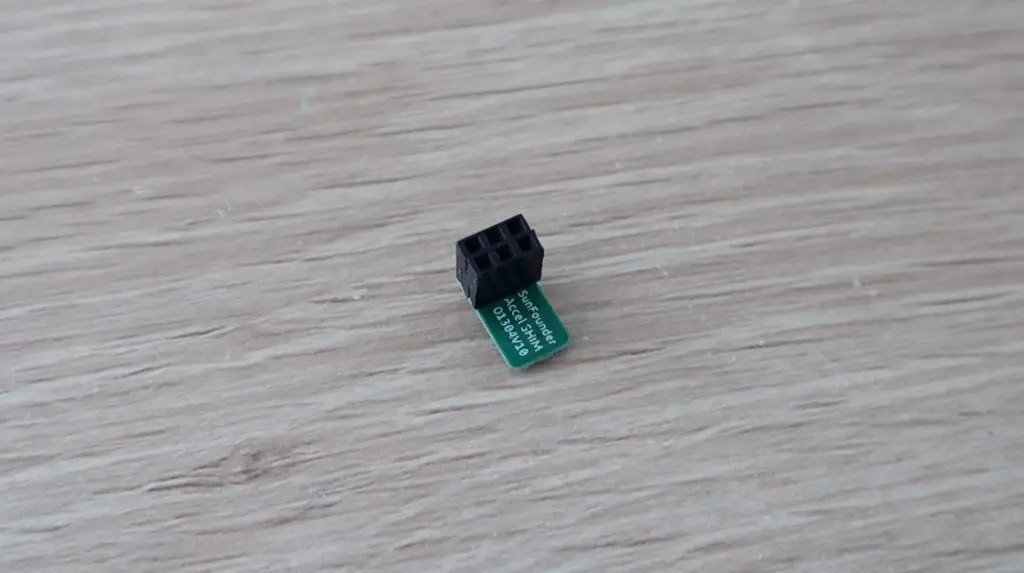
There is also an accelerometer shim to push onto the GPIO pins to auto rotate the display. I’m not sure why they don’t have proper female header pins on the shim, it’s just supposed to be pushed onto the exposed pins as shown below. I don’t really like this design as it feels like the shim can just fall off if the pad is bumped and you aren’t sure that all of the pins are actually making contact with the pins. The centre pins for example could be exactly in the centre of their holes and would then be making very poor contact with the pins if any at all.
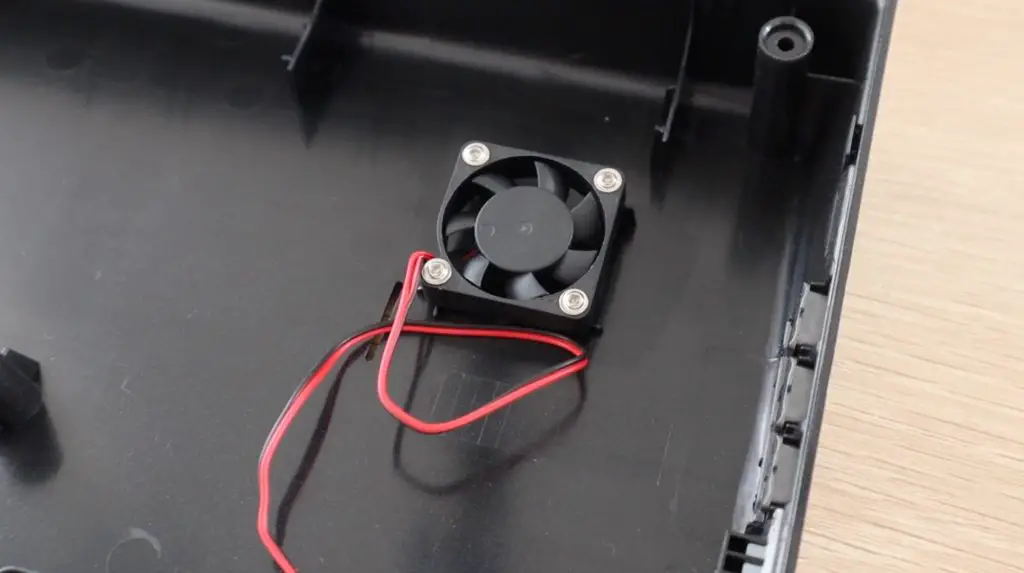
Lastly, we need to add the fan to the back cover. This is mounted directly onto the cover and pushes the air out of the case rather than pulling air in. When the case is closed, the fan is positioned directly above the Pis heatsink.
Once we’ve got everything installed, we can close it up.
Flashing RasPad OS To The SD Card
Next, we need to burn the operating system image to our SD card. They have their own operating system, RasPad OS, which I’m going to try first. This can just be downloaded from the RasPad website and is then flashed with a utility like Balena Etcher.
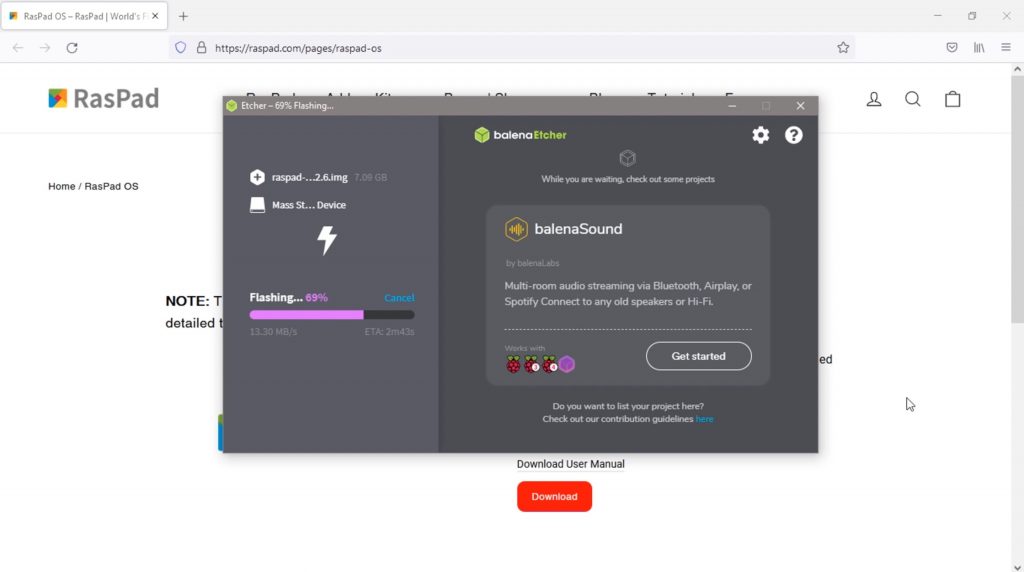
Once the SD card has been flashed, we can insert it into the microSD card slot and plug in the power adaptor. The power adapter is a bit bulky, but it needs to provide quite a lot of power to the Raspad to power the Pi, the display, and charge the battery when empty.
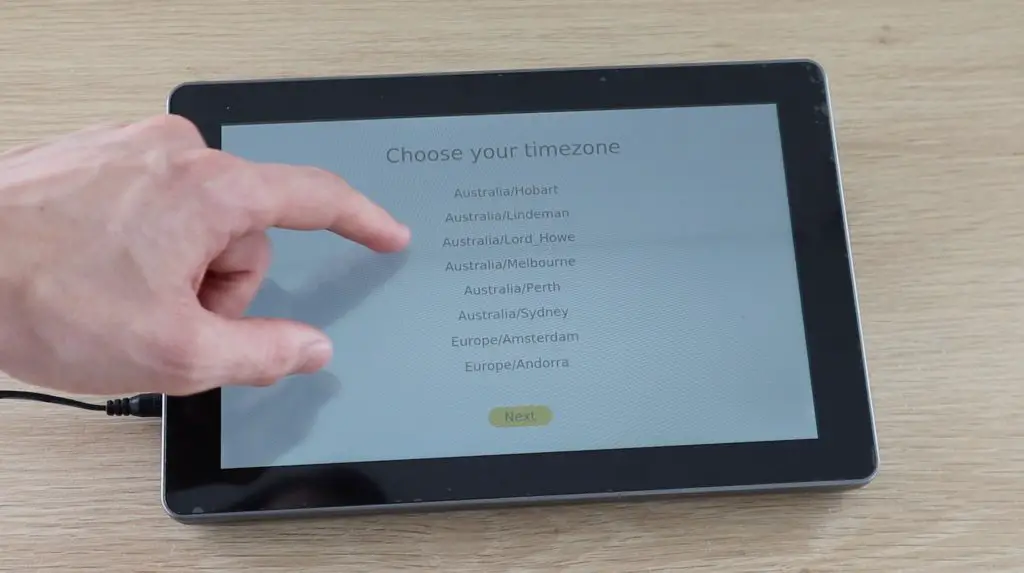
The first boot takes about a minute to complete and you’ve then got a couple of settings to get through. It would have been nice if this step included setting up a WiFi network as well, but you can just head over to the WiFi menu in the taskbar to set that up afterward.
Subsequent boots take a little under 30 seconds on RasPad OS and they do have an option to just turn off the display with a short press of the power button if you’re going to be away briefly. This obviously doesn’t turn the Pi off though, so you won’t want to do this if you’re not using it for longer than about 10-15 minutes.
Using The RasPad 3
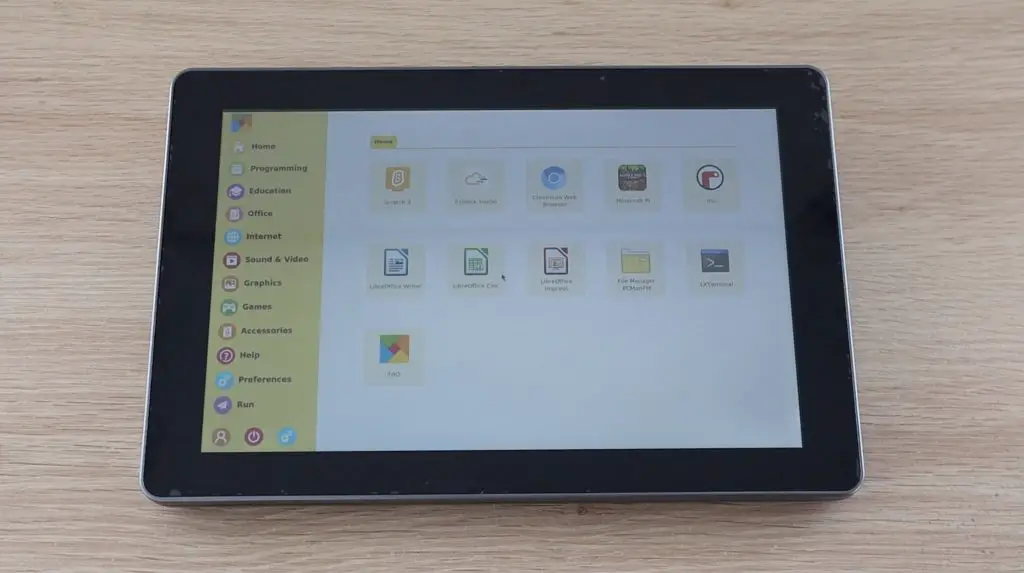
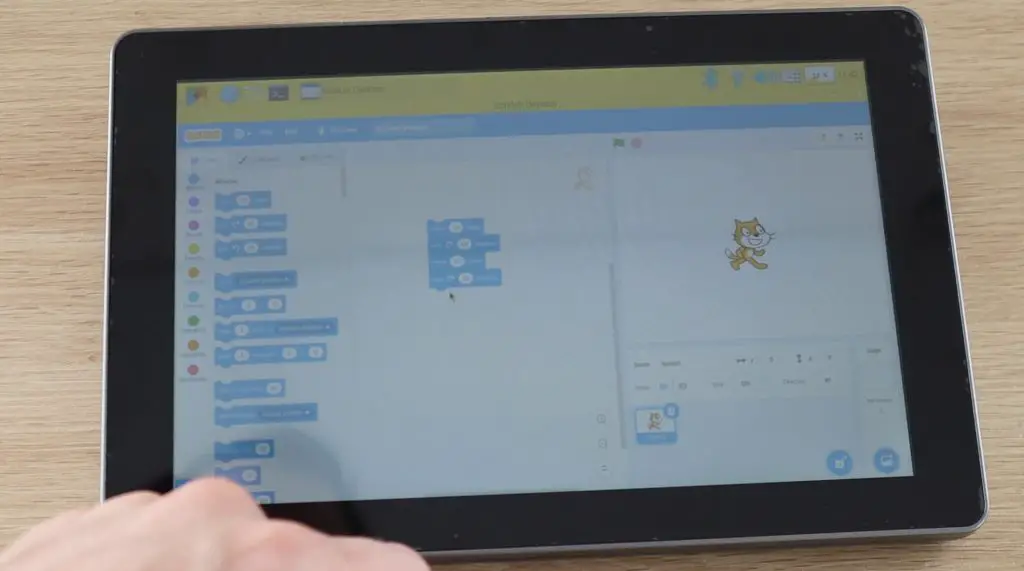
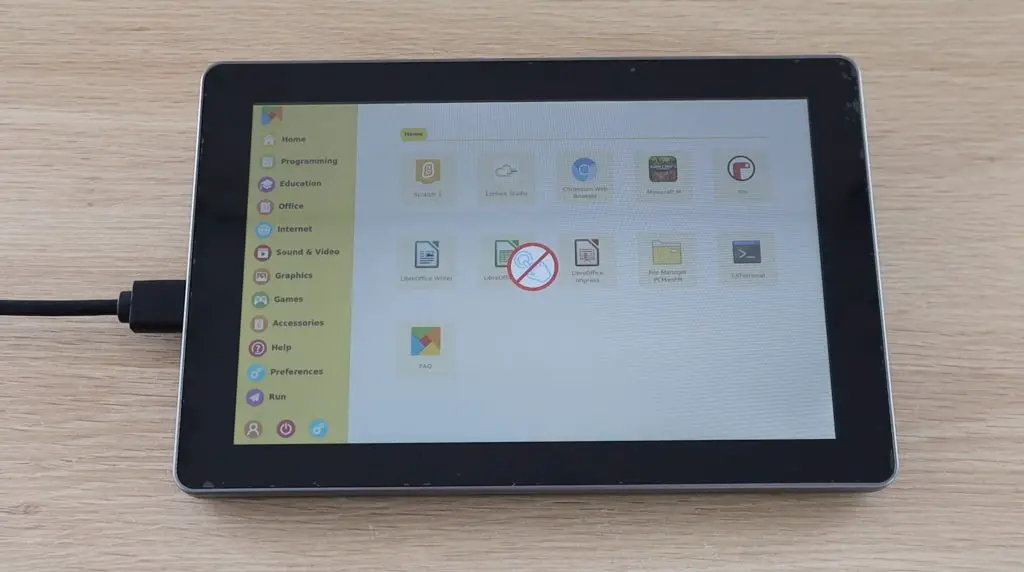
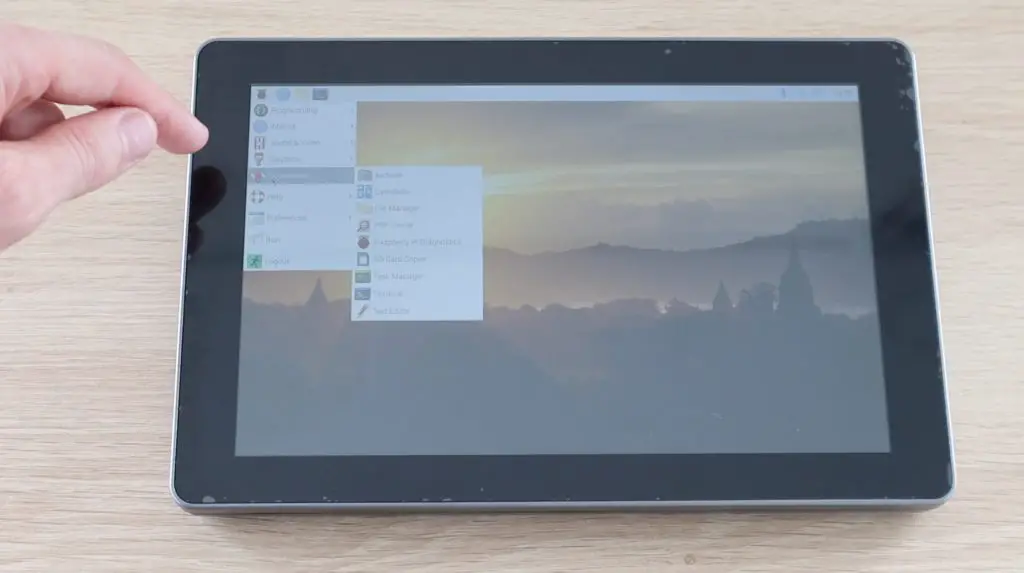
Their operating system looks quite similar to Raspberry Pi OS, but it does have a custom menu, which they call RasPad Launcher. This launcher suits a tablet-style interface a bit better and makes it easier to open applications on the touch display.

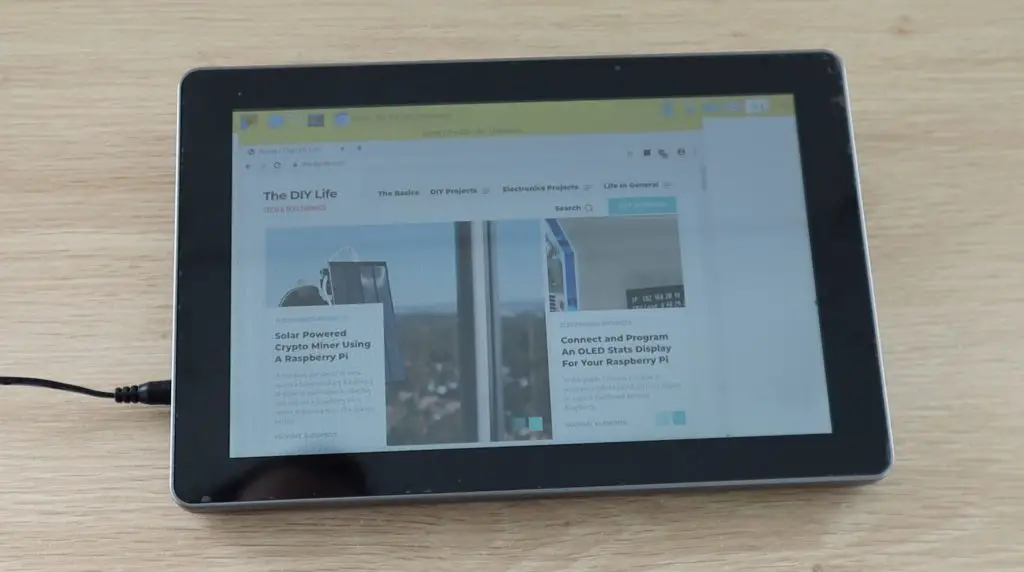
They’ve tried to make their operating system reasonably touch-friendly and you are able to get through tasks like using a spreadsheet or word processing app using the onscreen keyboard, but the keys are quite small and it’s just not anywhere near as easy as just using a keyboard and mouse.
This isn’t a fault with the hardware, the touchscreen on the Raspad is pretty good, it’s responsive and fairly accurate. These apps are just inherently designed to be used with a keyboard and mouse and so there are things that can’t be done easily with the touch screen, like a right click, and the small icons are difficult to press accurately.
Their documentation does guide you through installing a script to allow a long press to register as a right-click, but this needs to be installed as an extra on most operating systems.
Take an app like Minecraft for example, if you attempt to do anything on the touchscreen, it just results in downward digging. You’re also unable to close the app as clicking on or around the window just results in further downward digging.
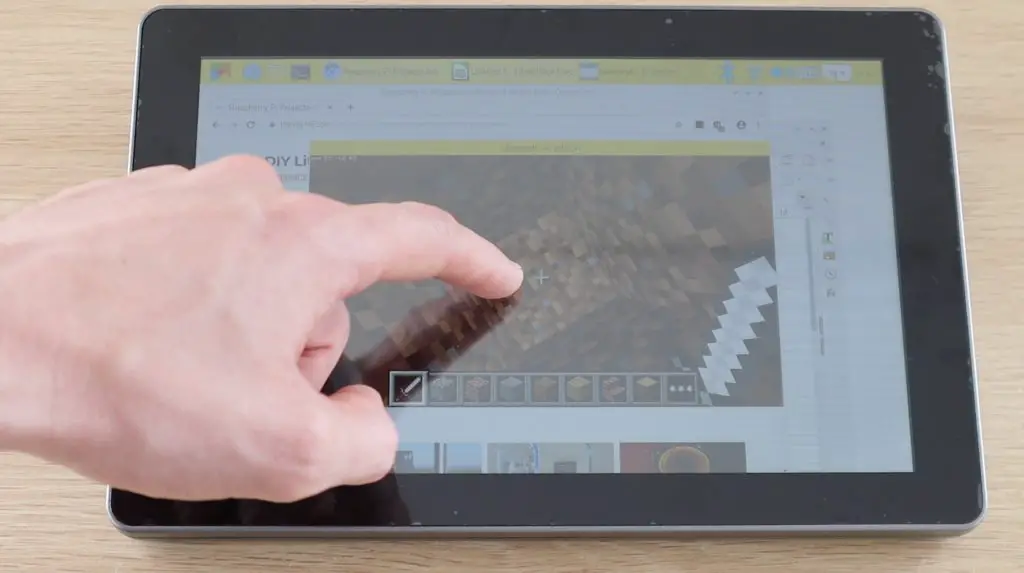
It does work well with some games and I think the tablet would be well suited to education where students do drag and drop programming. It would also work well or for home automation apps with a touch interface or other purpose-built touch screen apps. I’m thinking of registration systems for buildings/businesses, point of sale systems, questionnaires, and surveys – the ones with tick boxes and yes/no answers.
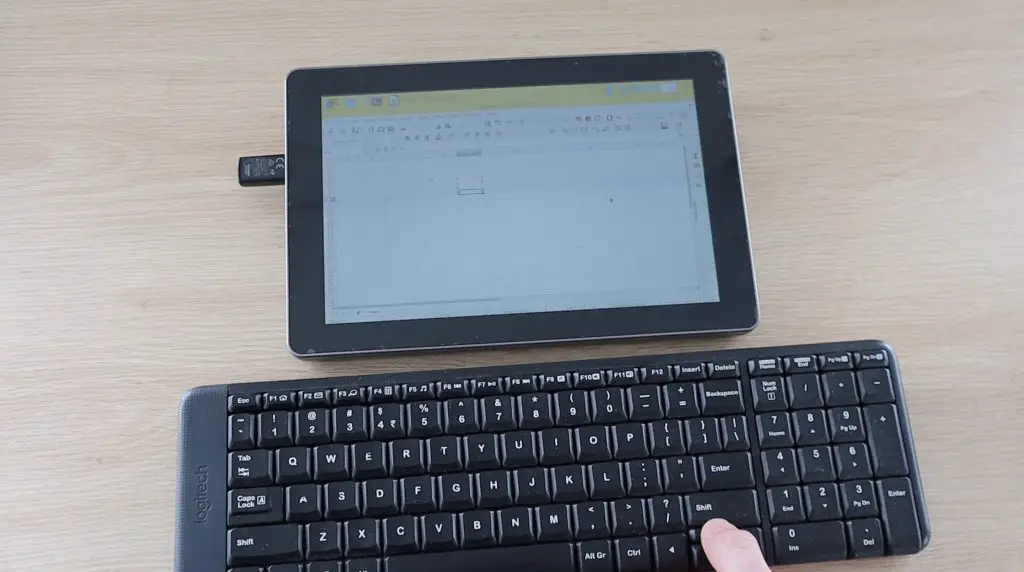
I think you’d have a hard time using the tablet for apps that require regular text input without using an external keyboard. Fortunately, this is quite easy to add and works just like a regular keyboard and mouse on a Raspberry Pi.
The speaker quality is also not bad if you’re using it to play or stream music or videos.
I tried connecting an external display to the Raspad and while this works well, it does disable the touchscreen. I’m not sure why they have done this as it would still be useful to use touch inputs with an external display, but that’s just something to be aware of if you’re planning on using it in this way.
The specs claim 3-5 hours of battery life. I managed to get a little under 4 hours, but this obviously depends on how you use it. If you’re running apps that don’t require much processing and you’ve dimmed the display then you’ll get better battery life.
I then tried the auto-rotate function and that didn’t seem to work. There isn’t anything mentioned in the manual about setup or use conditions, so I assume that this should just work when using their operating system.
I wondered if the shim that I was initially concerned about wasn’t connected properly, so I opened it up and added my own header pins to it. I then closed it all up again and this didn’t work either, so I think my auto-rotation shim is just faulty.
Running Different Operating Systems on the RasPad
Another great feature of the RasPad is that you have the option to run different operating systems or flavours of operating systems on it quite quickly and easily. They have listed a couple of options on their product page, but I would imagine that any operating system that runs on a Raspberry Pi would run on the RasPad as well.
I tried booting up Raspberry Pi OS and that worked perfectly, including with the touchscreen input, without any additional setup.
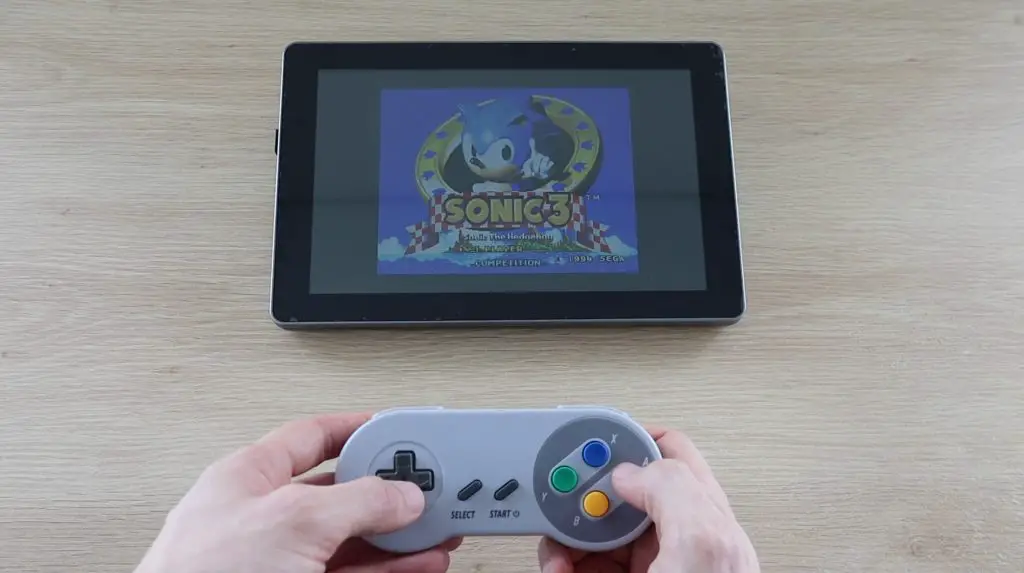
I also tried running RetroPie and that worked well too. It’s actually quite a nice package for a RetroPie system as you’ve got a portable battery-powered display and speakers all in one unit. Just plug in a controller and you’ve got a portable console that’s ready to go.
Suggestions For Future Versions Of The RasPad
After using the RasPad for a couple of days, I got to thinking of a couple of things that I would like to see on future versions.
One of the first that came to mind was battery level feedback to the operating system. There is a battery level indicator on the side and the device overlays a low battery level warning on the display when it gets low, but if you don’t actually turn the Raspad off then it just eventually dies. I would like to see a low-power shutdown script integrated into the operating system.
Next would be an option to add an internal SSD. There is a lot of free space inside the Raspad, and there is even a free USB 3.0 port. It would have been pretty easy to add a space or adaptor to add a small SSD, a slot built into the control board for an NVME drive would be even better.
Although there is a slot on the top for a GPIO ribbon cable to pass through, you either have to open up the case up every time you want to connect something to the GPIO pins or have a ribbon cable dangling out the back permanently. I would have preferred to see a set of GPIO pins (male or female would work) brought out to the side of the case, like the M5 Stack Modules, which can then be plugged into and removed easily.
My last suggestion is not so much a change to the Raspad but perhaps a future variant, and that would be to create a CM4 version. I get why they have designed the Raspad around the much more common Raspberry Pi 4B board, but given that it’s mounted inside and has a number of cables connected to it, it would be a lot simpler to just plug in a CM4 module. It could just be an easy option for those who want a Raspberry Pi tablet and intend on leaving their Pi inside the tablet permanently.
Final Thoughts On The RasPad 3
Getting back to the price point I mentioned earlier. At around $220 to $250, once you’ve added a Pi to it you’re pretty close to $300. This does seem quite high if you consider that you can get other tablets for around $200, but I think you need to take into account the use cases for the RasPad. There are definitely better options if you’re looking for a cheap tablet, but the RasPad offers makers the same level of flexibility and adaptability that a Raspberry Pi comes with. Being centered around a Raspberry Pi, you have a world of possibilities for operating systems, peripherals, sensors, adaptors, and input devices, which typically don’t exist on other platforms. How many tablets do you know of that have GPIO pins available to directly connect a moisture sensor to or drive a servo with?
With the RasPad, you’re paying for the convenience of the Raspberry Pi platform in a compact, all-in-one form factor, and that’s pretty cool!
Let me know what you think of the RasPad in the comments section below.