Last year Seeed Studios launched the reTerminal, a Raspberry Pi Compute Module 4 based touch display terminal with a pretty good list of features. One of the features that looked promising was their high-speed expansion interface on the back, which they said would be used to add plug-in modules to expand on the reTerminal’s functionality and IO.
At that stage, they hadn’t released any details on these expansion modules, but they reached out a few weeks ago and said that their first one has now been launched.
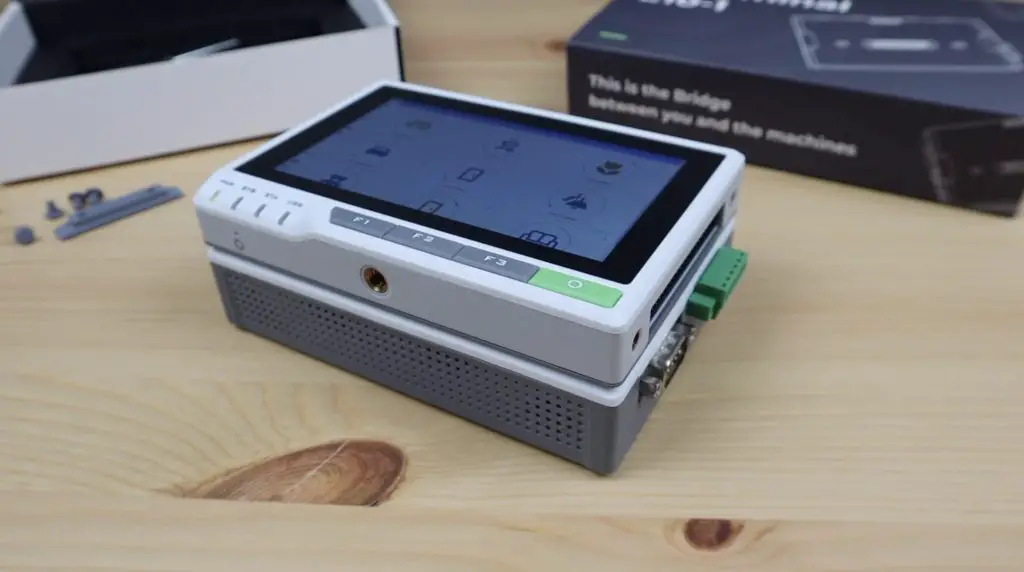
So here it is, the reTerminal E10-1, the first expansion module for the reTerminal.
Let’s open it up and see what it does and how it works.
Where To Buy The reTerminal E10-1
The reTerminal E10-1 is currently available through the Seeed Studio online store:
Unboxing the reTerminal E10-1
The reTerminal E10-1 is packaged quite similarly to the reTerminal, in a similarly sized box as well.
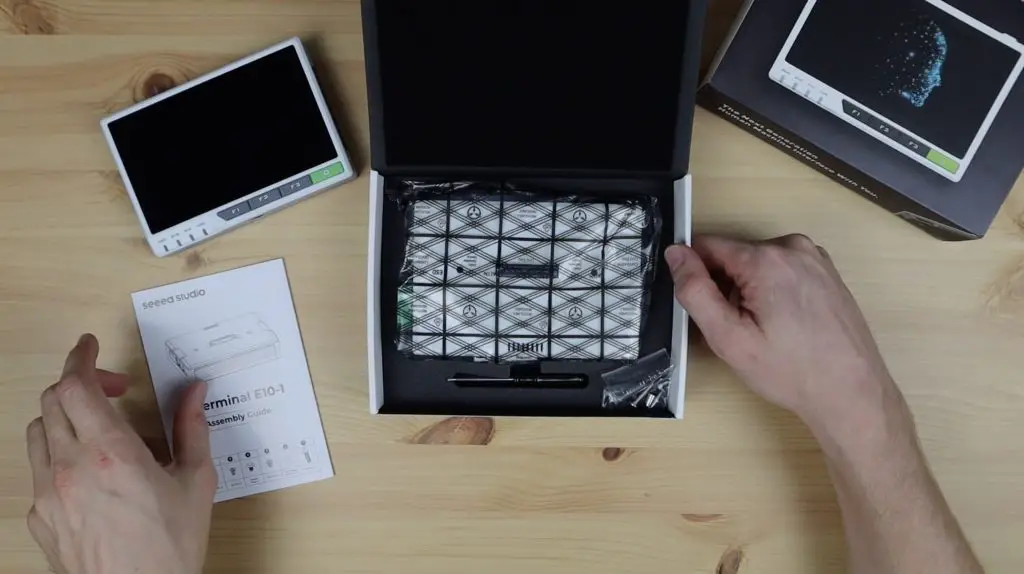
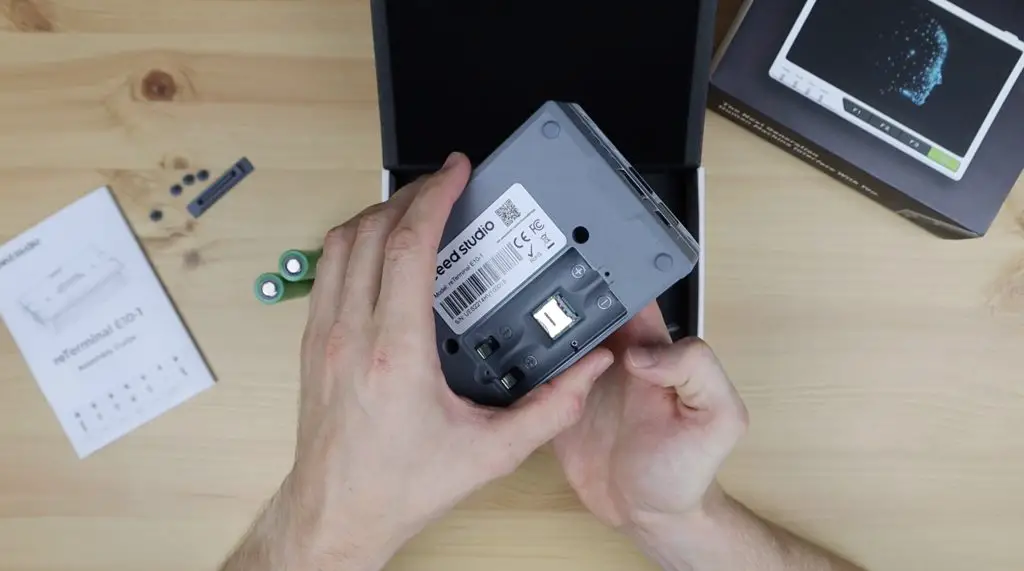
On the top, we’ve got a user manual and underneath it is the E10-1. They also include a small screwdriver and a pack of screws.
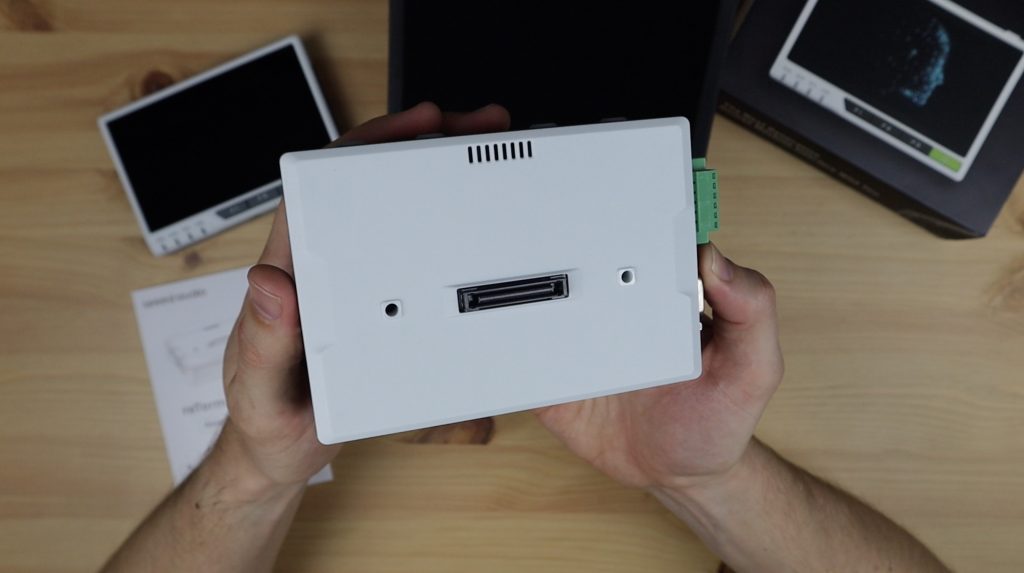
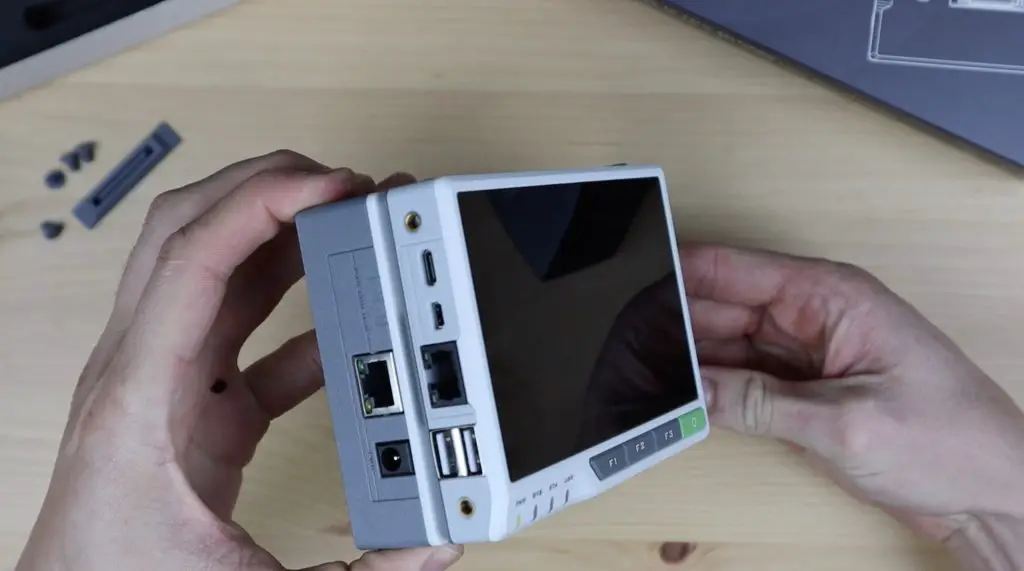
On the front of the E10-1 is the high-speed expansion port that’ll plug into the back of the reTerminal, along with a screw hole on each side to hold it in place.
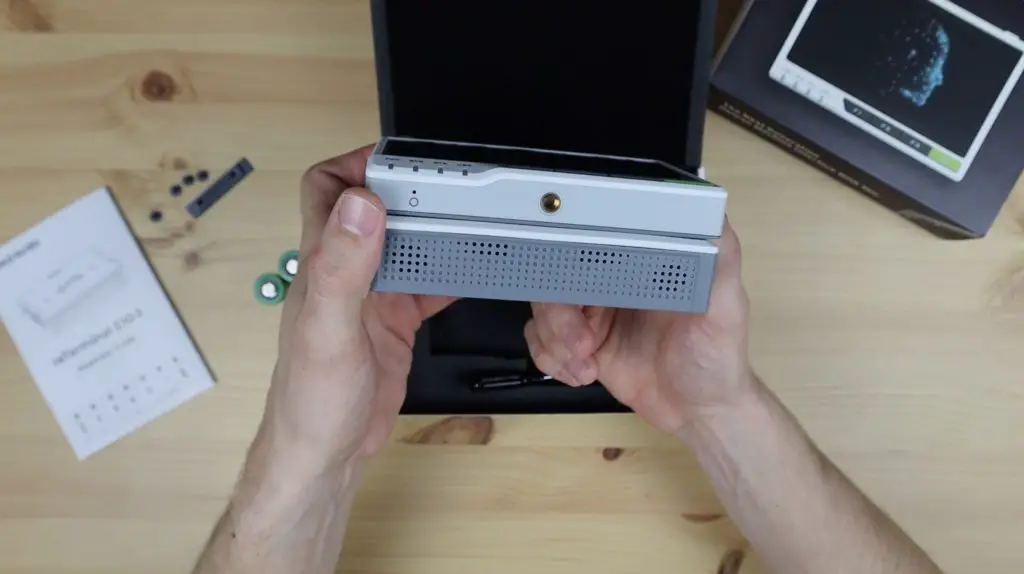
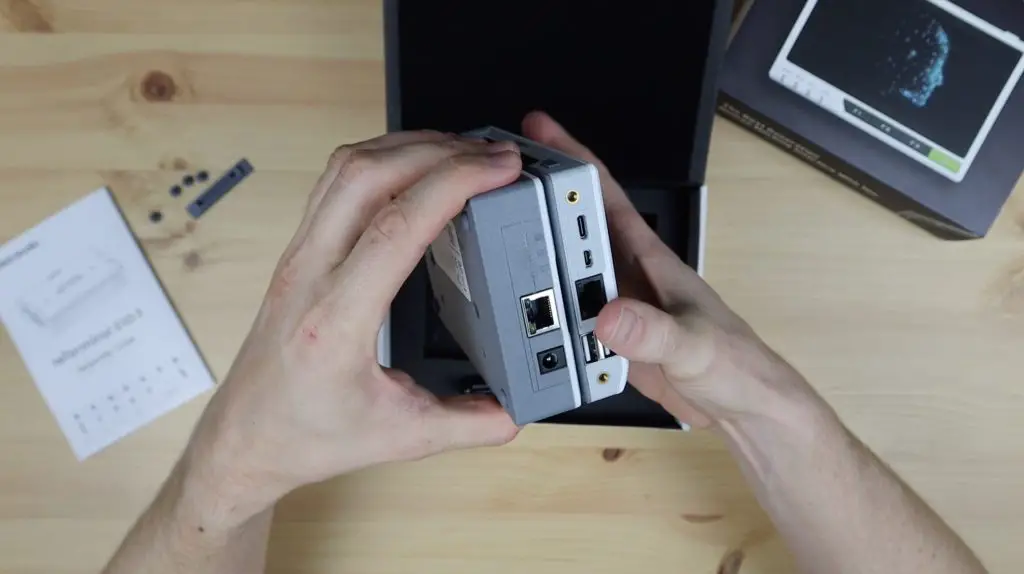
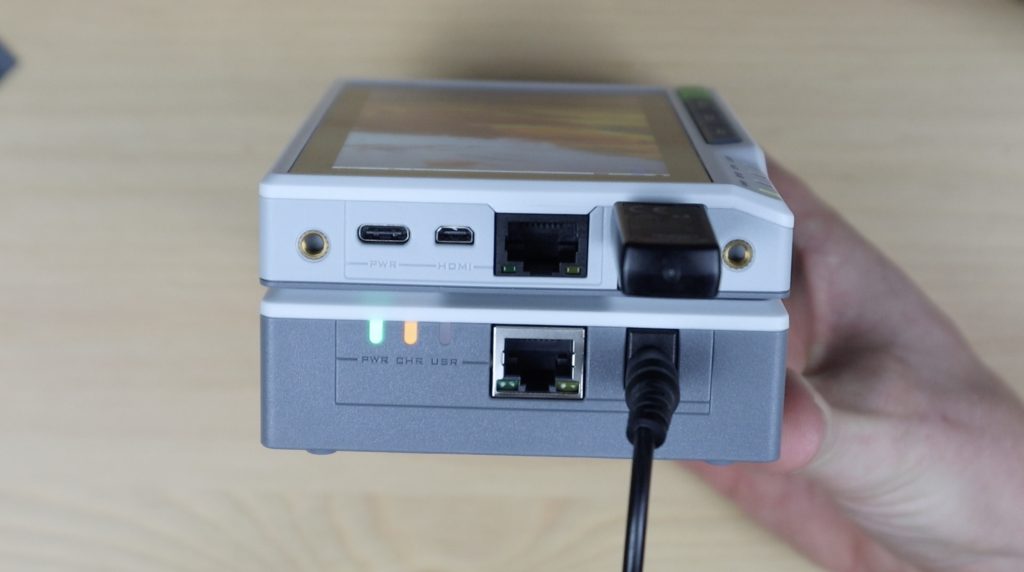
On the left side, we’ve got some status LEDs, an Ethernet port and a power port.
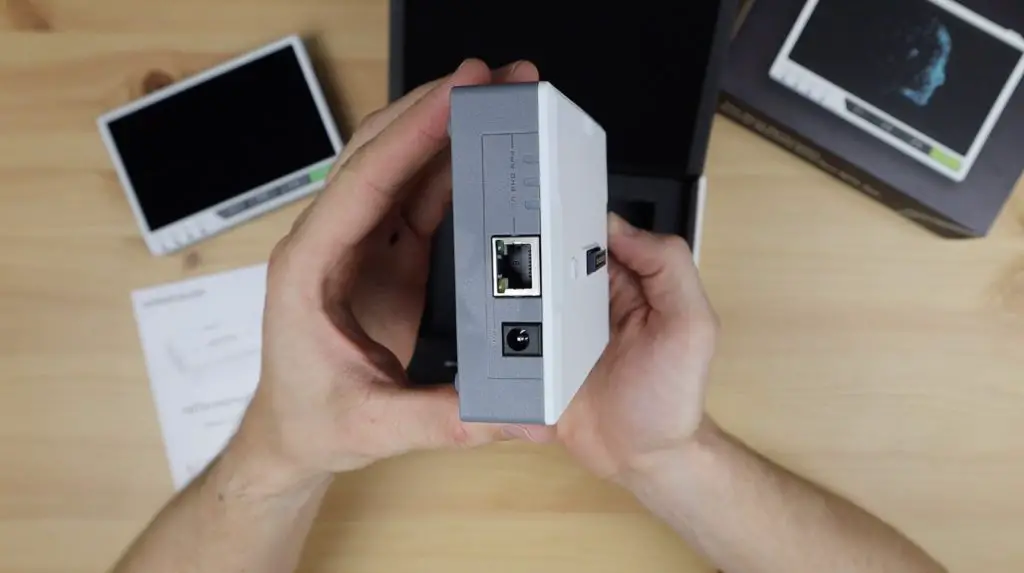
You may be wondering why we’ve got the Ethernet and power ports, as these are both already on the reTerminal. That’s because this module allows you to power the reTerminal in a few additional ways. The Gigabit Ethernet port on the E10-1 supports power over Ethernet, so you can power your reTerminal through a PoE enabled network without having to use a separate power adaptor. If you don’t have a PoE network adaptor or aren’t using Ethernet for your project then you can use the 12V barrel jack to power the reTerminal instead of the 5V USB C input on the reTerminal. Additionally, the E10-1 also has a built-in UPS circuit that runs on two 18650 batteries. So this allows the reTerminal to function as a fully standalone wireless, battery-powered device, something that was requested quite a lot when the reTerminal was released.
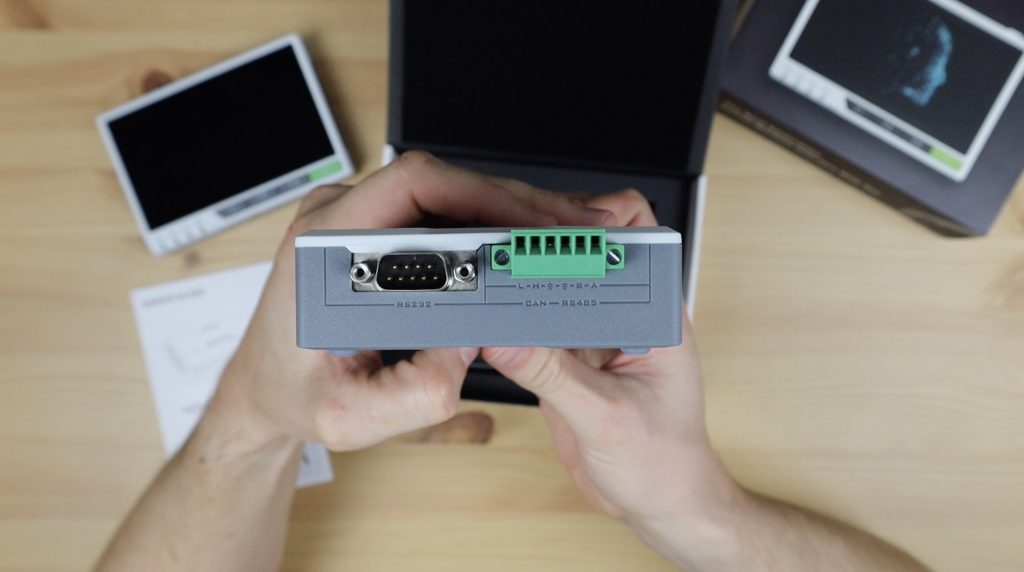
On the right side are two industrial ports, a DP9 connector for the RS-232 interface and a 6-pin terminal connector for the onboard RS-485 and CAN interfaces. So you’ve now got a number of options for industrial interfaces on the reTerminal, something that’s not very common in the Raspberry Pi expansion board range.
Along the top are some rubber plugs, one of which is an antenna interface.

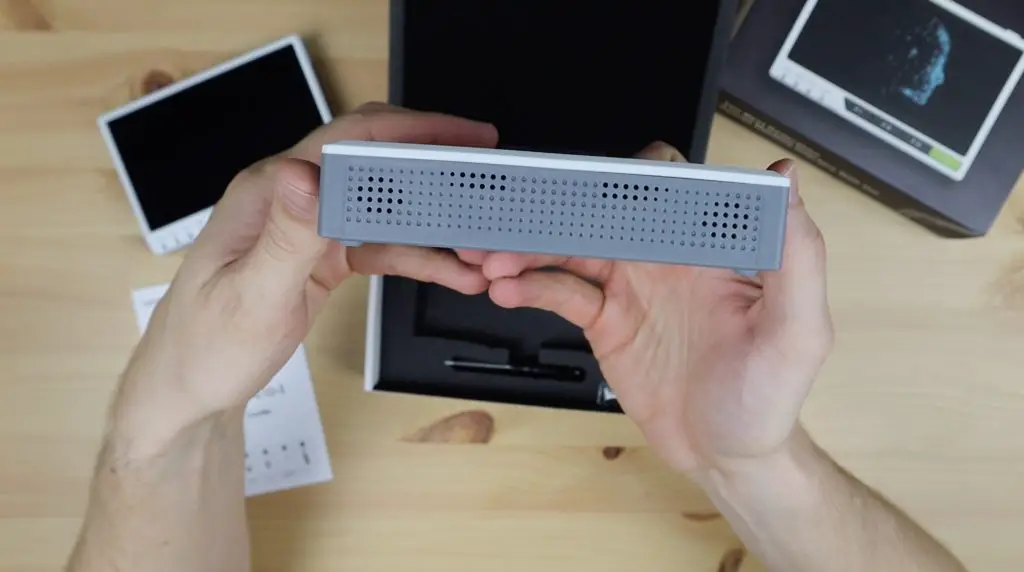
On the bottom are some vents to allow airflow for the internal fan and speaker.
The E10-1 is a bit thicker than the reTerminal, I guess that’s to allow enough space for the 18650 cells and the upright internal fan.
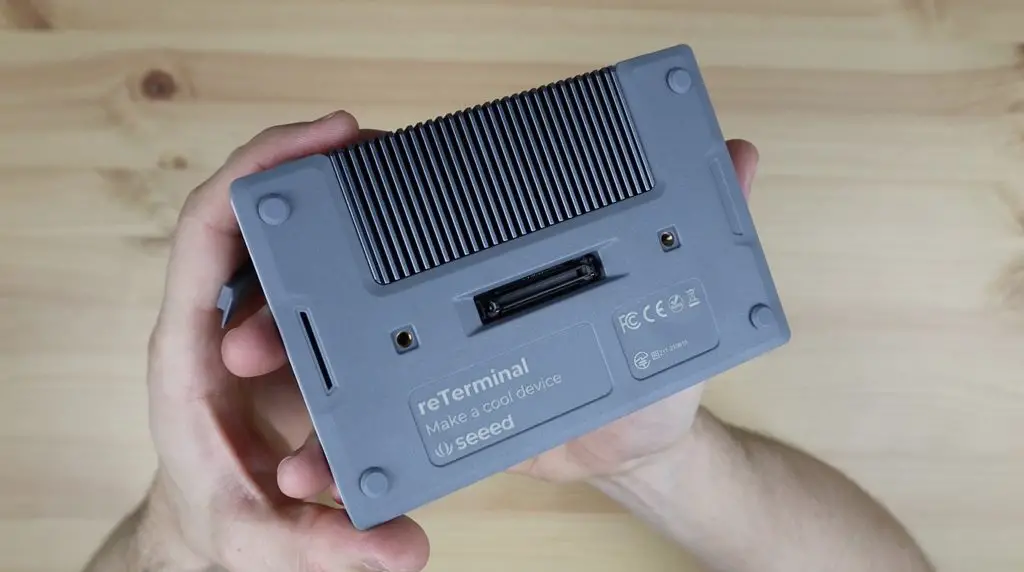
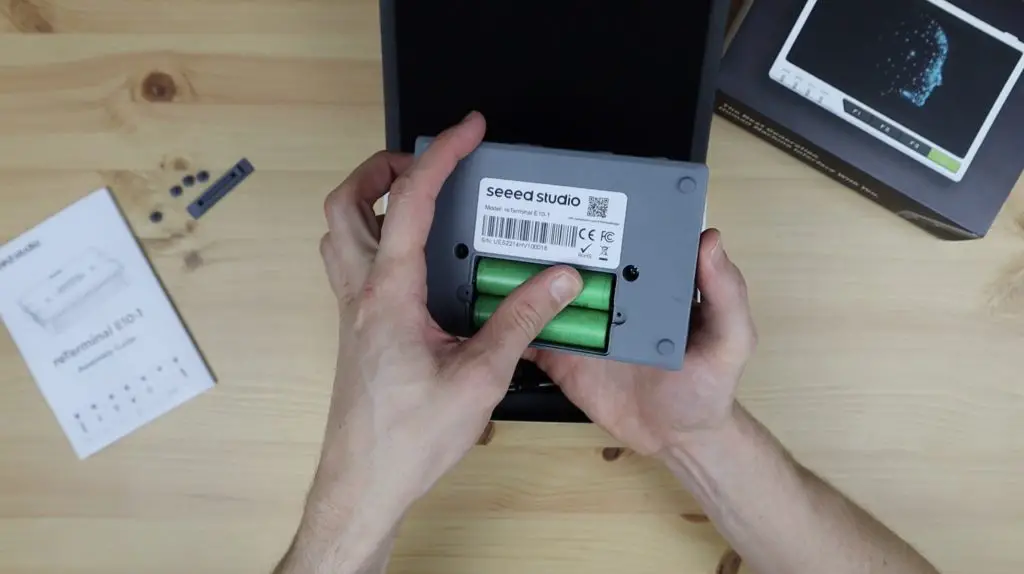
On the back we’ve just got the cover for the battery compartment. There isn’t an expansion port on the back of the E10-1 as well, so you won’t be able to stack multiple modules together as more become available, you’ll have to use them one at a time.

Let’s get the E10-1 attached to the reTerminal and try it out.
Attaching and Using the reTerminal E10-1 for the First Time
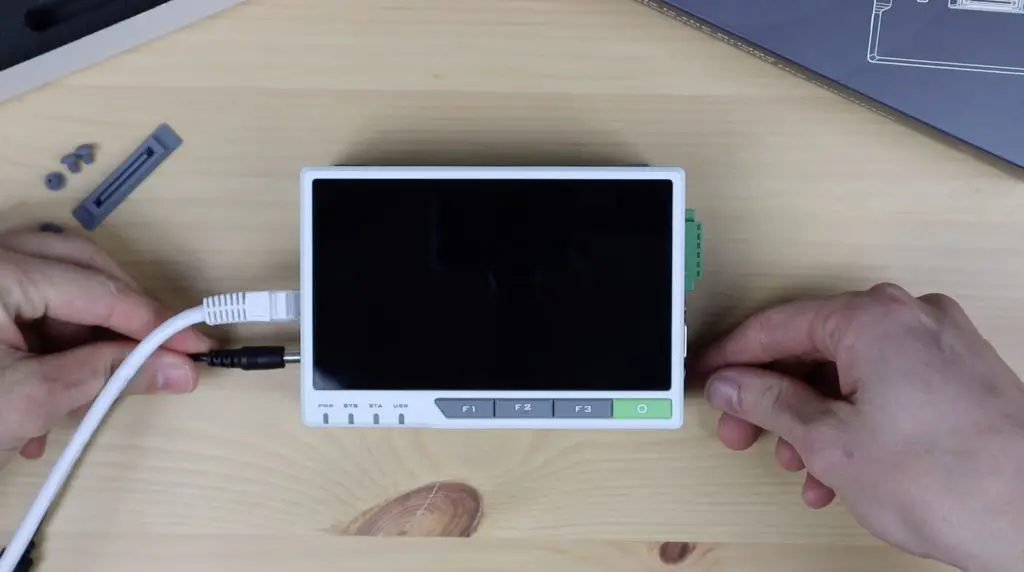
To install the E10-1 on the reTerminal, we need to first remove the rubber plugs on the back of the reTerminal to allow the E10-1 to plug into it. We can then secure it with the two included screws.
Once installed, the entire reTerminal assembly is now quite thick.
I’m also going to install two 18650 cells into it so that we can try out the UPS functionality. These just go into the battery compartment on the back of the E10-1.
With the E10-1 installed, it feels solidly built and like a good quality device, but it’s a bit too bulky to be a truly handheld device. It would be best to have it installed on a wall panel or into an electrical enclosure- which is made easy with the multitude of threaded mounting points.
Let’s plug in our ethernet and power cable and power it up. The CM4 module in the reTerminal has onboard WiFi, so you can use a wireless connection if you’d like to.
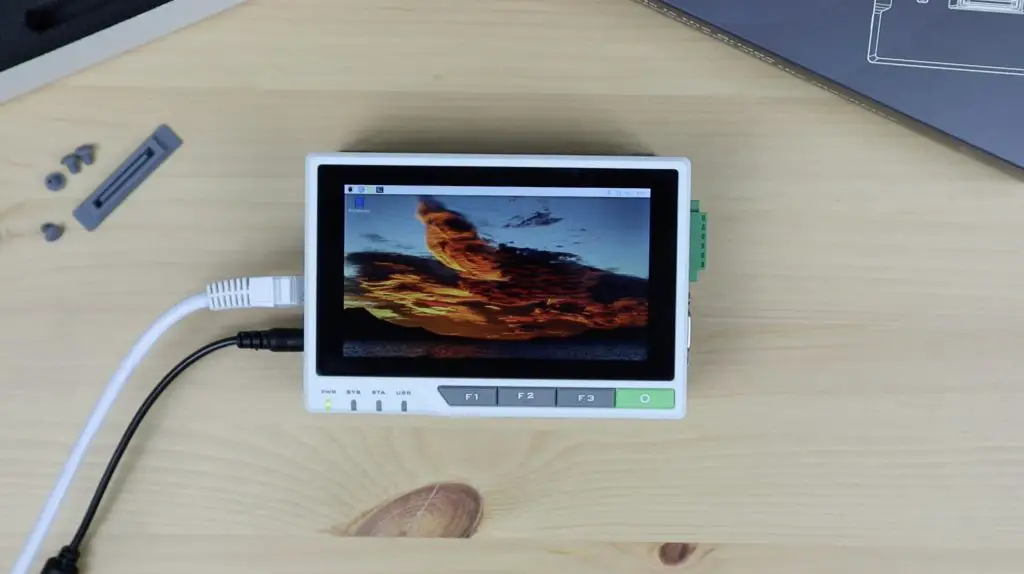
It looks like it works right away, the reTerminal powered up and has booted to the desktop.
There is a driver that they say needs to be installed to use the functions of the E10-1. The driver is installed using the following terminal commands:
$ git clone https://github.com/Seeed-Studio/seeed-linux-dtoverlays.git
$ cd seeed-linux-dtoverlays
$ sudo ./scripts/reTerminal.sh
Reboot the reTerminal and then enter the following command to complete the installation:
$ ls /boot/overlays/reTerminal-bridge.dtbo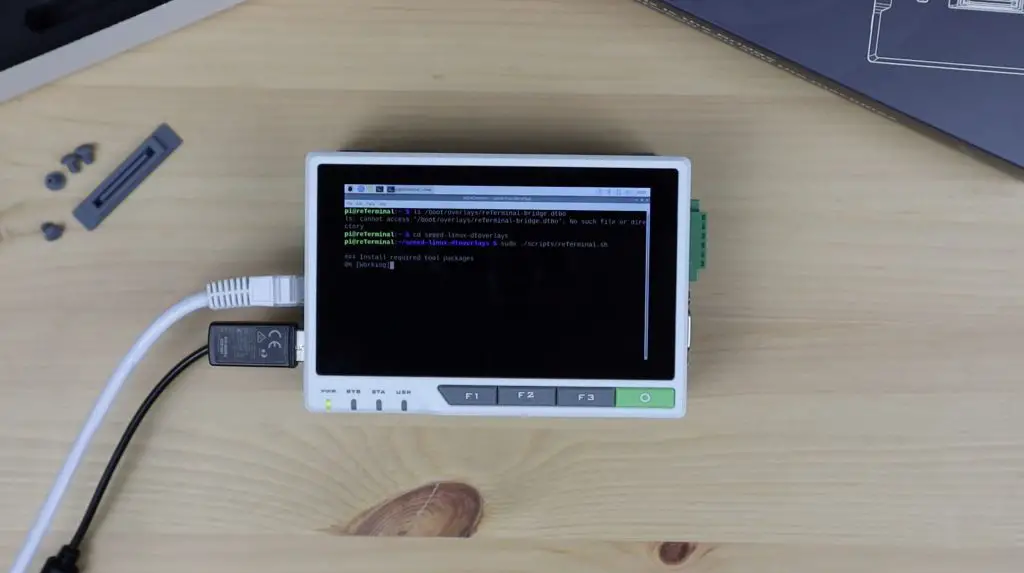
I’m not sure what works with or without the drivers as I reloaded the operating system on my reTerminal to get Raspberry Pi OS Bullseye loaded. Part of this process is the installation of the latest reTerminal driver which appears to include the E10-1 drivers as well. I haven’t specifically installed the E10-1 driver and as far as I can tell everything I’ve tried has worked correctly, but I haven’t tested any of the industrial interfaces yet.
Testing Some of the reTerminal E10-1 Basic Functions
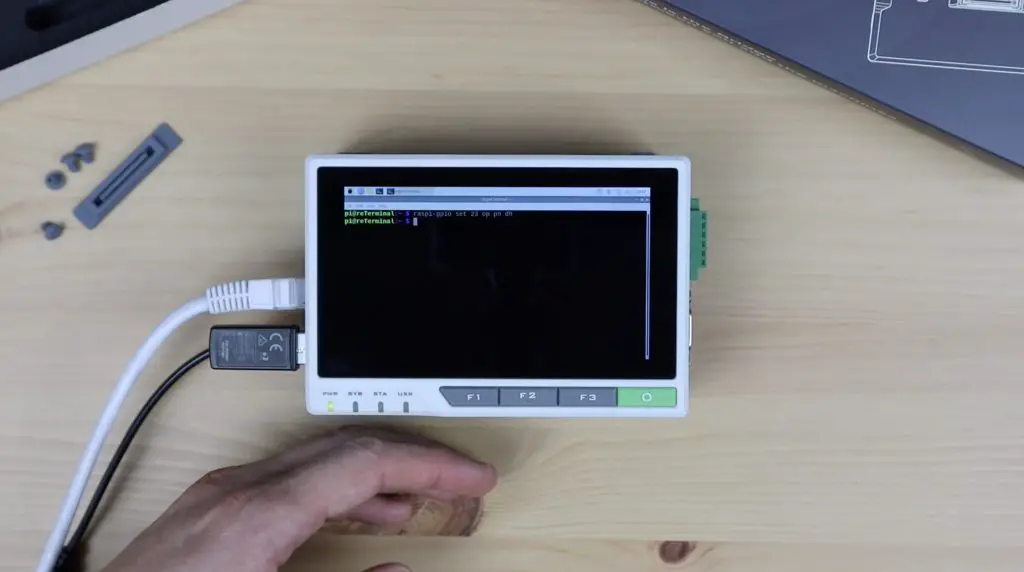
Inside the reTerminal E10-1 is a small cooling fan that is controlled using GPIO pin 23. This fan is off by default, so you need to turn it on through the terminal or through a script that runs in the background.
Let’s try turn it on through the terminal using the following command:
$ raspi-gpio set 23 op pn dhYou’ll then be able to hear a faint humming sound coming from the reTerminal E10-1.
I’m going to turn it off again as we probably don’t need it if we’re not using an SSD or something generating a lot of heat within the enclosure. This can be done with the following command:
$ raspi-gpio set 23 op pn dlNow let’s see if it stays on when I remove the power supply. My batteries were partially charged before I put them into the reTerminal, so it shouldn’t need much time to charge first.
That looks like it has worked. It’s still running with the power cable removed.
The indicator LEDs on the side show when it’s receiving external power and when the internal batteries are charging.
I also wasn’t sure if the Ethernet port on the reTerminal is disabled when the E10-1 is plugged in, so I tried that out. Both ports worked equally well, so it looks like you can use either port if you’re not using PoE.
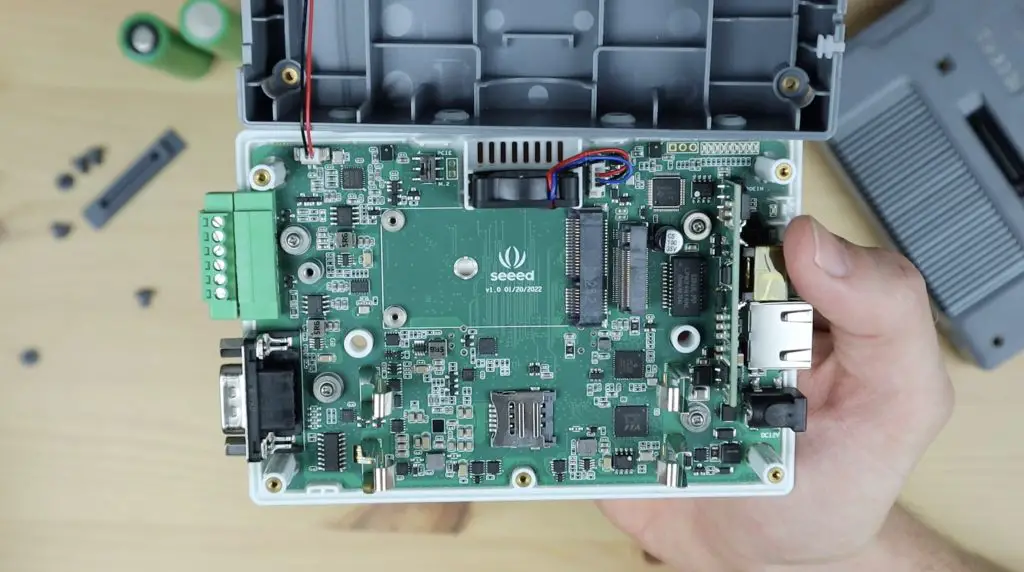
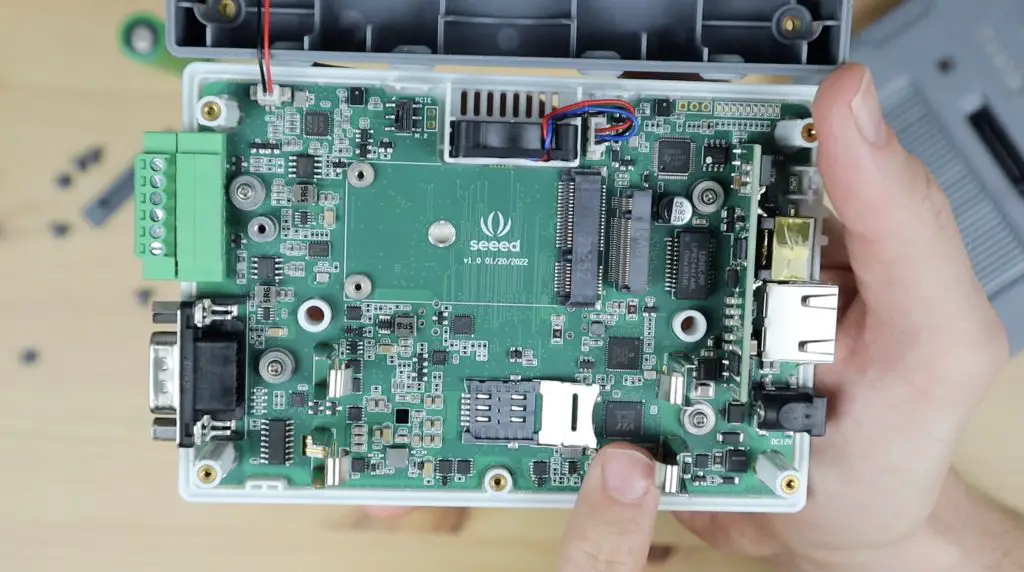
Opening Up the reTerminal E10-1
The reTerminal E10-1 is not just limited to external features, it’s also got a host of internal interfaces to allow for expandability. Let’s remove it from the reTerminal, then open it up and take a look at what’s inside it.
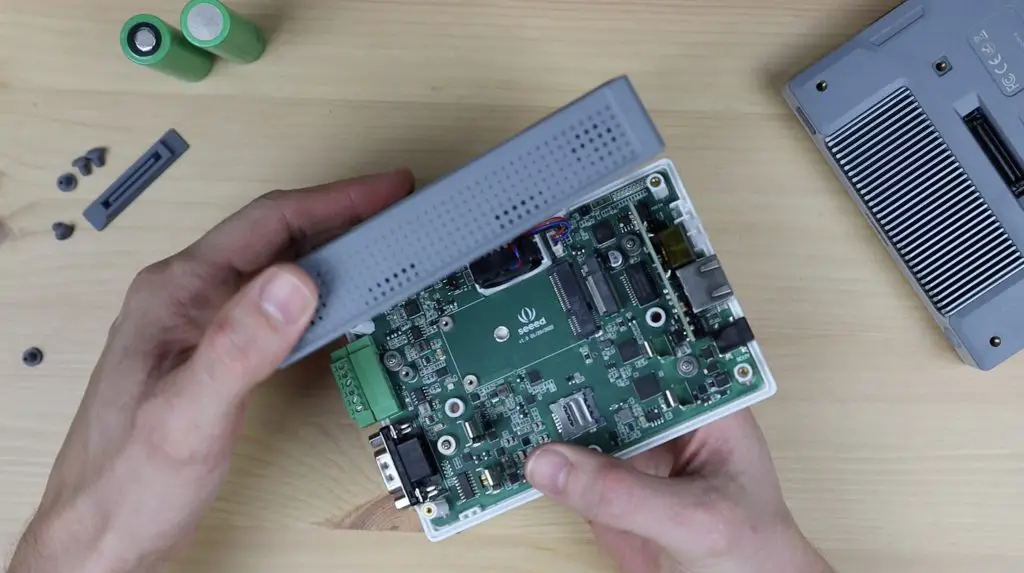
The main internal interfaces are the mini-PCIe connector, that allows you to add a 4G, LTE or LoRa module, and the M.2 B Key connector which allows you to add an SSD, or USB 3.0 ports or a 4G or 5G wireless module.
Seeed have provided a list of devices that they’ve tested with the reTerminal on their product Wiki. I’m going to try one or two of them out in a future video.
We’ve also got a sim card slot for the wireless modules, dual microphones and a speaker along the top and the PoE adaptor for the Ethernet port.

Final Thoughts on the reTerminal E10-1
I think the reTerminal E10-1 and even the reTerminal itself are geared more heavily towards mild industrial applications than home use, but could certainly be useful in certain home applications.
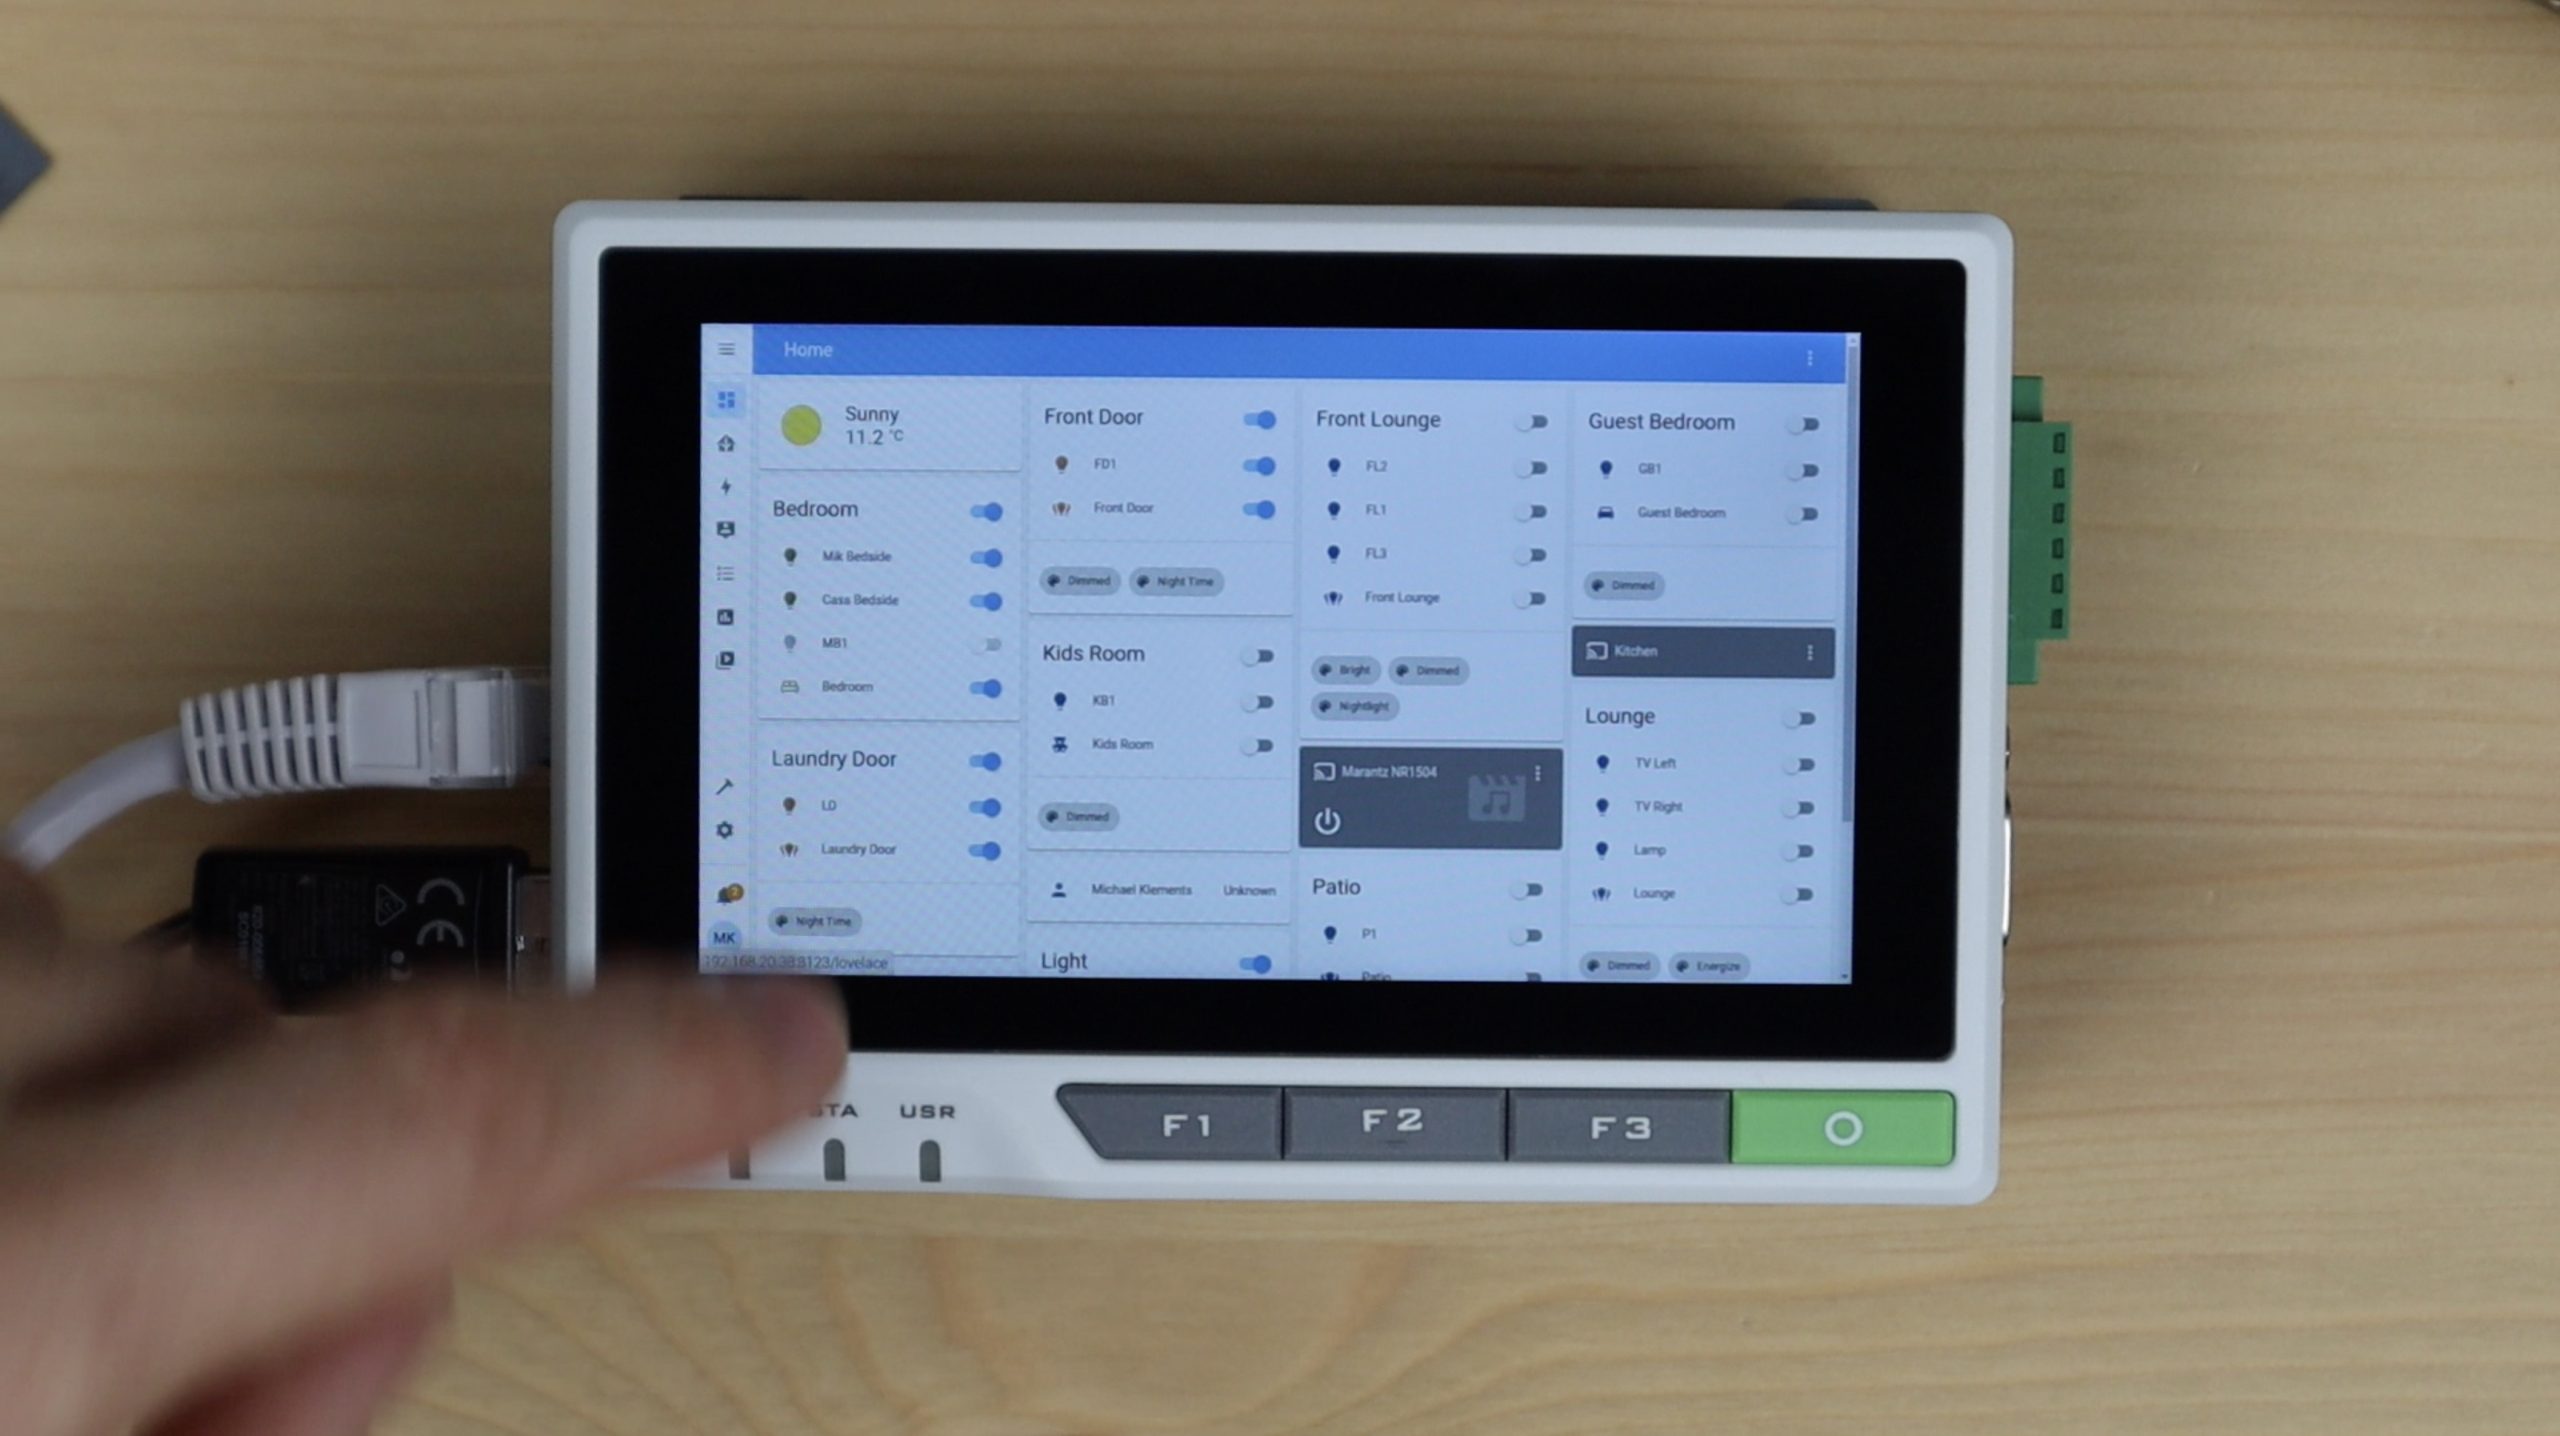
The touch interface on the reTerminal along with the UPS and industrial interfaces that the E10-1 add make this a great device for building industrial system HMI’s to interact with machines, systems and sensors. It’s even great for creating home automation dashboards through applications like Home Assistant, which will now be battery backed. With the addition of a wireless 4G or 5G module you can be notified of power outages and even run some security routines and still have some level of control when your home’s power is disabled or interrupted.

With the batteries and fan in the enclosure, the reTerminal E10-1 is quite a bulky add-on, but since it’s designed to be wall or panel mounted rather than handheld, this probably won’t affect most use cases.
Let me know what you think of the reTerminal E10-1 in the comments section below and let me know what kind of devices you’d like to see me test on it.