A common question I’ve seen across a number of my Raspberry Pi projects and videos is whether you can use a Raspberry Pi to mine cryptocurrency. The answer to this question is yes, it is technically possible, but probably not in a way that is going to make you any amount of money. In fact, you’ll be lucky if you ever make enough money to even recoup the hardware cost.
With that said, instead of just showing you how to mine cryptocurrency on a Raspberry Pi, I thought why not make it a bit more interesting and make it solar powered as well. That way we don’t even have to worry about offsetting the electricity costs associated with running the crypto miner. So in this project, we’re going to be building a solar powered crypto miner using a Raspberry Pi.
Now since we’re already heading down a road to no profit, there’s not much point in going overkill and trying to solar power a cluster of Pis or even a single Pi 4. I’m rather going to try and get away with building the cheapest setup possible to show you how long it would take to pay it back and start making some money.
Here’s a video of my build and setup of my solar powered crypto miner using a Raspberry Pi, read on for the full write up.
What You Need To Build A Solar Powered Crypto Miner
- Raspberry Pi Zero W – Buy Here
- 32 GB SD Card – Buy Here
- 5W Solar Panel – Buy Here
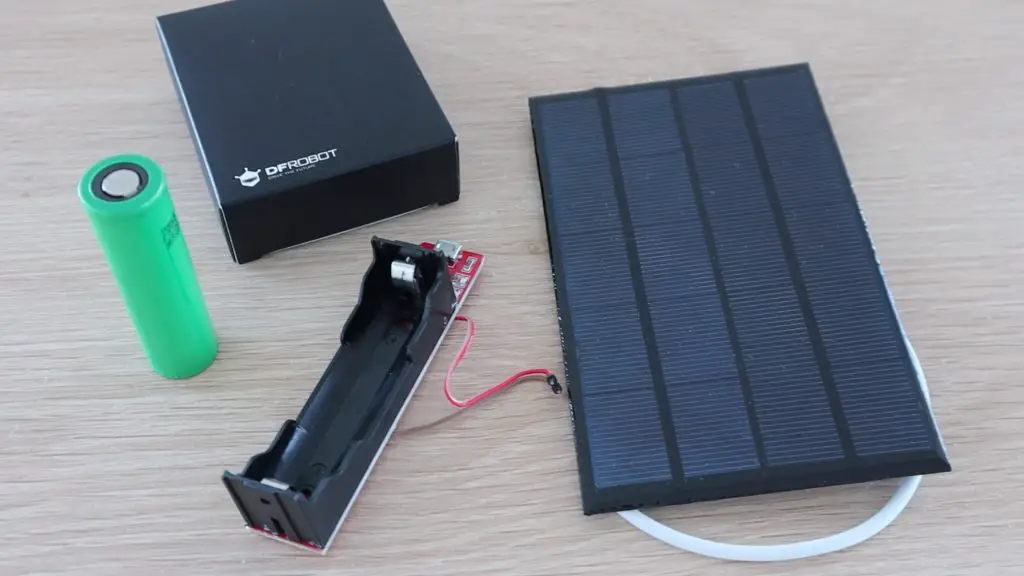
- 18650 Lithium Ion Battery – Buy Here
- 18650 Battery Holder – Buy Here
- DF Robot 5V Charge Controller – Buy Here
- USB Micro Cable – Buy Here
- GoPro Suction Cup Mount – Buy Here
Note: The above parts are affiliate links. By purchasing products through the above links, you’ll be supporting this channel, with no additional cost to you.
Assembling The Solar Powered Crypto Miner
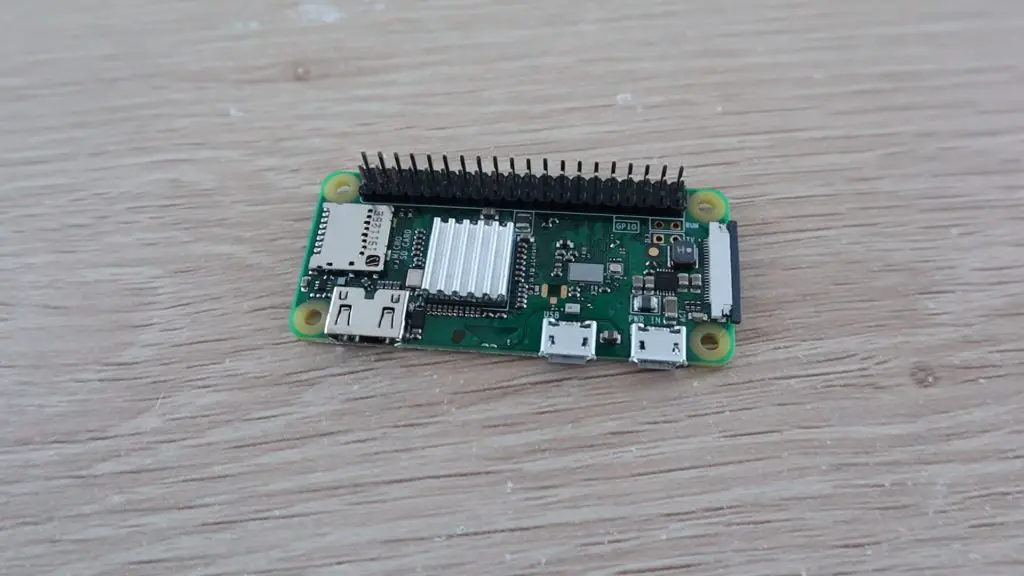
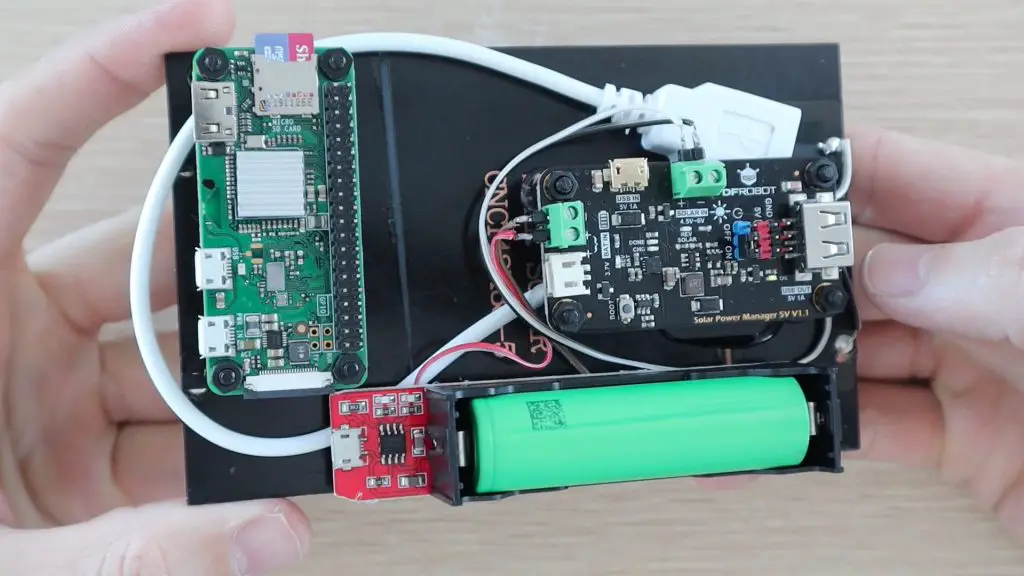
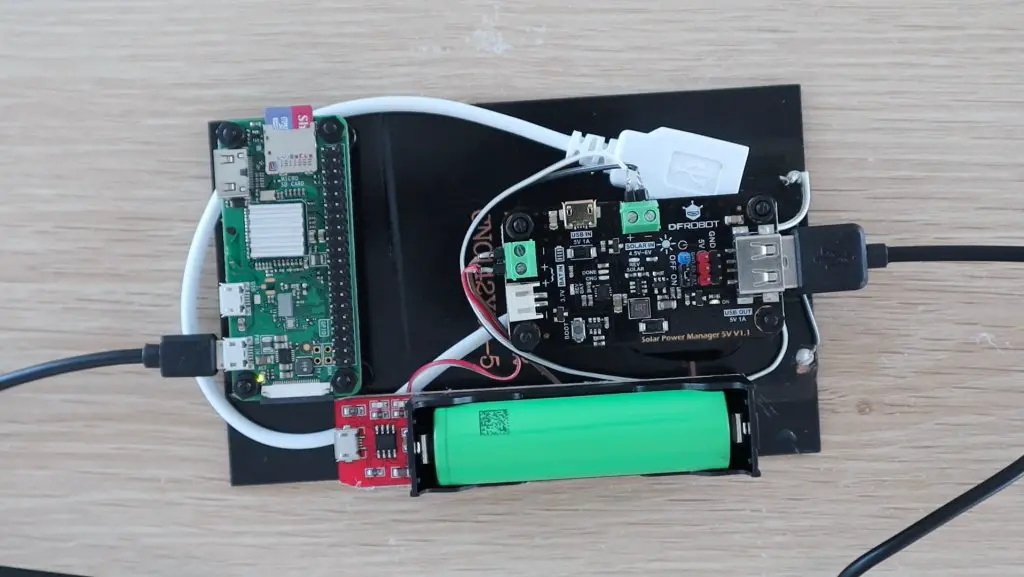
The brain behind this project is a Pi Zero W. It’s one of the most power-efficient Raspberry Pis available and it’s got built-in WiFi, so we don’t need to worry about powering any external dongles or running network cables.
What Size Solar Panel Do We Need?
To start out we need to figure out how much power our Pi Zero W uses when it is running and connected to WiFi so that we know what size solar panel we’re going to need to power our crypto miner.
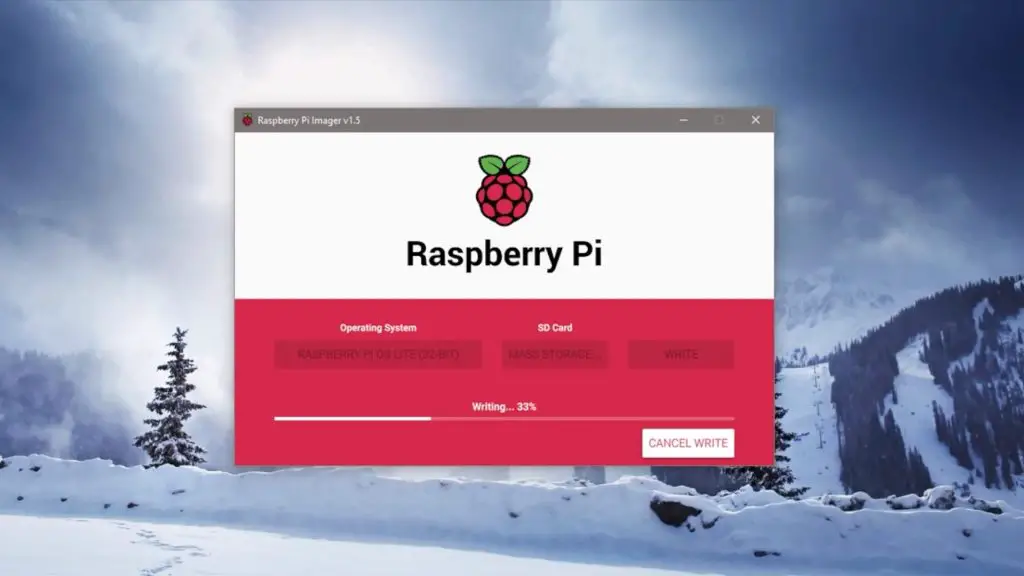
We’re going to install Raspberry Pi OS Lite as we’ll be running this as a headless setup and we’ll access the Pi over our WiFi network for any additional work we need to do in order to set it up.
I usually just use Raspberry Pi imager to burn the image to the SD card. Select Raspberry Pi OS Lite as the operating system, then choose your connected SD card as your storage location and then click on write to begin burning it to your card.
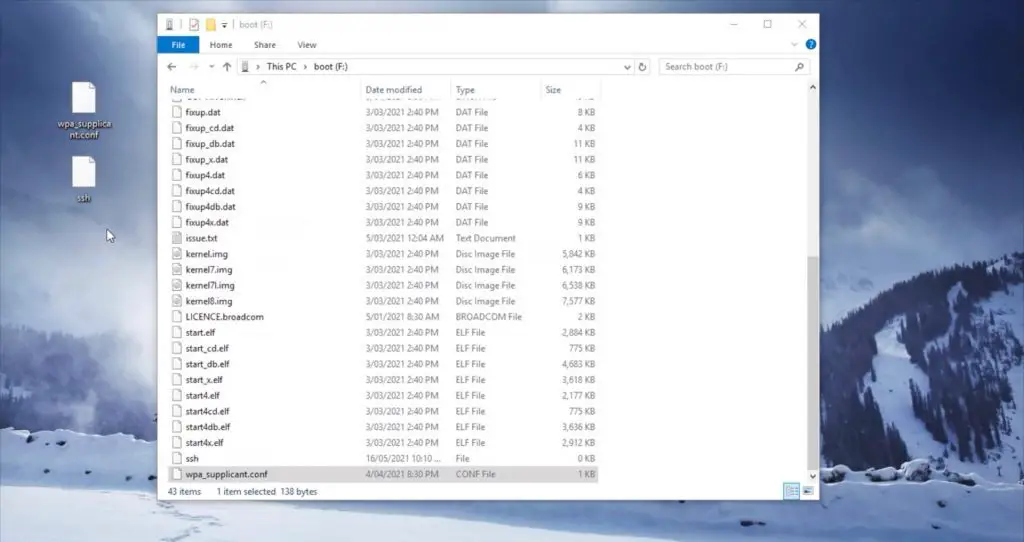
When this is done, you’ll need to remount the disk and open the boot directory. Next, create a next blank text file in the boot directory and rename it “ssh” with no extension.
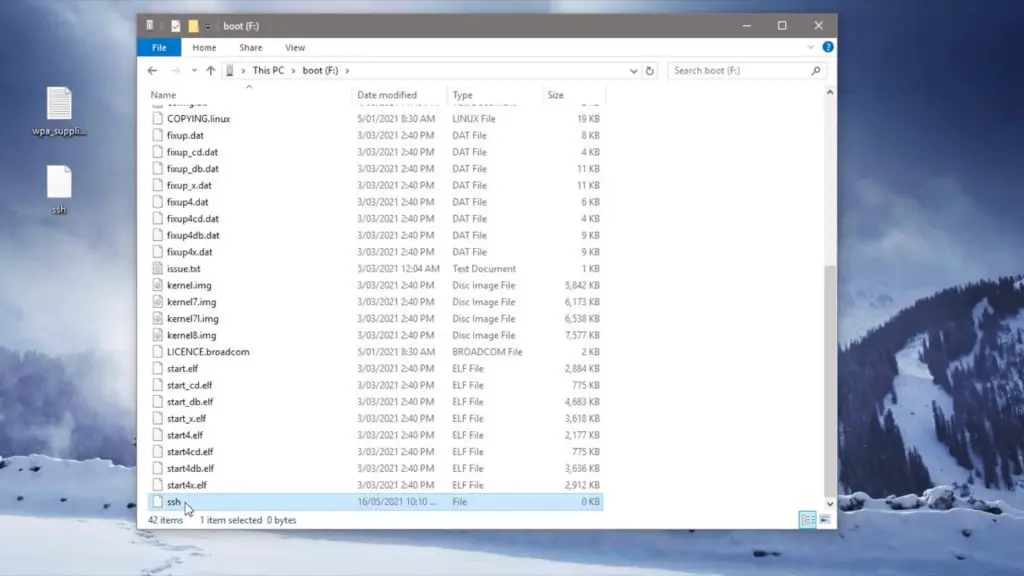
You’ll also need to set up a “wpa_supplicant” configuration file that tells your Pi how to connect to your WiFi network. You can download the template below, then just update your network name and password and save the file.
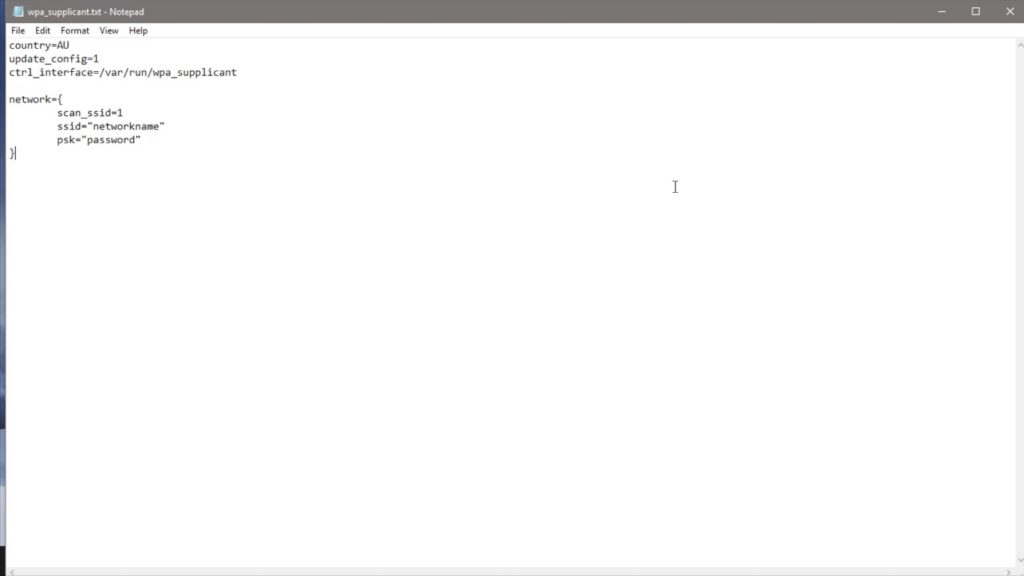
The last thing to do is to change the extension from .txt to .conf and then copy it into the boot directory as well.
I’m going to boot the Pi up and use a USB power meter to measure the amount of power the Pi uses when idling and when transferring data over WiFi.

It looks like our Pi uses just under 100mA when idling and this spikes to about 130mA when using WiFi. So we need a panel that is able to produce at least 1W and we need a little extra for when a cloud comes over or it’s not in full sun.
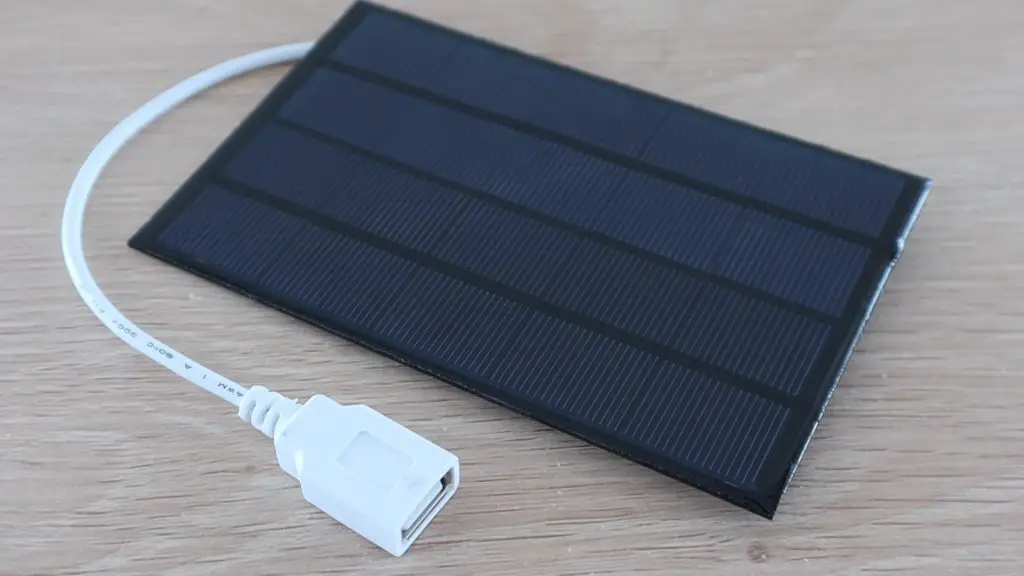
I’m going to use this 5W panel which is designed to charge mobile phones. This will provide up to 1A at 5V, which should be more than enough to keep the Pi powered and will produce a bit extra to power the Pi during times when it is overcast or not in full sun.
Adding A Charge Controller And Battery
Now that we’ve got our Pi and our solar panel, we just need to add a charge controller and a battery.
Now you might be thinking why don’t I just plug the Pi directly into the USB port on the solar panel. I could do that and it would probably work when the panel is in full sun, but if there is a disturbance to the light on the panel, then the panel would immediately stop providing sufficient power to the Pi and the Pi would turn off or reboot. Obviously, this would only need to happen a couple of times before the SD card is corrupted.
So we add the solar charge controller to take the power from the panel and use it to charge a battery and then use the battery to power the Pi. This way when there is an interruption to the solar panel’s power, the Pi is still powered by the battery.
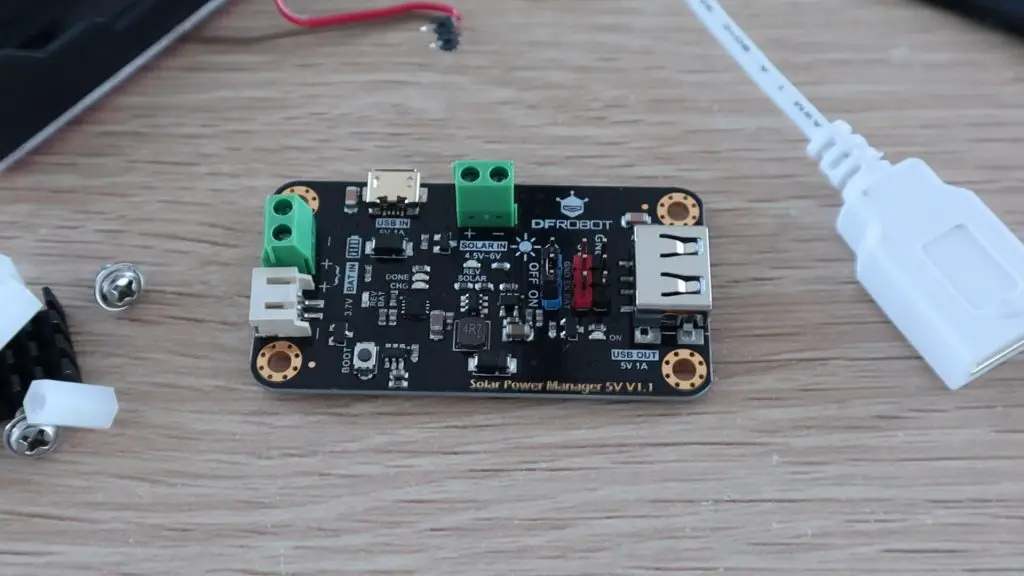
This charge controller comes from DF Robot, it takes the input from the solar panel and uses it to charge a 3.7V lithium-ion or lithium-polymer cell. It then uses the battery to provide a regulated 5V supply to the USB port and some header pins. It’s also got a number of safeguards and an over-discharge feature to protect the battery.
I’m using a single 2500mAh 18650 lithium ion battery, which should be able to power the Pi for a maximum of about 8 hours. If you want the rig to be able to run through the night then you’ll need to add a second or third battery in parallel to store the additional energy from the solar panel.
The 5W solar panel should provide enough power to run the rig continuously through the day and night with some buffer for short overcast periods of a couple of hours if you add two additional 18650 batteries (3 in total) in parallel.
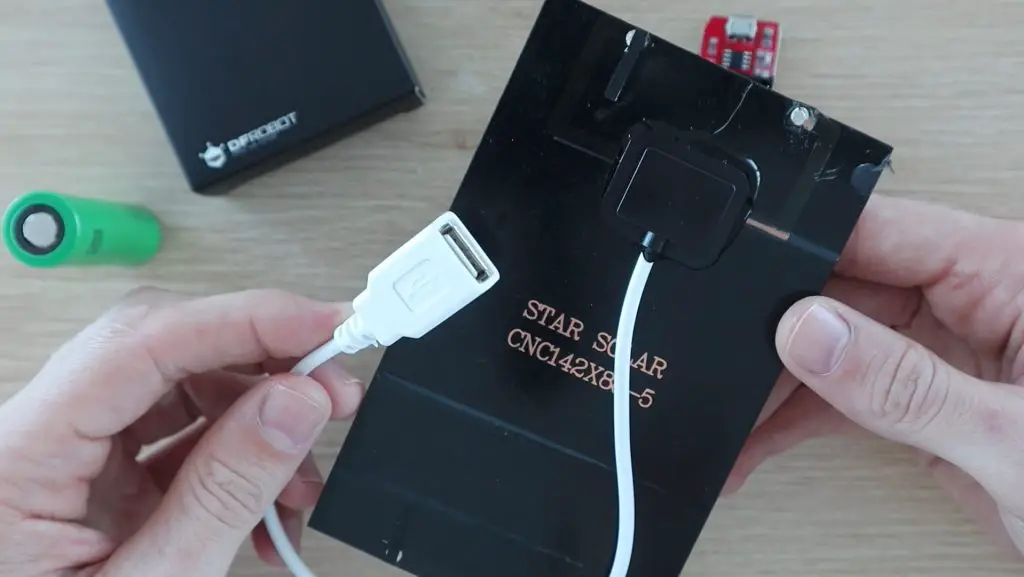
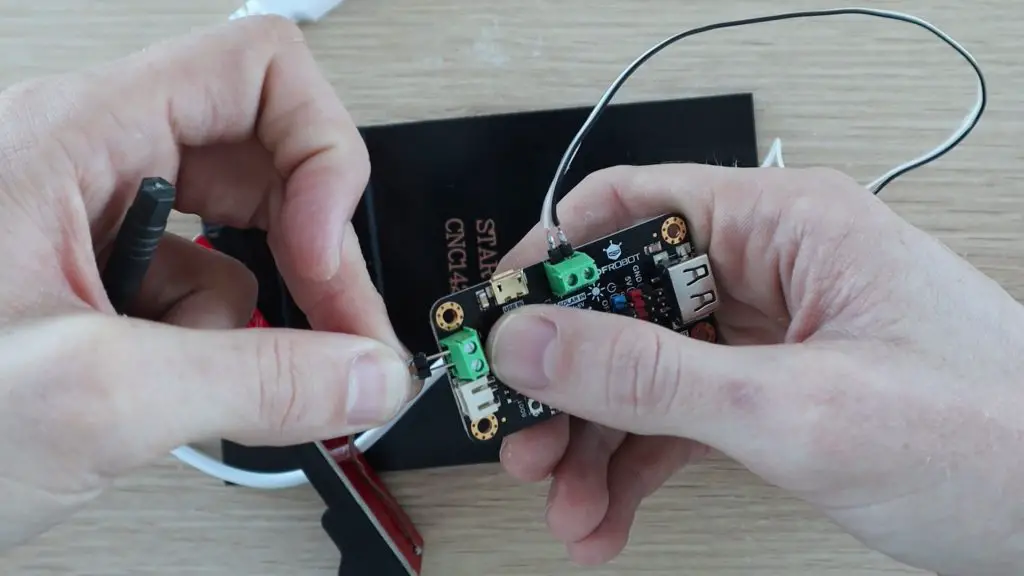
I’m going to connect new leads directly onto the tabs on the panel as I suspect that there is a regulator between the USB lead and the tabs which we don’t need. I’m going to test these tabs first using my multimeter in order to get the polarity correct when connecting it to the charge controller.

Next, I’m going to use a soldering iron to solder the new leads directly onto the tabs.

We can then connect the solar panel and the battery to the charge controller. I’ve used a battery holder which has a built-in USB charging circuit, which I’m not going to use for this project. The one linked in the parts list is just a standalone single cell holder.
I then glued all of the components onto the back of the solar panel using some nylon standoffs so that I can mount it onto the GoPro suction cup mount and stick it onto an outdoor window.
Once this is all done, we’re ready to plug in the micro USB cable between the charge controller and the Pi and let it boot up.
Stick the crypto miner up in a sunny spot so that the solar panel starts charging the battery and supplying power to the Pi.

Setting Up The Mining Software
Now that your solar powered crypto miner is in the sun and plugged in, your Pi should boot up and connect to your WiFi network automatically. You’ll need to find its IP address, which can be done in a number of ways. The easiest I find is to log into my router and find it in the DHCP table.
You can then access the Pi through an SSH connection using a utility like Putty. Type in your Pi’s IP address, make sure that SSH is selected and then click on open to open a new terminal window.

Login with the default username (pi) and password (raspberry), which you should probably change if you’re going to be using your Pi for any period of time, and then run the usual updates and upgrades by typing in the following command:
sudo apt-get update && sudo apt-get upgrade -y
While your Pi ticks away at the updates, head over to Minergate to create an account to join a mining pool. If you don’t know what a mining pool does, it’s essentially a group of people who put all of their resources together to collectively mine cryptocurrency, and the profits are then divided among participants based on their level of contribution to the pool.
Once the updates are complete, install the below dependencies by running this command:
sudo apt install git automake autoconf libcurl4-openssl-dev libjansson-dev libssl-dev libgmp-devWe’re going to be mining for Monero using cpuminer-multi. So we’ll need to download the GitHub repository by running this command:
sudo git clone https://github.com/carolinedunn/cpuminer-multi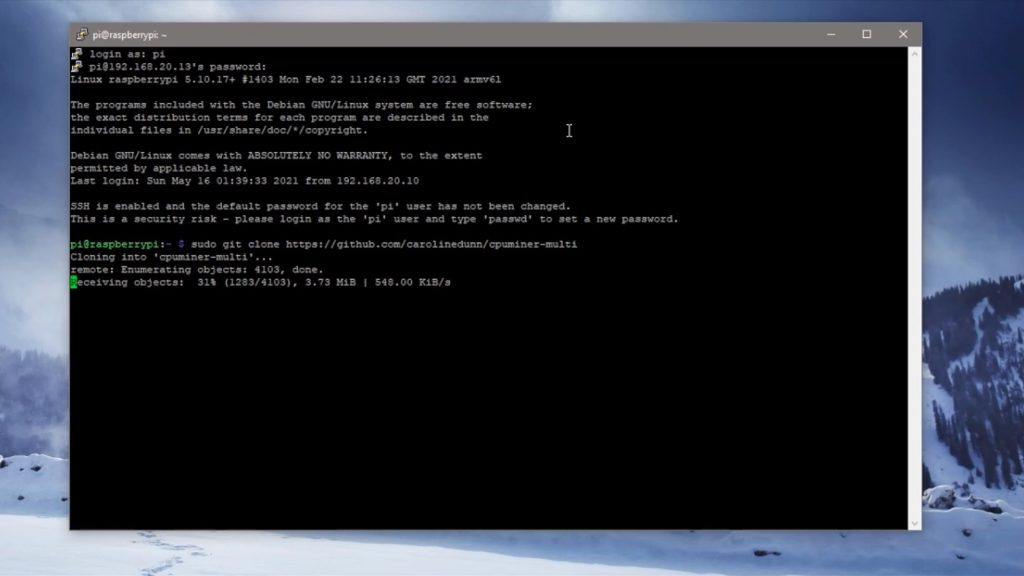
When the repository has been downloaded, navigate to the directory:
cd cpuminer-multiWe then need to compile the code using the following commands:
sudo ./autogen.sh
sudo ./configure
sudo ./build.sh
These do take a while to get through, particularly the last one.
Mining Monero On A Solar Powered Raspberry Pi
Once this is all done, we’re finally ready to start the crypto miner and start contributing to the pool. Enter the following command to start mining on your Pi:
./cpuminer -a cryptonight -o stratum+tcp://xmr.pool.minergate.com:45700 -u MINERGATE_EMAIL_ADDRESSWhen it starts running, you should see some figures being displayed alongside “CPU #0”. This is the hash rate of your Raspberry Pi.

Ours is sitting at a dismal 1.47 hashes per second. Which is really bad!
In order for you to be making any meaningful money from mining Monero, you need to be above about 100 kilohashes per second. So we’re sitting at almost 100,000 times less than this limit at the moment.
Let’s use CryptoCompare’s profitability calculator to have a look at how much money we’d make if we could leave this setup running for a month or a year.
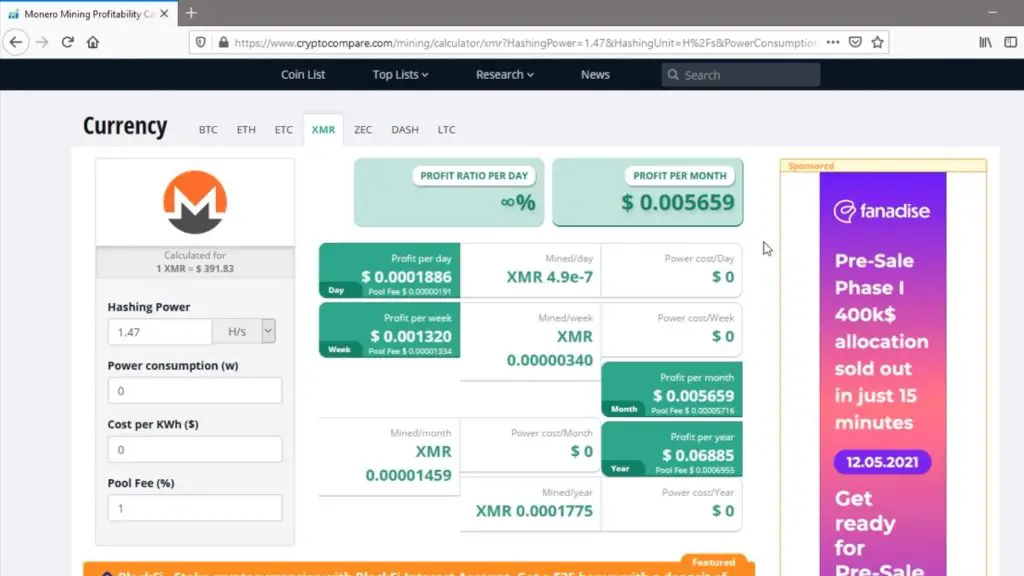
So at 1.47 hashes per second, we would be earning $0.0057 per month or $0.069 per year. So it would take almost 220 years of mining just to pay off the Raspberry Pi.
So you can see that crypto mining on a Raspberry Pi, even with free electricity, is just not that practical. Your Pi would need to run far longer than the expected life of the equipment to even pay back the hardware cost associated with it.
I’m going to try to set something similar up on my water-cooled Pi cluster as well to see how many years that would take to pay off. So, subscribe to my newsletter or my Youtube channel so that you don’t miss out on that, and let me know your comments and thoughts on my solar-powered crypto miner in the comments section below.
Hi Michael,
We are a small solar panel factory, definitely we can make a 5W 1A solar panel at a pretty cost with UV resistance features.
As a support, we can provide 2~3pcs free of charge, real support, free shipping.
Ha, just let me know your idea.
Best regards
Kevin Wang
You got something underneath the battery holder , what is that ? As the battery holder link is just a holder. No circuits.
The holders I’ve got have a USB charging circuit built into them. You don’t need this with the solar charge controller as it’s also got a USB charging interface.
How do we mine with the other pools in minergate
You just need to change the algorithm to suit the cryptocurrency you’d like to mine. There are also other pre-compiled GitHub repositories that are set up to mine specific currencies.
Hello Everyone!
Is it worth it? Be honest, please.
I can’t avoid thinking about those machines with expensive hardware.
Is this project effective?
Have you tried mining using a GPU and any of the GPU based miners like TeamRed, T-Rex or PhoenixMiner? I doubt a solar panel will be able to power one of those, but still it would be interesting to see a Pi based miner using a GPU.
As far as I’m aware no-one has been able to get a GPU to communicate effectively with a Pi yet. I’m sure this will come soon on a Pi 4 Compute module.
Thanks Michael, I do enjoy your videos and posts, they are inspirational … I keep my fingers crossed to see some day an autonomous GPU-based mining device that use the Pi 🙂
I noticed that the Amazon affiliate link for the 18650 Lithium Ion Battery is presently broken. I looked on Amazon and saw there are various 18650 batteries with different mAh values. Any specific mAh amount we should use for this?
Get better quality ones, like Sony or Samsung cells rather than just the highest mAh rating.
hi
can i know what is red board under 18650 Battery Holder
It is just a micro-usb charging circuit. You can find those holders on Aliexpress for a few dollars.
Hi, Fascinating project. Can you advise what you’d enter into a Crontab file for the miner software to run automatically (based on the install you’ve run through) after a reboot please? Thank you.