EcoFlow are a popular name amongst campers and adventurers for their portable power stations and solar generators. These allow you to store power in a portable unit to take with you to charge devices, run small appliances and provide lighting.
They’re now taking it a step further with their launch of EcoFlow Power Kits. This is a modular system designed specifically for RVs, camper vans and trailers and small off-grid installations. The idea being that the system eliminates the complexity of traditional setups, being plug and play, compact and efficient, and allowing modern monitoring and control.
EcoFlow have sent me their 2kWh kit to set up in my workshop to show you how it works.
Here’s my video of the unboxing of the EcoFlow Power Kits package and installing it into my workshop to take it off-grid:
Where To Buy EcoFlow Power Kits?
EcoFlow products are stocked through a number of local distribution partners, but the easiest way to buy from them or to find a local stockist is through their web store:
What Are EcoFlow Power Kits?
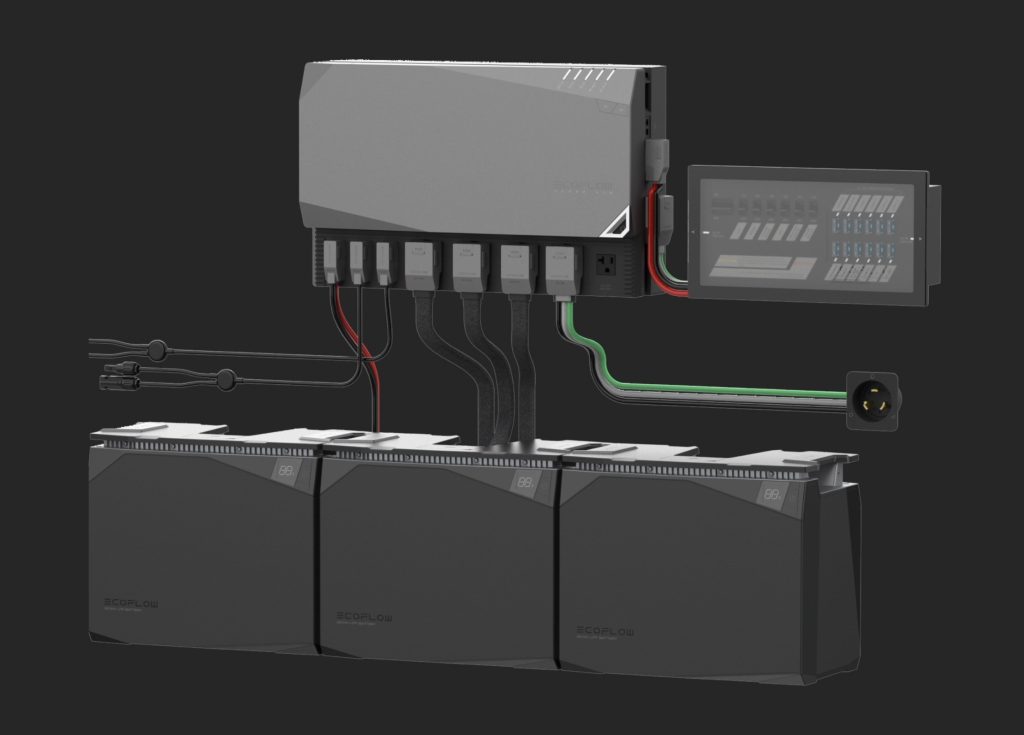
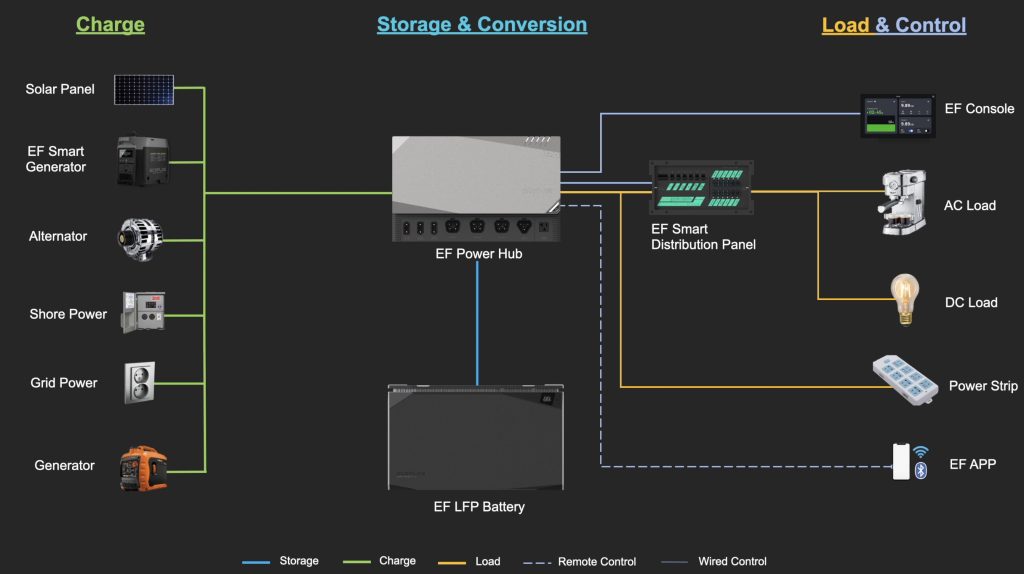
EcoFlow Power Kits is essentially an all-in-one package for powering your off-grid home, camper van, mobile home or trailer. It allows you to take a variety of input sources to charge one or more batteries and then use this power in AC or DC form to power your devices and appliances.
The core system consists of the EcoFlow Power Hub, a Smart Distribution Panel and a Control Panel. These arrive in this awesome matt black packaging, protected with foam inserts.
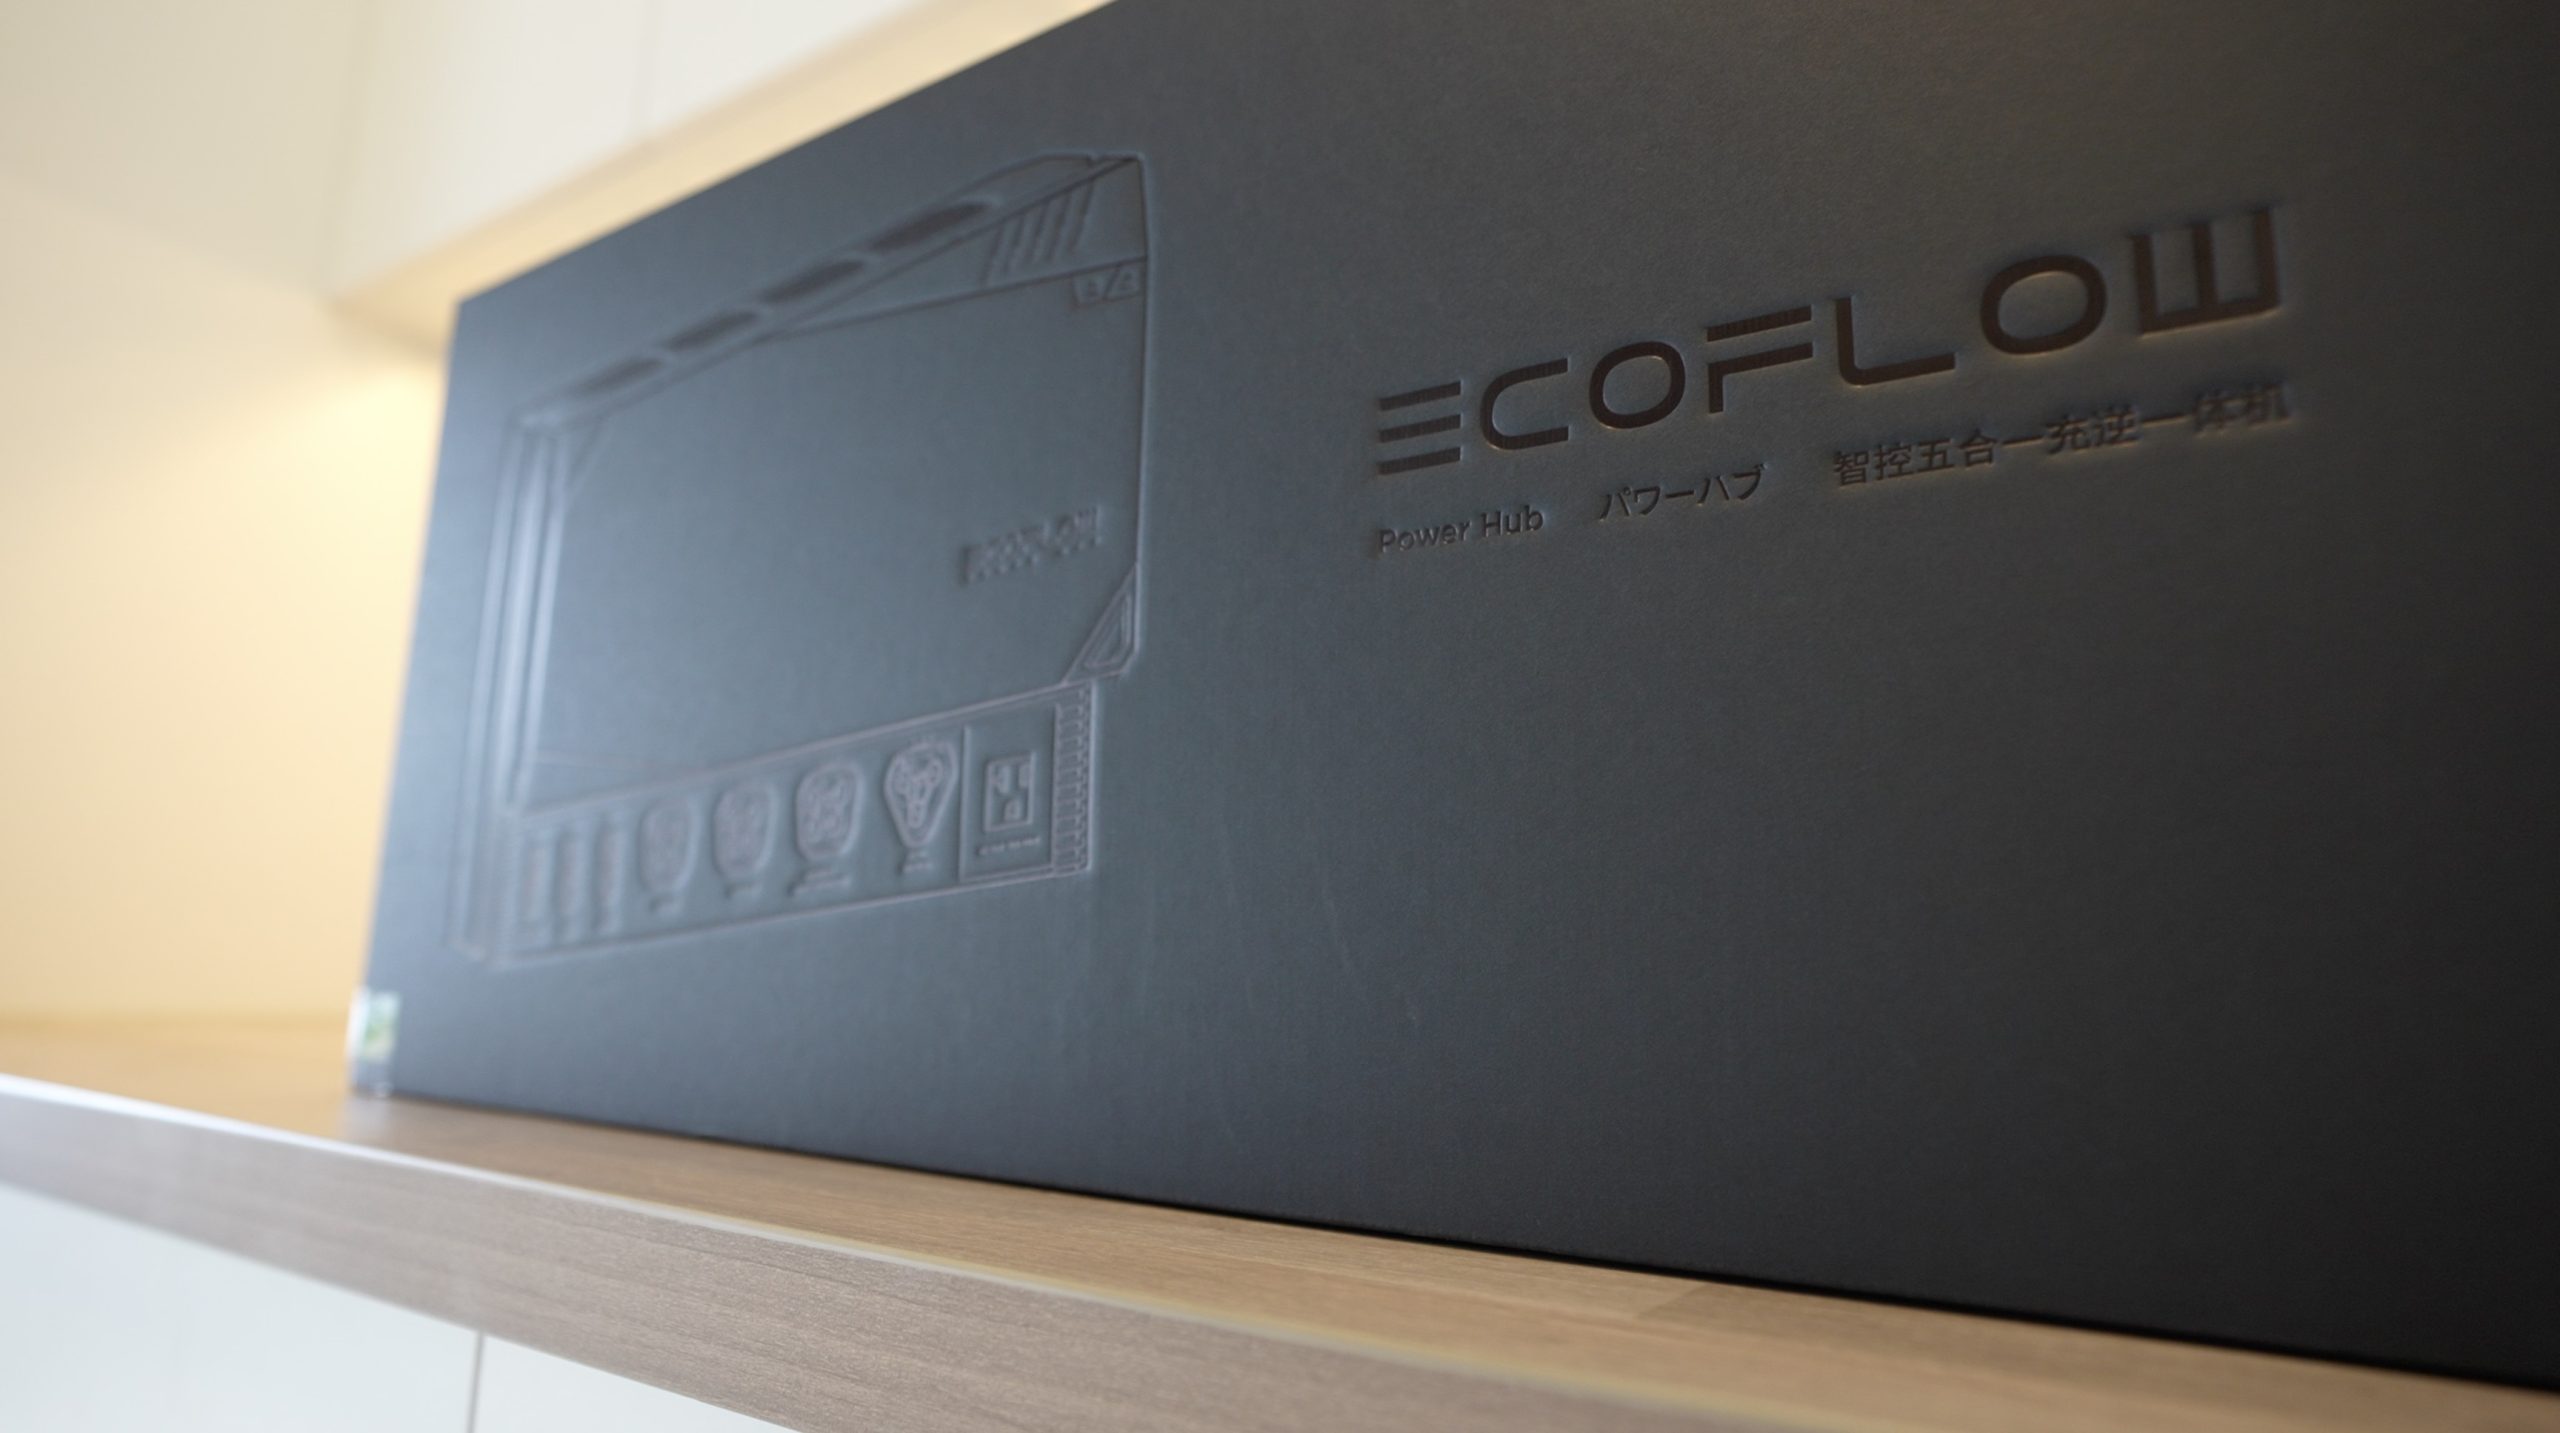
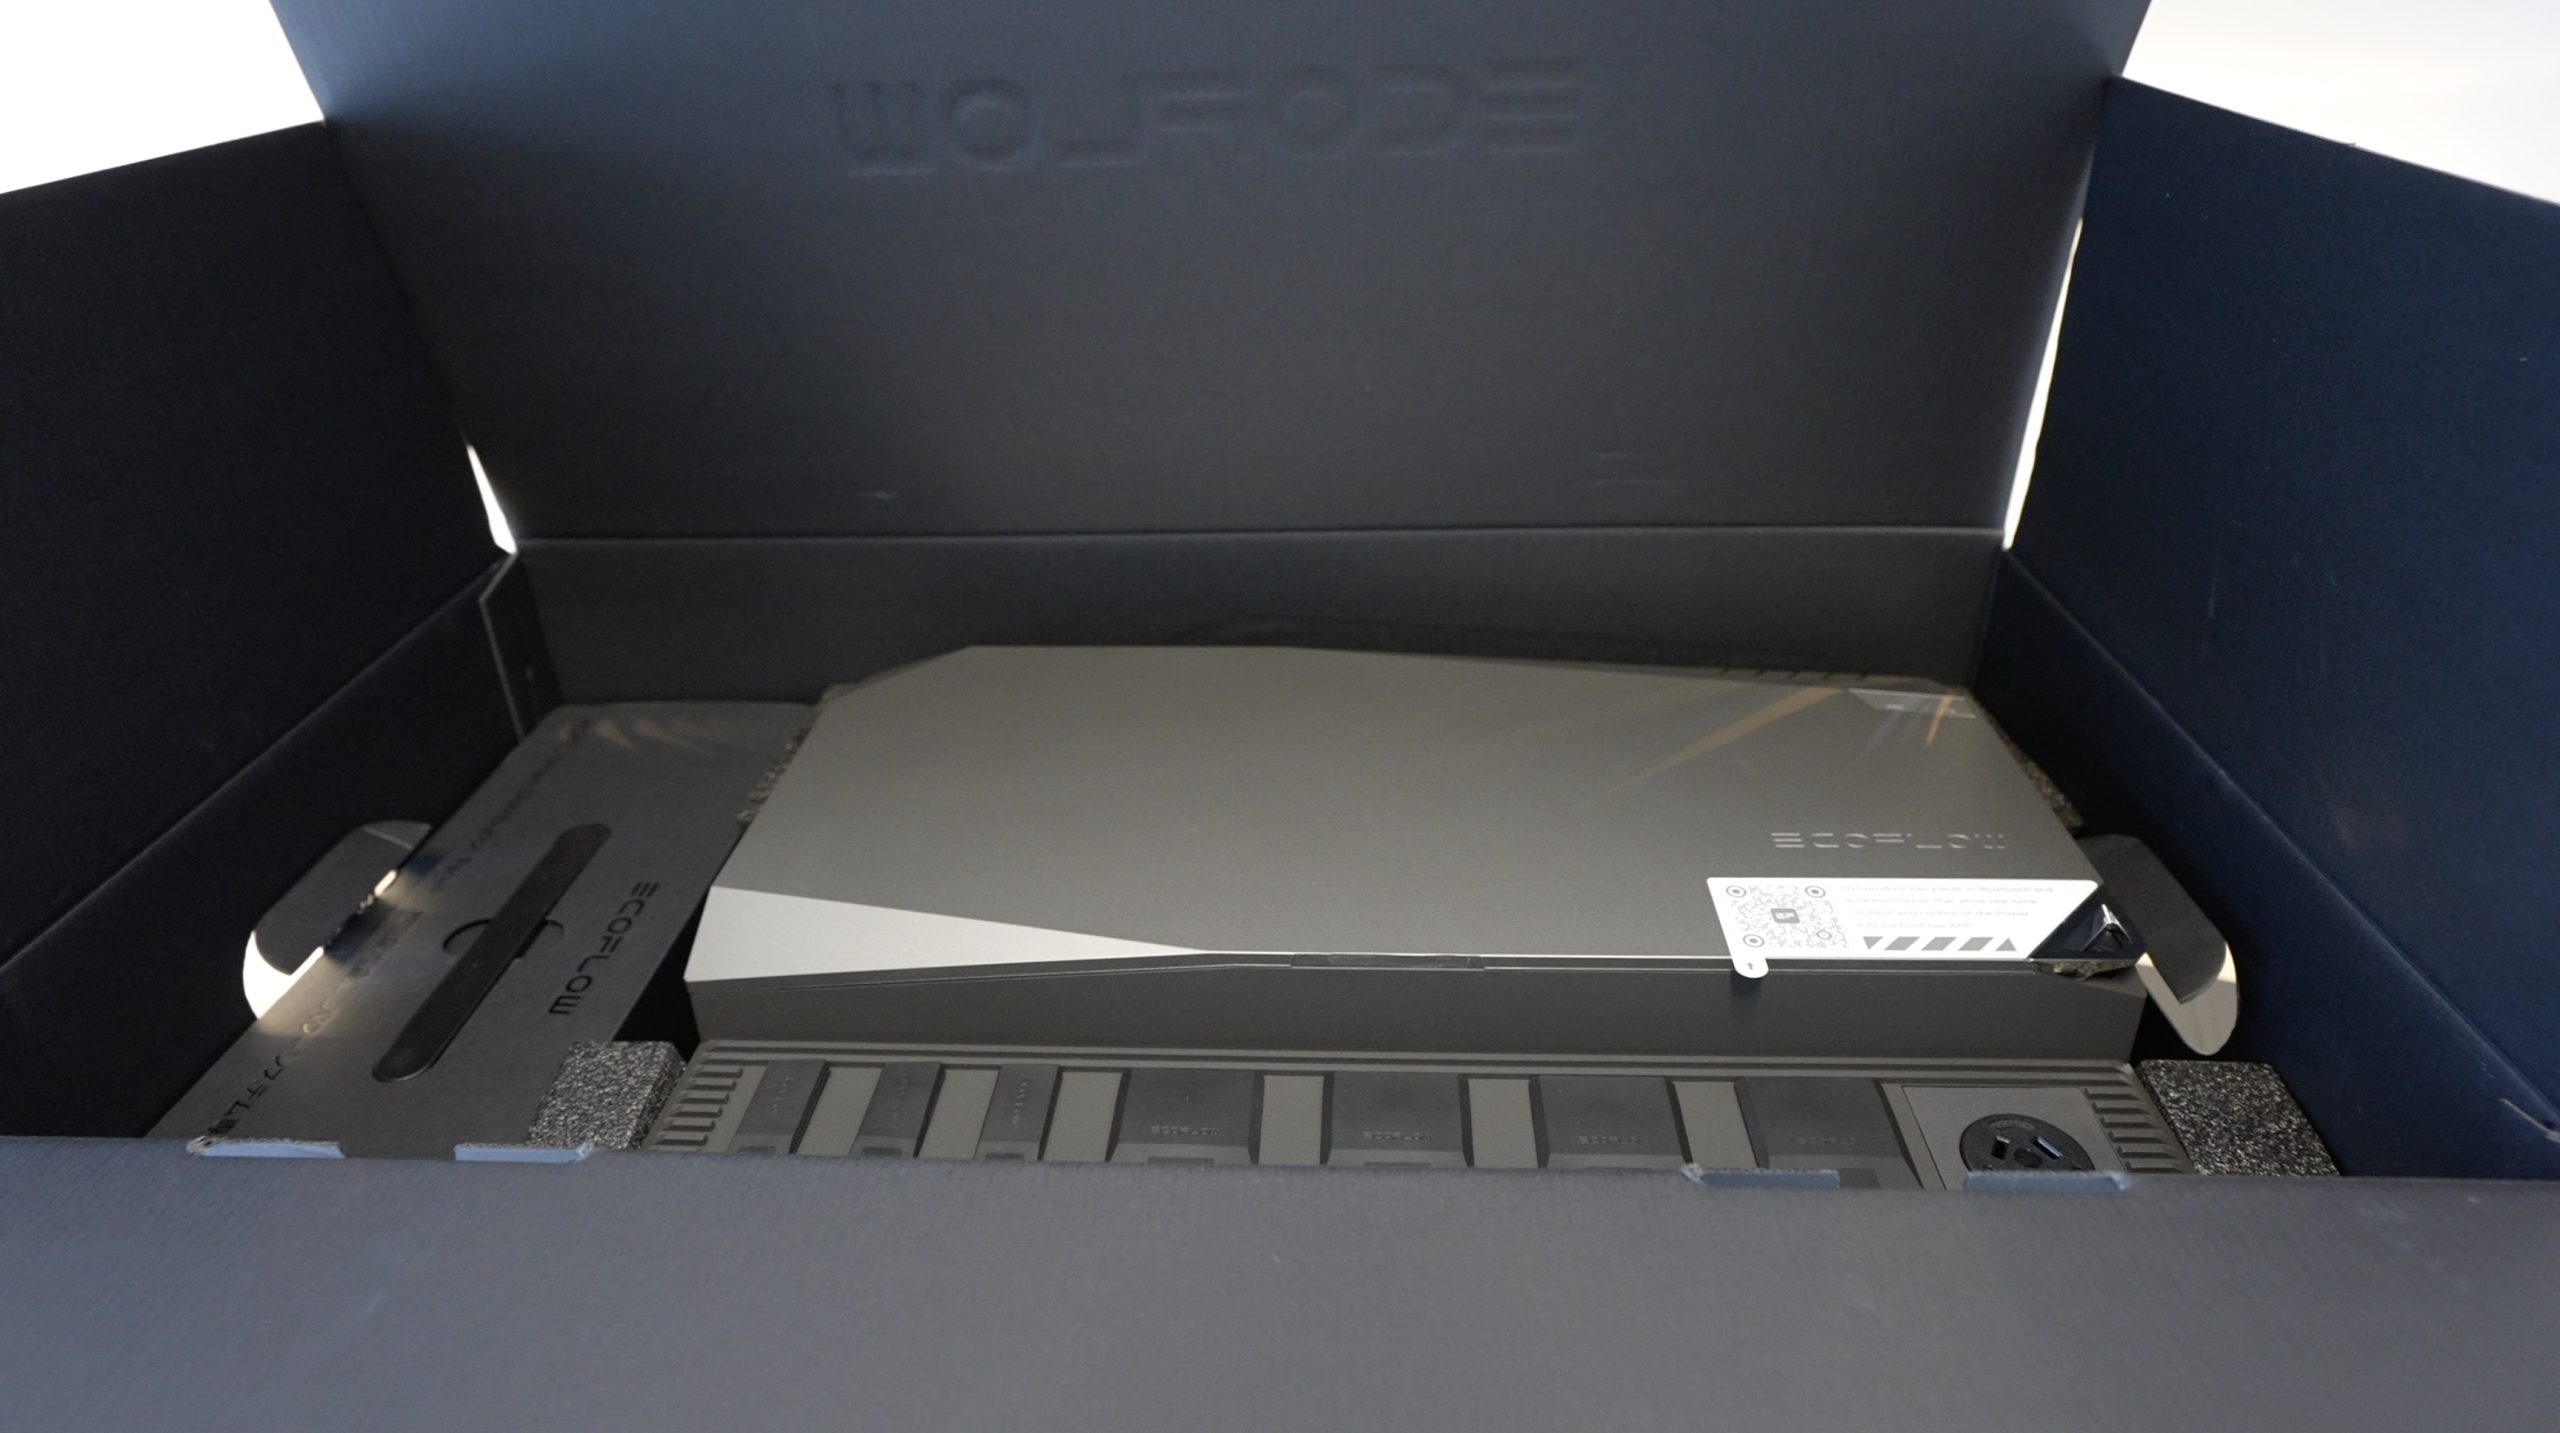
I really like the sleek and modern design they’ve gone with and they’ve used high-quality materials as well. This feels like a premium product that’s built to last.
You can then add up to 3 of these 2kWh or 5kWh batteries to power the system. What makes this system great is the ability to easily add or remove battery capacity to your setup, so you can start small and expand as you need to. The batteries are also stackable, you can stack up to three of the same size batteries on top of each other when you scale up your capacity.
A Closer Look At The Main Components
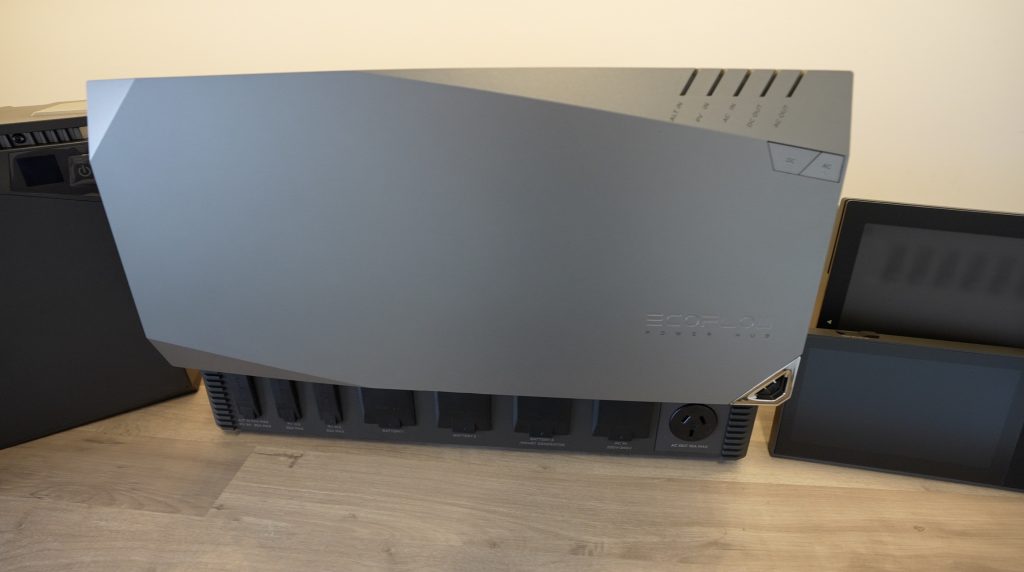
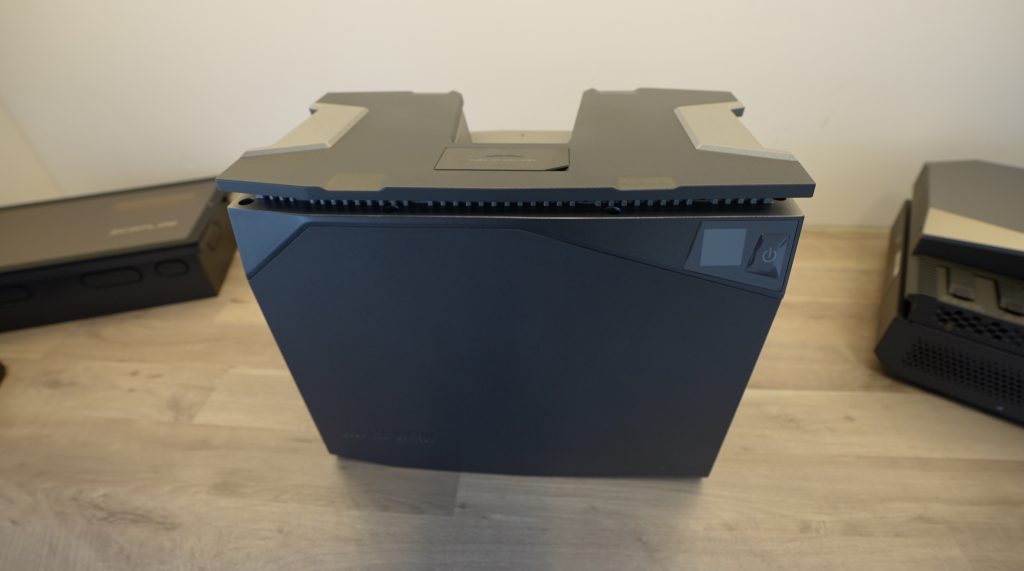
EcoFlow Power Hub
The power hub is the main storage and generation controller. This includes a pure sine wave inverter which can produce up to 3,600W of mains power and can handle a surge of up to 7200W.
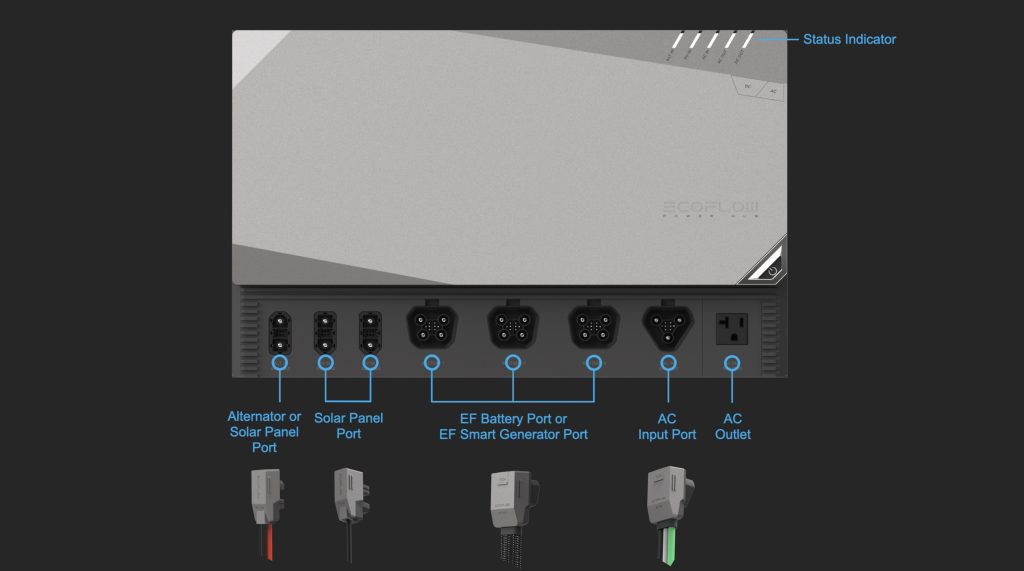
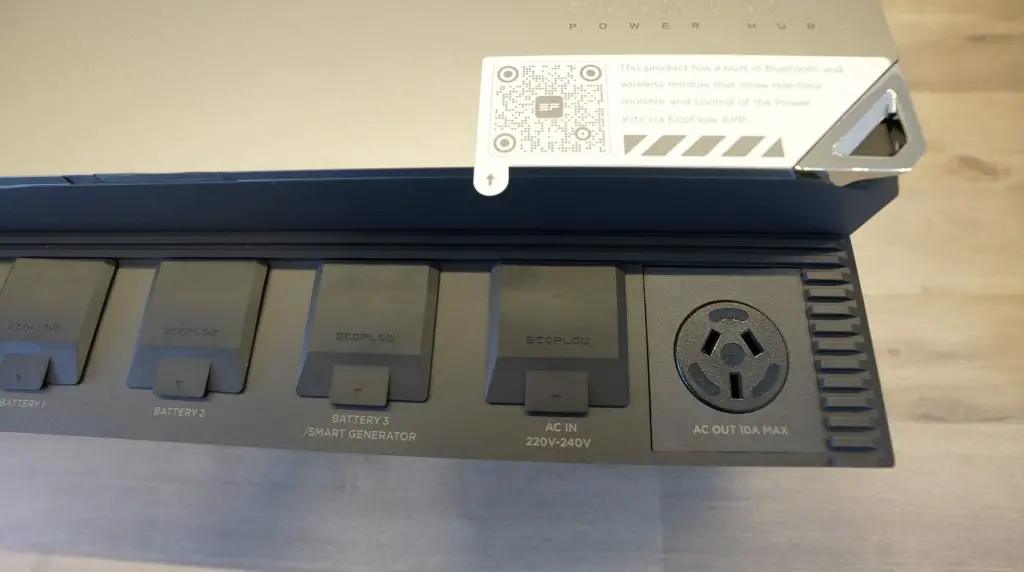
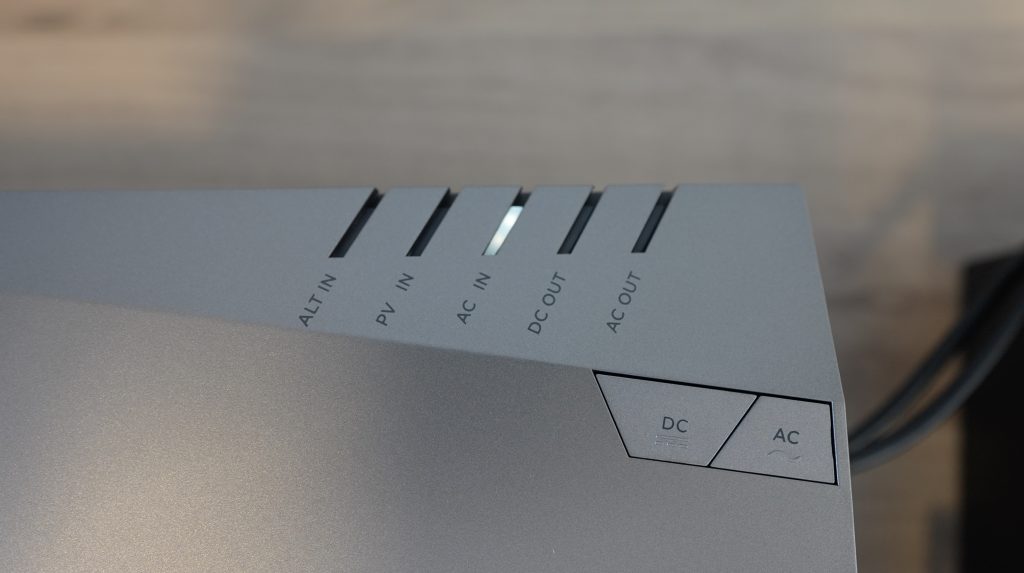
It has a range of ports along the bottom and side, into which their pre-made cables plug into, making this an easy-to-install, plug-and-play solution. It can also do up to 1000W supply of DC power at either 12V or 24V.
To charge the batteries or supply power to the system, it’s got a 3000W AC charger.
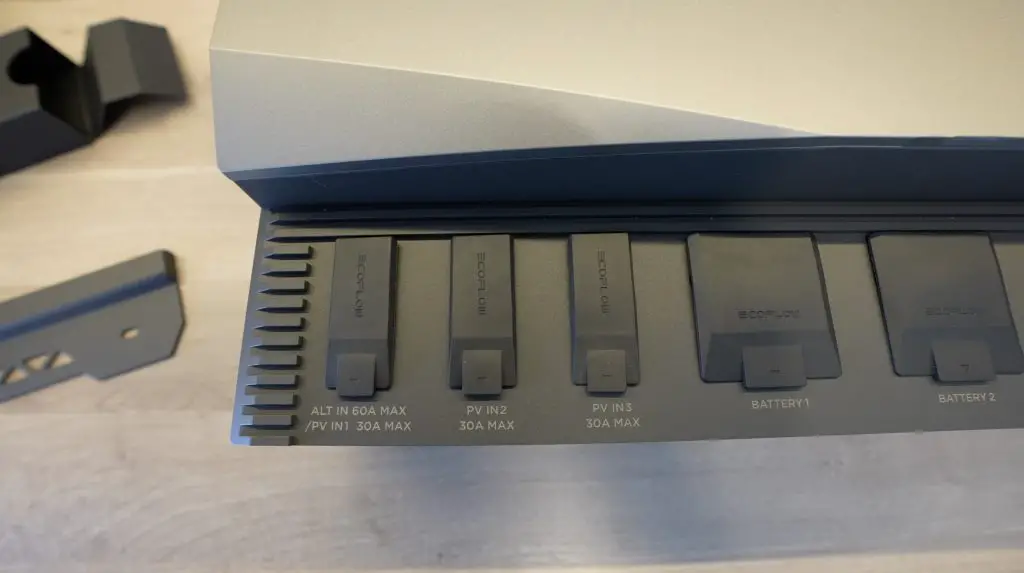
The DC input for the alternator can take a 1600W alternator or PV input and the other two solar inputs can each also do 1600W, all with MPPT charge controllers. So you can have up to 4800W of charging capacity on the DC input.
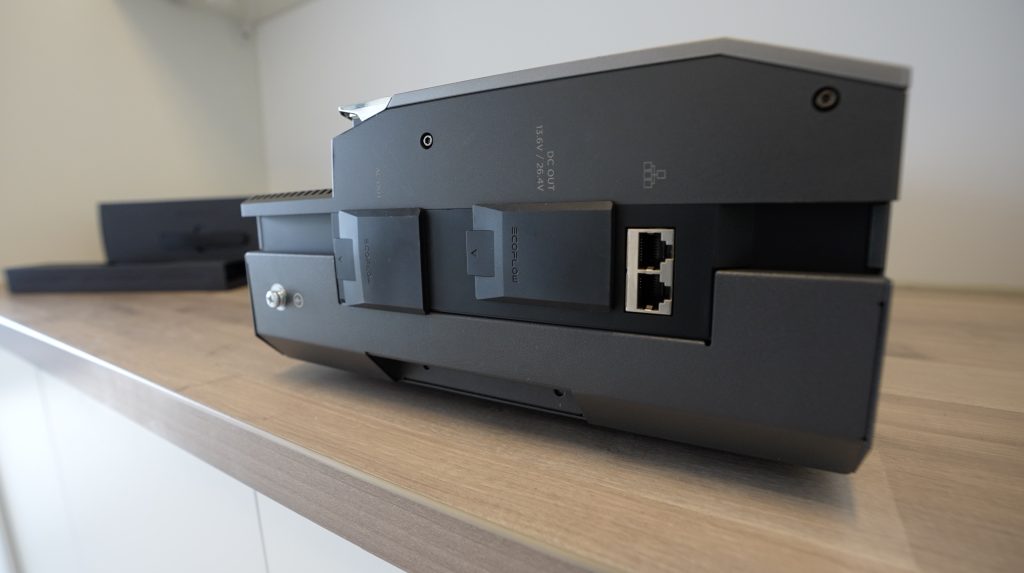
Power is then provided to your devices and appliances through the two ports on the side of the power hub.
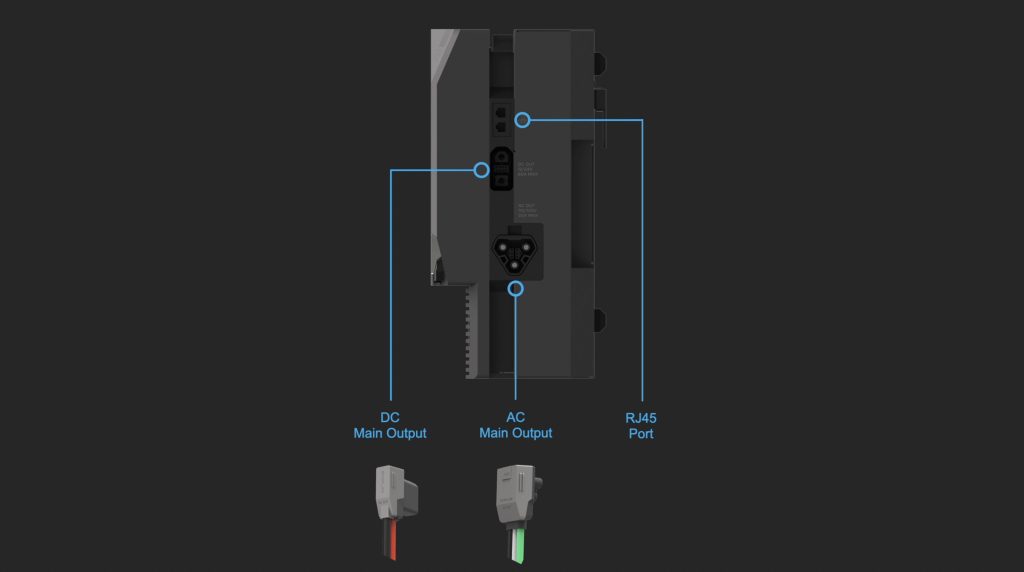
On this side, we’ve got two RJ45 ports for CAN communication as well as the AC and DC outputs that supply power to the smart distribution panel.
So through the available inputs, you’ve got options to charge the system through solar, through one of their smart generators, through an alternator, an AC power source or through a generator.
EcoFlow LFP Battery
The Power Hub manages the flow of power to and from the system, but we still need a way to store it. This is done by connecting up to three batteries, or two batteries and one of their smart generators.

The batteries are Lithium Iron Phosphate batteries and both models run at 51.2V. The 2kWh ones have a capacity of 40Ah and the 5kWh ones have a capacity of 100Ah.
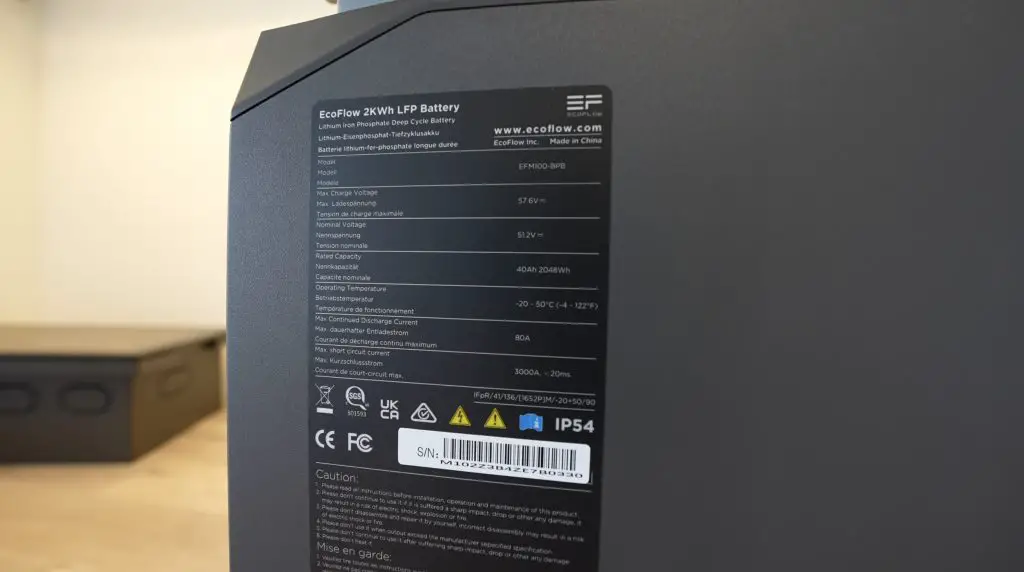
They’re rated for 3000 cycles with a discharge depth of 80%, so they should be good for around 8 years when used daily. They’ve got an integrated battery management system with auto heating for use in cold environments, a built-in fuse and other safety protection features.
EcoFlow Smart Distribution Panel
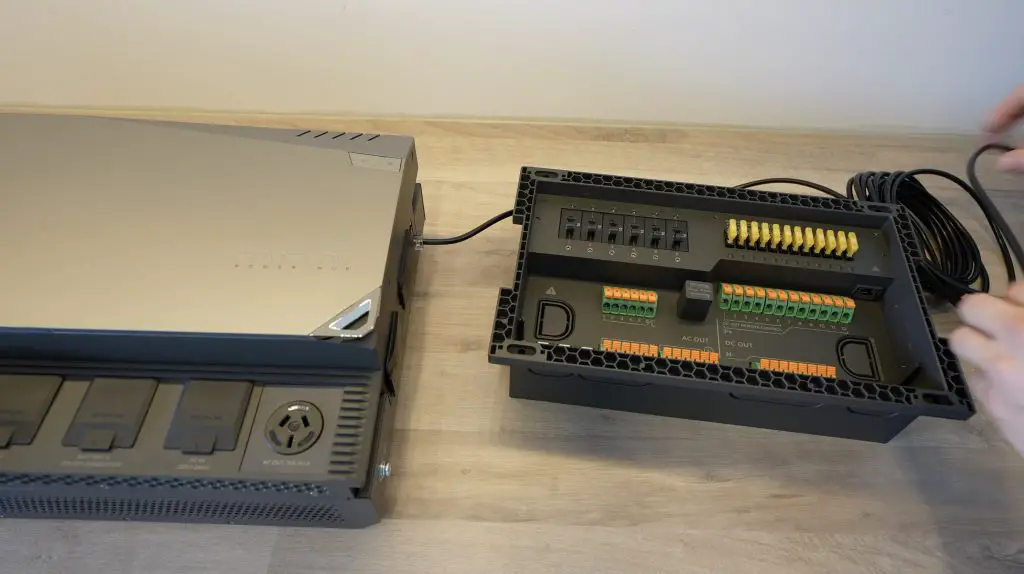
We’ve got the two main AC and DC outputs on the side of the power hub, but EcoFlow have made it easier to use these outputs by running them through their smart distribution panel.
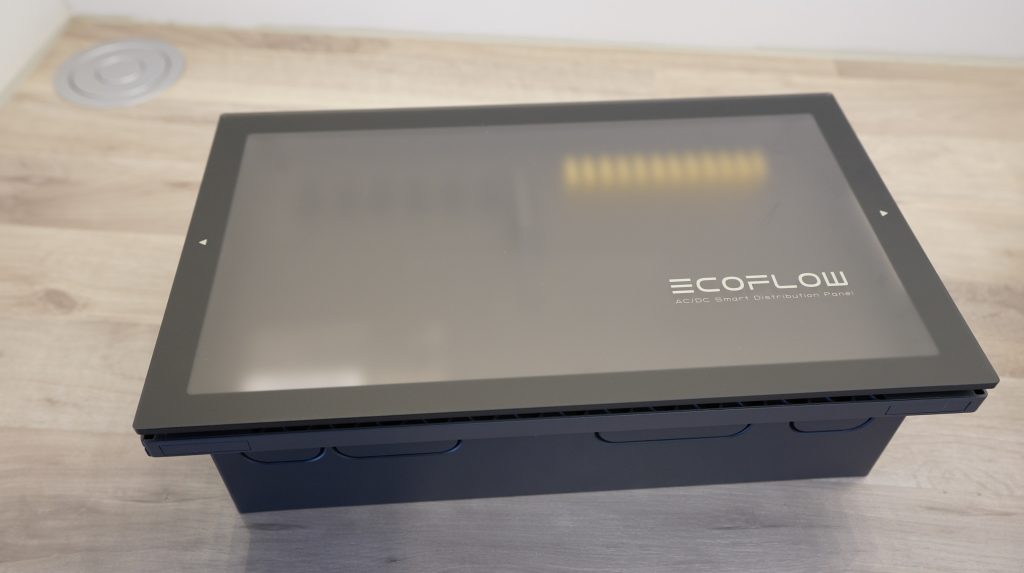
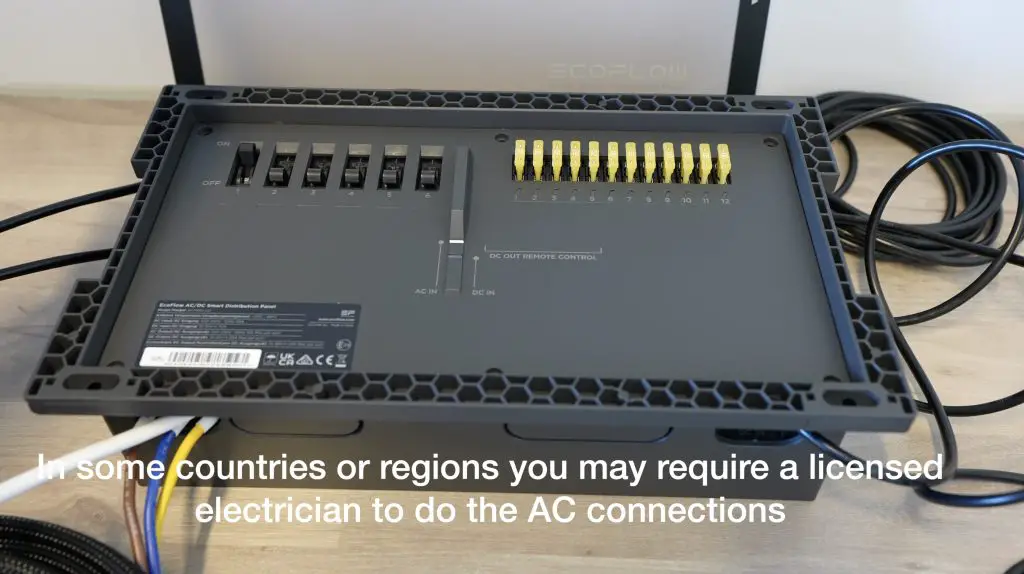
The Smart distribution panel is designed to replace your existing van or trailer’s distribution board. This board provides 6 20A protected AC mains outputs and 12 fused DC outputs, which are controllable by the Power Kit Console or through the App, and they give you full power monitoring capabilities as well.

Important Note: In some countries or regions a qualified electrician is required to do any electrical work/connections on 110VAC or 220VAC supplies. Please make sure that you check your local regulations beforehand.
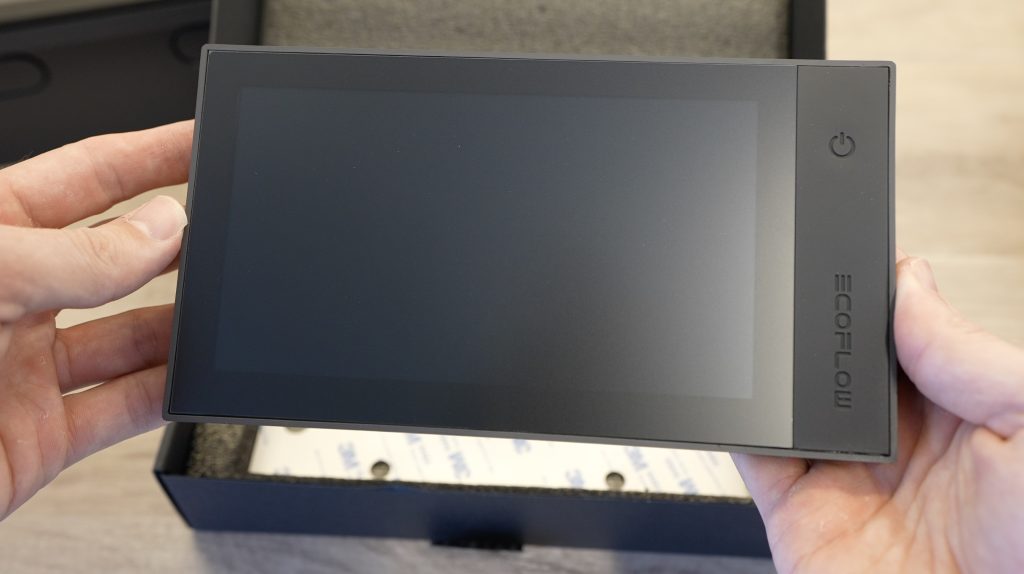
EcoFlow Console
The console is a 7-inch IPS touch display with an RJ45 CAN communication interface. This is the primary means to interact with the system if you’re not using the mobile App.
Preterminated Cables
The cables are included with the kit as well and are pre-terminated to quickly hook up to the distribution board, alternator or solar panels.
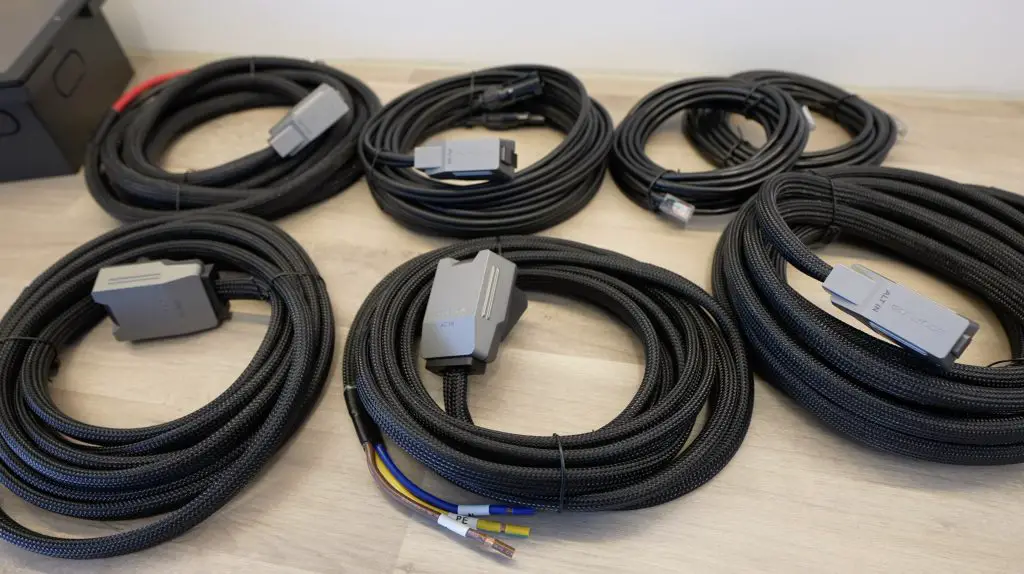
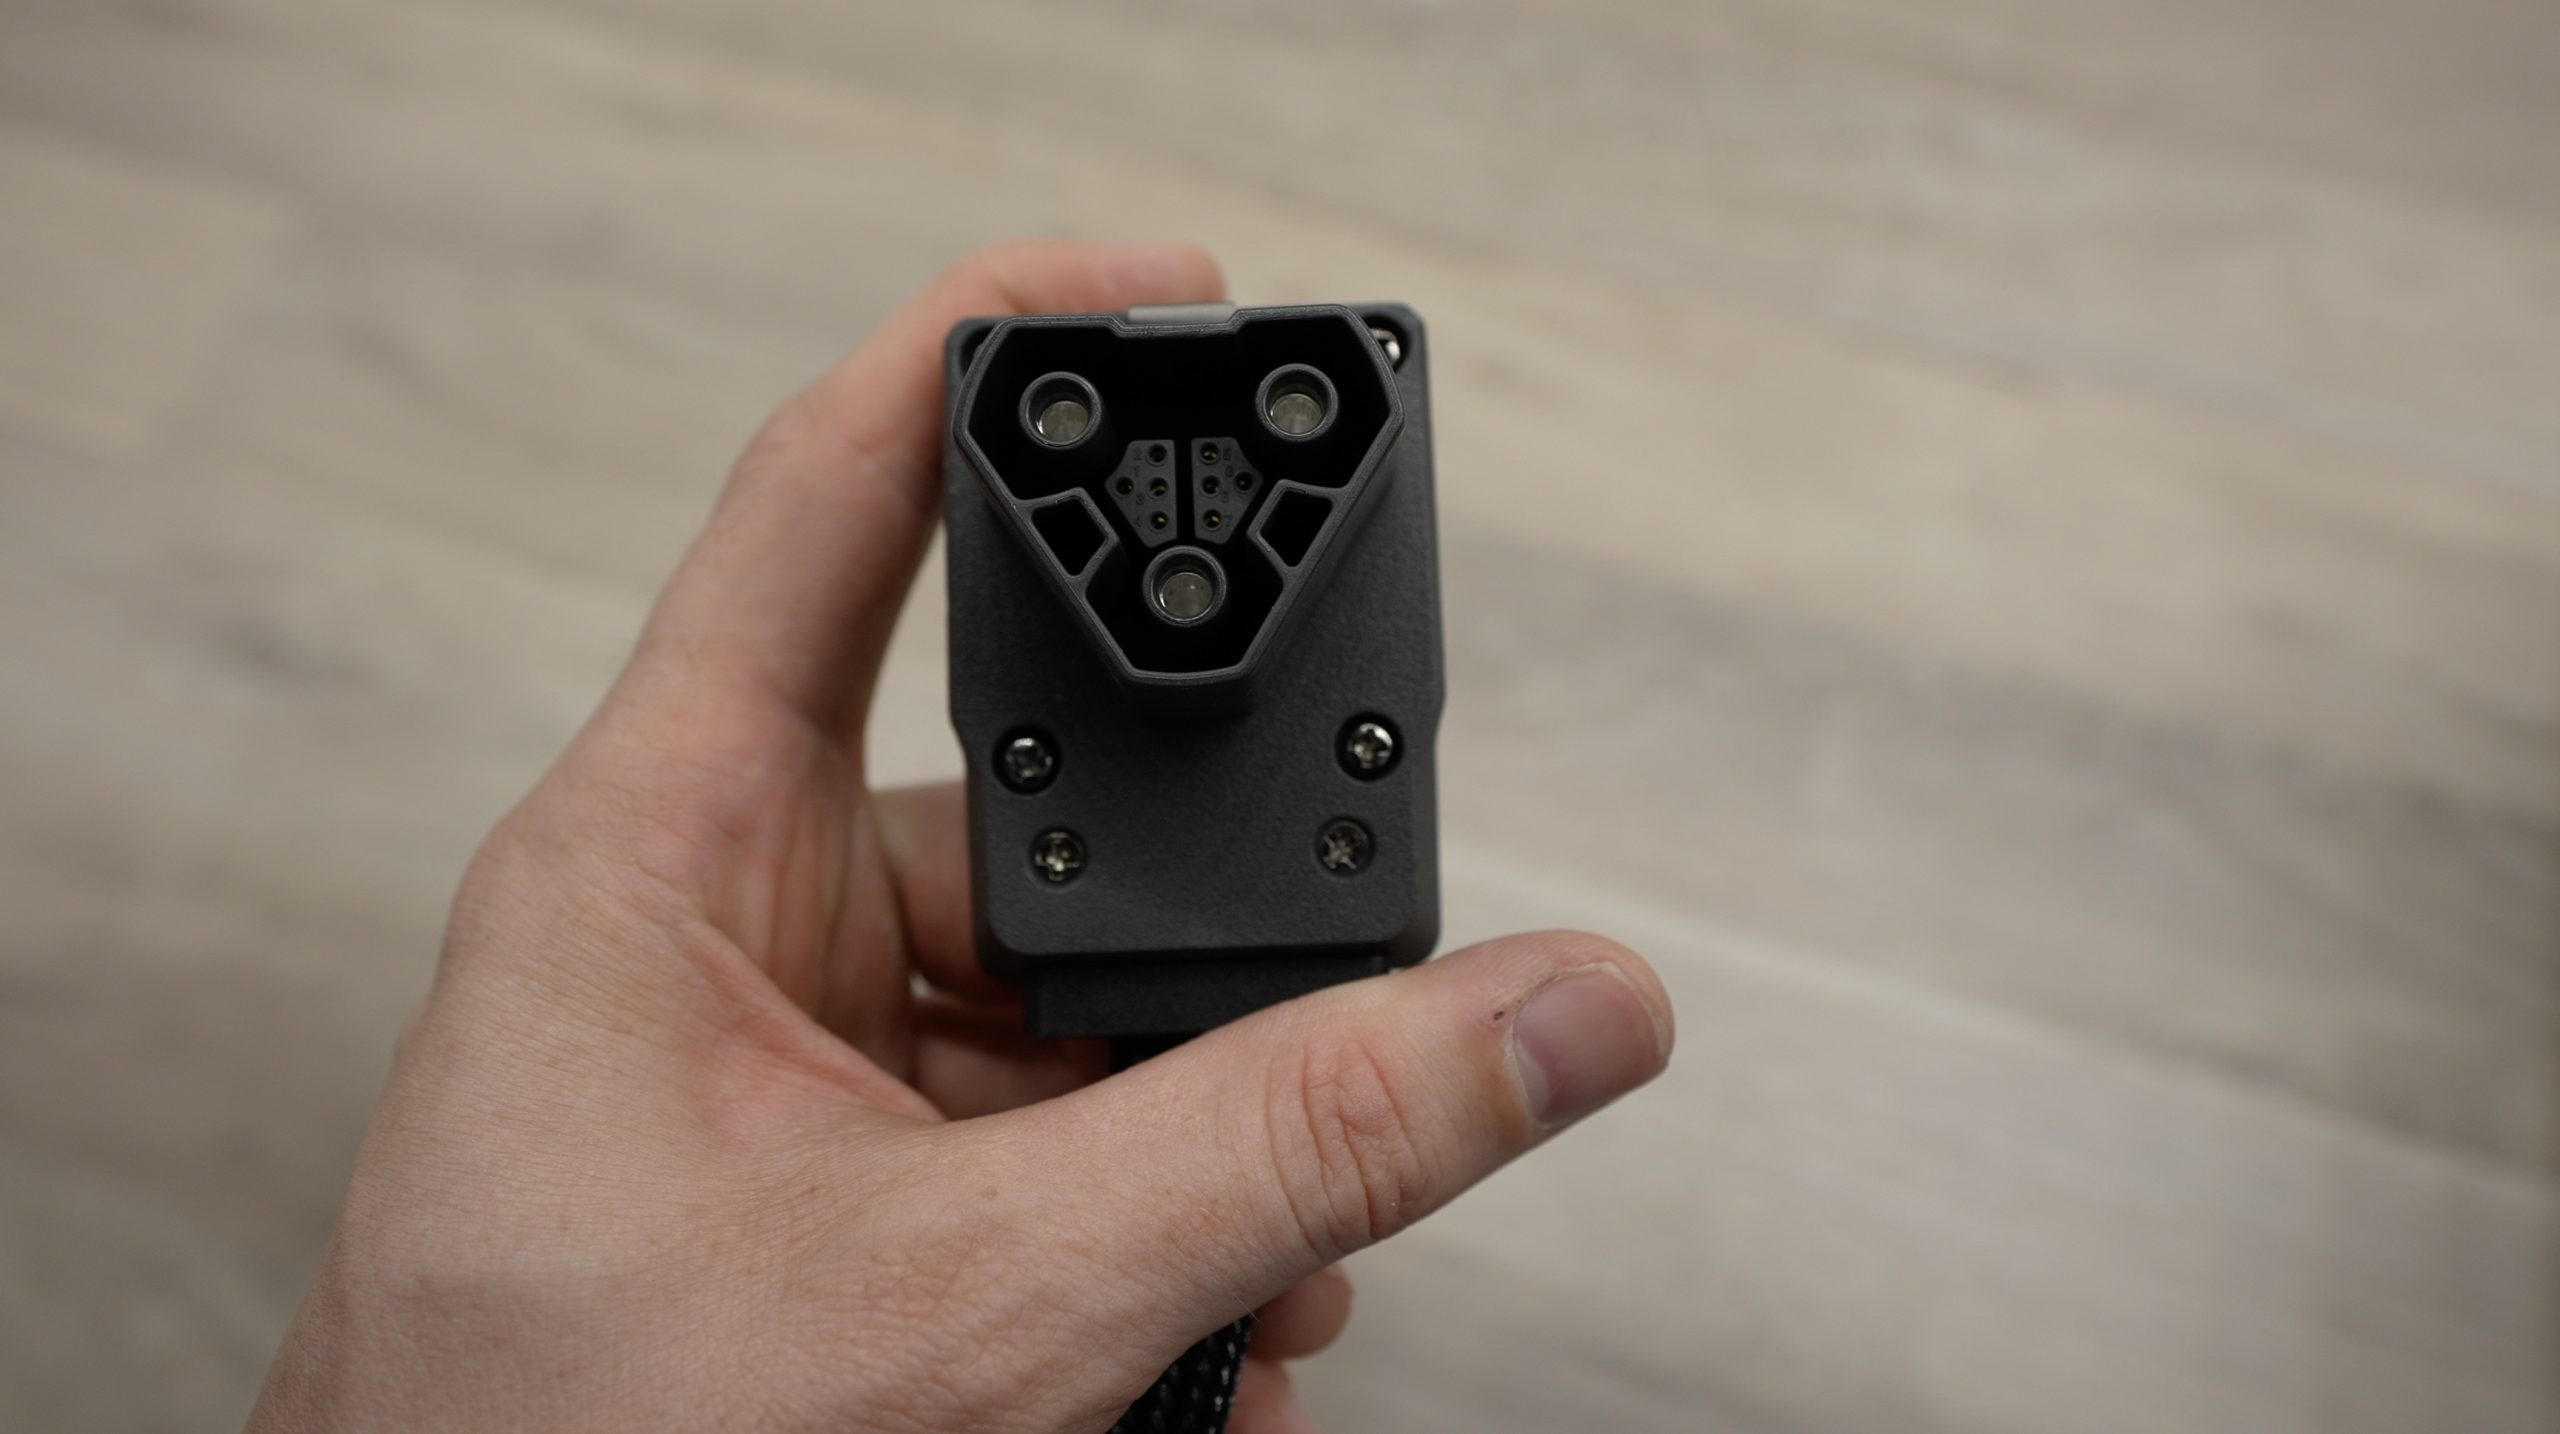
Each cable has a clearly labelled plug on the end and the plugs are different so you won’t be able to plug them into the wrong ports, so you’re protected against damaging your equipment.

Testing The Power Kits System On My Workbench
Connecting The System Components Together
Before I install the system in my workshop, I’m going to hook up some of the main components on my workbench so it’s easier to see how it all connects together and works.
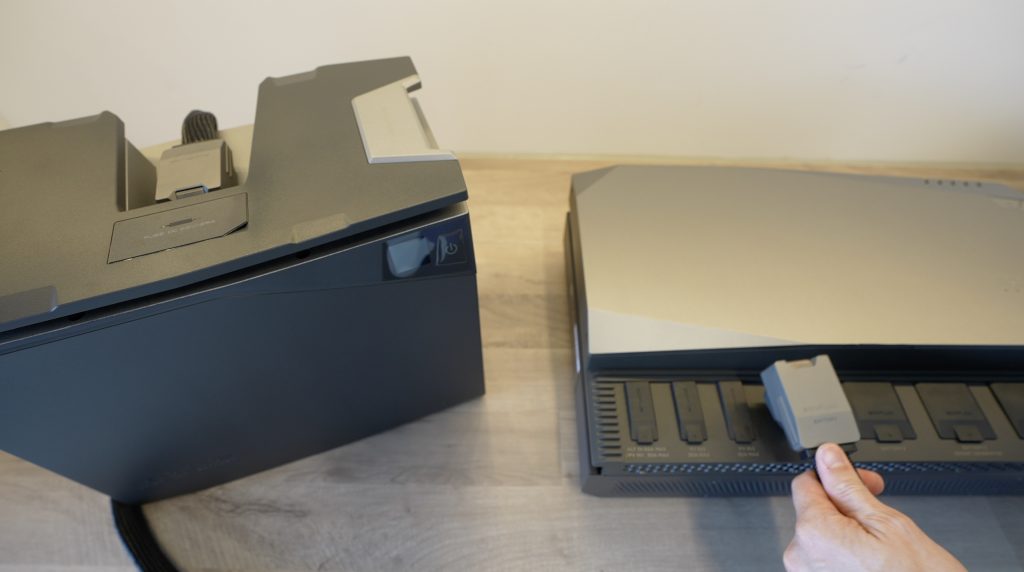
Connecting the components up is really simple you just remove the covers from the ports you want to use and plug them in.
First, let’s hook up the battery to battery port 1.
We can then connect the CAN interface to the smart distribution board to control the circuits and get power consumption data back.
Then connect the console with another RJ45 CAN cable. The console is where we’ll be able to control the system and see energy usage information.
With those hooked up, we should be able to turn the system on.
Turning The System On For The First Time
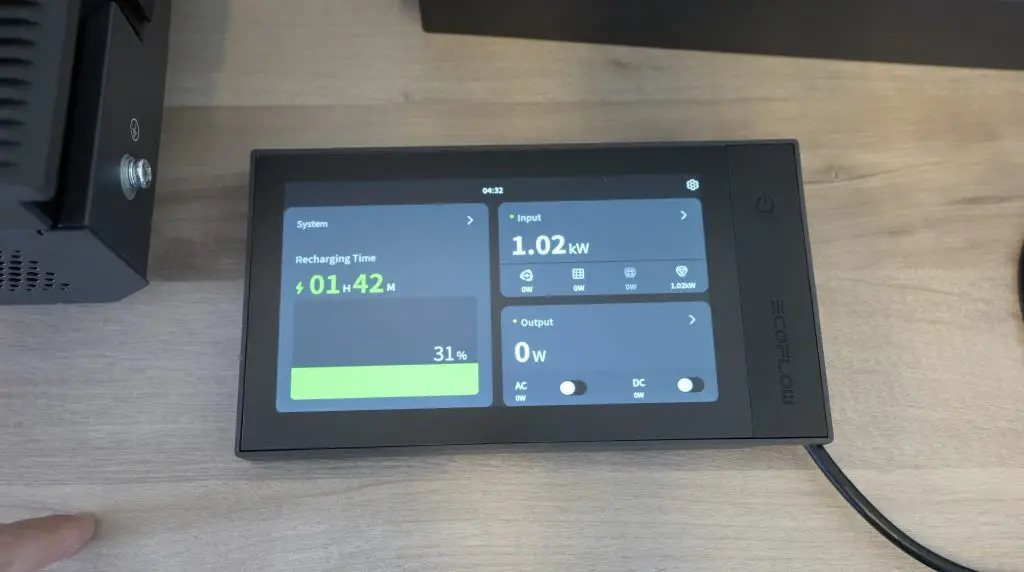
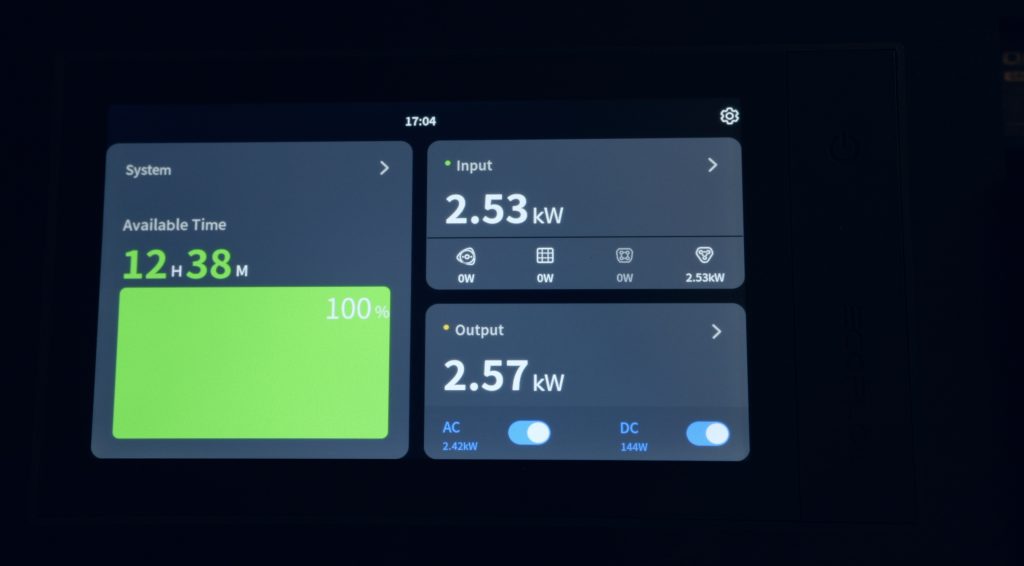
From the console, you get information on the battery capacity remaining as well as the expected run time at the current power consumption until the batteries are empty. You can also turn loads and inputs on or off and access the system’s settings. I’m going to connect it to my WiFi network so that I’ll have access to the system remotely through the EcoFlow app as well.
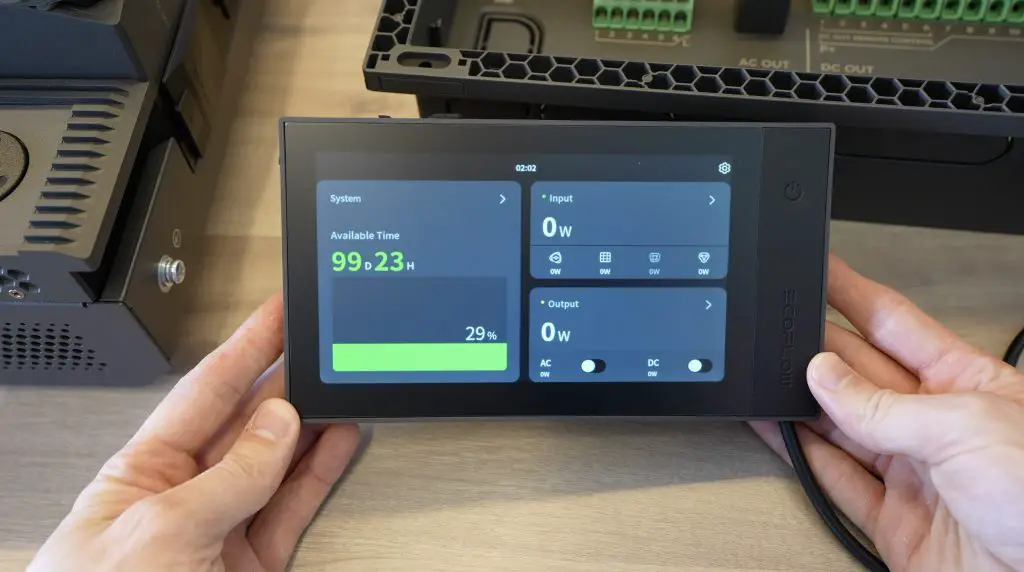
The battery is only at 29%, so I can plug the AC input into one of my mains outlets to charge.
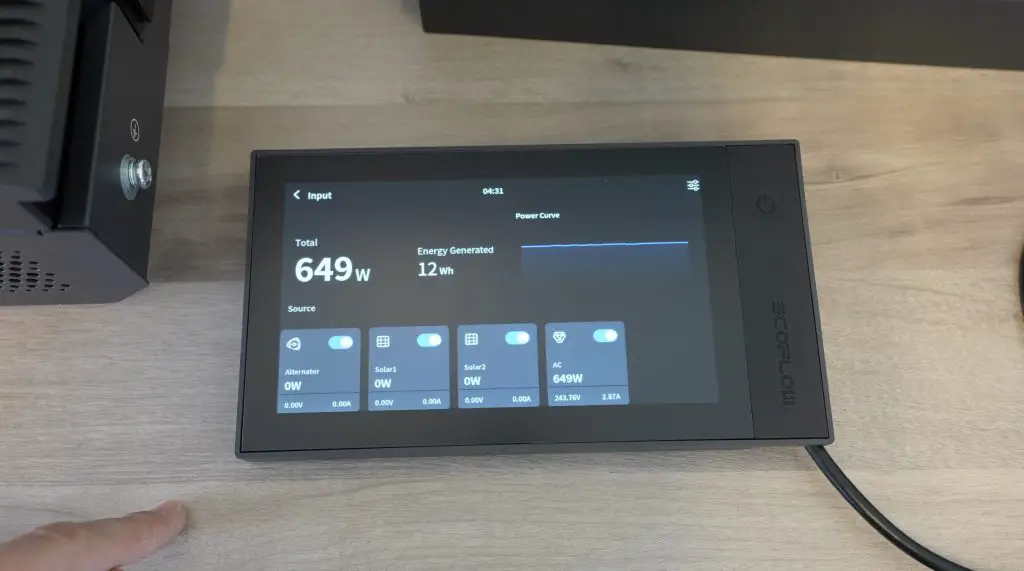
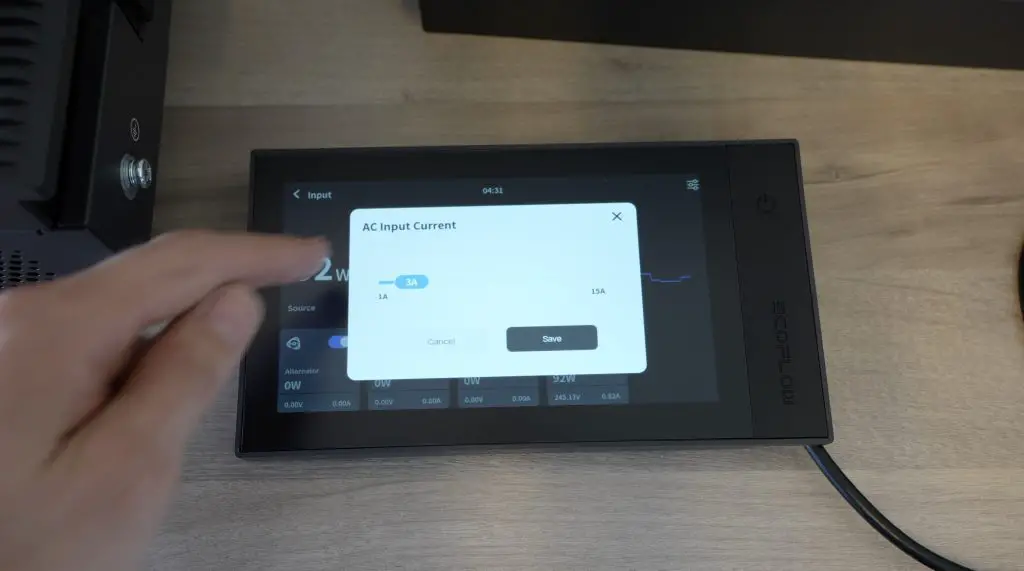
They’ve also got some really clever features here. The built-in charger can charge at 3000W, but if you’re at a small campsite or RV park then your site probably won’t have the capacity to supply this much power, so you can limit the charger’s power draw as well. You can also easily adjust it up or down to suit new sites.
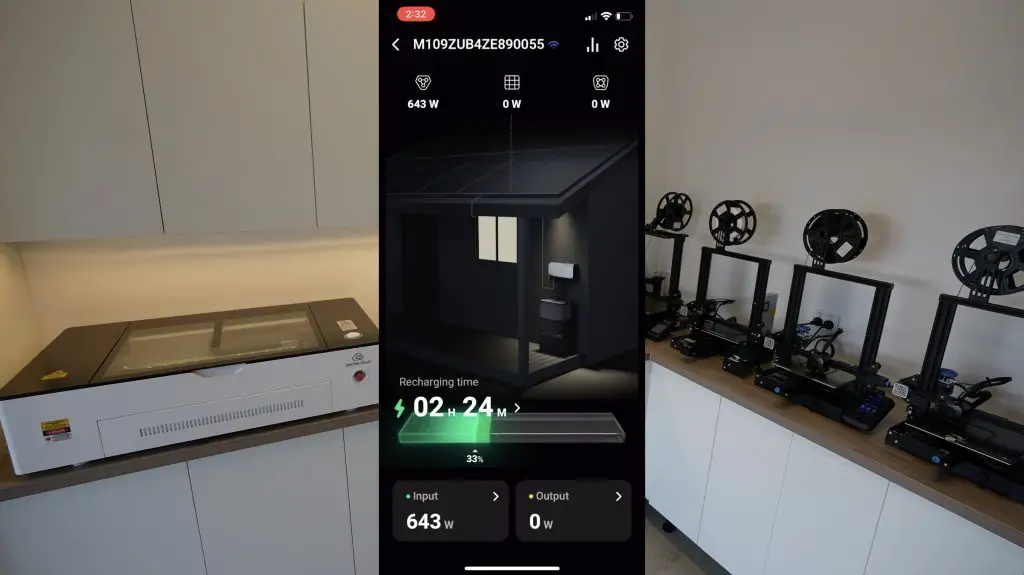
Now we can see that the Home Screen has switched to tell us how many hours it’s going to take to fully charge the battery.
If you’ve got multiple batteries connected, you can also get more detailed information on each of the individual batteries.
The power hub has some status indicators along the top to tell you which inputs and outputs are currently active and you can use the buttons below the indicators to turn the AC and DC outputs on or off.
The battery’s indicator shows its charge capacity and has a little indicator in the corner when charging as well.

Trying A 3D Printer As A Load On The System
As a first test, I’ve connected one of my 3D printers to the smart distribution panel. This should provide a relatively light load of around 250-350W.
We can see its power consumption start showing up if we set it to preheat and if we turn off the AC input, the system is then running solely off of the battery. So now the panel is indicating that it’ll be able to run for a little over 2 hours at this output.

The 3D printer only draws this much power when heating up, once it is running then it uses around 100 to 120W continuously. So the 2kWh battery should be able to power it for around 13-14 hours using 80% of its capacity.
If we switch the printer off again then the load drops back down to almost zero.
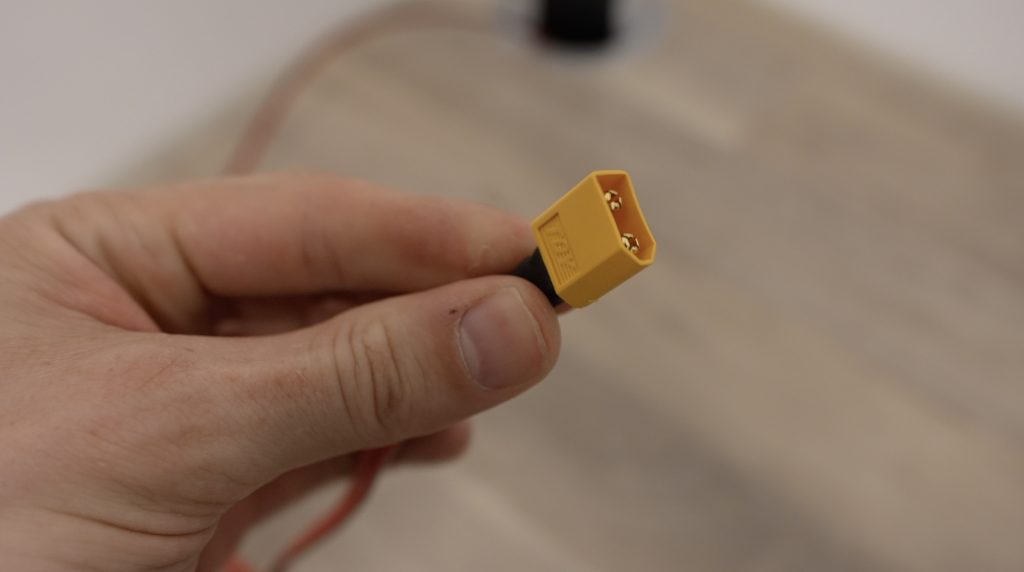
The system can also easily replace 12V or 24V systems that you might already have installed as it’s got a built-in DC-DC step-down converter. I’m going to try powering one of my printers directly since they all run at 24V anyway. This should actually be more efficient because we’re using direct DC power from the battery rather than converting it to AC and then the power supply on the printer is converting it back to DC.
To do that, I soldered an XT60 connector onto the end of a power lead that is fed from one of the Smart Distribution Board outputs. My older Ender 3 Pro still uses one of these connectors between the power supply and control board, so it’s easy to bypass.
Taking My Workshop Offgrid Using EcoFlow Power Kits
So now that you’ve seen how the system works on my work bench, I’m going to get it installed in my workshop and really load it up.
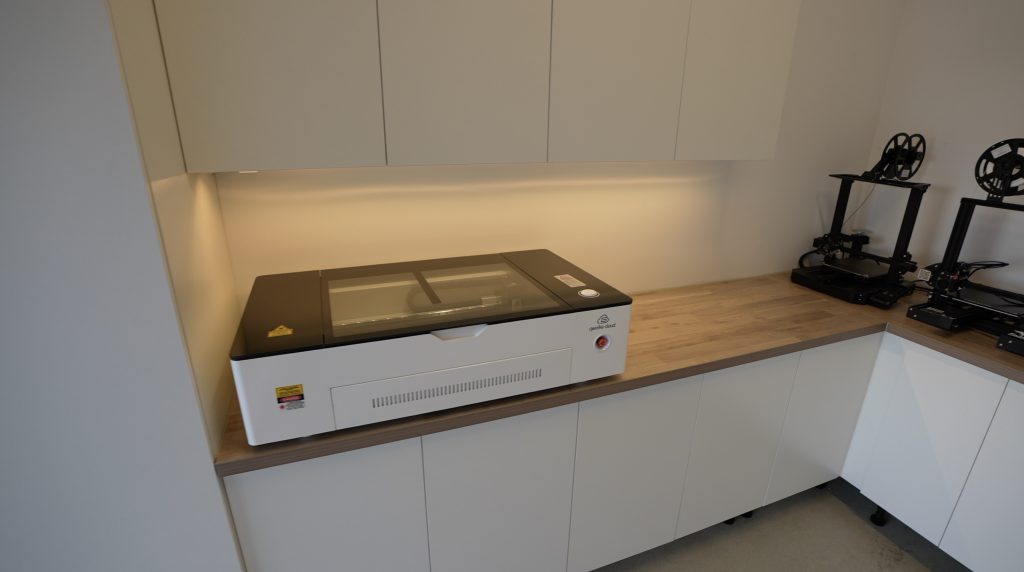
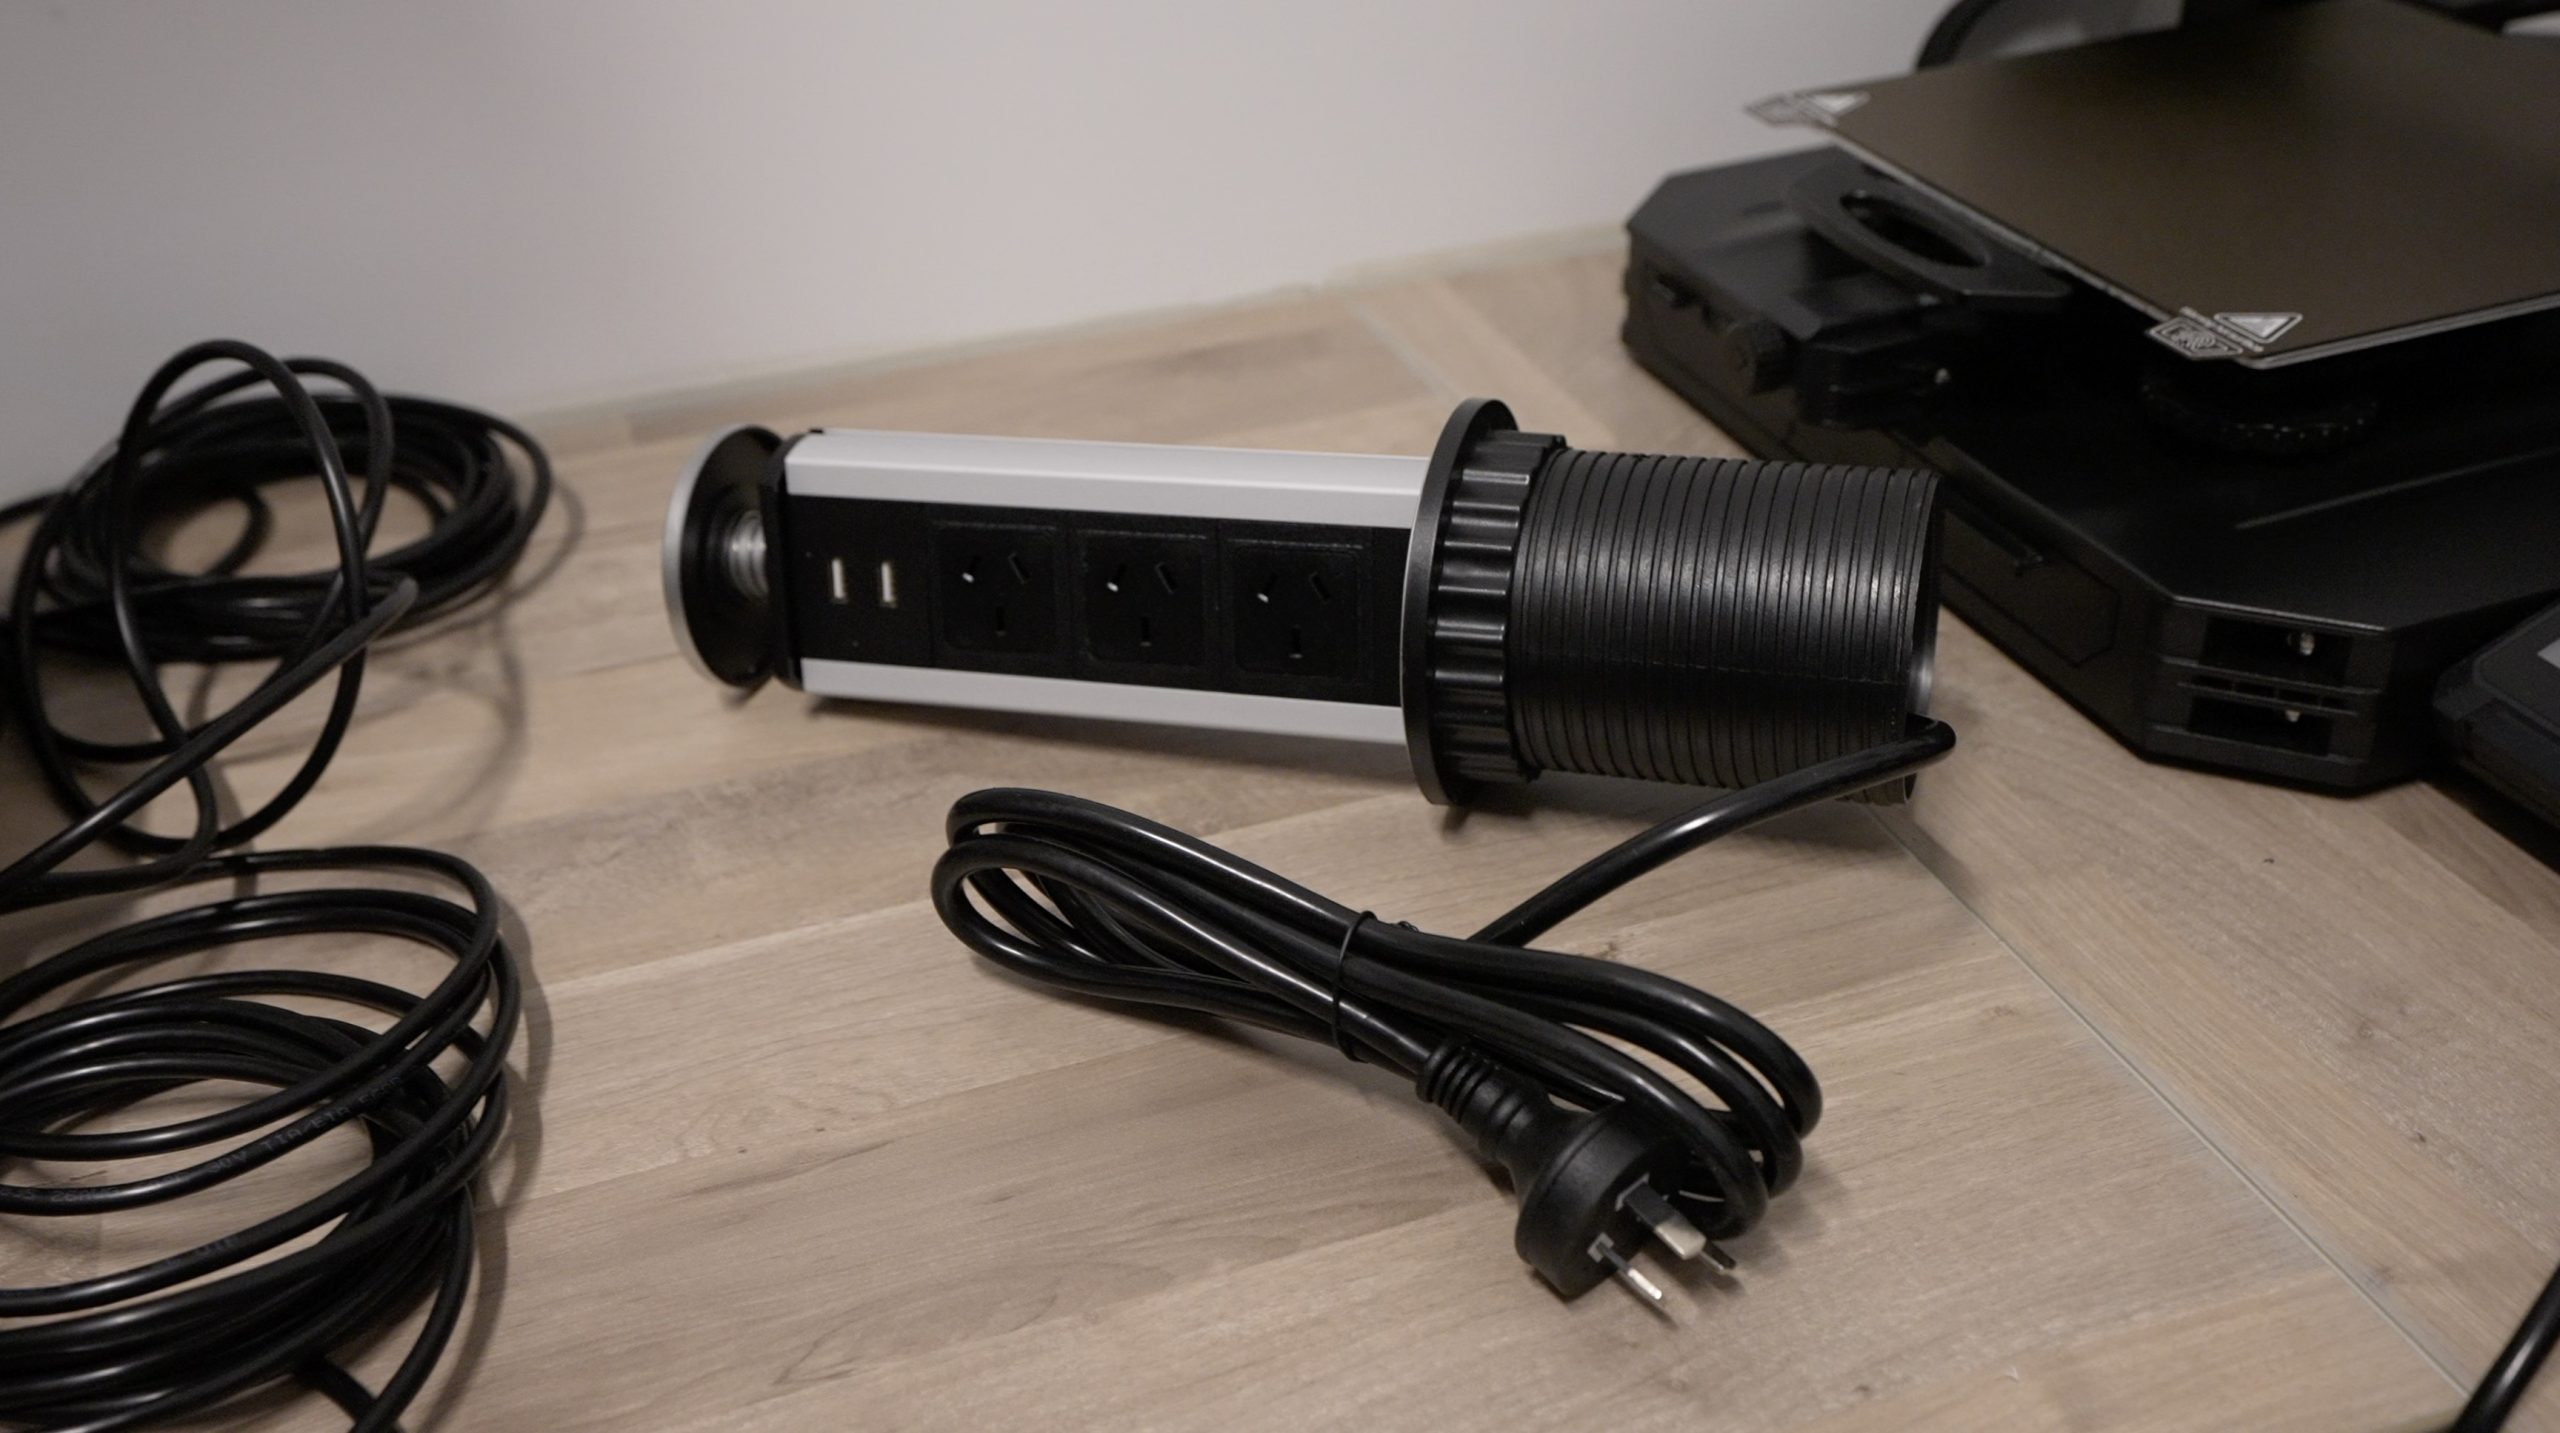
I’ve bought two of these benchtop plug points which I’m going to install on either side of my workbench. One in my work area, which will also be used for the laser cutter and one on the 3D printer side which will run my 3D printers.

I’m also going to connect my workshop lights to another 24V DC output.
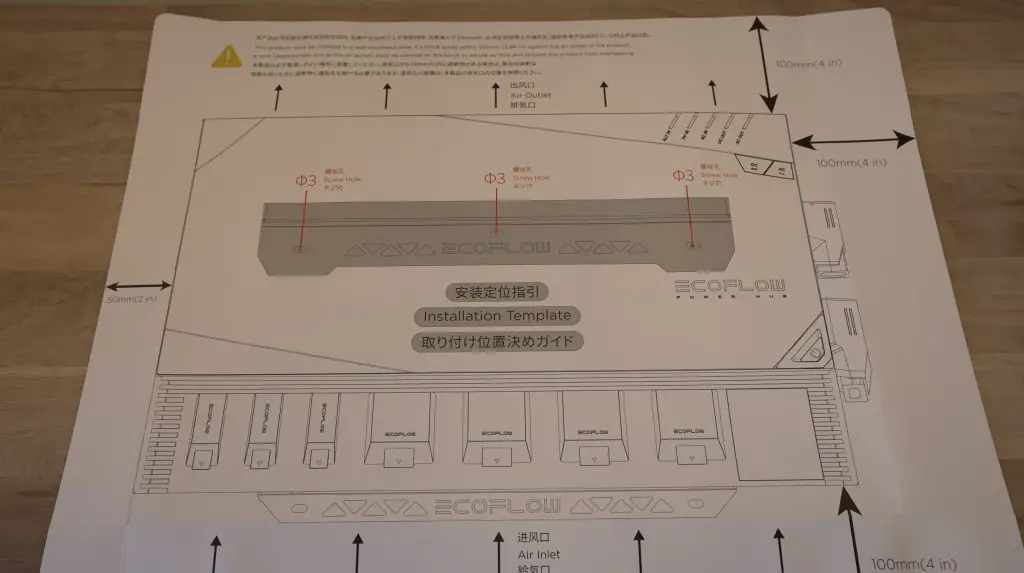
To install the equipment, EcoFlow have again made things really simple, each part of the system comes with a manual and its own set of mounting hardware including brackets and screws. They also give you a few different fuses for the DC circuits.
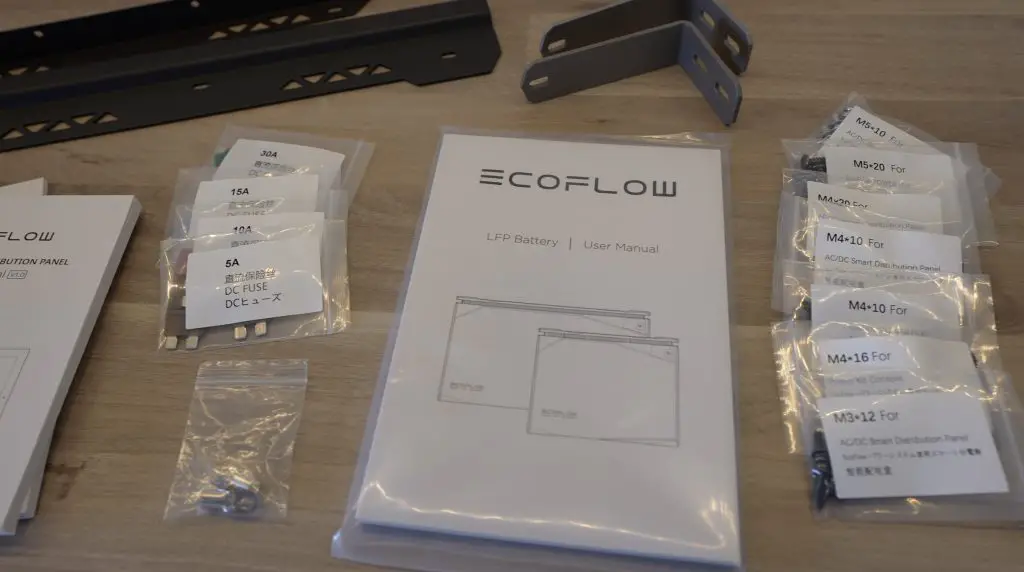
Each device to be mounted also includes a mounting template to make sure that you get the holes in the right places and that you allow enough room around the power hub for cooling and cabling.
I’ve got solar panels on my home which provide excess power during the day, so I’m going to set the system up to charge during the day and I can then use the stored battery power overnight for lighting and to run my printers. I could also add a dedicated solar panel to this system in my workshop, but since I’ve already got panels installed and the power available, I may as well use it.
Configuring The Power Kits System Using The EcoFlow App
With the system installed, I’m now going to configure it using the EcoFlow app.
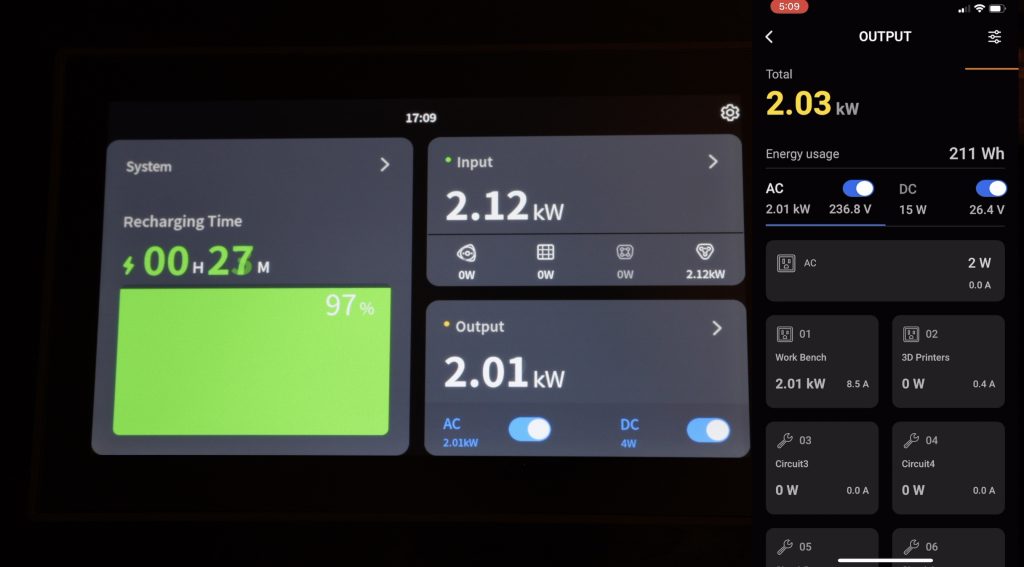
The app gives you a similar set of controls to the console, with the added benefit of being able to control the system remotely. So you can turn power inputs on or off and you can control all of your loads. You can also see what supplies are connected and the charge state of the batteries.
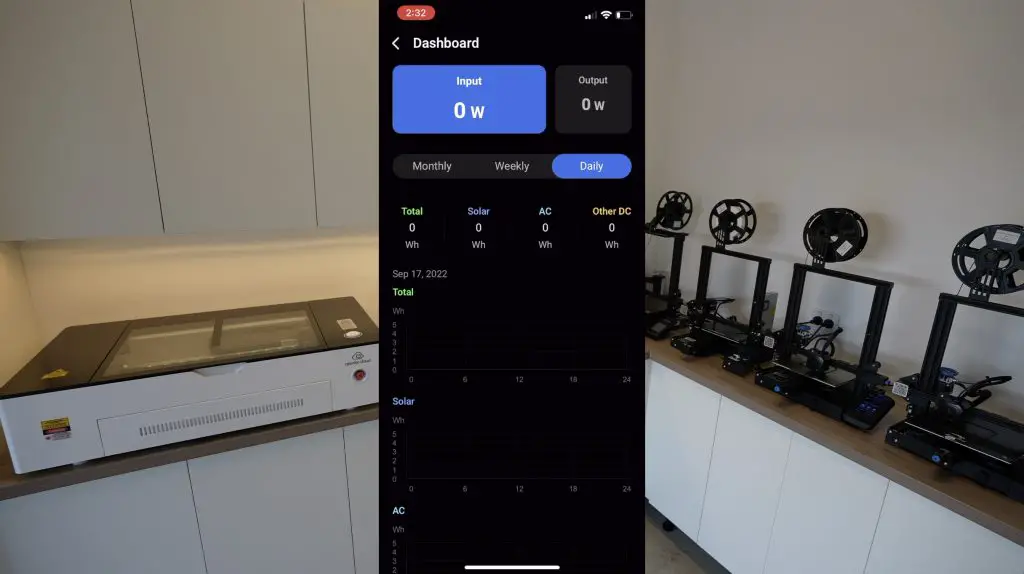
It also gives you more detailed information on your daily, weekly and monthly energy inputs and consumption.
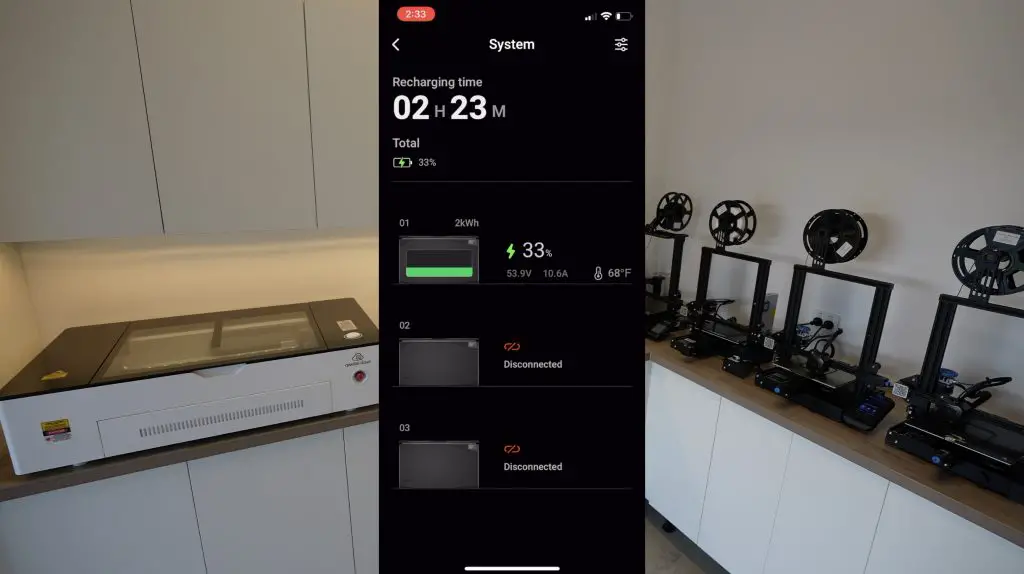
You can get more detailed information on each of the connected batteries and see the remaining time to fully charged or the remaining run time when using the battery’s capacity.
They’ve really put a lot of effort into this app, even the graphic of the home on the main screen is animated. You’ll notice things like the batteries change to show your configuration and the inputs glowing when active.
Testing The Power Kits System Under A Heavy Load
With the system now set up in my workshop, I can now really load it up. I’m going to do this by switching on a 3D printer on the 24V DC supply, two on the AC supply and a heater on another AC supply.
I turned these on in sequence and kept the AC mains charger switched on to keep the battery charged.
The system was drawing slightly less from the AC supply than what it is supplying, I assume because the battery is full, so it doesn’t want to overcharge. The system ran without any issues producing 2.5kW through a mix of AC and DC loads.
Now let’s see if we can turn off the AC supply and run entirely from the battery. This is going to be quite a significant load on this single 2kWh battery – it’ll be drawing around 50A just to keep up with this load.
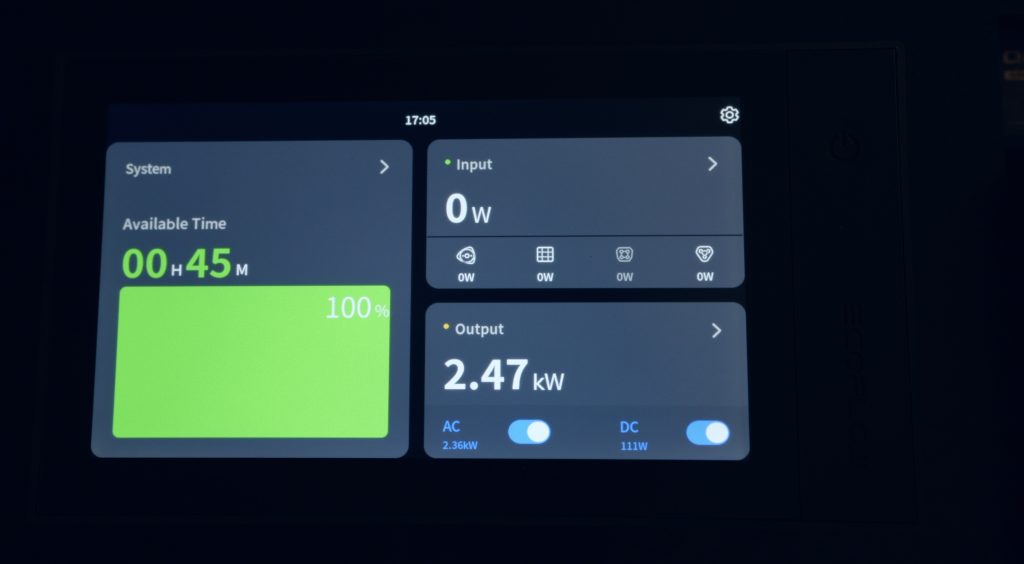
The system and the battery run without any issues with that load as well, which was quite impressive. I then also allowed the system to recharge at maximum power.
Final Thoughts On The EcoFlow Power Kits
EcoFlow have made some smart decisions in the design of the system. All of the DC voltages have been kept below 60V, so they’re safe to handle. They’ve also gone with a 48V battery voltage instead of the usual 12V or 24V so that the cabling is carrying a lower current for the same power output. This means less heat is generated and the system is more efficient.
The other great thing about the modular design is that you aren’t locked in to a particular size system, it’s really easy to expand or reduce capacity and even add or remove charging options as you grow into your van, RV or off-grid home installation.
I’m really excited to see how my workshop does on this system. It allows me to keep a much closer eye on my power consumption and it also helps me use the excess solar power that I generate during the day to run my printers, tools and laser cutter at night.
Let me know what you think of the Ecoflow power kits in the comments section below, and let me know if you’ve got any questions about it or if you’d like to see me try something out on it.
Be sure to check out EcoFlow’s web store if you’re interested in getting your own EcoFlow Power Kits system for your off-grid installation, camper van, RV or trailer.
Soldering XT60 connectors is what causes fires do not do that, it’s very dangerous.
Hi, can I ask where you purchased the ac in charge cable from, i have the same kit and my battery is really low and i would like to charge using the mains power before installing in my garden office? I thought the video and blog were brilliant by the way helped me to setup my own with ease.