Today I’m going to be unboxing and trying out the POP 3D portable scanner, which Revopoint have sent to me to share with you. This is a handheld 3D scanner that Revopoint say can scan with an accuracy of within 0.3mm using dual infrared sensors and an RGB camera. The addition of the RGB camera means that you can capture RGB colour information for each data point and render full-colour 3D models.
Here’s my unboxing and review video, read on for the write-up:
Where Can You Get The Revopoint POP Scanner?
You can buy your own kit from Revopoint’s website or on Amazon.
These come in three different options:
- POP 3D Scanner
- POP 3D Starter Kit
- POP 3D Advanced Kit
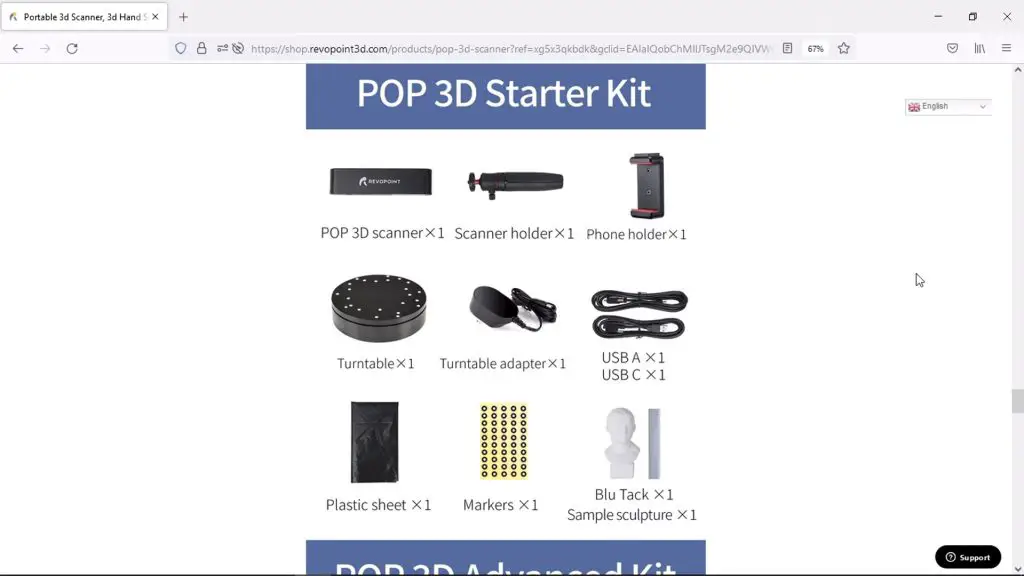
The options mainly differ in their inclusion of a turntable, that automatically rotates your models and a mobile accessory kit that makes it easier to use your phone in conjunction with the scanner.
At around $600, they’re not cheap, but they are priced quite competitively when you compare them to what else is available in the consumer-level at-home 3D scanning space.
Specifications
| Scanning Technology | Dual Camera Infrared Structured Light |
| Single Point Accuracy | Up to 0.3mm |
| Single Frame Capture Range | 210mm x 130mm |
| Operating Distance | 275mm ± 100mm |
| Minimum Scan Volume | 30mm x 30mm x 30mm |
| Scan Speed | Up to 8fps |
| Light Source | Class 1 Infrared |
| Output Format | .stl, .ply, .obj |
| Scanner Weight | 225g |
| Scanner Dimensions | 155mm x 38mm x 26mm |
| Compatible With | Window, Mac, iOS & Android |
Unboxing The Revopoint POP Scanner
Now that we’ve taken a look at its basic specifications, let’s open up the box and see what it looks like.
Revopoint have sent me the POP 3D starter kit, which is the kit that includes the turntable and a mobile phone mount.
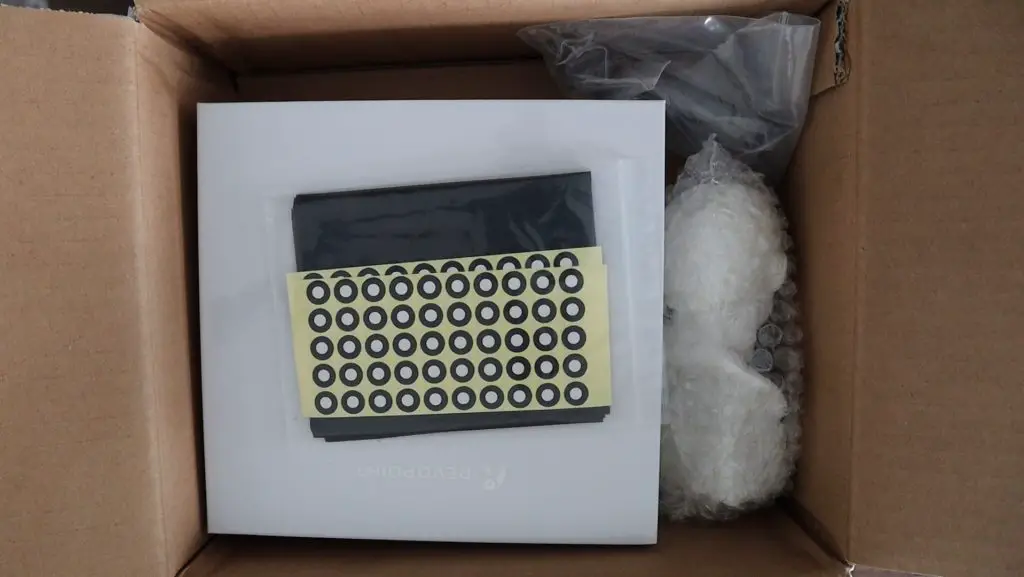
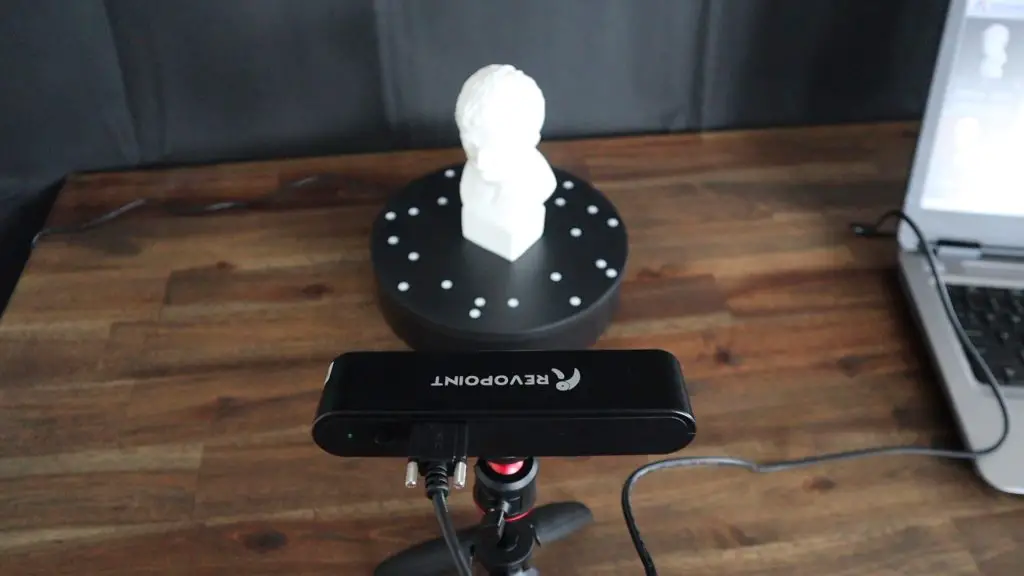
In the box we’ve got some marker stickers and a black background sheet, then a box containing the POP Scanner, a sample object to scan (a white bust), a mobile phone holder and then the turntable with tracking markers already stuck onto the table.
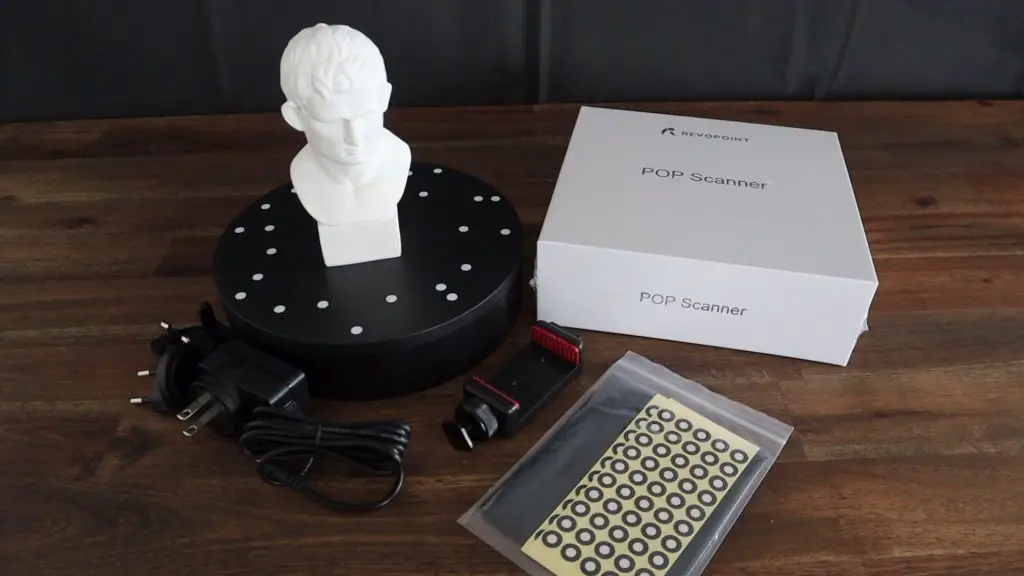
Now let’s open up the POP Scanner and see what’s included in its box.
We’ve got a quick start guide, user manual and warranty card, we’ve also got two scanner cables, one with USB type A and one with USB type C connectors. We’ve got a strip of blue-tac (I’m not entirely sure why – possibly to secure models on the turntable), a telescopic stand for the scanner and lastly the POP Scanner itself.
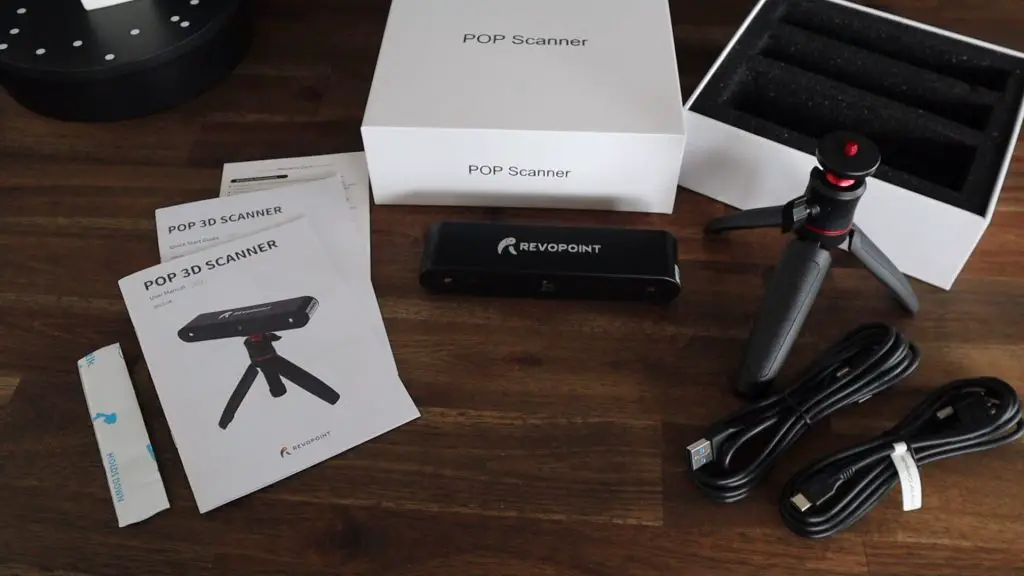
So altogether you get quite a bit with the kit. It literally has everything you need to be able to complete your first couple of scans, including a few consumable items like the markers, and the black background to make it easier to scan more difficult objects.
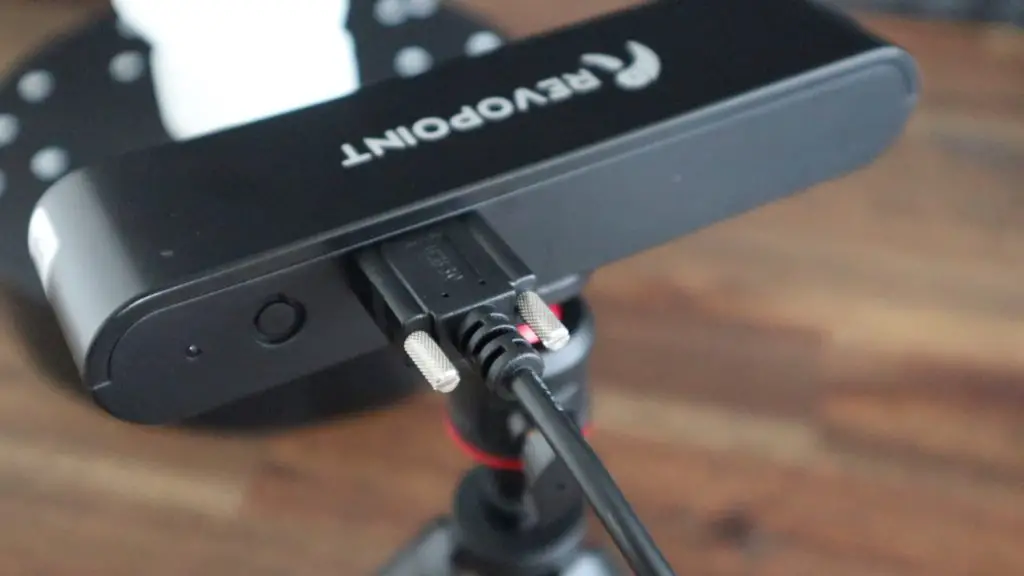
The cables are a little bit strange looking, they’re a USB 3, micro-USB port on the scanner end that also have a thumbscrew on either side of the port to secure it to the scanner.
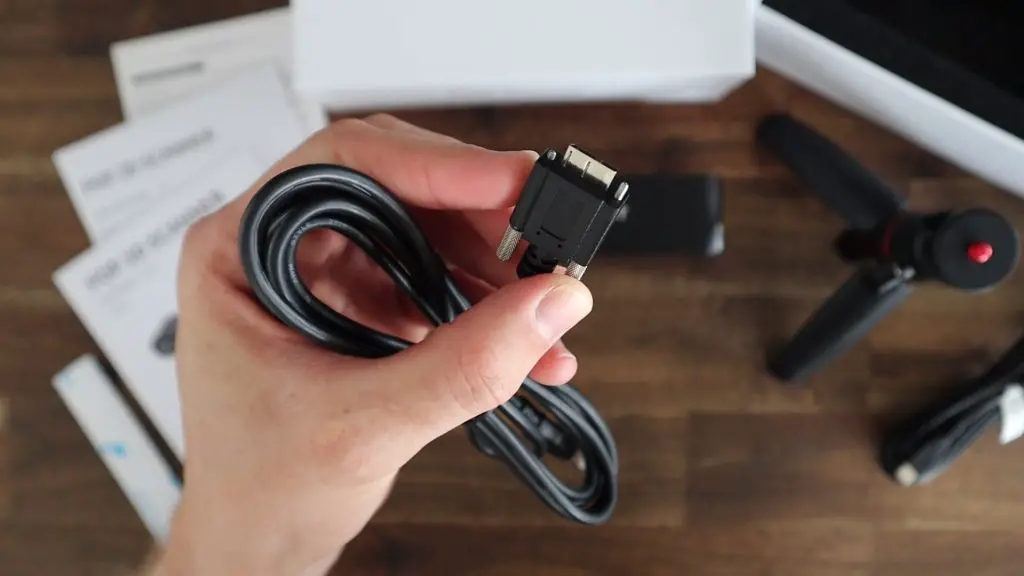
This helps to ensure that the cable isn’t pulled out of the scanner while it’s being move around which is a nice addition. You’re given a USB A and a USB C version of the cable so it’s compatible with more devices, like the newer Macbooks which have done away with USB A ports.
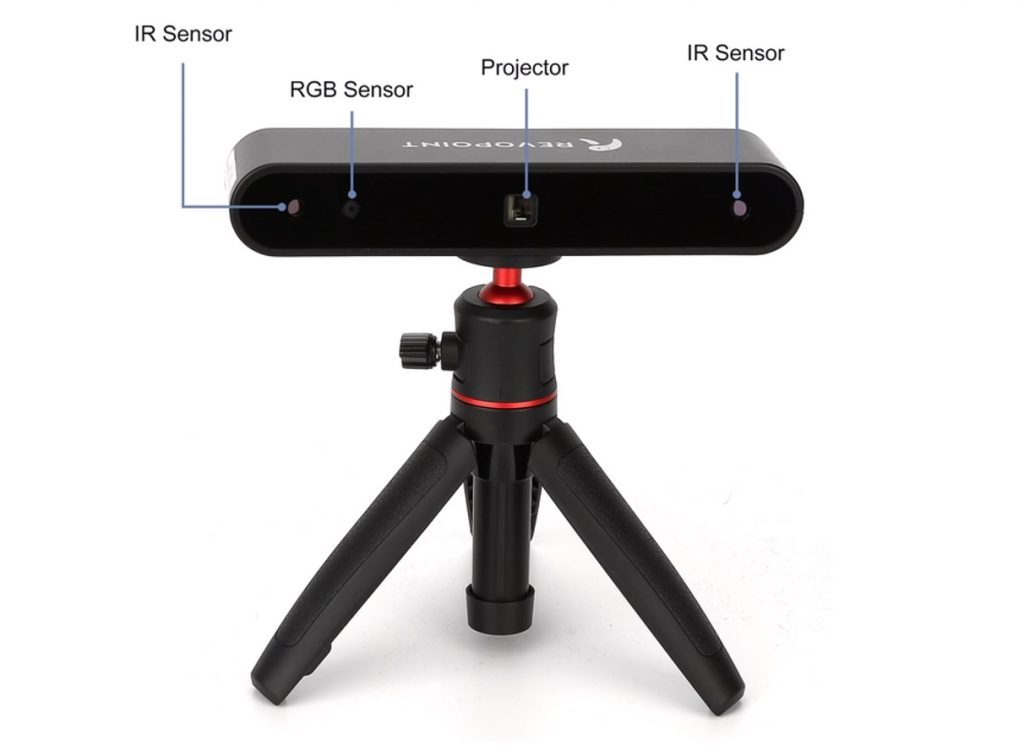
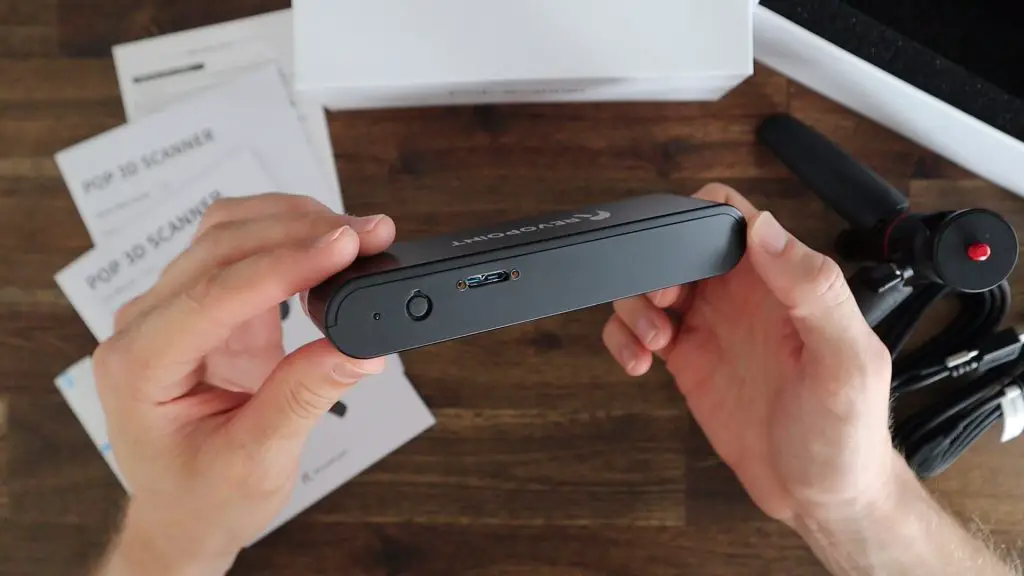
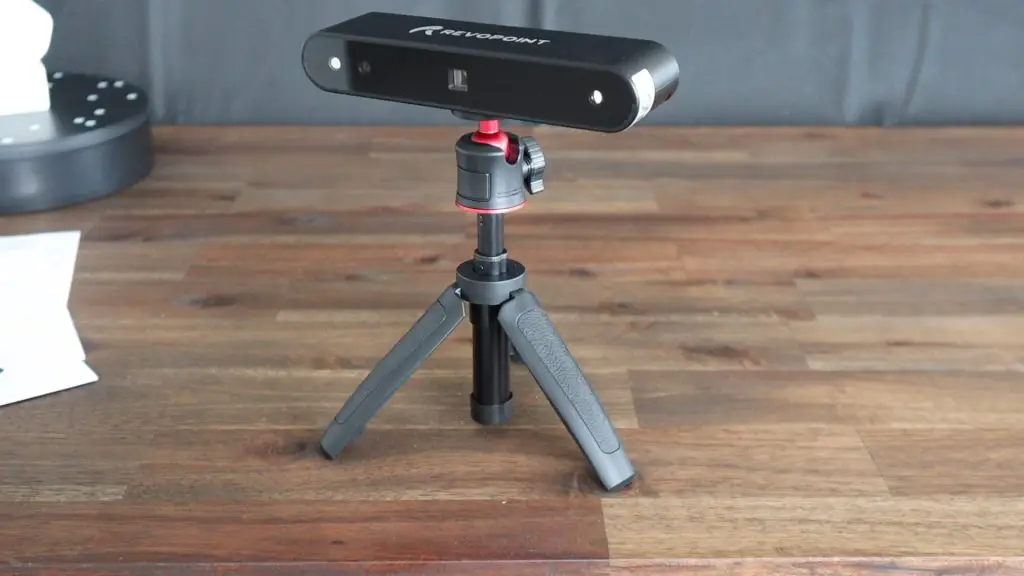
The actual scanner is quite compact, on the front there are four visible elements, at the centre is a projector, which I assume emits the infrared light for the two outer infrared sensors to detect, and on the left side of the projector is an RGB camera which shows you where the scanner is pointed and captures colour information for each scanned point.
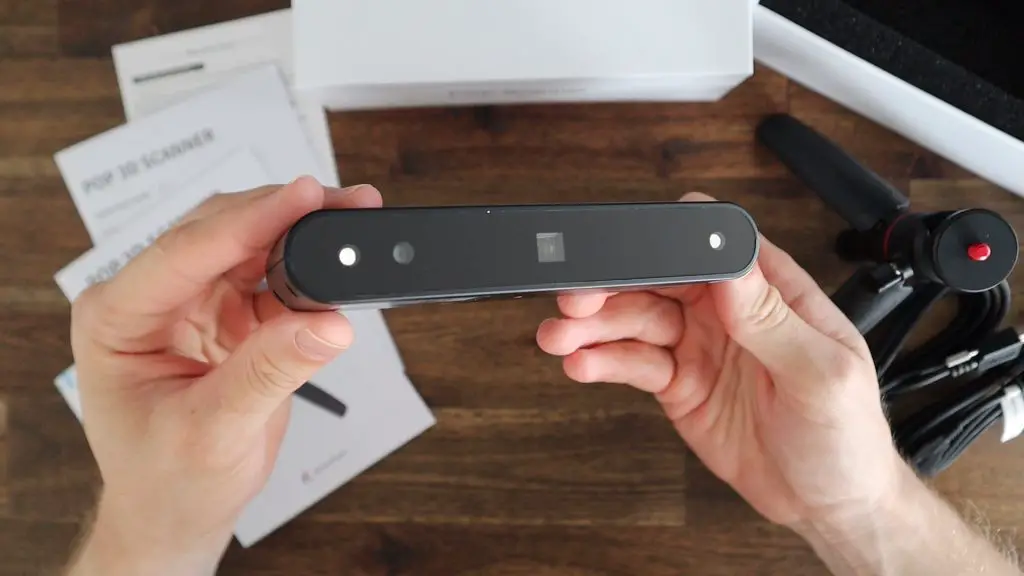
On the bottom is a tripod mount.
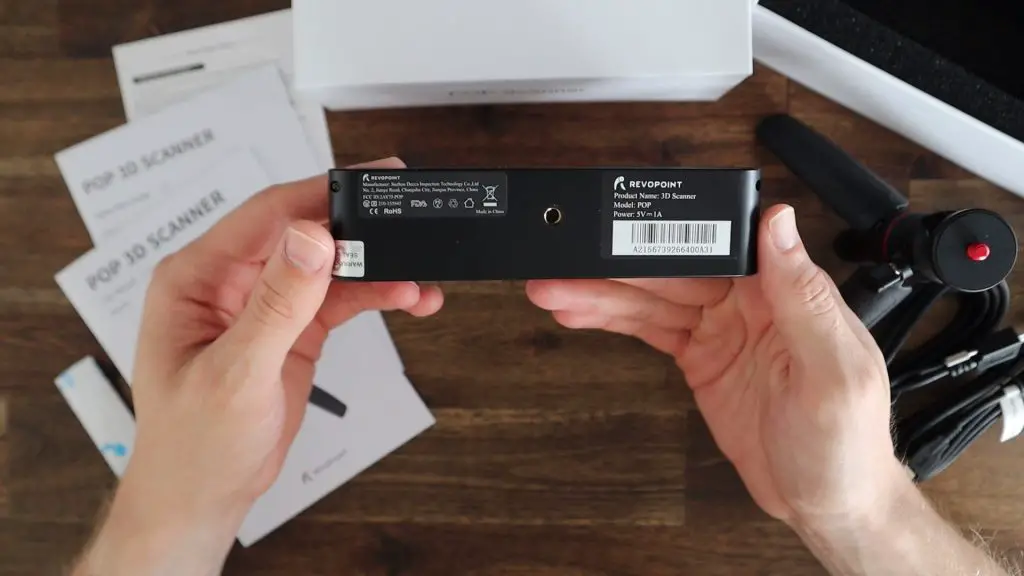
And on the back is an indicator LED, a button. Which to be honest, I’m not sure what it does, it doesn’t seem to be mentioned in any manual that I’ve seen. I thought it might have been a WiFi pairing button or something similar but this doesn’t seem to be the case either. And next to the button is the micro-USB port.
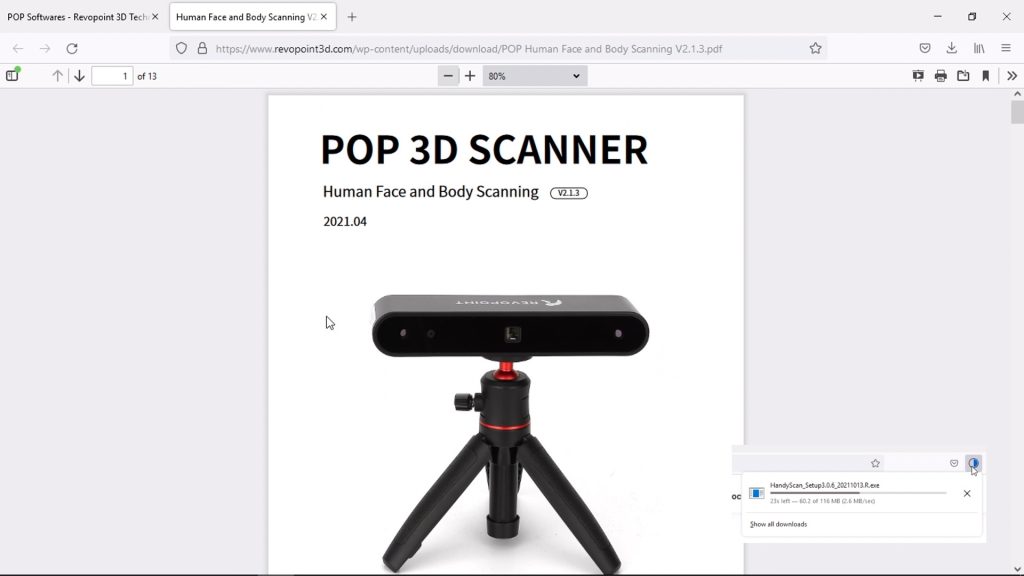
Installing The Revopoint Scanning Software
To use the scanner, we need to head over to the Revopoint Downloads page to download two software packages, Handy Scan and Handy Studio. These have both been developed by Revopoint.
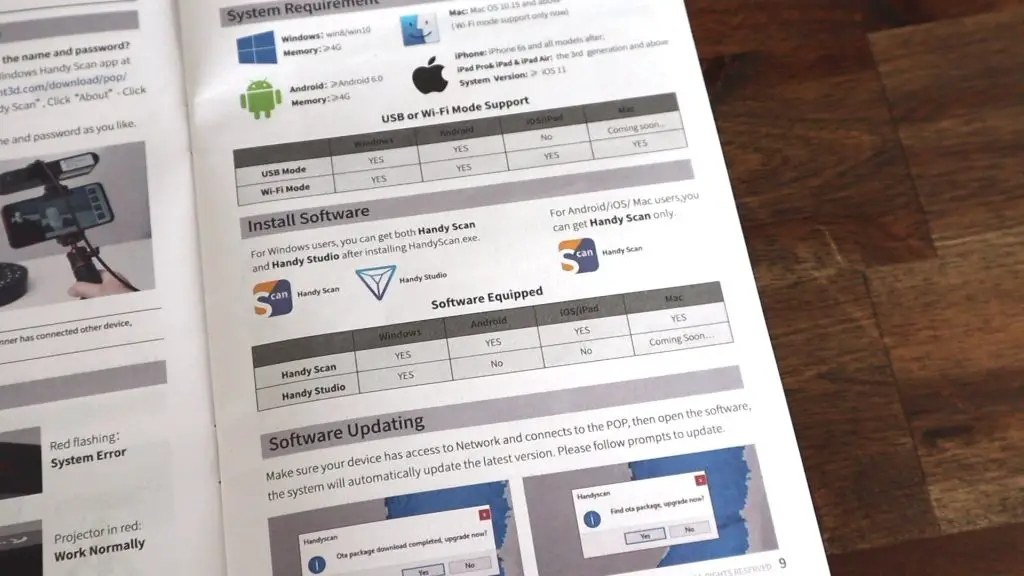
Handy Studio is only available on Windows at the moment but is only used for editing and refining the models, for which Handy Scan has some basic functionality as well.
It’s also worth noting that Handy Scan is also available as a mobile app for IOS and Android. You can pair the scanner with your phone over WiFi and scan directly on your mobile device, so you don’t even need to use a computer.
Their website also has a number of instruction manuals in a few different languages.
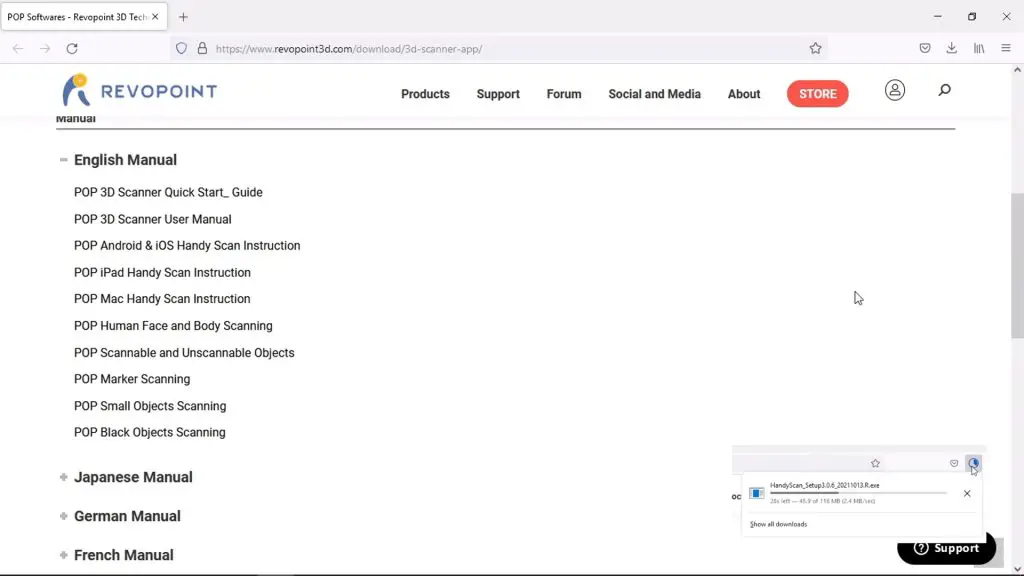
In addition to the standard user manual and the quick start guide, they have more in-depth instructions for some common features that people might be trying to scan, including:
- Face and Body Scanning
- Marker Scanning
- Scanning Small Objects
- Scanning Black Object
- Scannable and Unscannable Objects
These each take you through the best settings to use and the process to get a good quality scan of the feature type. In the Scannable and Unscannable Objects manual, they even tell you what you can do to be able to scan objects that are typically unscannable.
Scanning The Test Object
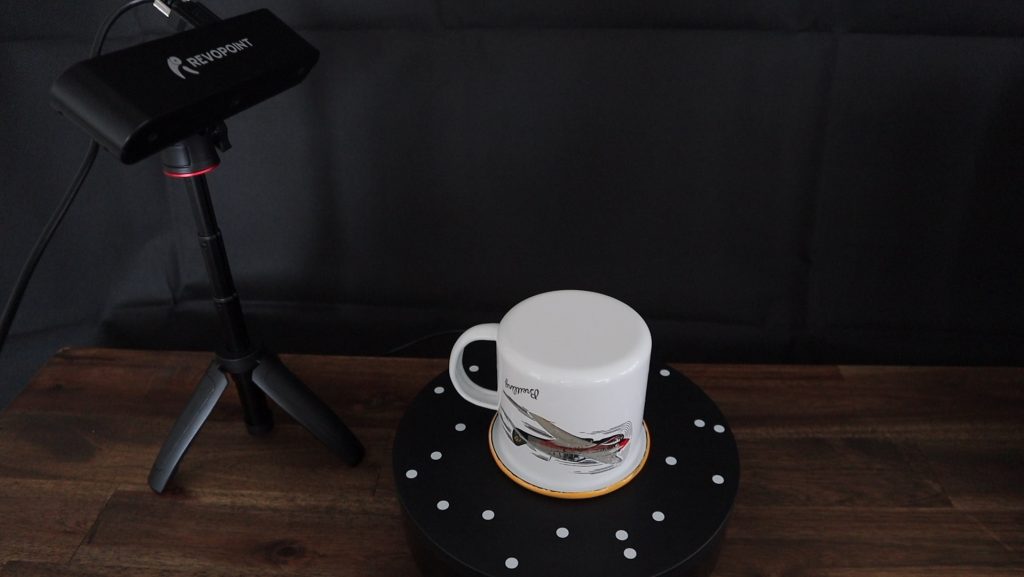
Let’s set up the scanner and try our first scan of the test object that came with the kit.
I’ve got the USB A cable hooked up to the scanner and the software running on my computer.
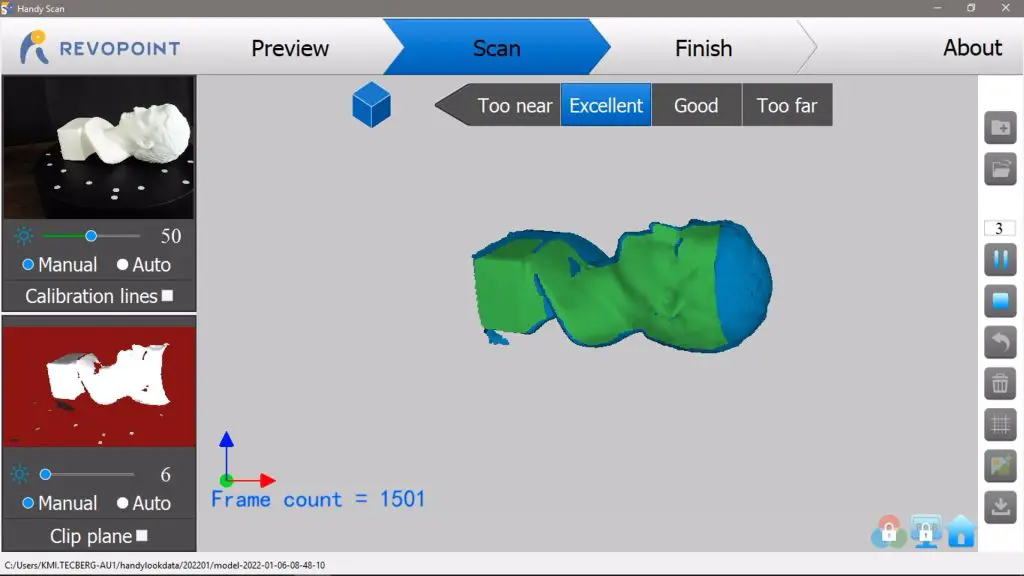
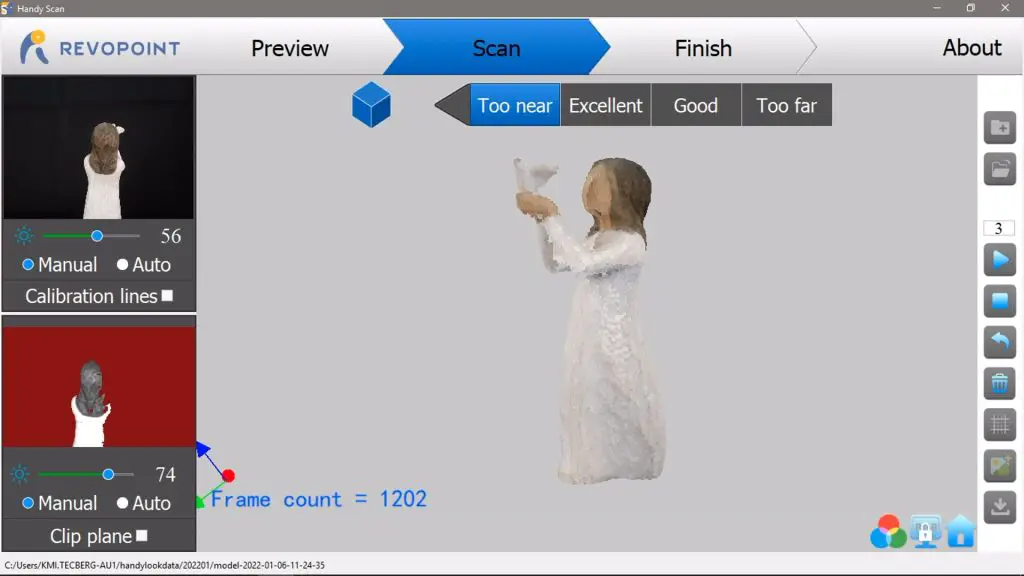
I’ve put the object onto the turntable and aimed the scanner near the top, looking slightly downward at it. You don’t have to capture the whole object in one go, you can move the scanner or object around to capture different viewpoints, we’ll look at this in a bit.
In the scanning utility, you can see a feed from the RGB camera in the top left and the infrared feed in the bottom left. You get a current render of the model and what the scanner is seeing in the middle of the screen.
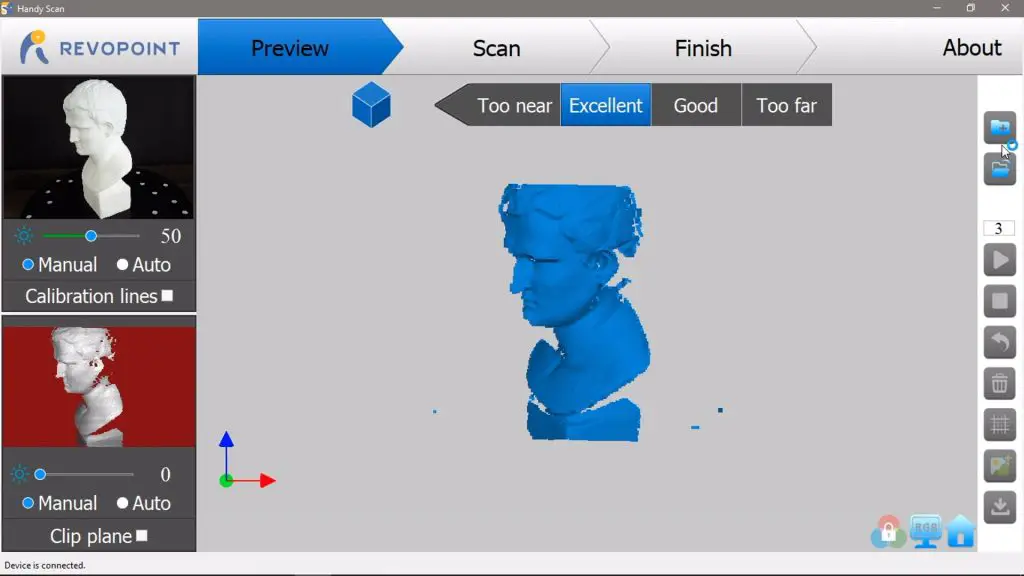
I’m going to start a new project and select to scan a feature and no colour as the model is all white in any case.
We can then just click on start to start capturing the point cloud information, and we can now see the model developing as the scanner captures it.
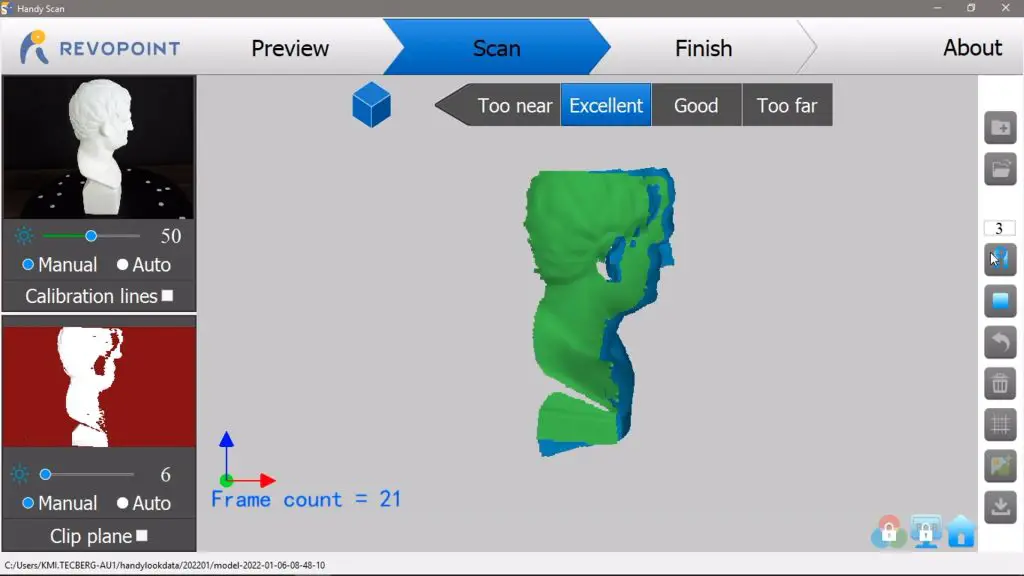
Once all of the features at this angle have been captured, we’ll need to re-position the scanner at a new angle to capture the features that were hidden. We just pause the scan while we move the scanner and then hit resume to continue scanning.
We can also change the orientation of the model on the turntable and the application will automatically detect the new orientation and continue capturing the point cloud. I was actually quite impressed by how well this works. I expected it to have some difficulty reorienting itself when I turned the model on its side but it picked it up really quickly and continued the scan.
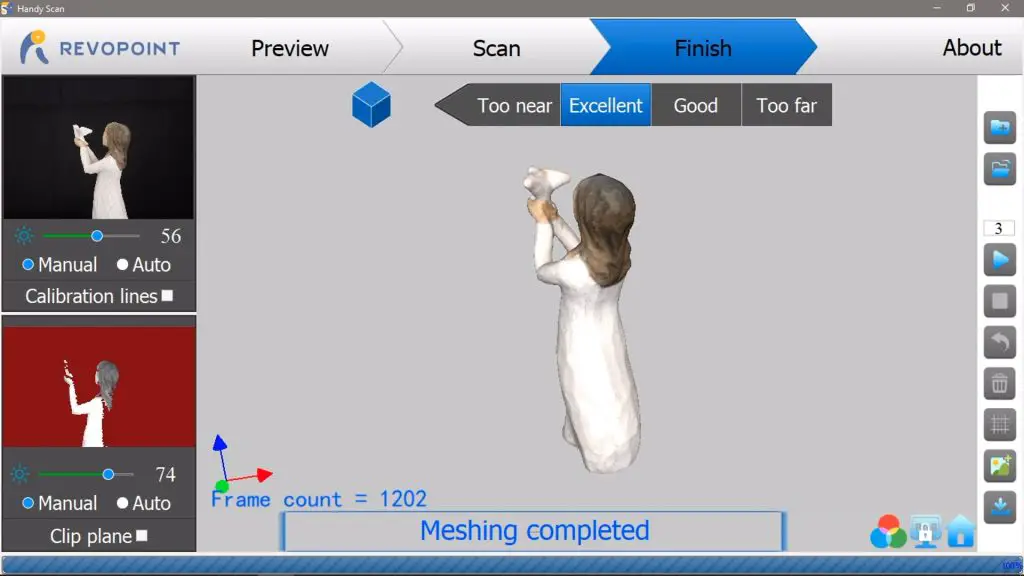
Once you’re done scanning, you can click complete and the application does some post-processing of the model.
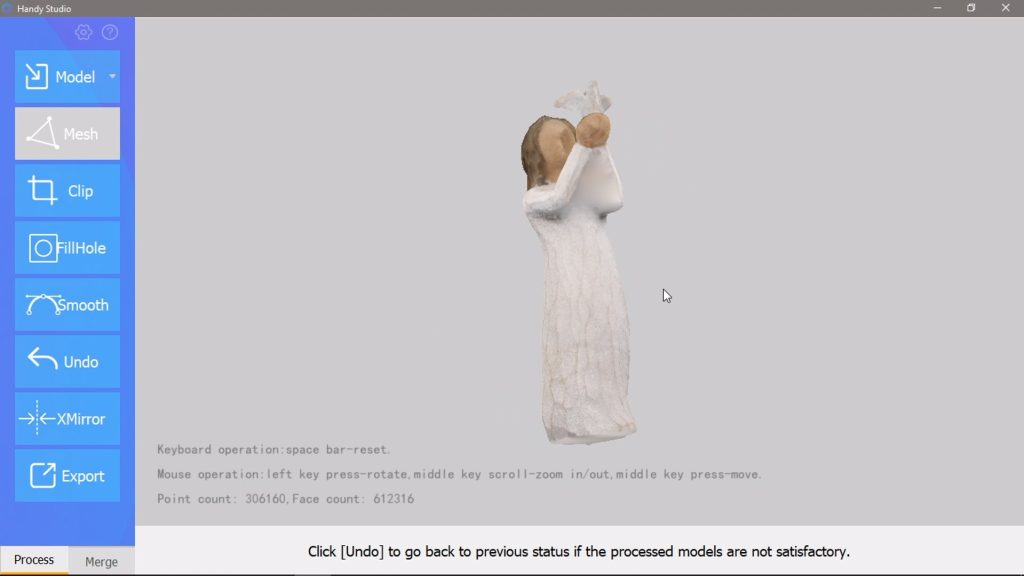
There are a few points that I can see have been scanned outside of the model area, so I’m going to open the model up in Handy Studio to edit.
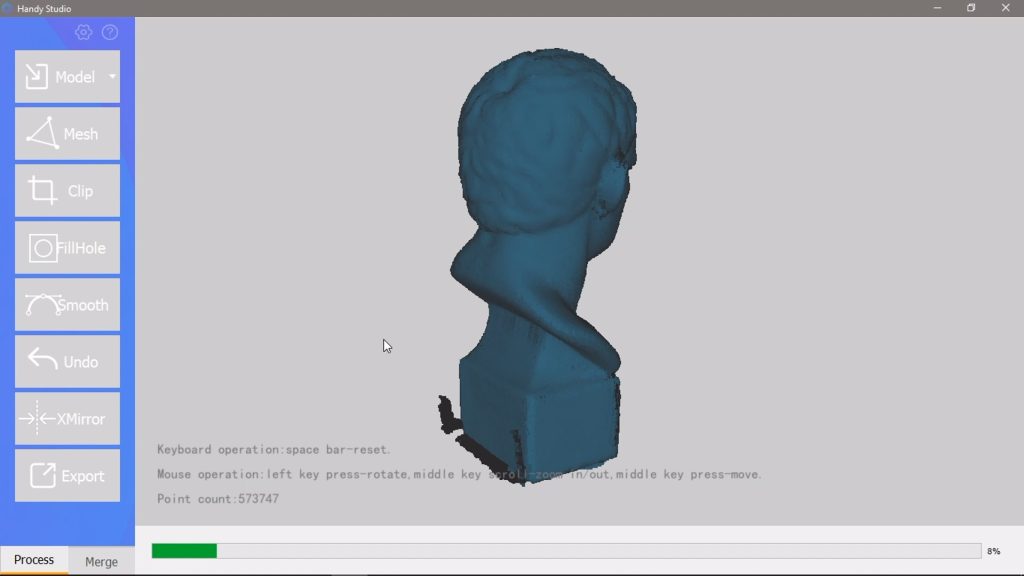
I can then crop these addition points off of the model after meshing it. We can now also see that the surface of the model is a little rough, so I’m going to run the smoothing function on it to smooth it out a bit.
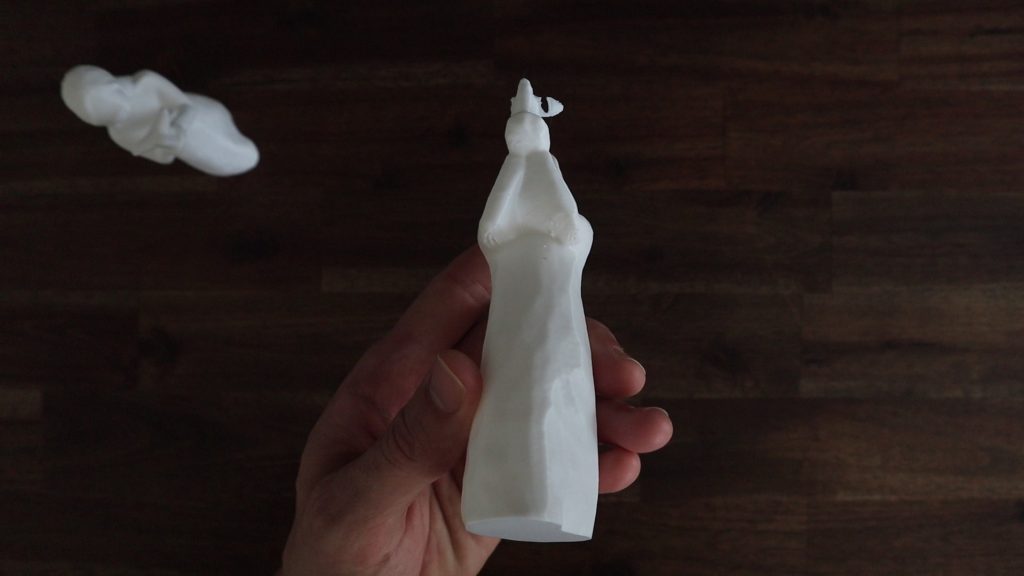
After 7 hours of printing, this was the result.
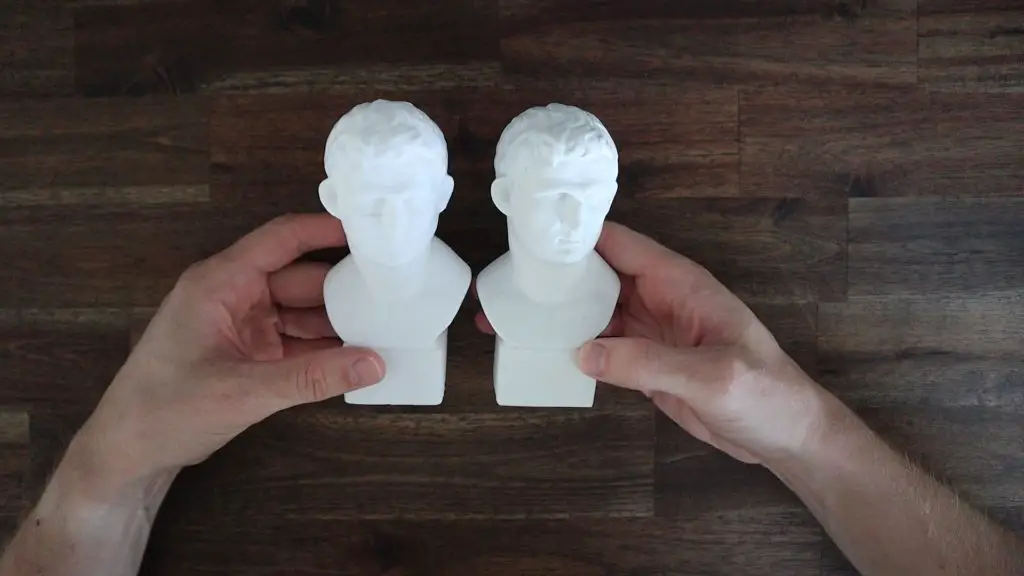
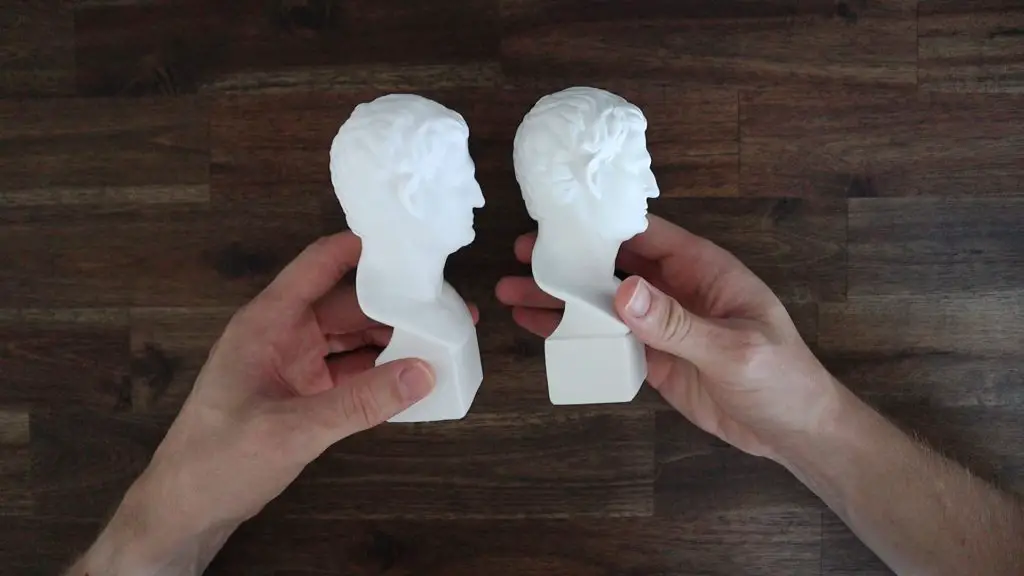
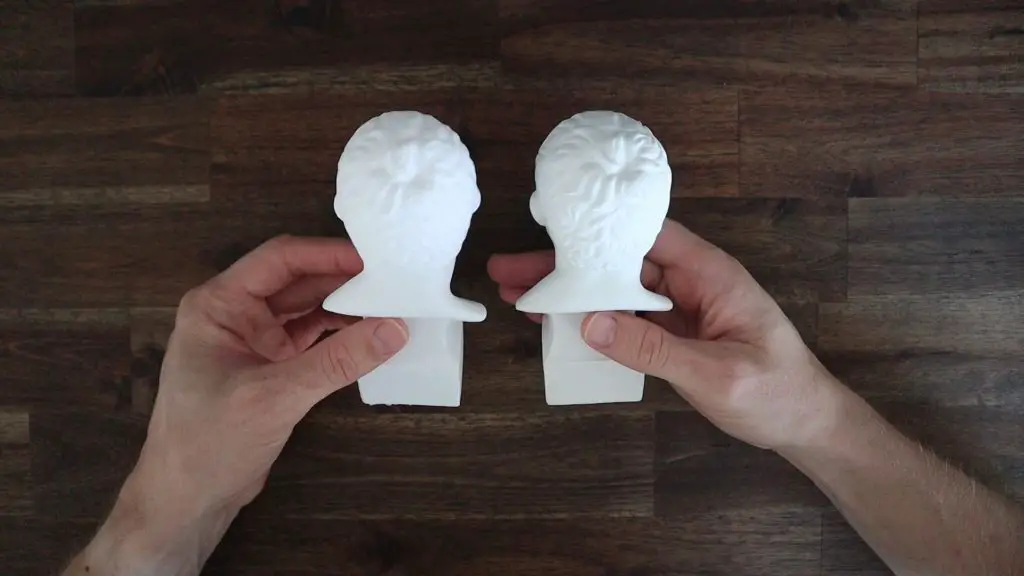
I’m actually really impressed with how well this print turned out. You can see it has lost a tiny bit of definition in the features, but it has captured the model really well. Even the scale is pretty much perfect. I have used some 3D scanning apps on my phone before and I can tell you that this is a massive improvement over anything I’ve seen from a phone app.
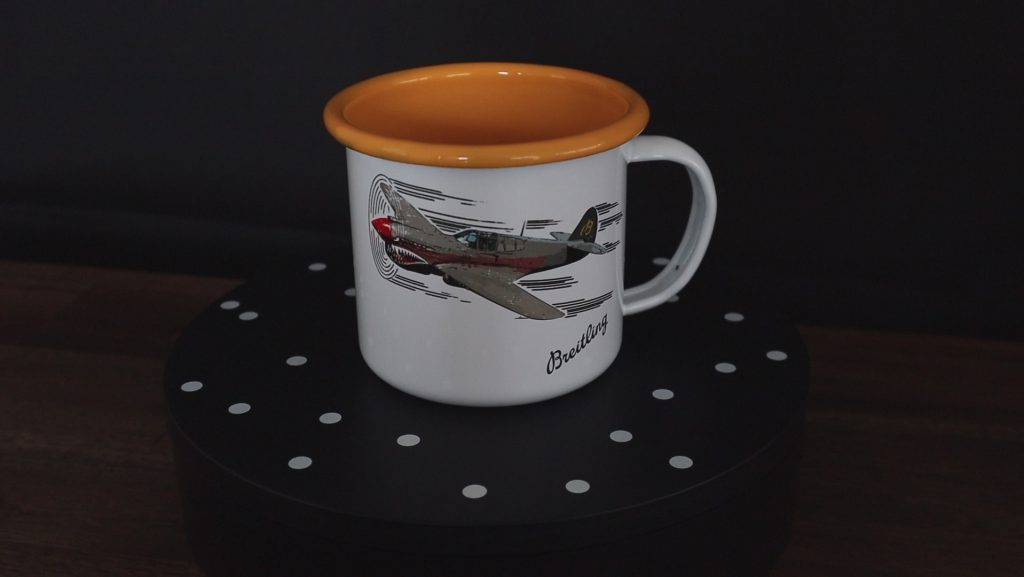
Scanning A Mug With Limited Features
Next, I tried capturing a mug. I choose a mug because it was one of the objects mentioned in the manuals as being difficult to scan. So I figured that if I could get good results with a difficult object then I’d definitely be able to scan easier models.
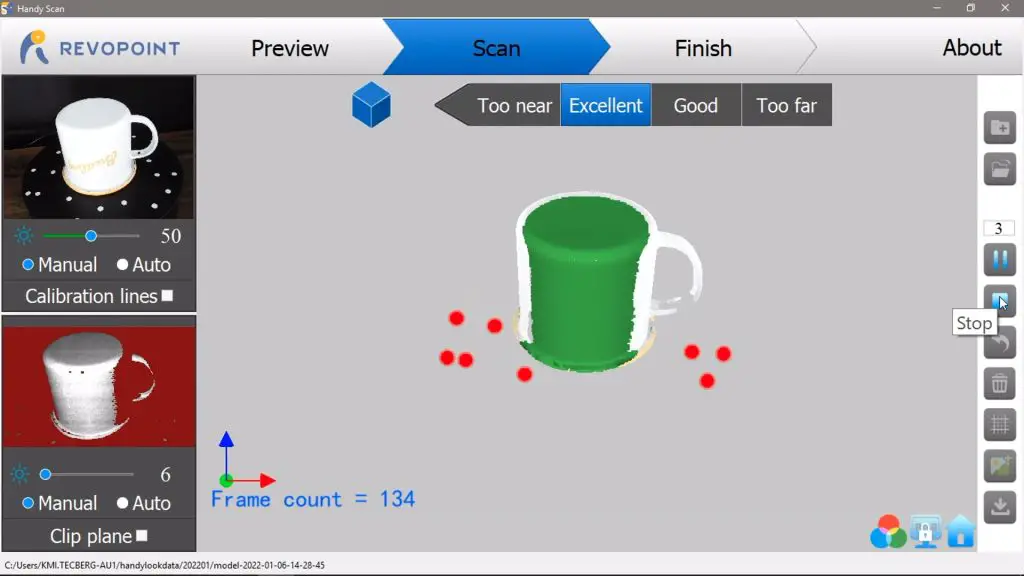
What makes the mug difficult to scan is that it doesn’t have many distinct features for the scanner to keep track of as it rotates. The handle is pretty much the only feature on an otherwise cylindrical object. So we have to make use of the white dots on the turntable to help keep track of the rotation of the object.
I’ve put the mug in the middle of the turntable and I’ve got the scanner set up to look down at the mug so that it captures a portion of the yellow inside edge.
By setting the software up in marker mode, you can see that the white markers on the turntable are being identified and displayed in red on the main model view in the middle.
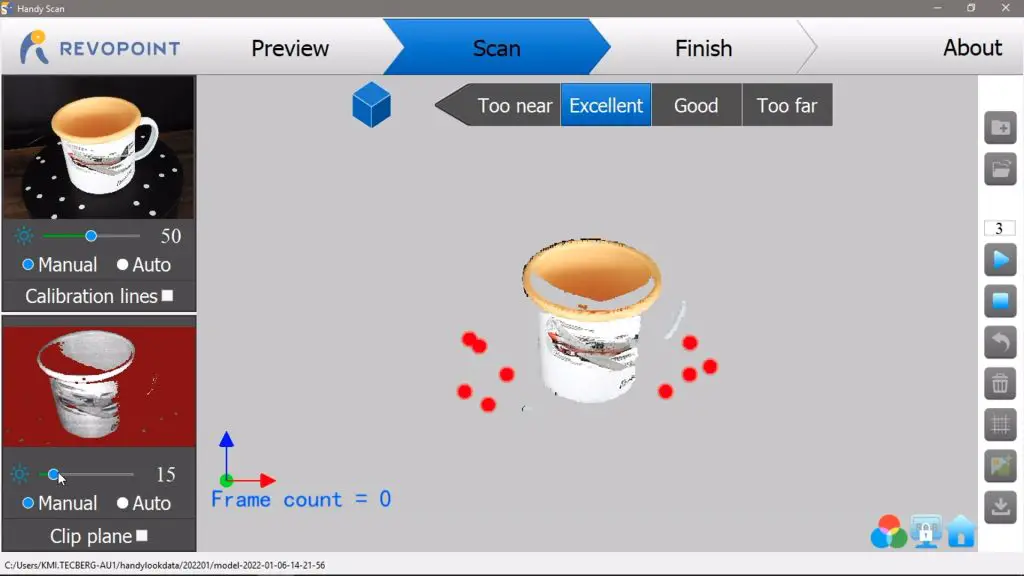
I then started the scan and allowed the model to make one full rotation. When using the markers, you can’t adjust the orientation of the object. So I have to do two scans to get both sides of the mug. One upright and one turned over so that we capture the bottom part of the handle and bottom face of the mug.
So I saved the upright model and then started a new scan to scan the underside of the mug.
I again let it scan a little over one full revolution before stopping and saving the model. I’m also quite impressed by how well the image and text on the mug have come out in the point cloud.
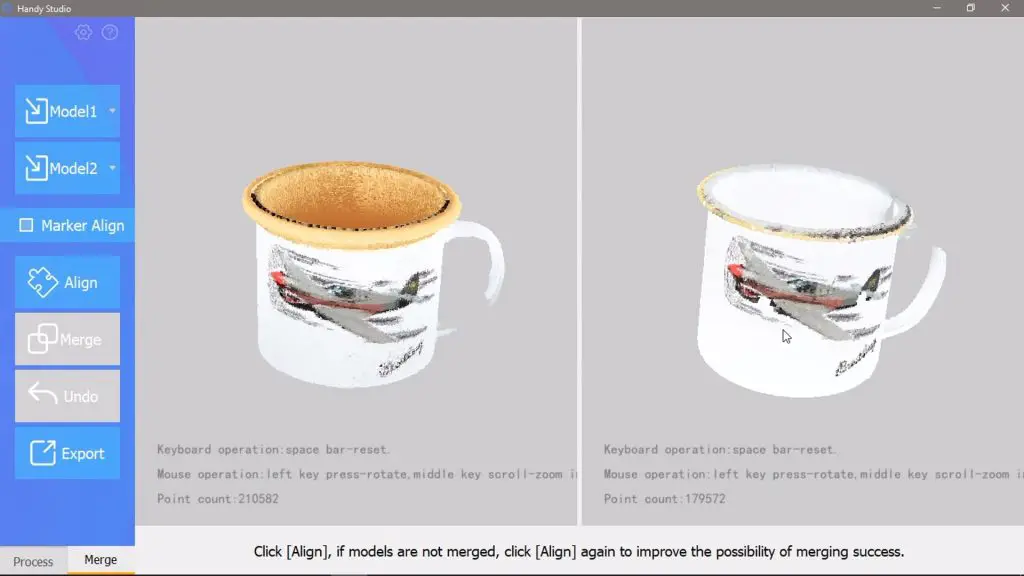
Now that we’ve got the two sides of the mug scanned, we need to combine them. We can do this in Handy Studio using the merge function. This allows you to combine two models into a single model. You could also repeat over and over if you have multiple angles of the same object which have each captured different details.
The auto-align feature didn’t work at all on the mug, but this is again probably due to it not having enough features to properly identify the orientation of each model.
So the second option is to identify alignment markers on the models to tell the software how to merge them. This was quite easy to do with the text and image on the mug.
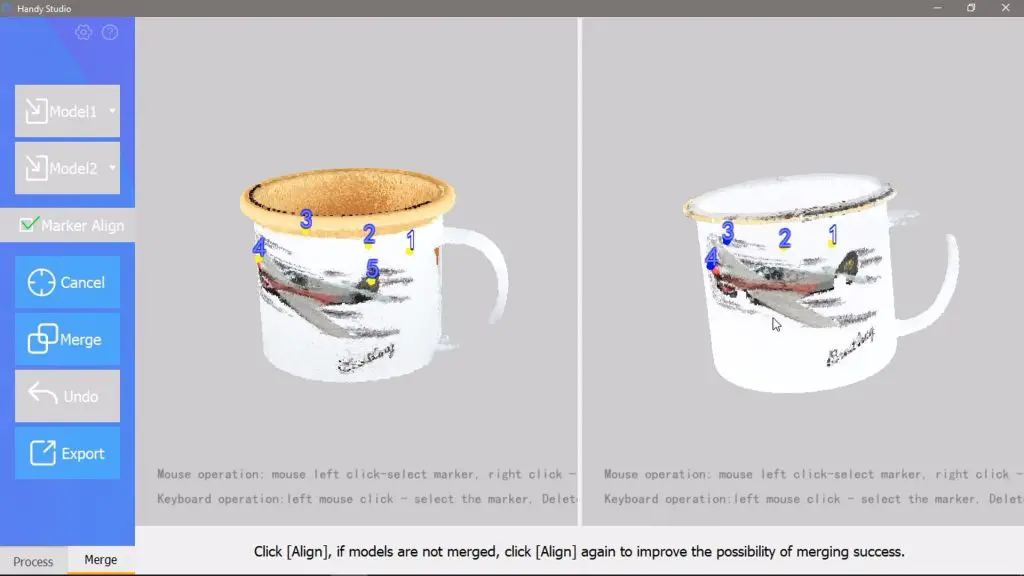
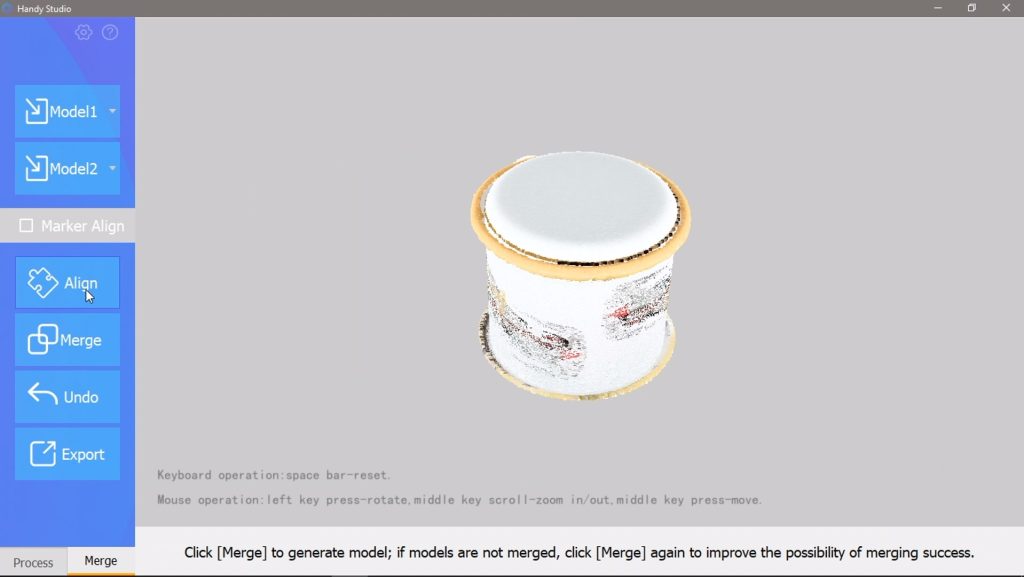
I mapped out 6 identification markers and then tried to merge them again. This time it worked really well.
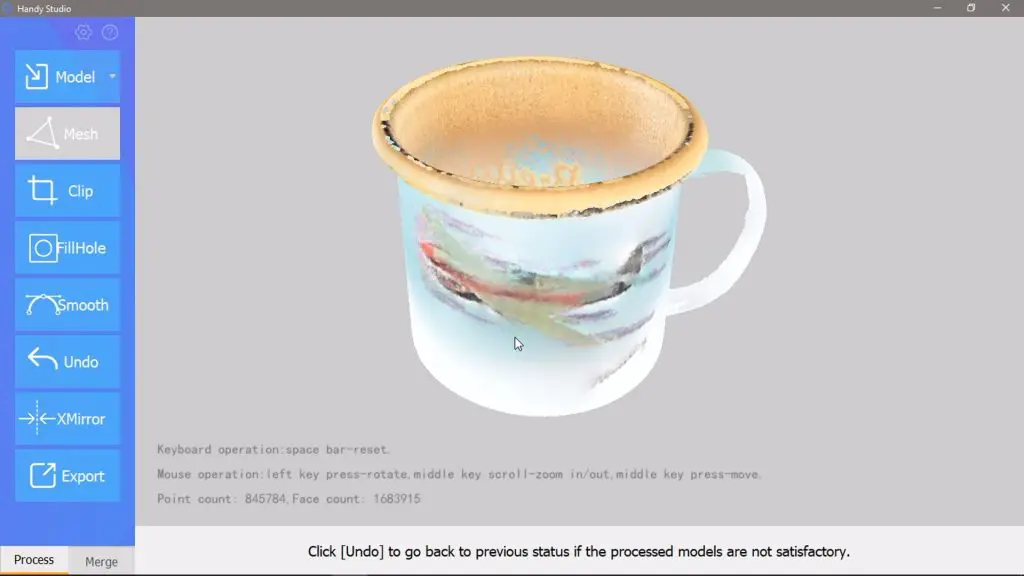
The only real issue is that some of the resolution in the image (just the coloured texture, not the 3D model) has been lost and the white areas have developed a bit of a blue hue. I can only assume that this is because the images were probably not perfectly aligned.
This also got me wondering why you couldn’t use the distinct graphics on an object as an aid in tracking its orientation. The scanning app only seems to “track” an object using the infrared data, the RGB camera data is then just overlaid onto it. So as soon as the handle on the mug went out of sight, the scanner lost track of its orientation, although the text and graphics were still clearly visible and would have been an easy way to track the movement of the object. This was just a thought, I might be oversimplifying or misunderstanding how the “spatial awareness” of the scanner works entirely.
In any case, the actual 3D model came out pretty well for an object that was said to be difficult to scan.
Scanning A Full Colour Textured Model
Next, I wanted to try a model with some colour. I chose this one as it’s still light coloured, so should be easy to scan, but it has some texture to it and also some smaller features, including a hole between the arms – which are usually a challenge for scanners.

This also scanned impressively well. There were a couple of small spots on the face and neck which were obscured by the arms and weren’t captured, but it actually did a pretty good job overall.
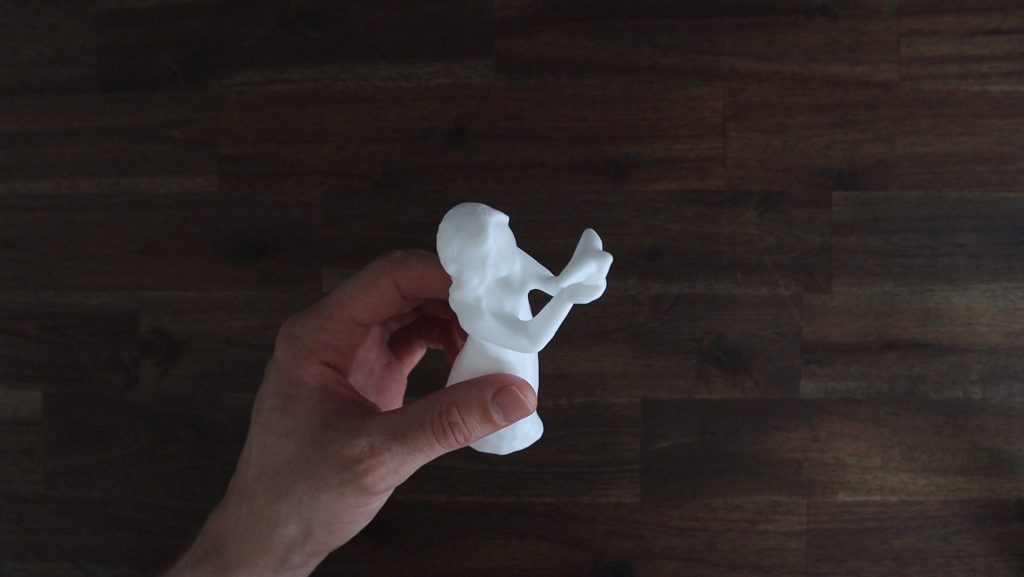
I tried the meshing option in the Handy Scan app and this did quite a good job of filling in the gaps. The only downfall was that it lost a bit of definition in the bird – making it a bit fatter or thicker than it actually was on the model.
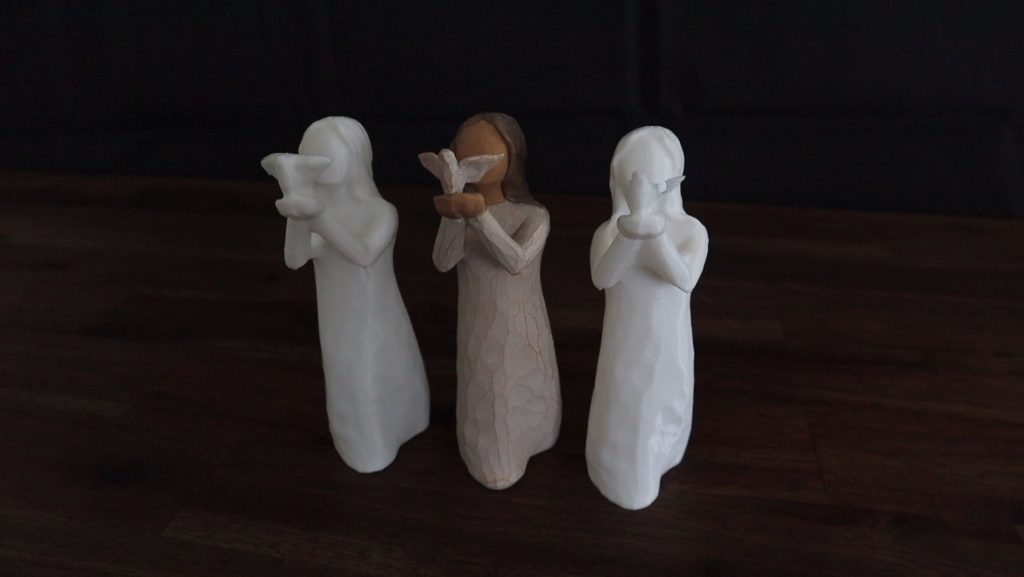
When I printed it out, you could see that the bird didn’t quite look like the original model.
Handy Studio had another effect. It meshed fine and kept the definition in the bird, but when trying to fill in the gaps in the chest and face area, it filled the gap between the arms as well. There didn’t seem to be a way to tell the app to leave this “gap” open.
My 3D printer also had some trouble printing the bird in that level of detail, but you can see it looks much more similar in size to the original model, although the arm area is now filled in.
All in all, I still think it did a pretty good job on both, aside from the bird, the model looks almost perfect, even the carved texture on the surface of the model was captured.
Final Thoughts
Overall I’m really impressed with the performance of the Revopoint POP 3D Scanner and I’d definitely recommend checking it out if you’re interested in reproducing 3D models at home or if you’ve been looking for a portable and affordable scanner.
It definitely is a bit more difficult to scan darker objects and it struggles with smaller objects – anything smaller than about a 5cm x 5cm x 5cm cube is quite difficult to get a meaningful model of.
Revopoint have also recently launched the POP 2 scanner, so have a look at that as an option as well and let me know what you think of this scanner in the comments section below.