If you’ve left it too late to get a pair of safety glasses to safely view the solar eclipse, here’s a quick any easy projector you can make. The projector uses a pinhole to project and image of the sun (and eclipse) onto the lid of an old chip/pringles container, a slot on the side enables you to view it. This is also one of the safest ways to view the eclipse as you’re never looking directly at the sun!
This article is based on Solar Eclipse Pinhole Projector by Potternum1 and is modified and used under the Creative Commons 2.5 license CC BY NC SA.
What You’ll Need To Build Your Own Solar Eclipse Pinhole Projector
- An Old Chip/Pringles Tube
- A Sheet Of White Paper
- Matt Black Spray Paint
- Small Drill & Drill Bit
- Scissors
- Measuring Tape or Ruler
- Some Newspaper To Paint On
How To Make Your Own Solar Eclipse Pinhole Projector
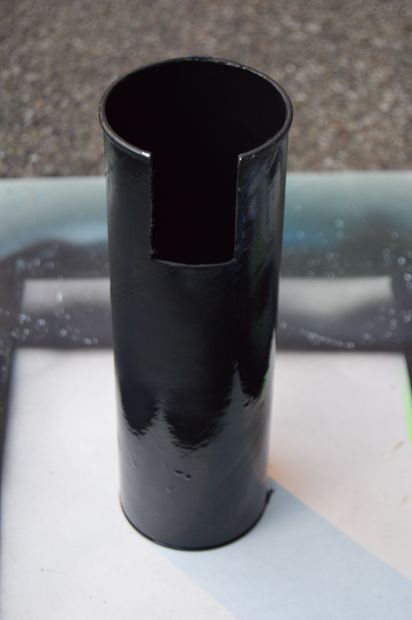
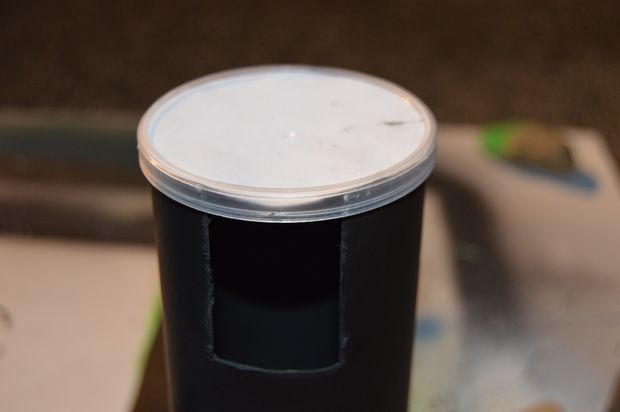
To start off, you’ll need to cut a slot into the side of the container to view the screen. Mark off a 5cm (2″) x 3.5cm (1.5″) rectangle on the side of the container near the open end.
Use a sharp pair of scissors or a dremel to cut the marked area out.

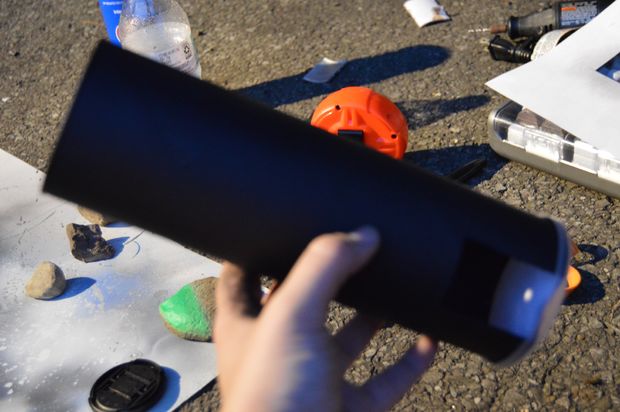
Place the empty tube on a piece of news paper and paint spray the inside black. You can also paint the outside black as well but the inside is the important part. You don’t need to paint the bottom of the tube of the lid.
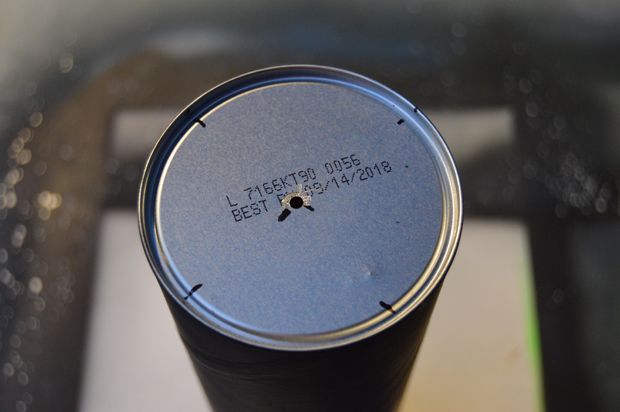
Once the paint has dried, mark the end of the tube in the centre.

Now find the smallest drill bit you have 1-2mm (3/64-7/64″) works well. Drill a small hole where you have marked the centre point. This is where the light form the sun and eclipse is going to enter your tube projector.
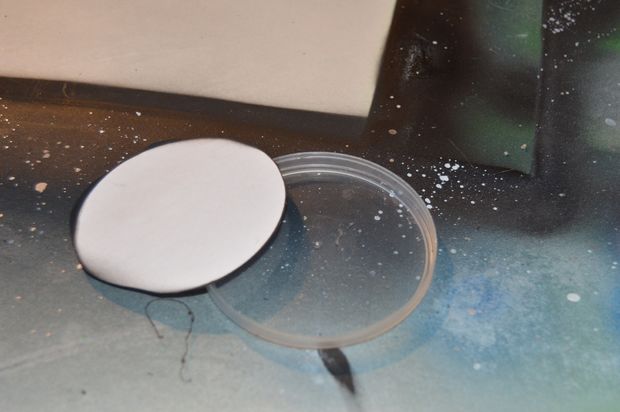
Now you need to cut a circle of white paper to fit snugly inside the lid of your tube. Place the lid onto the piece of paper and trace around the outside with a pencil then use your scissors to the circle out. Press the circle of paper into the lid and put it back onto the tube.
Your projector is now ready to be used. You can test it out with a light bulb. Your projected image will be visible on the screen through the side of the tube.
You can also experiment with different length tubes. A longer tube, such as those used for shipping drawings and documents should yield a larger image.
If you enjoyed this article, have a look at these 10 Best DIY Solar Panel Tutorials or find out how to build your own DIY Solar Tracker to track the sun and get more power out of your solar panels.