I’ve seen quite a few people have added an air assist system to their K40 laser cutters using either an aquarium air pump or a radial fan. There are a couple of different reasons given, but most say that the fan blows the smoke away and improves engraving quality, that you get better cutting results and that you have less chance of your material catching fire. I’ve never had significant problems with any of these but I thought I’d try one of these solutions out and see what the results were. I chose to go with the radial fan air assist option as a fan is only a couple of dollars, which is much cheaper than an aquarium compressor.
Here’s a video of the modification, read on for the step by step instructions, and print files.
Make sure that you turn off and unplug your K40 laser cutter before working on it and allow the machine to stand for 10 minutes before working on it. While this addition is made to the low voltage DC side of the supply, there is always a risk in working in the open electrical compartment with the power still on.
What You Need For This Addition
- 24V Radial Fan – Buy Here
- 7mm Drag Chain – Buy Here
- Latching Metal Push Button – Buy Here
- 22AWG / 1.6mm Electrical Wire
- M3 x 15mm Hex Head Screws & Nuts – Buy Kit Here
- M4 x 25mm Hex Head Screw & Two Nuts – Buy Kit Here
- 2 M4 x 15mm Hex Head Screws & Nuts – Buy Kit Here
How To Install The Radial Fan Air Assist On Your K40
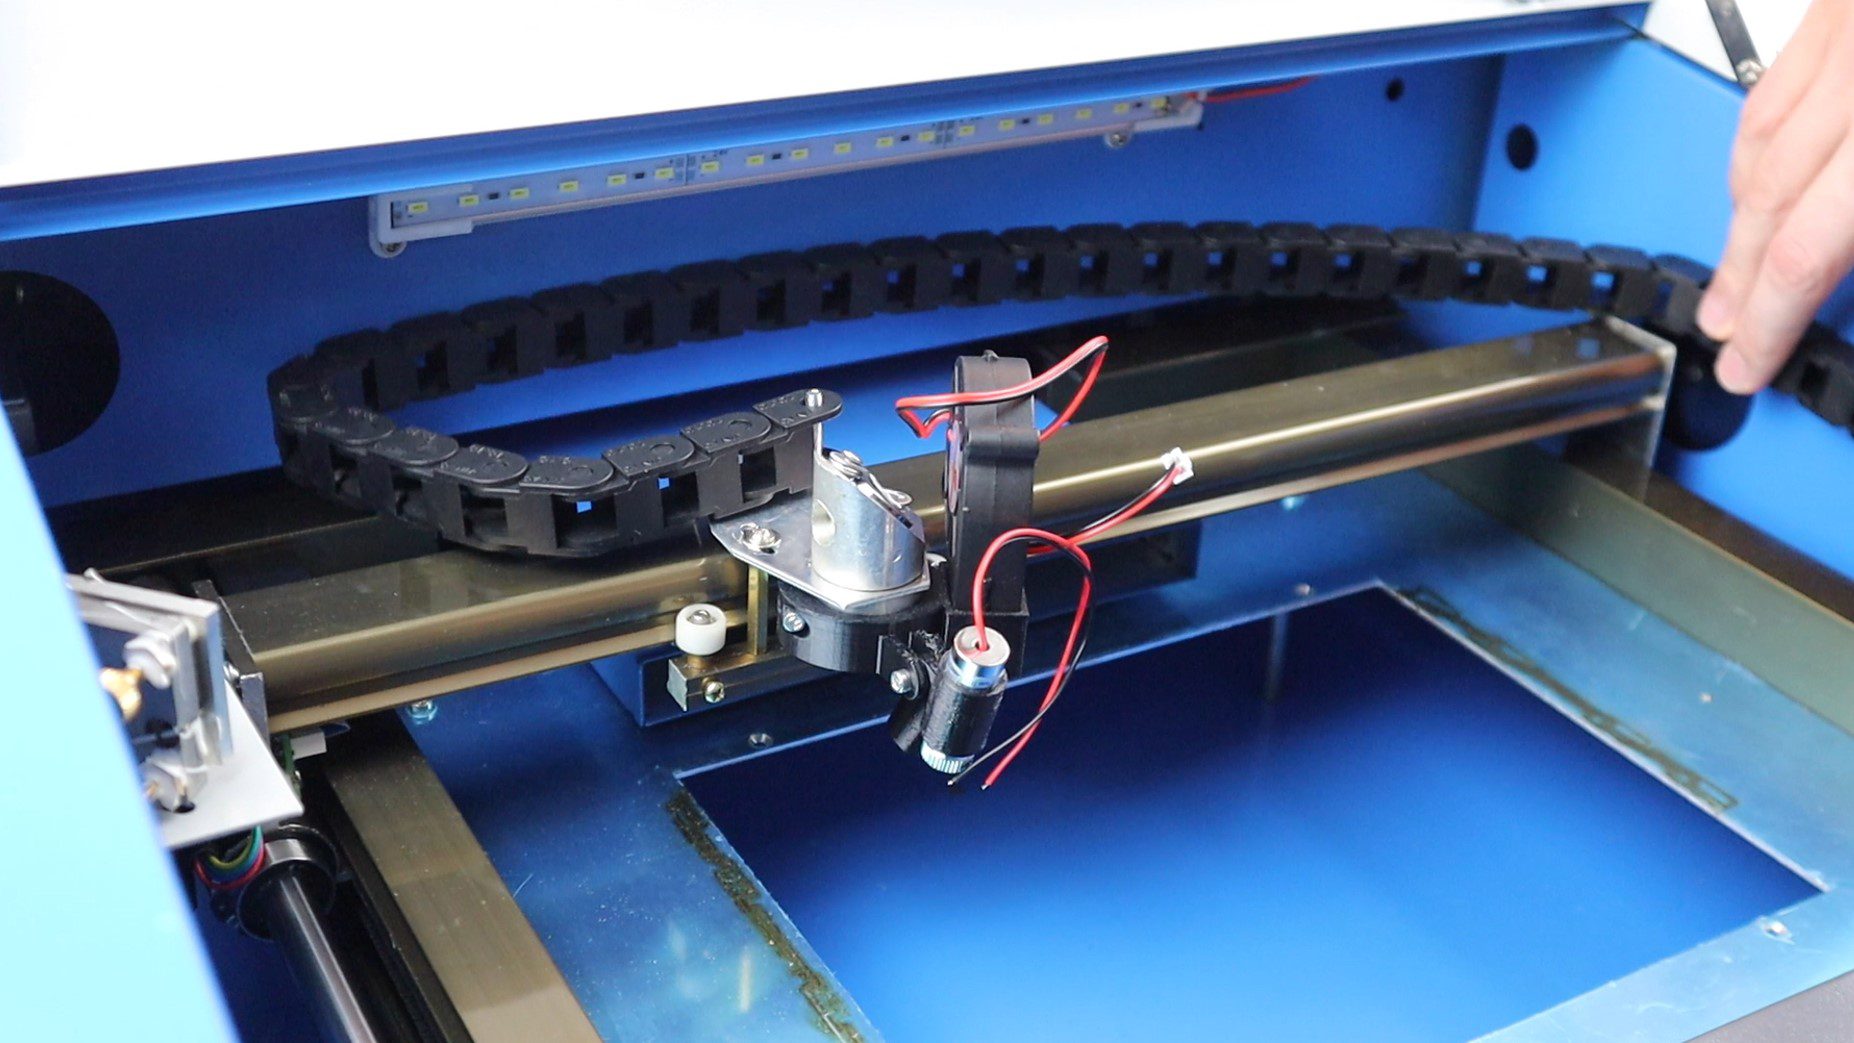
Mount The Radial Fan And Duct
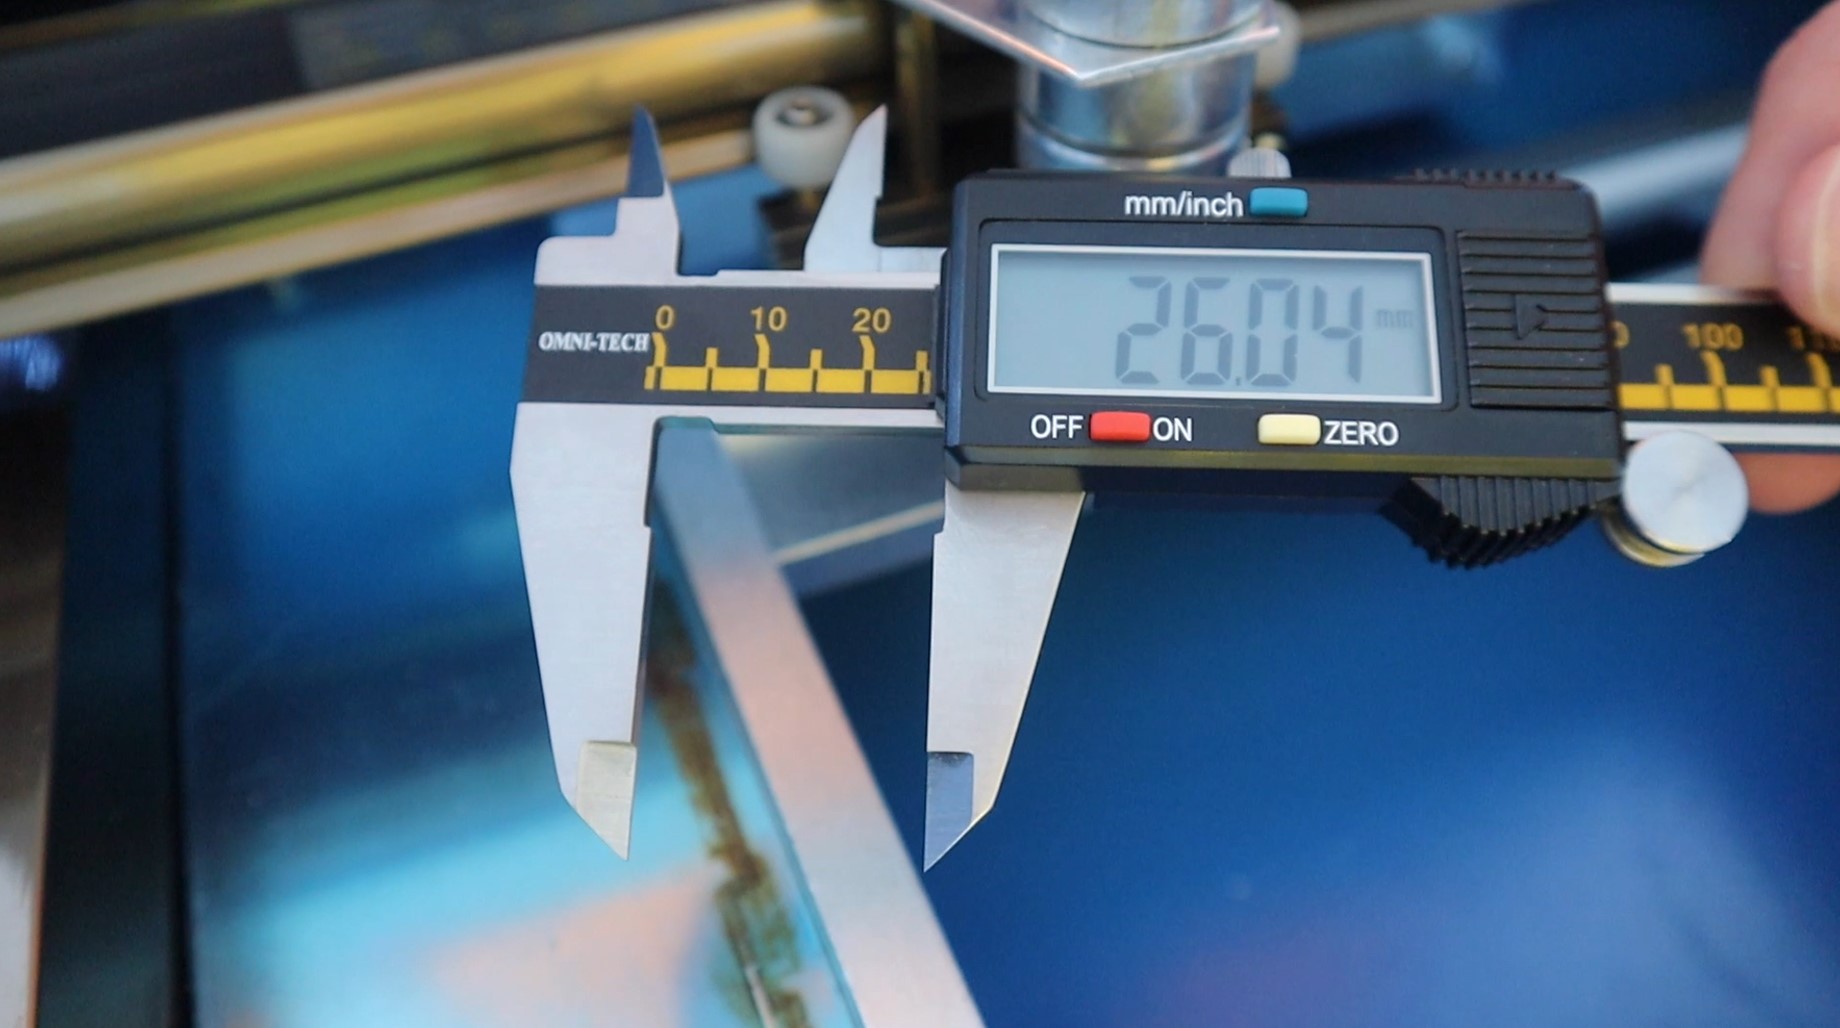
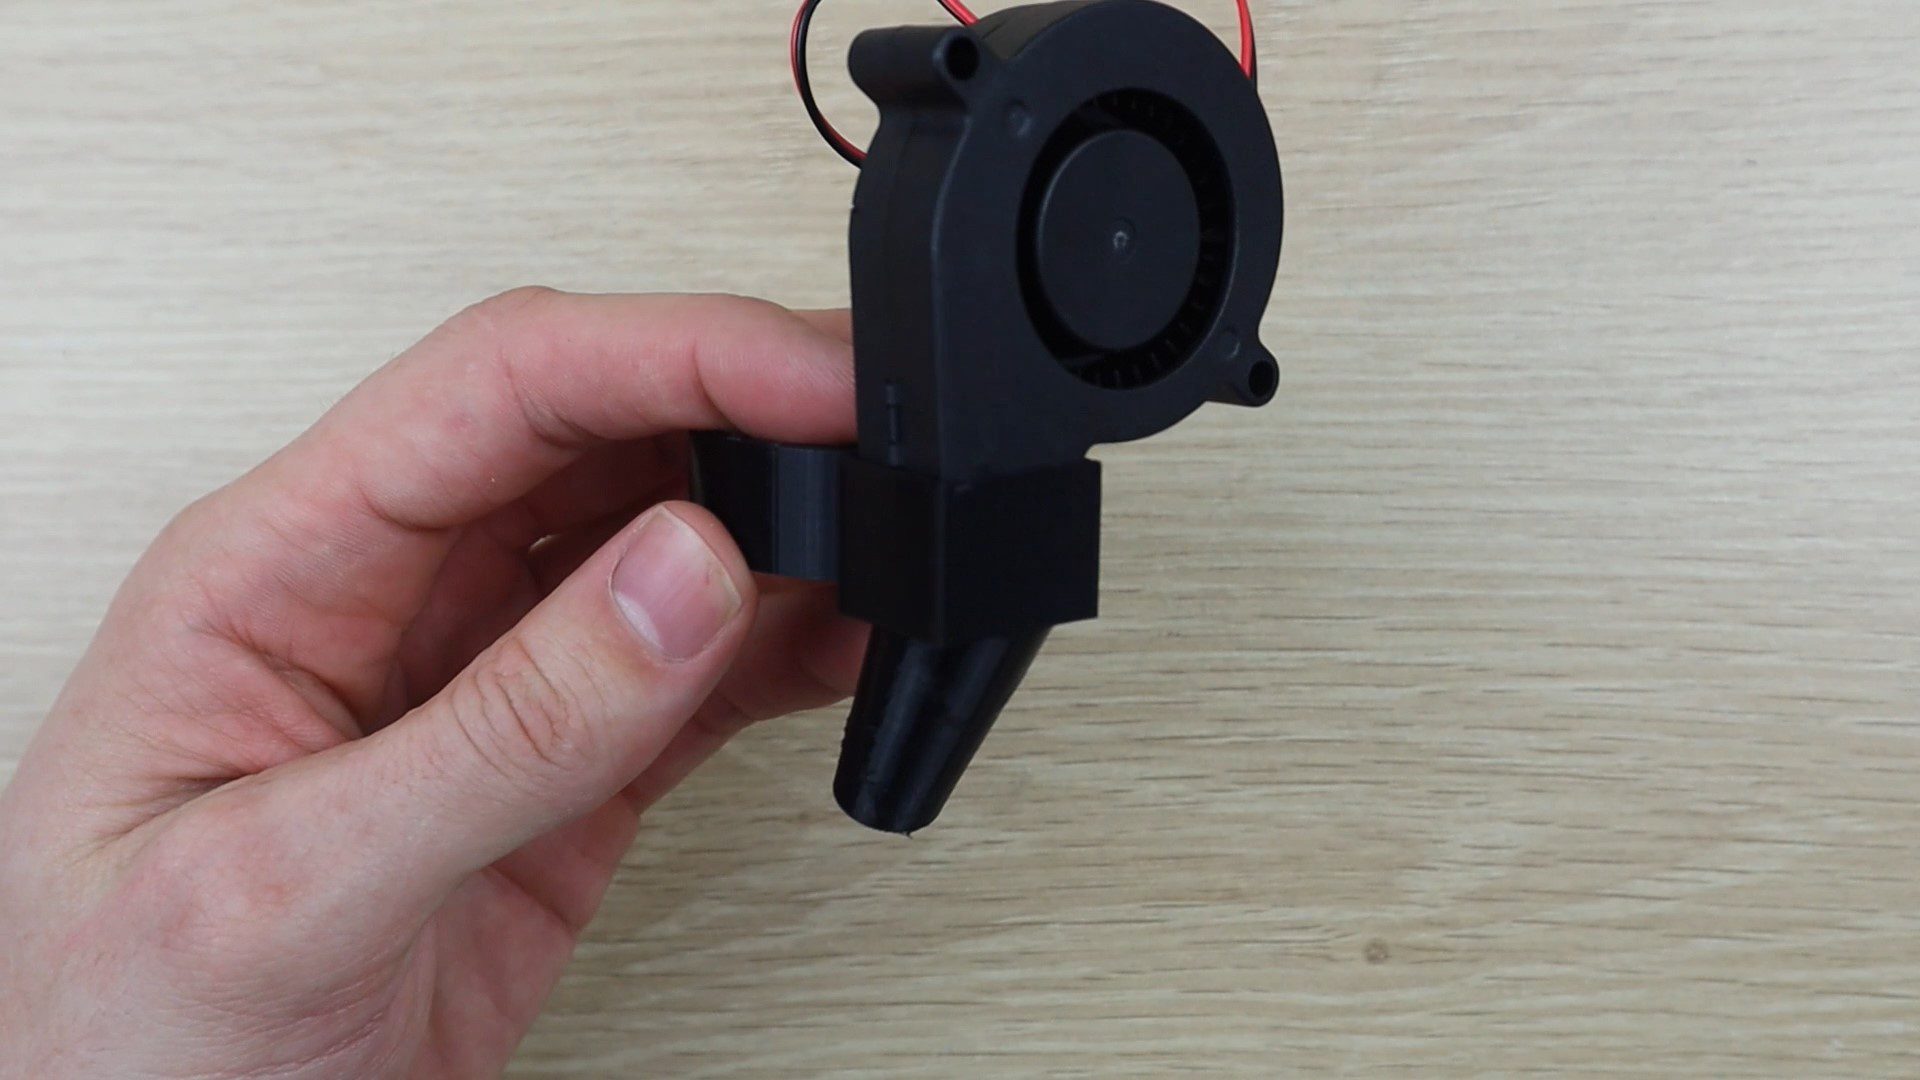
I started out by measuring the head of the laser cutter in order to design a 3D printed bracket to hold the fan and a duct to direct the flow towards the cutting area. I designed the duct away from the lens rather than around the lens as it didn’t seem like a good idea to direct dirty air from inside the cutting chamber towards the lens. On compressor systems where the clean air is being drawn in from outside the cutting chamber, it makes sense to direct the airflow past the lens to keep it clean.
At the same time, I designed an arm to support a red dot laser pointer to make it easier to see exactly where the laser is going to be cutting and avoid wasting materials. I’ve included print files for the model with and without the pointer. Have a look at my other guide on adding a red dot laser pointer to your K40 laser cutter if you’re interested in that option as well.
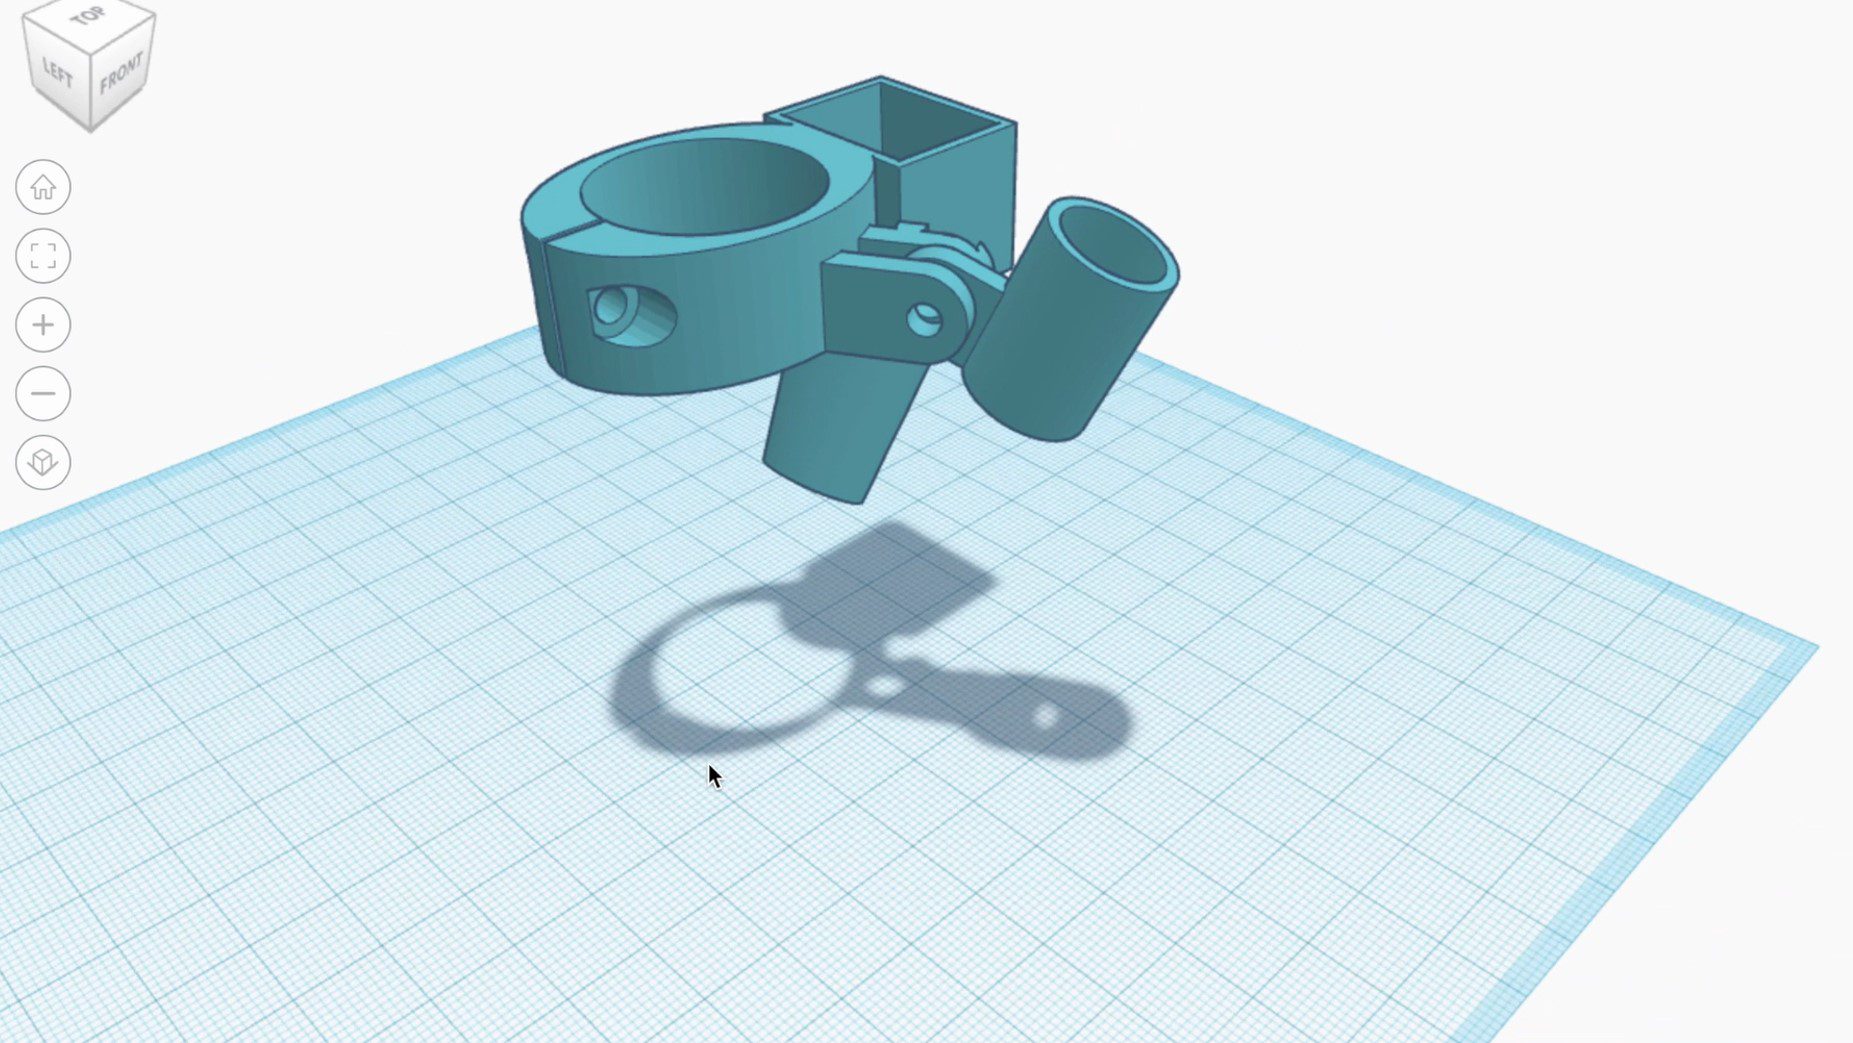
Download 3D Print Files – Fan & Laser Pointer Files
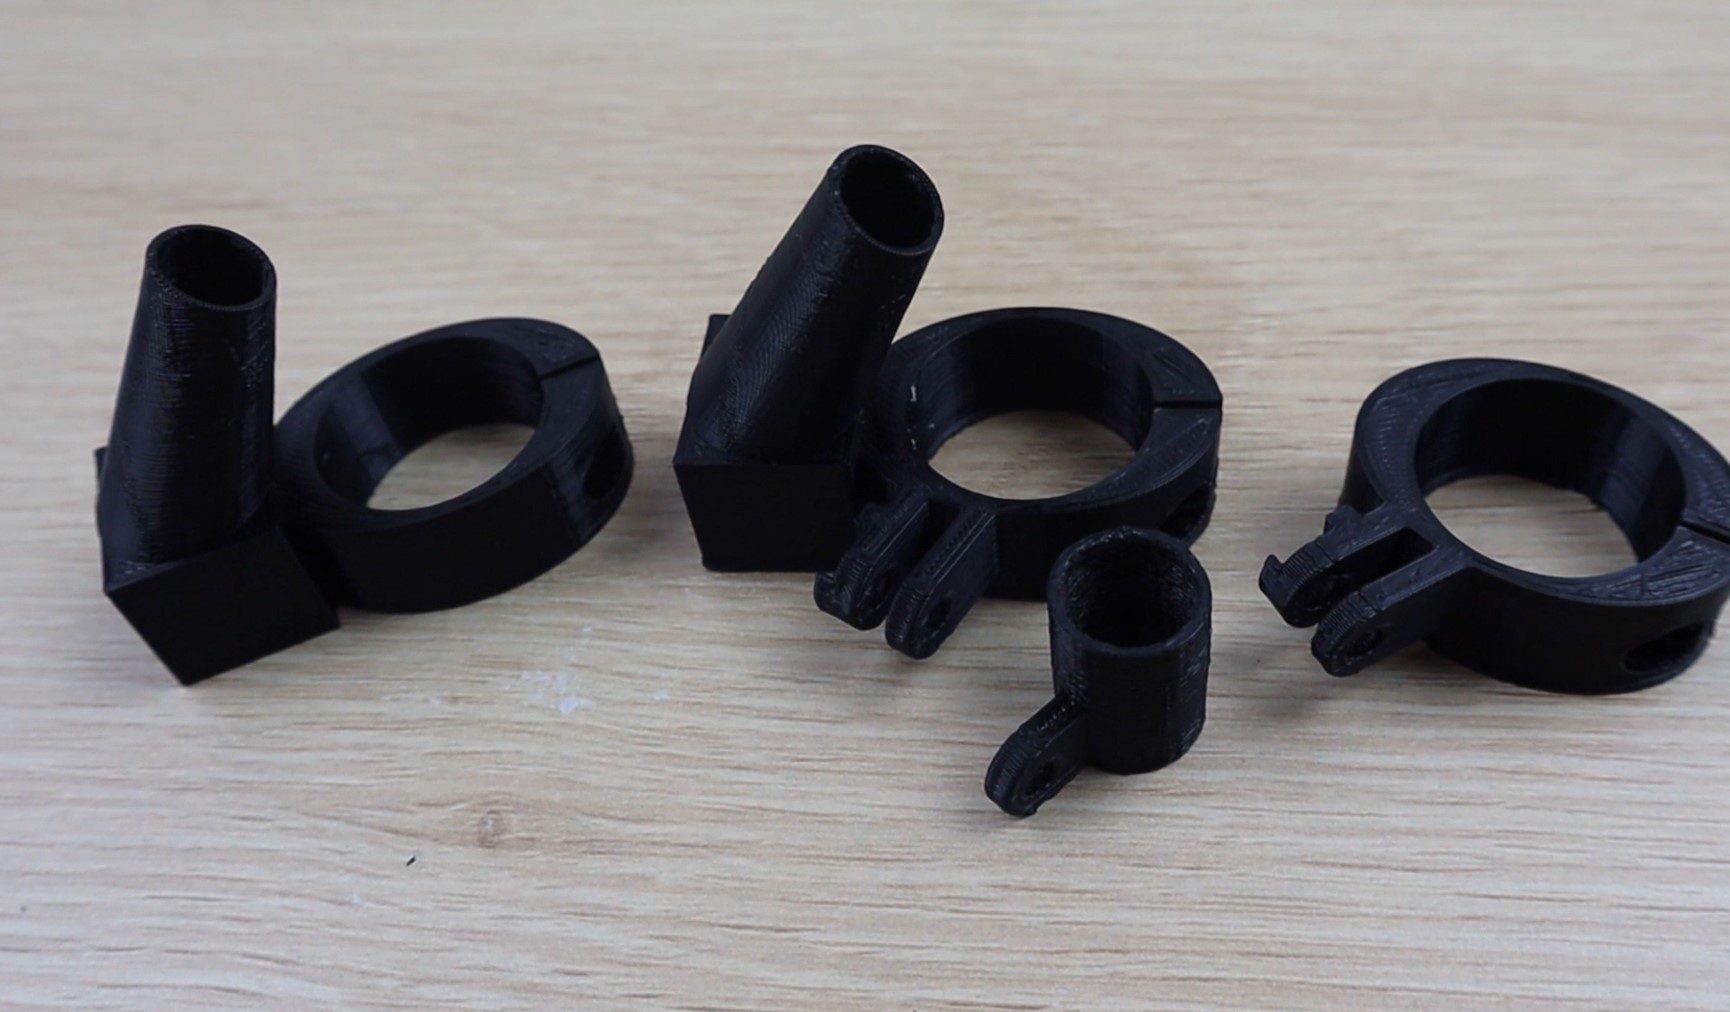
I printed out the bracket using black PLA with a 50% infill.
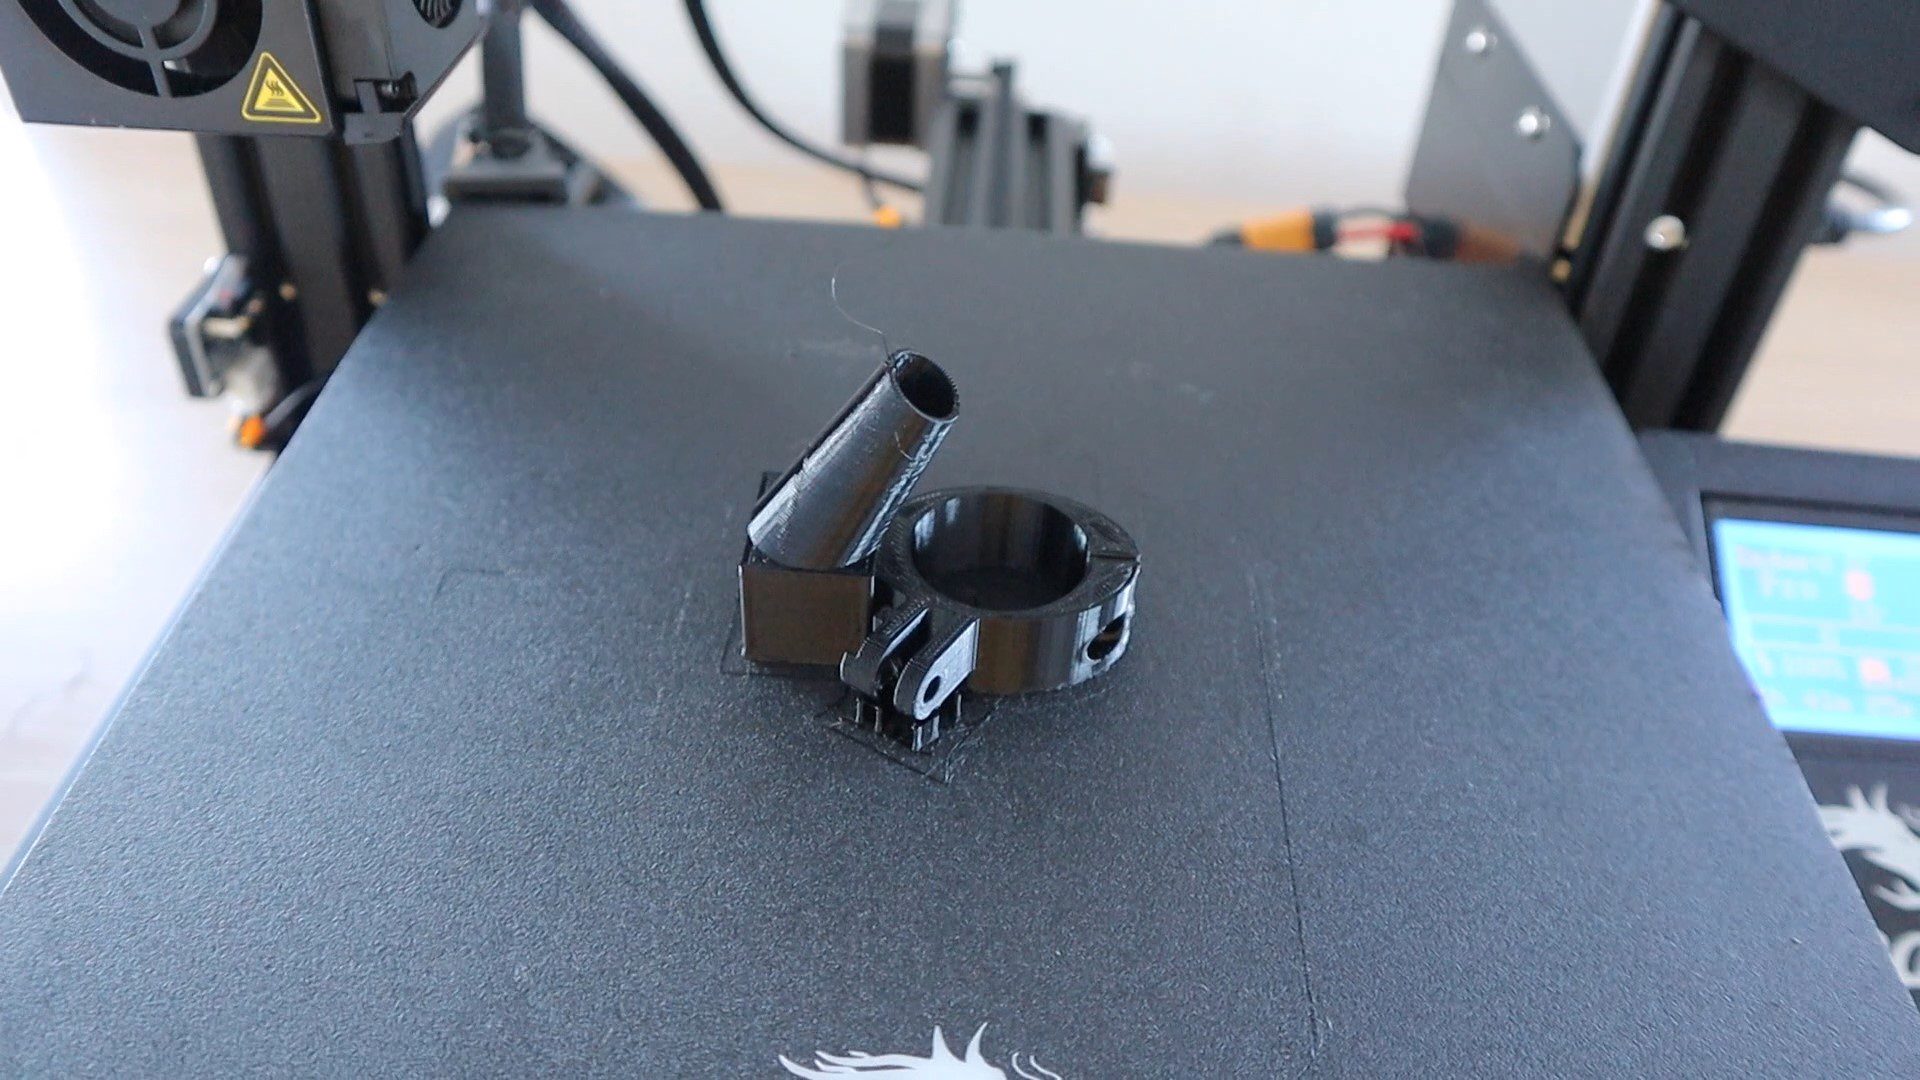
There are three included models in the download, one for the pointer only, one for the fan assist only and one for the pointer and fan assist.
I ordered one of these 24V radial fans which are said to be designed as laptop cooling fans as this can be powered straight from the existing 24V supply and the fan outlet is perfect to attach to a duct to direct the airflow towards the cutting area.
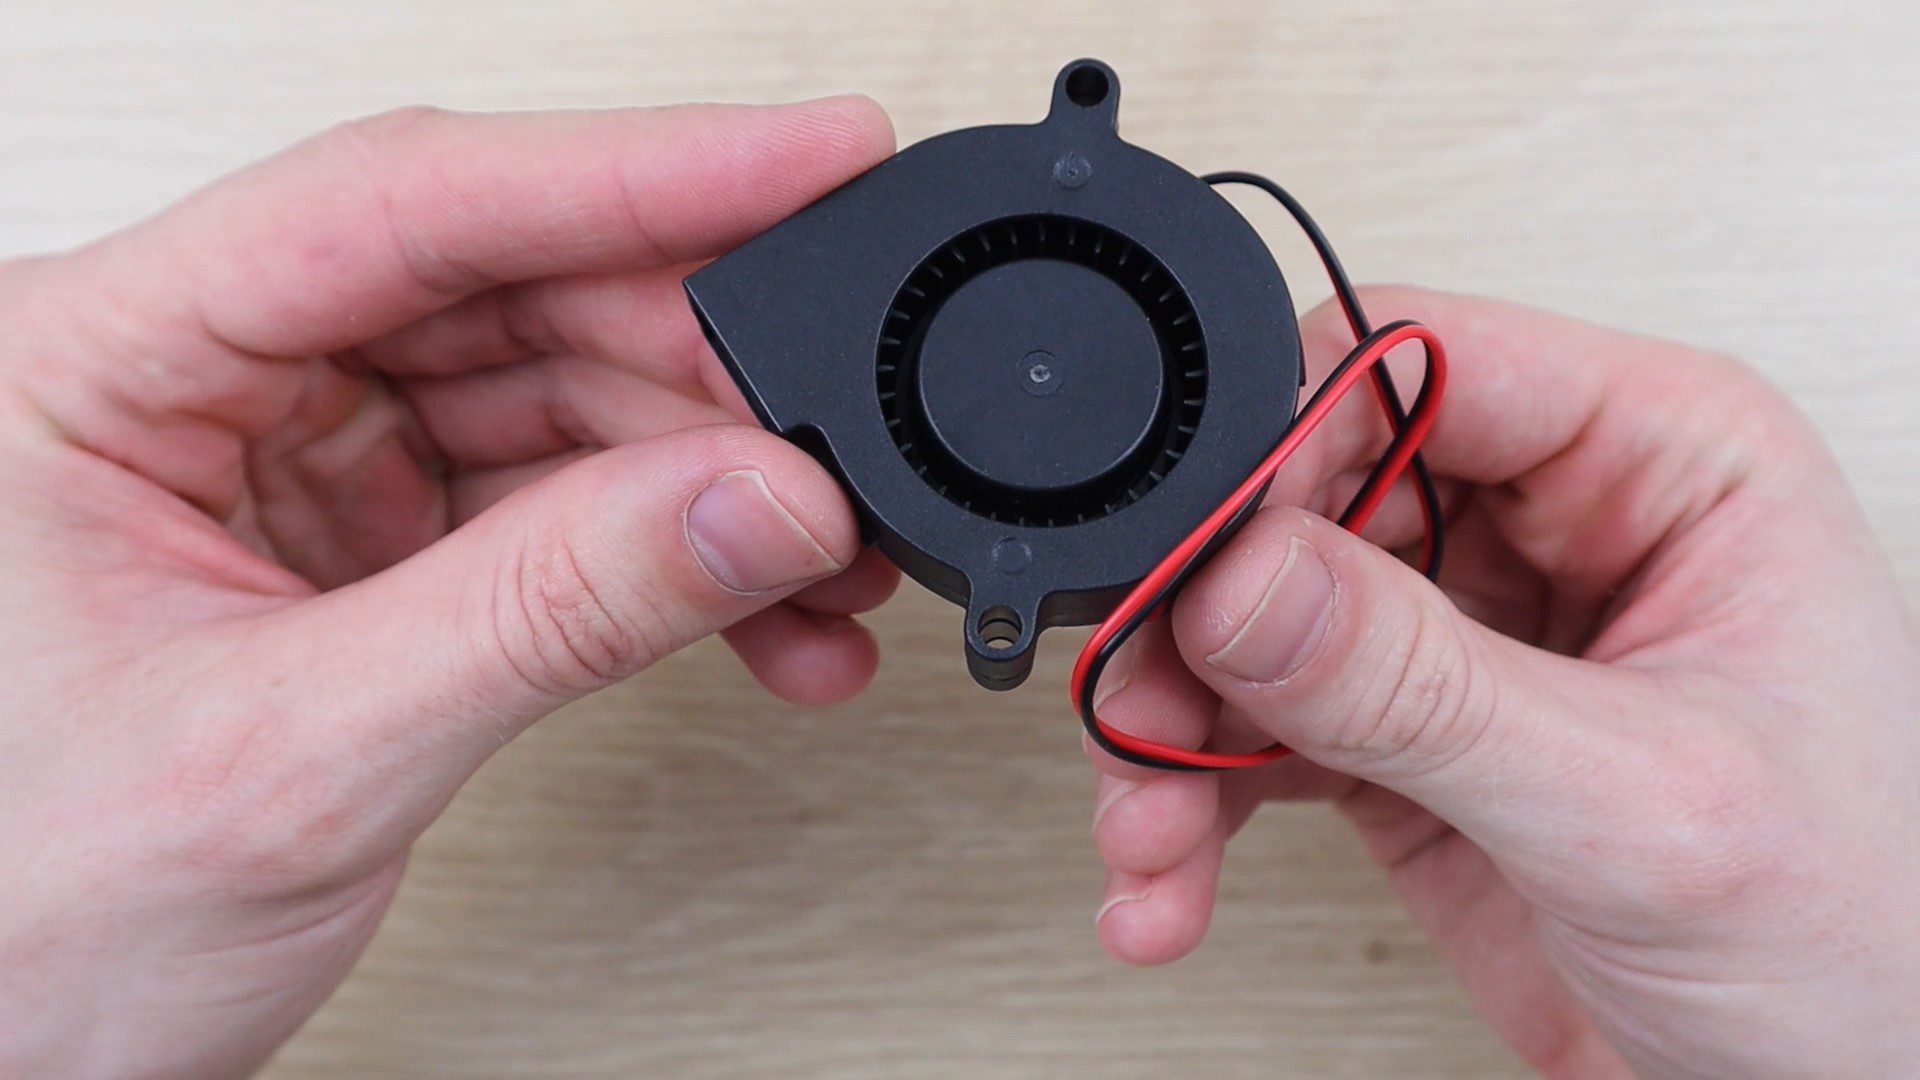
Push the fan into the top of the ducting. It should be a fairly snug fit and you can add a bead of hot glue around the edges to seal it up and hold the fan in place.
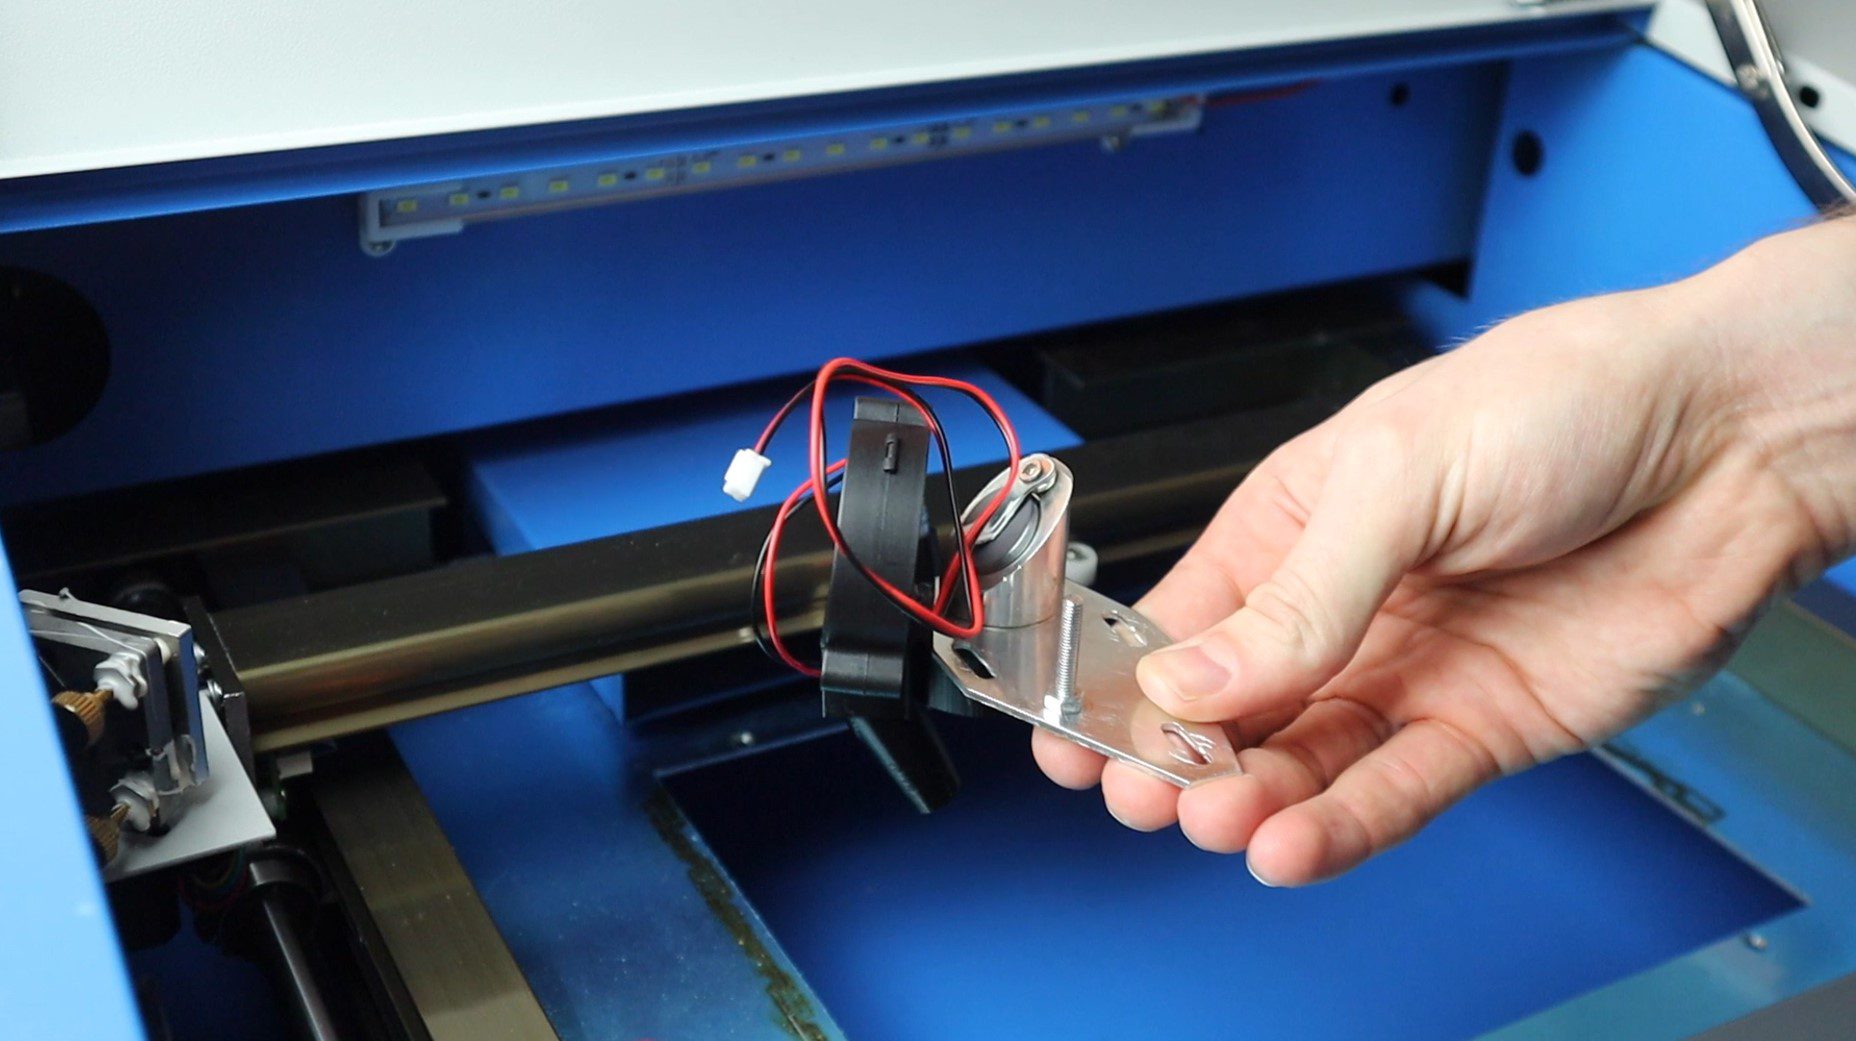
An M3 x 15 hex head screw and nut is used to clamp the bracket around the head of the laser.
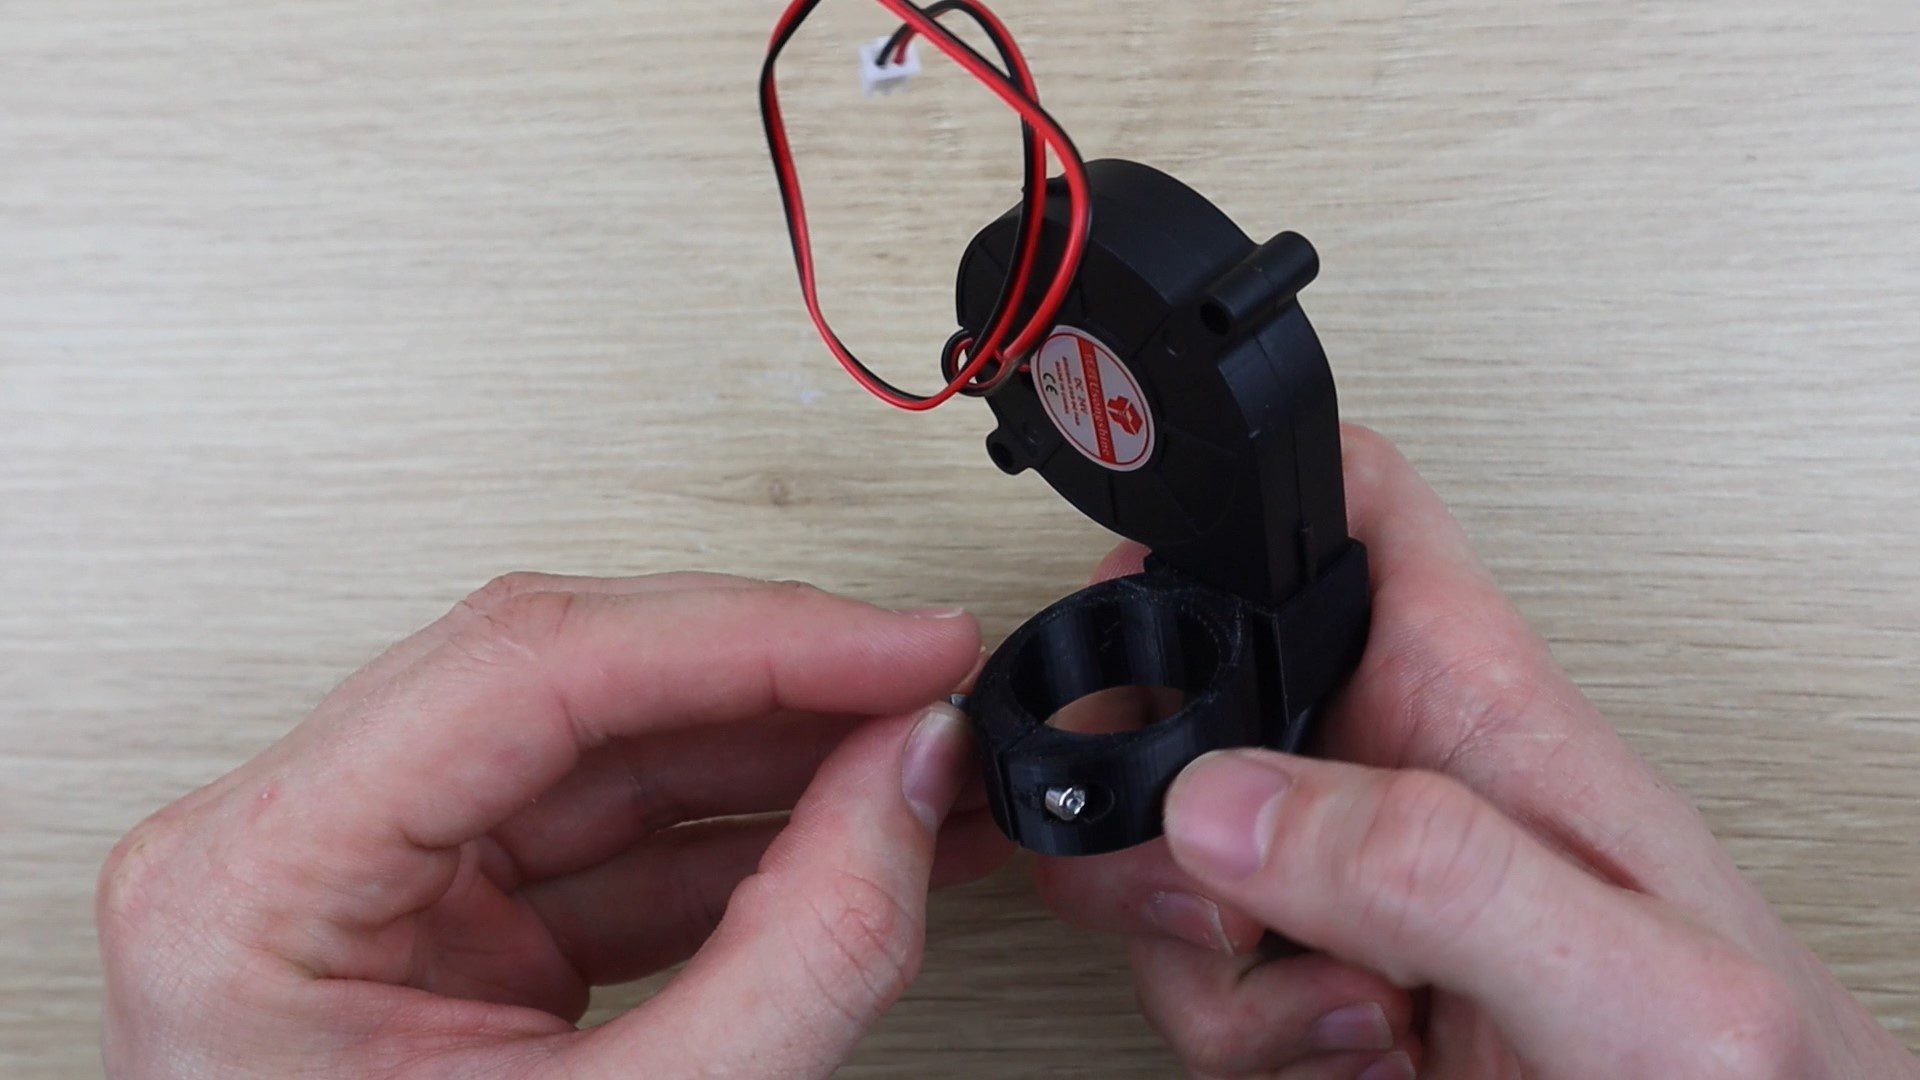
Slide the bracket onto the bottom of your head of your laser and then secure it by tightening the screw.
Now that the fan is in place, we need to add the power connection and a pushbutton to turn it on. I’m going to be doing this next step in conjunction with the red dot pointer addition, but the method is exactly the same whether you’re doing one or both modifications.
Supply Power To The Radial Fan
You’ll need to add a drag chain to support the power cables to the head of the laser so that they don’t get caught up when the laser is moving. The one end of the drag chain gets connected to the head of the laser and the other onto the sidewall of the machine.
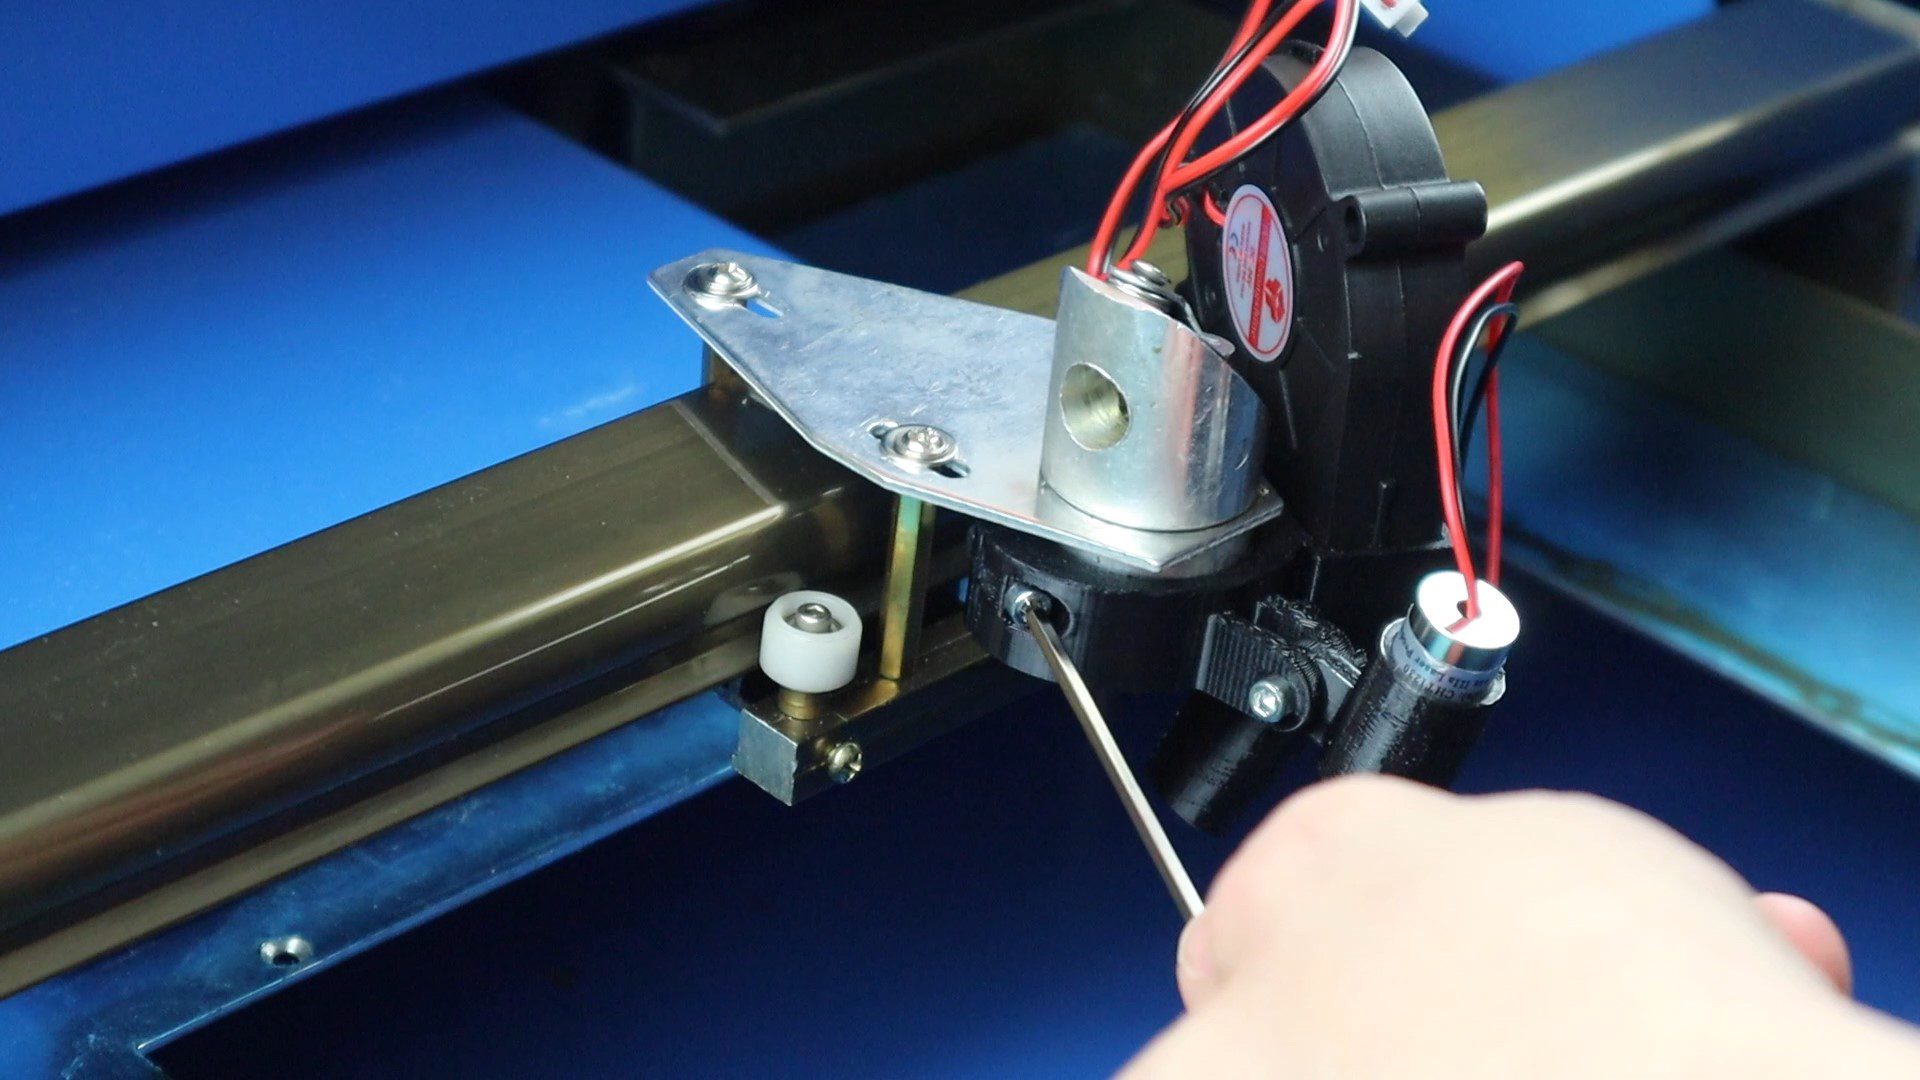
First, we’ll need to add an anchor screw onto the laser cutter head. I took the head off for this step as its easier to work with. I drilled a 4mm hole on one side of the head and add an M4 x 25mm screw which was long enough to fit through the drag chain and then replaced the head.
Place the end of the drag chain onto the laser cutter head and then measure out the length that you need. You want it to be long enough to reach all four corners of your bed but not too long that it gets in the way.
Remove the spare links so that it’s the correct length and then add the end support.
Mark off the two holes for the end supports so that you can drill the required holes.
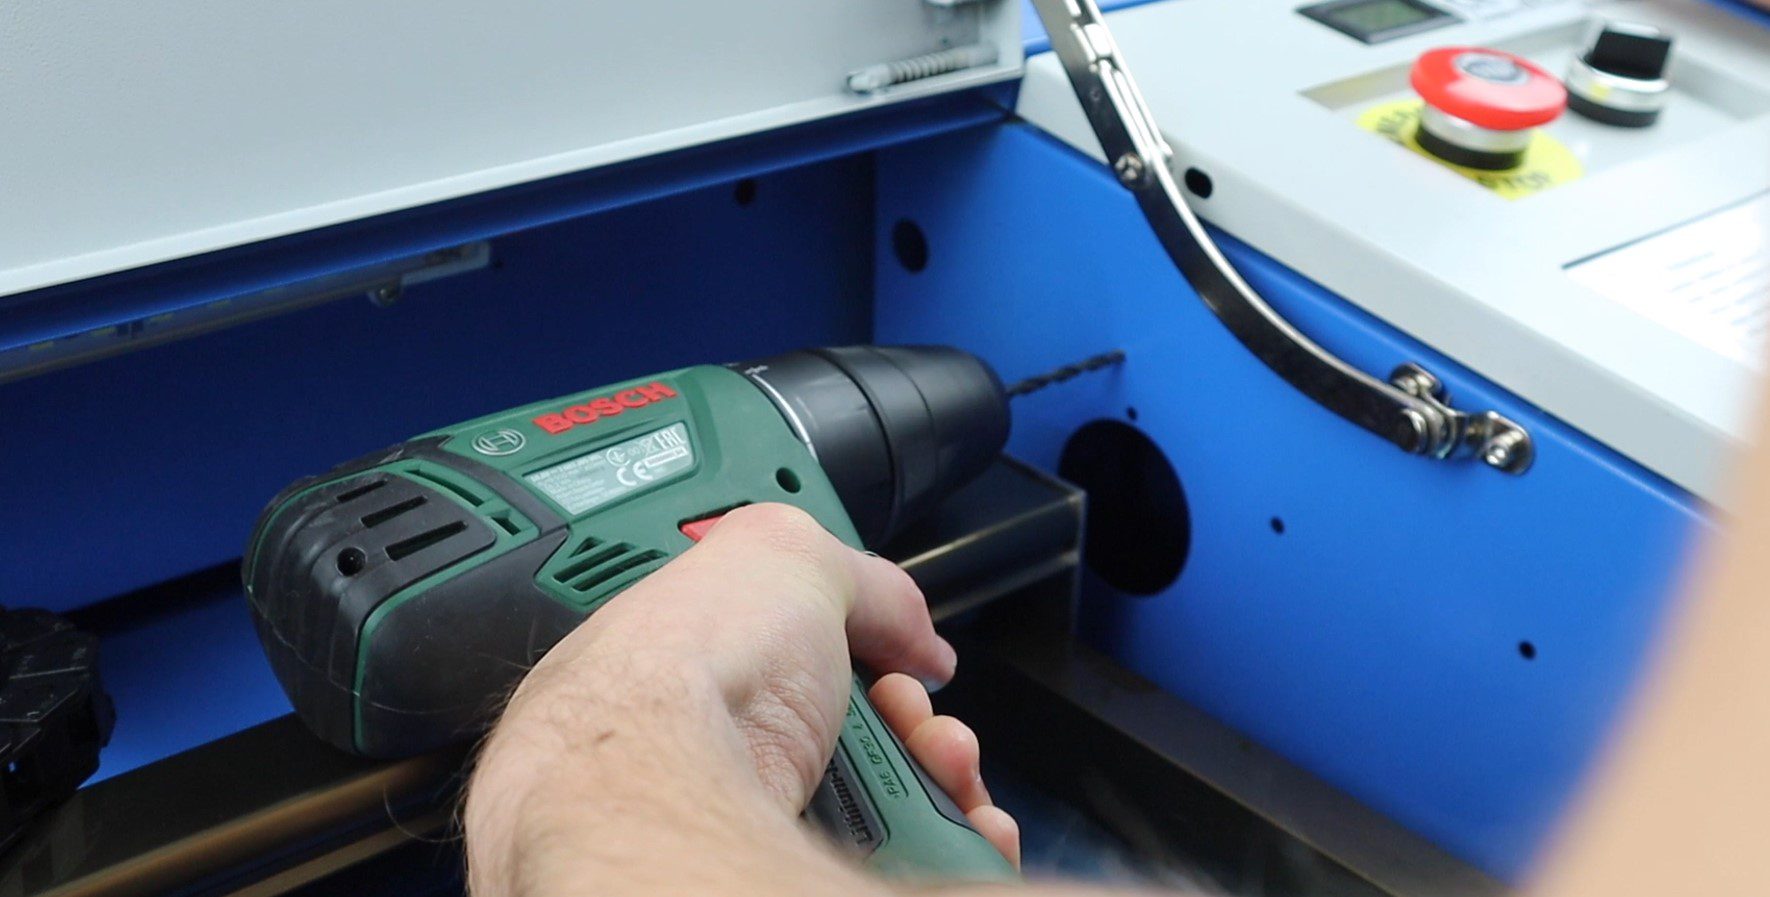
I used a 4mm drill bit to drill two holes for some M4 x 15mm screws which I then secured through the sidewall.
You might also want to add a thin screw or rod onto the head to stop the drag chain from being able to move into the path of the laser. This will interrupt the laser’s path, causing your cut to fail and potentially damage the drag chain or cause it to catch on fire.

Next, I added some pushbutton to the control panel. I added four buttons, one for the pointer and one for the fan assist and then another two which I plan on using for a height-adjustable print bed in the future. I wasn’t too worried about keeping them neat as I’m planning on replacing the front panel in the near future as the LCD display is not very useful and the more basic ammeter panel is actually a better and more accurate option.
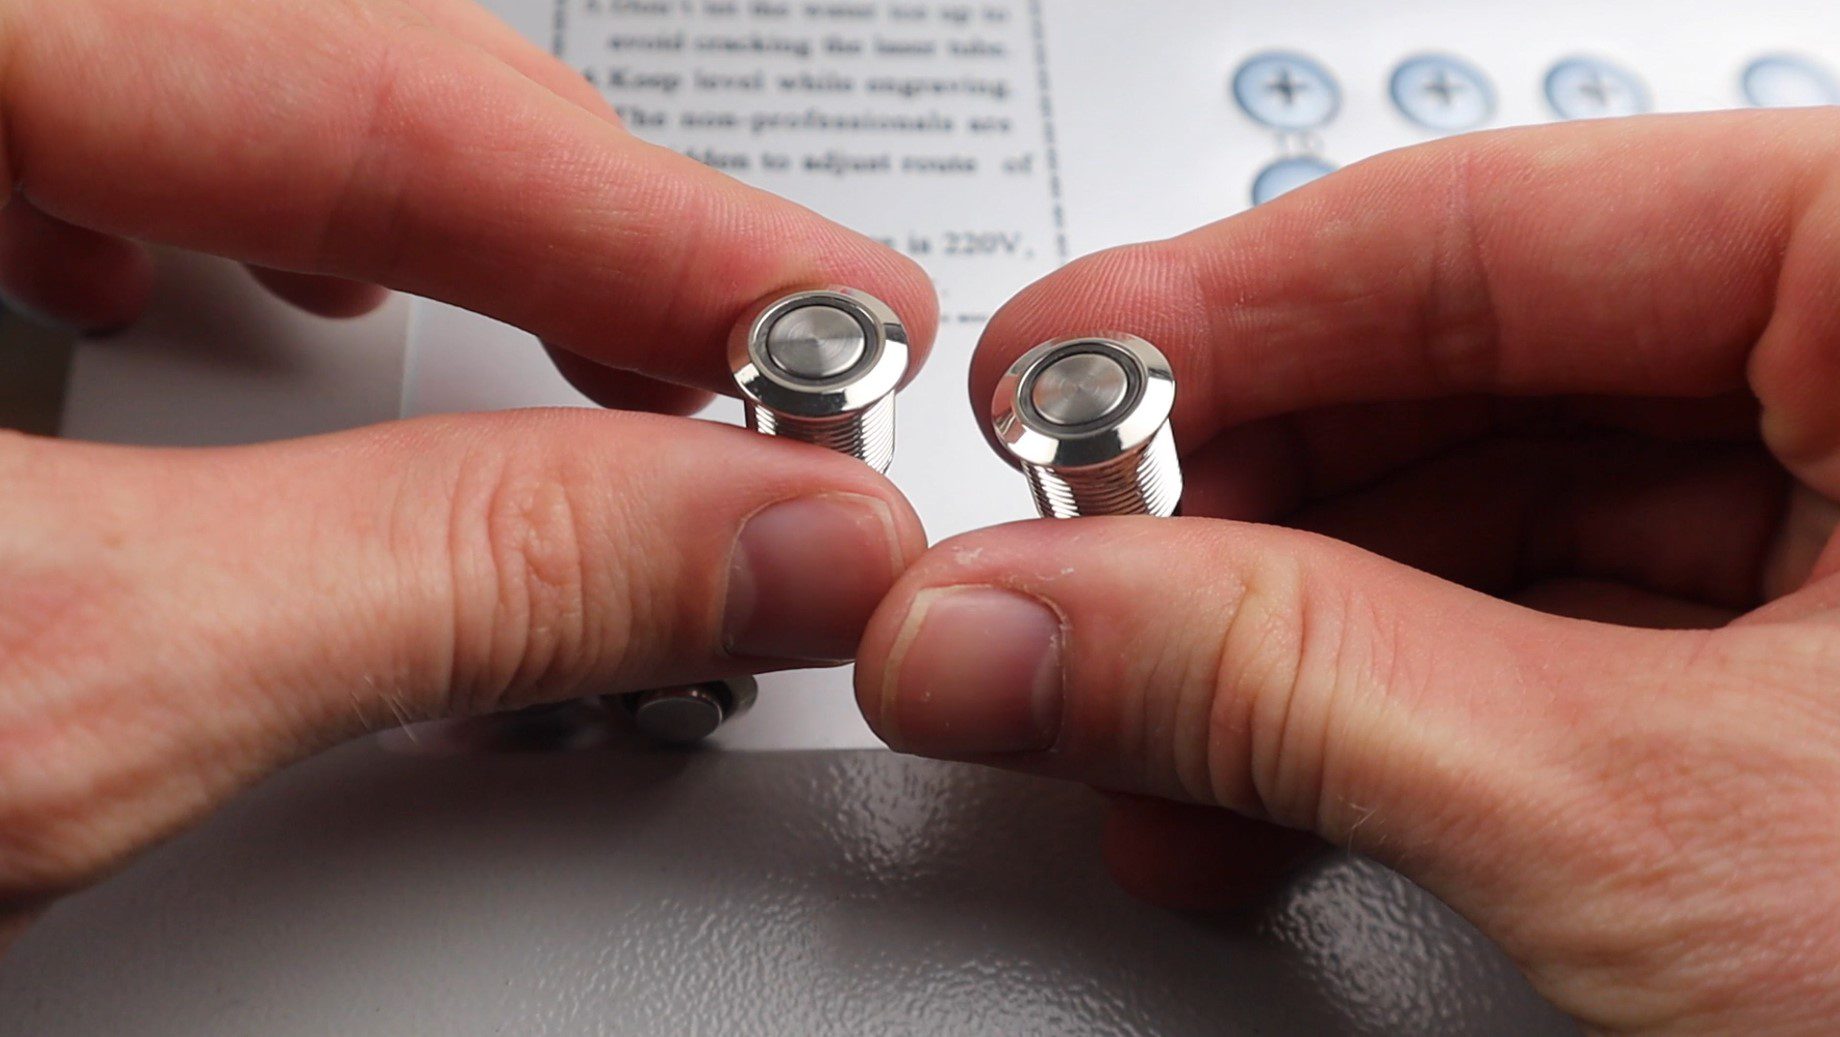
I removed the control panel to drill the holes and install the pushbuttons.
I then got to work on the wiring. I needed three wires to the head, one for 24V for the fan, one for 5V for the pointer, and one common/ground. If you’re not using the fan or not using then pointer then you’ll only need two.
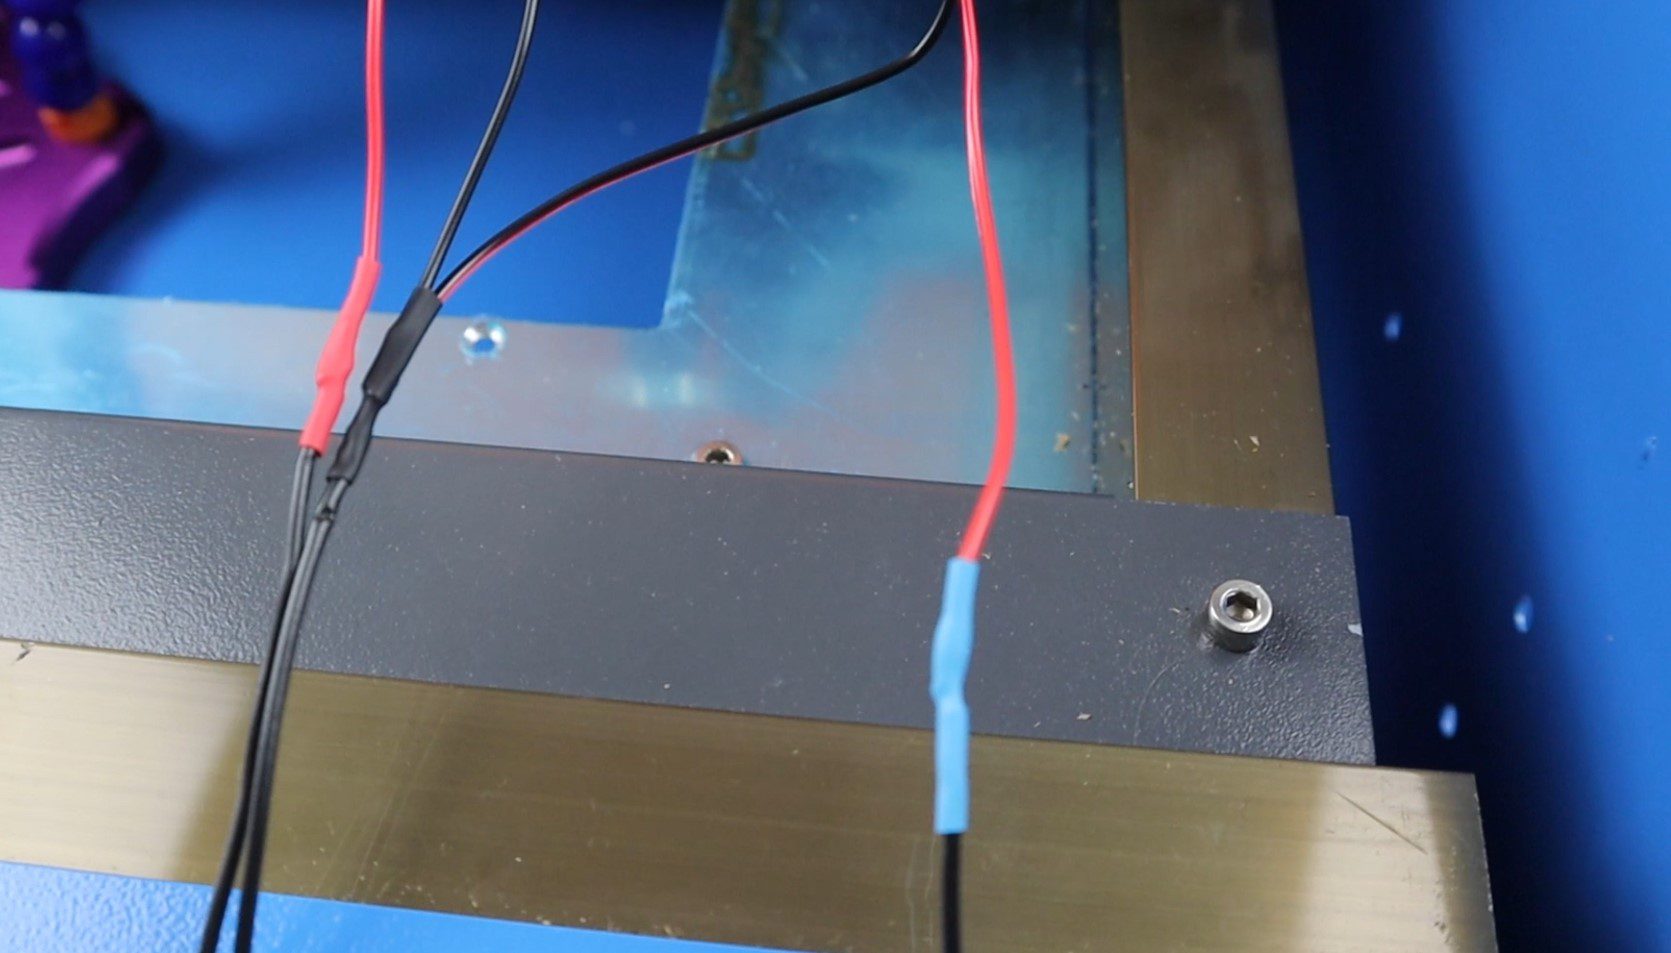
Feed then wires through the side of your machine and into the electronics compartment. I ran them in the existing cable bundles so that the wiring is kept neat. I ran the wires up to the pushbuttons and then down to the power supply for power.

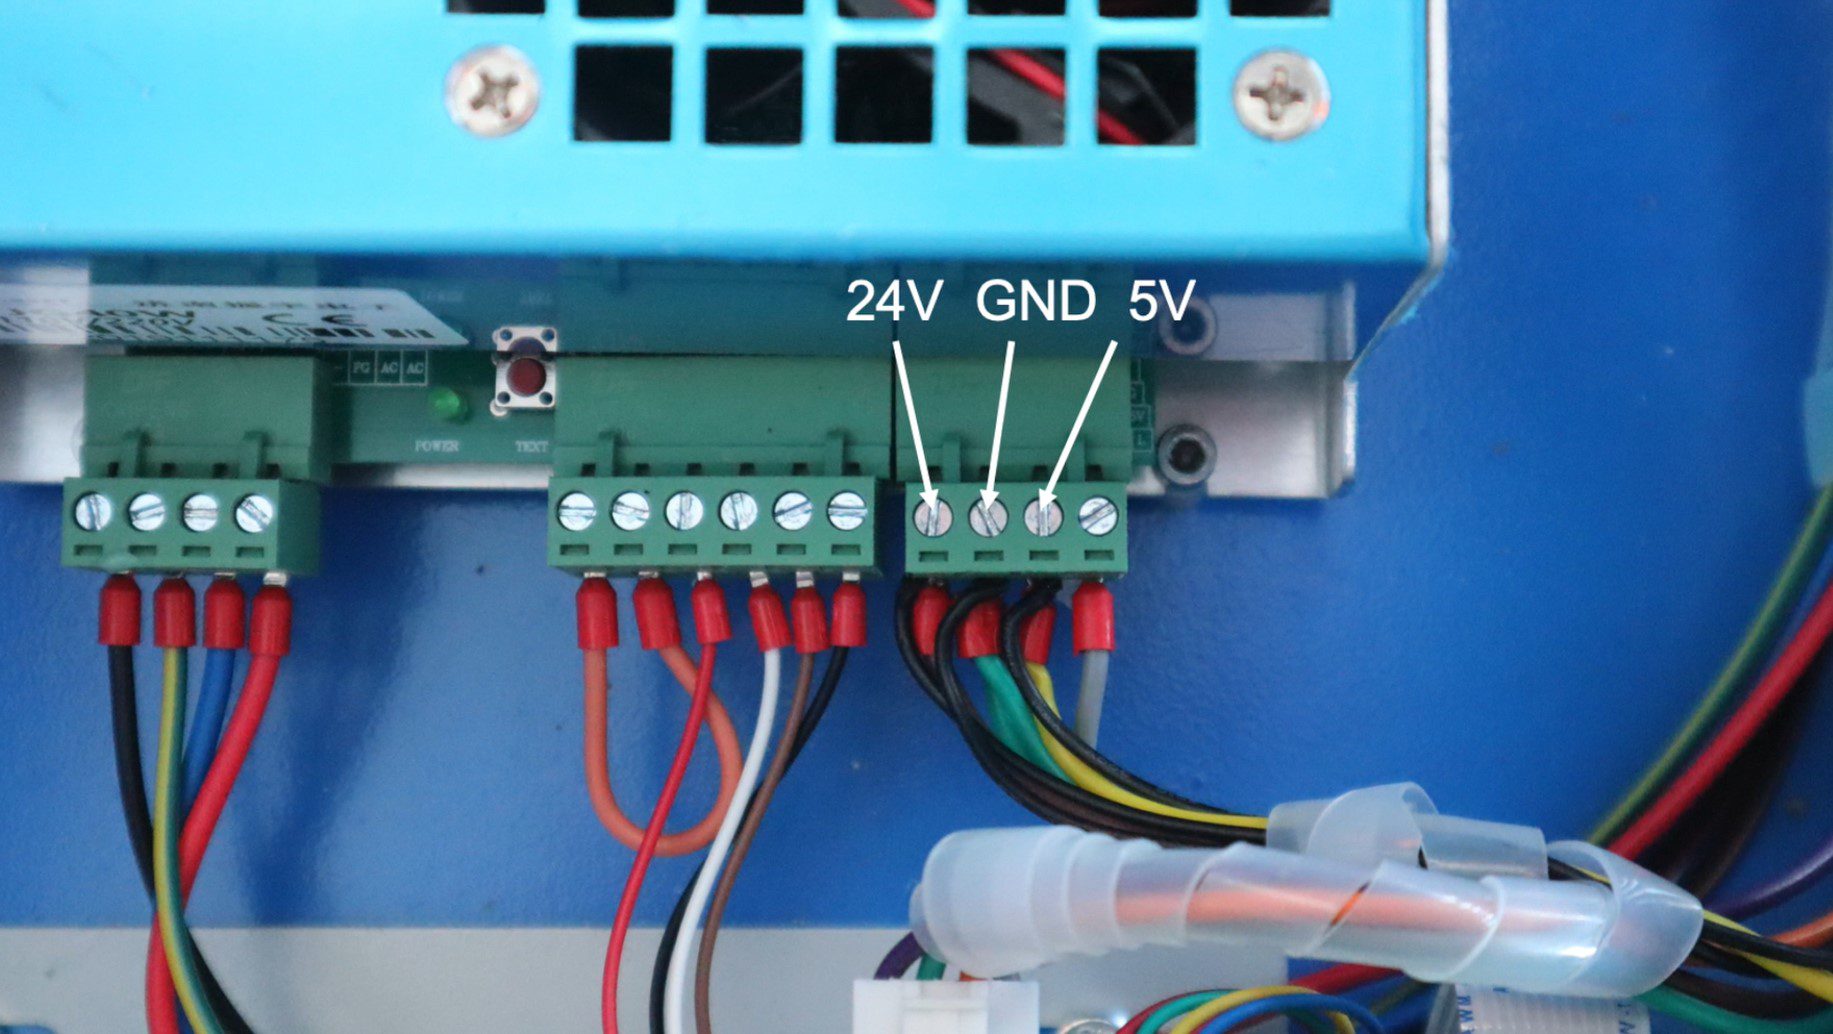
You’ll need to hook your wires up to these three terminals on the power supply, depending on what you’re supplying. Keep in mind that this power supply is not really designed with much extra capacity, so don’t add anything which will draw a lot of power or you may burn it out.
Once all of the wiring is done, check the connections and then turn it on to try it out.
Test The Radial Fan Air Assist On Your K40 Laser Cutter
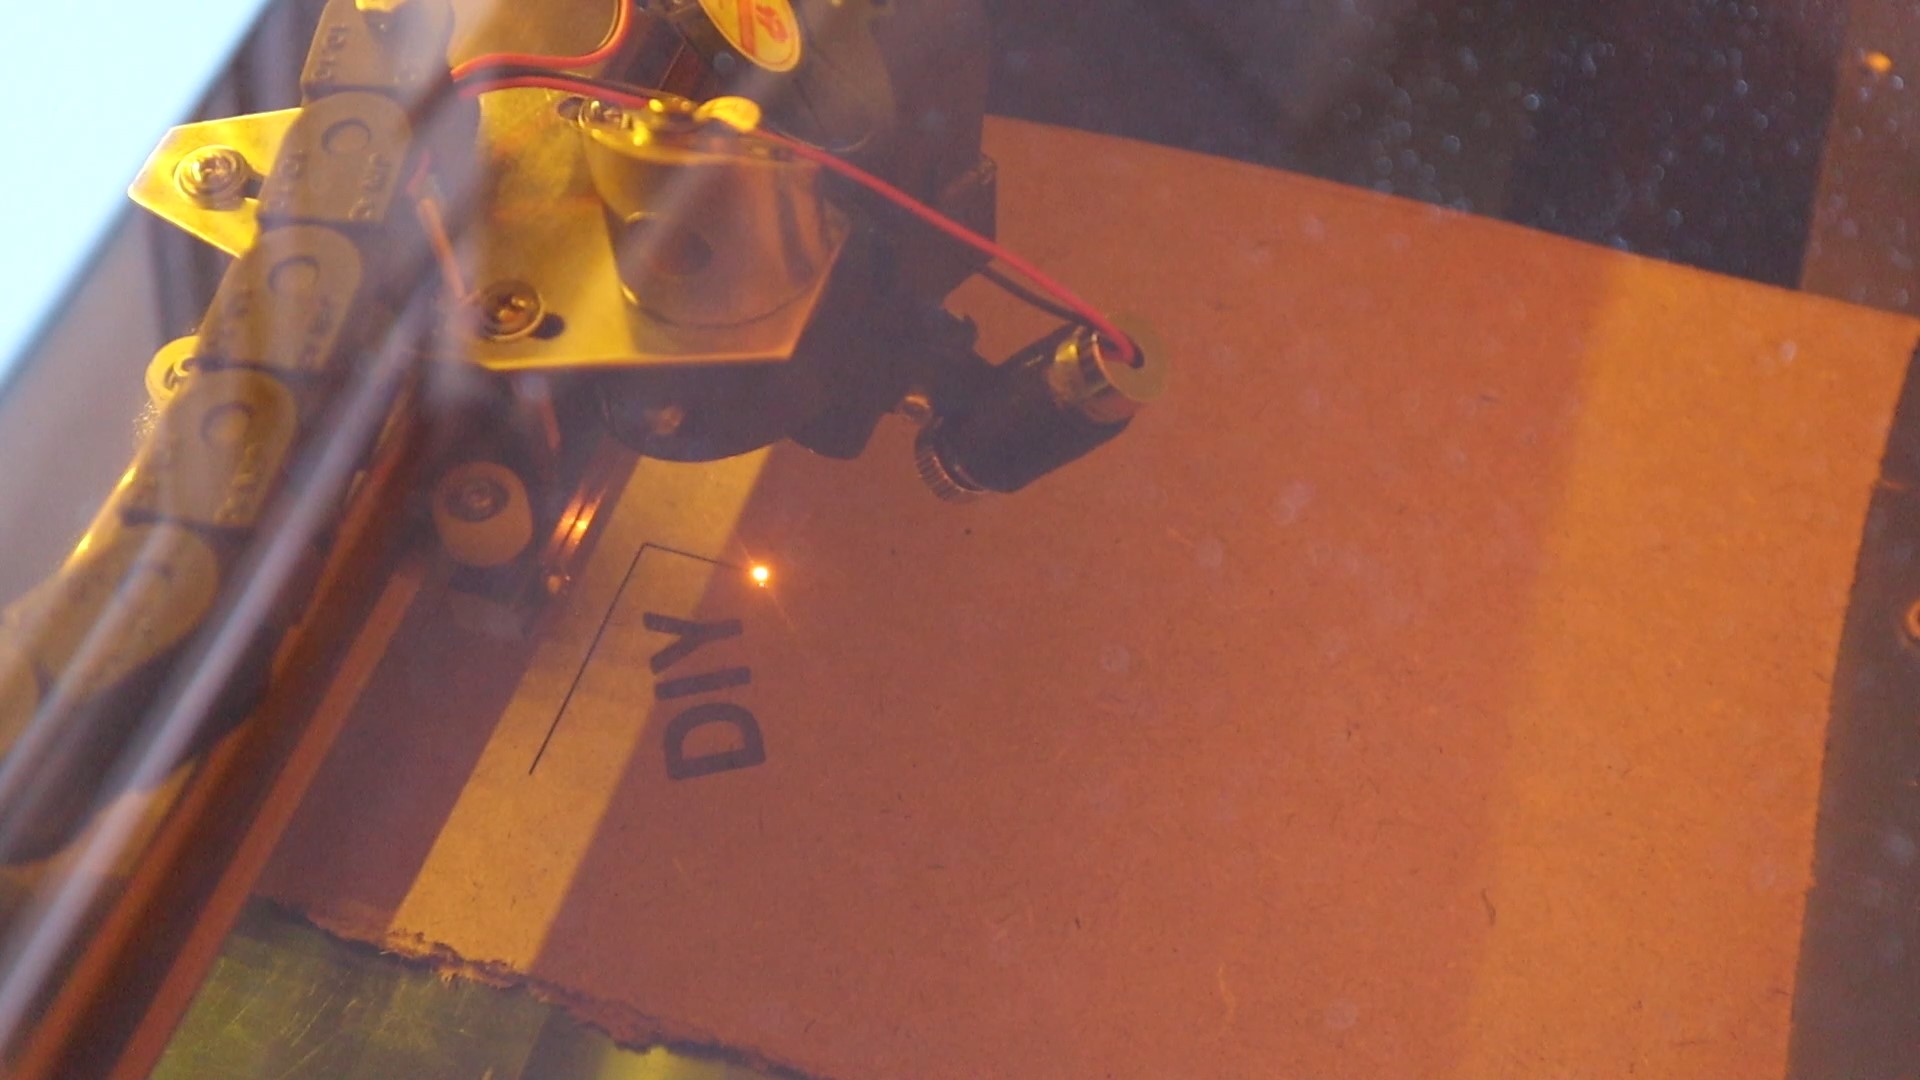
Now that all the wiring is done, let’s turn on the fan and test it by doing an engraving and a cut.
There’s actually an impressive amount of airflow from such a small fan.

I designed a small logo engraving and a rectangular cutout around it to test on a piece of 3mm MDF. I engraved and cut the two side by side so that you can see the difference.
I did the engraving on 15% power and 100mm/s and the cutting at 35% power at 20mm/s. I didn’t want it to cut all the way through the MDF as I wanted to see how deep the cut was with each test.
This is the result, which wasn’t what I was expecting.
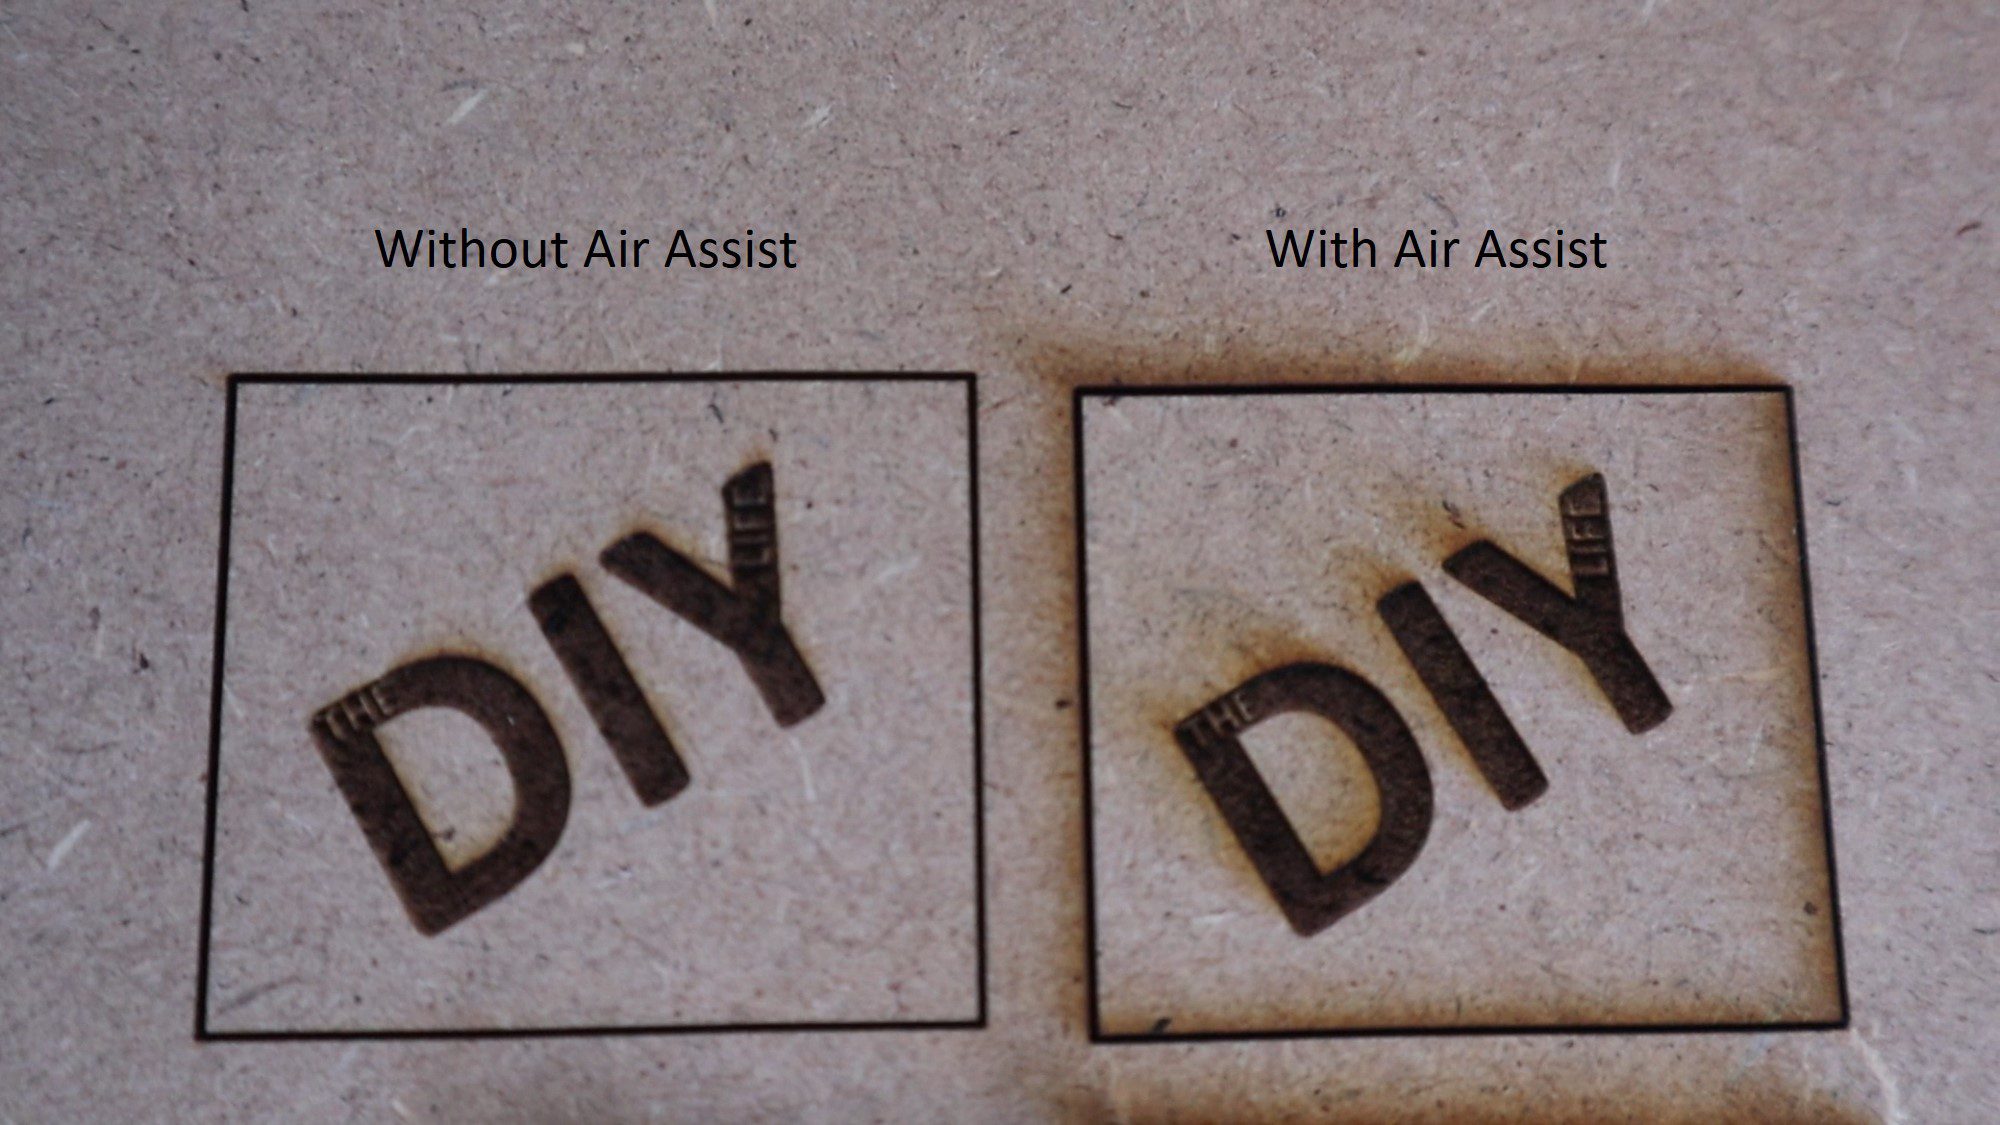
The engraving is actually more dirty with the fan assist on. It seems like instead of allowing the smoke to rise up and away from the wood, it was being blown back down onto the wood, causing more significant marking. The cutting performance was improved with the fan assist on. The cut was just under halfway through the MDF without the air assist and was a little more than 2/3 of the way through with the air assist on.
I’ll probably land up removing the fan air assist as I tend to engrave with masking tape in any case as it produces much cleaner results and since I still need to do 2 passes to cut through the MDF with or without the air assist, there isn’t much benefit to it. I might look at trying out an air assist solution using a workshop compressor in the future and see if more airflow leads to a better quality engraving or even more improved cutting performance.
Have you tried doing any modifications to your K40 laser cutter? Let me know in the comments section below.
Thanks for your great video on the Obstacle avoiding robot car. I am a newbie to this Arduino stuff and as a 76 year old it is a great means of training the brain. I completed my Robot car but wondered if you did anything more on adding left and right movement to the ultrasonic sensor during forward movement to detect objects slightly off-center which may come into the robot’s path, and then gently turn the robot car away from them. I realise it’s going back 4 years so understand if you haven’t added anything to the project.