Today we’re going to be assembling a 3D-printed case for the new Raspberry Pi 5 and Pineberry’s HatDrive! This is an adaptation of my standard desktop case for the Raspberry Pi 5, with adjustments made for the top and bottom hat versions of the HatDrive! This case also includes an adaptor so that you can still use the power button on the back of the Pi 5.
What You Need To Assemble Your Case
If Building HatDrive! Top:
- Case Kit (3D Printed Parts & Screws) HatDrive! Top – Buy Here
- 2230 NVMe Drive – Buy Here
- Raspberry Pi 5 Active Cooler – Buy Here
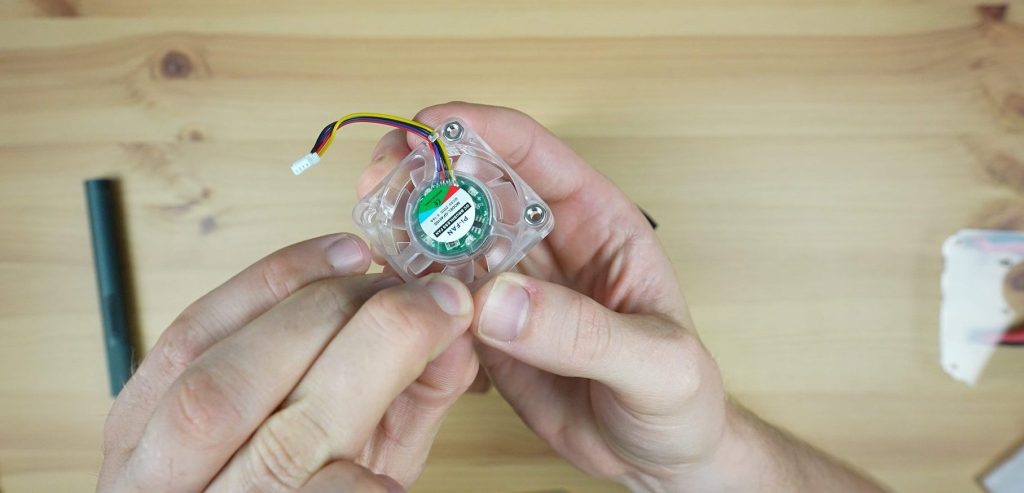
- 40mm 5V Fan – Buy Here
If Building HatDrive! Bottom:
- Case Kit (3D Printed Parts & Screws) HatDrive! Bottom – Buy Here
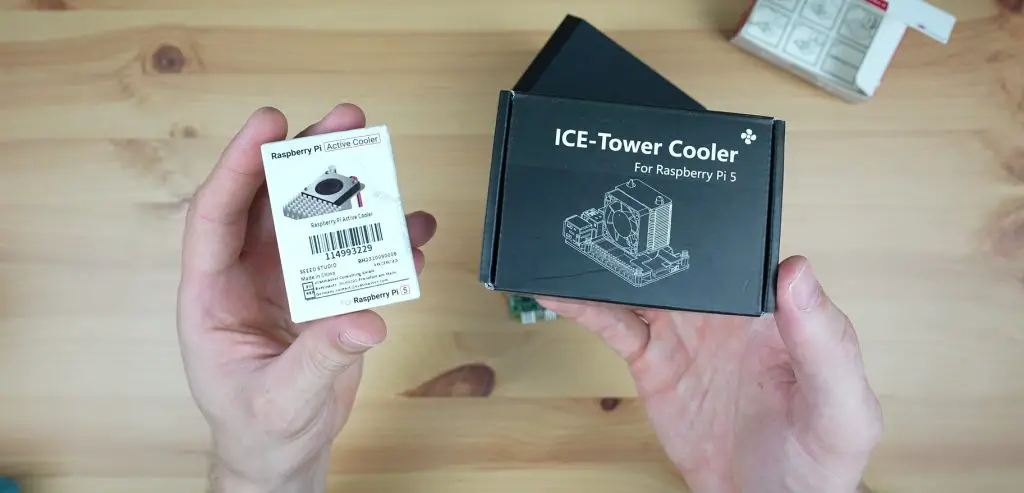
- Ice Tower Cooler (for the Pi 5) – Buy Here
- 2280 NVMe Drive – Buy Here
- Or Alternate Cooling Solution Below
- Raspberry Pi 5 Active Cooler – Buy Here
- 40mm 5V Fan – Buy Here
Ensure that you get the Ice Tower cooler for the Raspberry Pi 5, the cooler for the Pi 4 will not fit.
Assembling The Raspberry Pi 5 HatDrive! Case
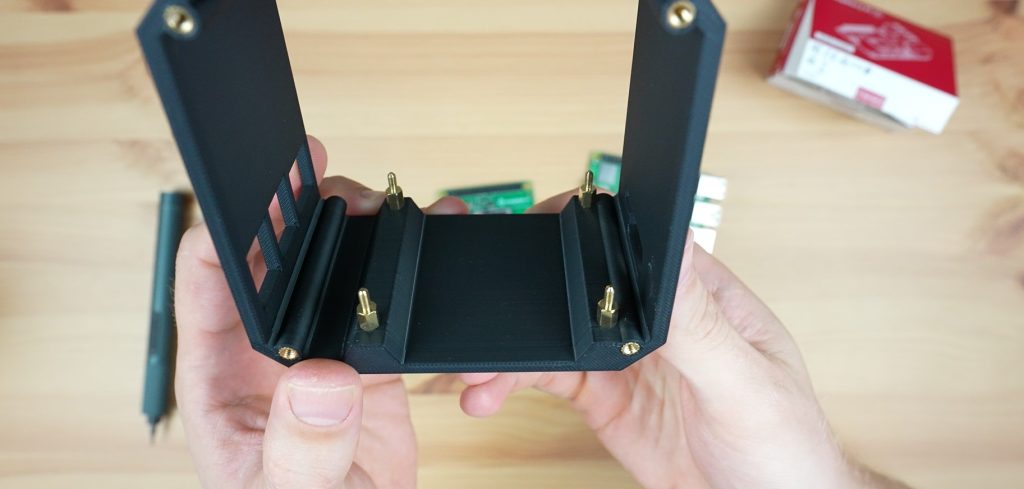
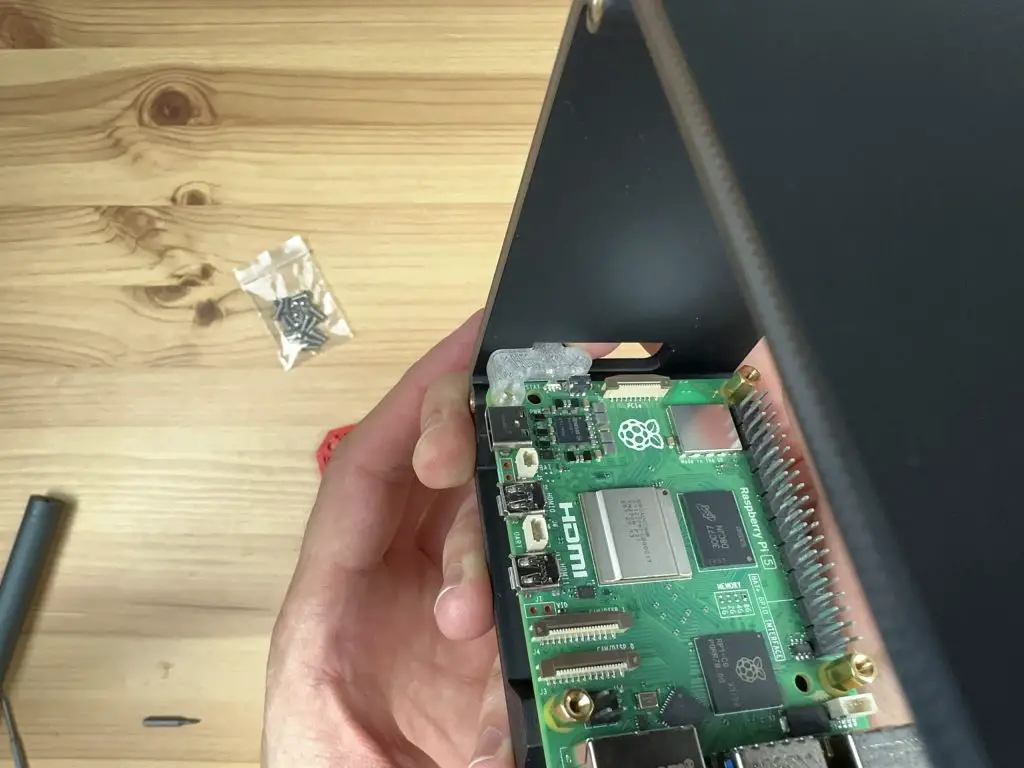
To start, we need to install the M2.5x6mm brass standoffs that come with the case kit on the bottom of the case. These are installed with the male thread facing upwards into the case and are each held in place with an M2.5 button head screw through the base of the case.
HatDrive! Top Installation
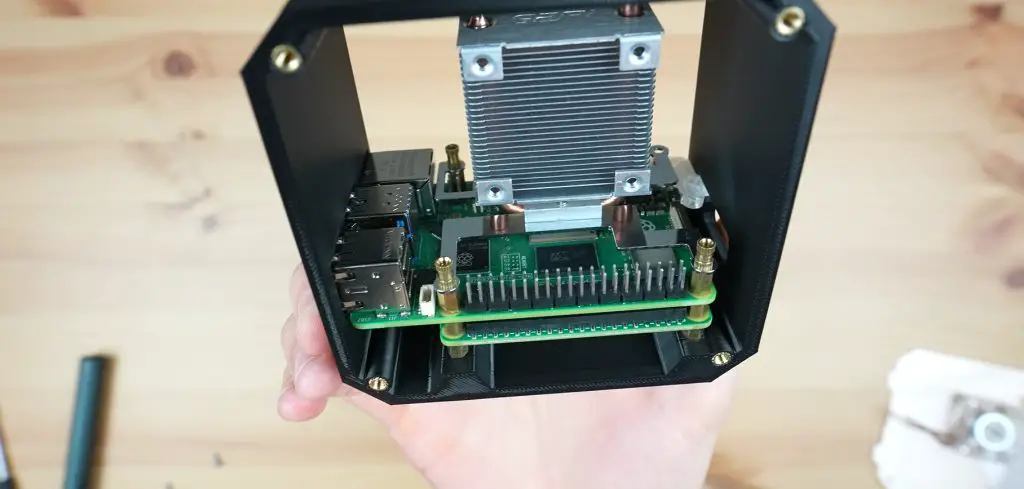
If you are using a top-mounted HatDrive!, the next step is to install your Raspberry Pi. Position the Pi onto the standoffs and secure it with three M2.5 brass standoffs (female to female) that came with the HatDrive.
Don’t install a standoff on the hole nearest to the power port, this is where the button adaptor will go.
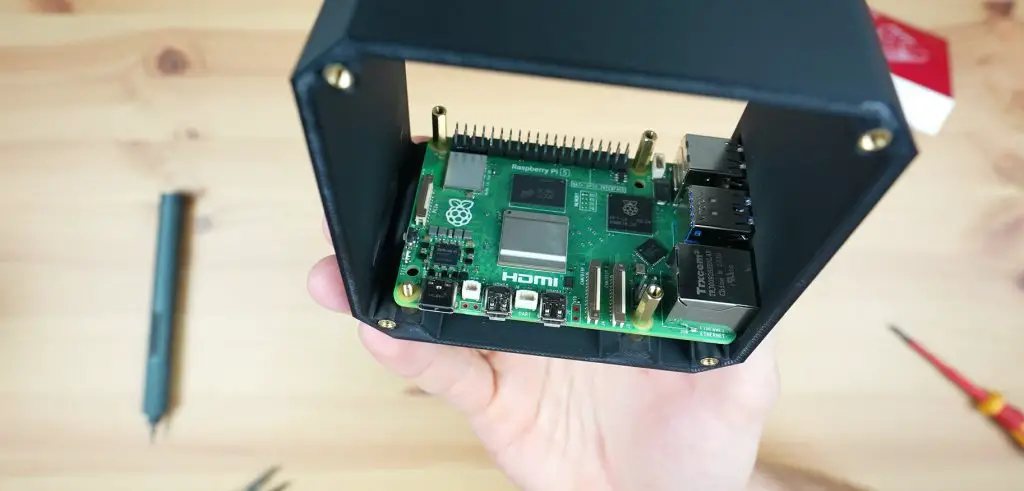
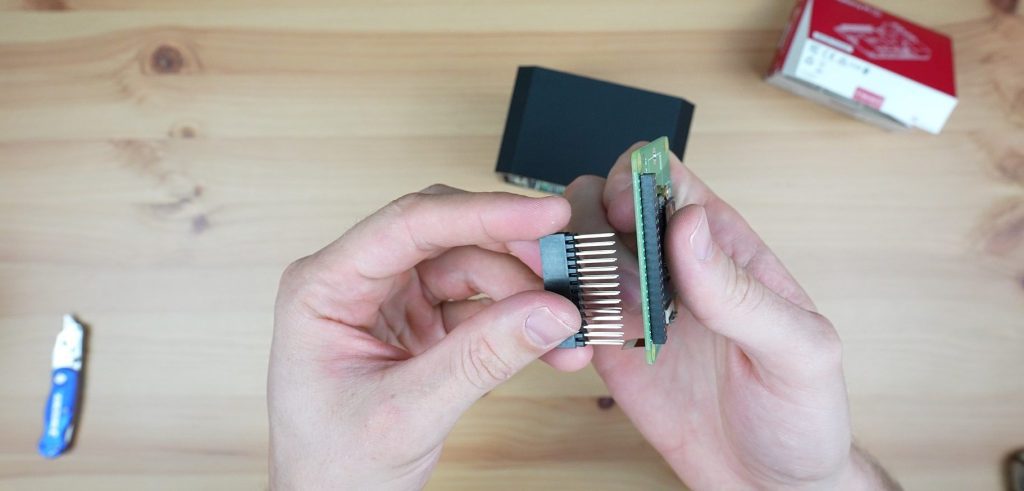
Next, install the button adaptor. Guide the adaptor into position from the inside of the case through the larger SD card slot area. Then move it across into the narrower button slot area and over the threads on the standoff.

Screw the fourth standoff through the button adaptor and onto the brass standoff. This will now hold the button adaptor in place but still allow the power button to be pressed.
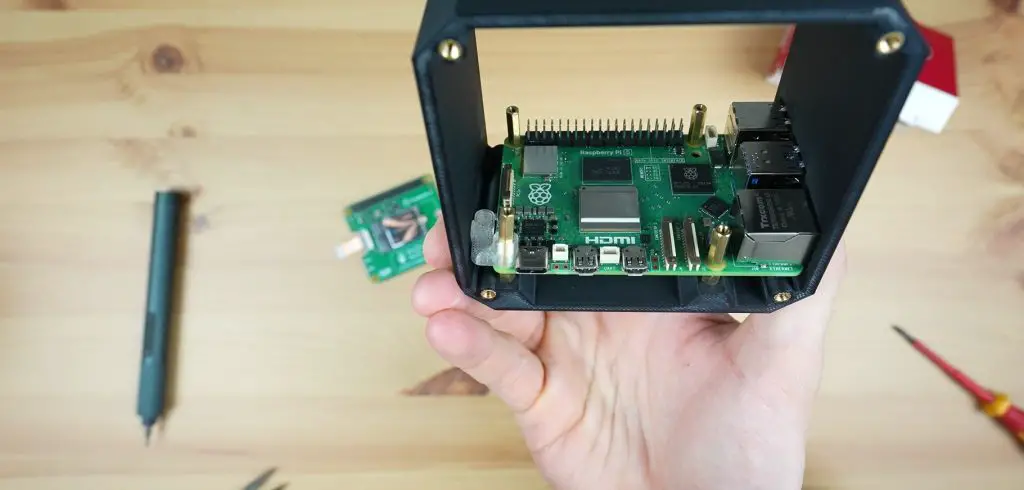
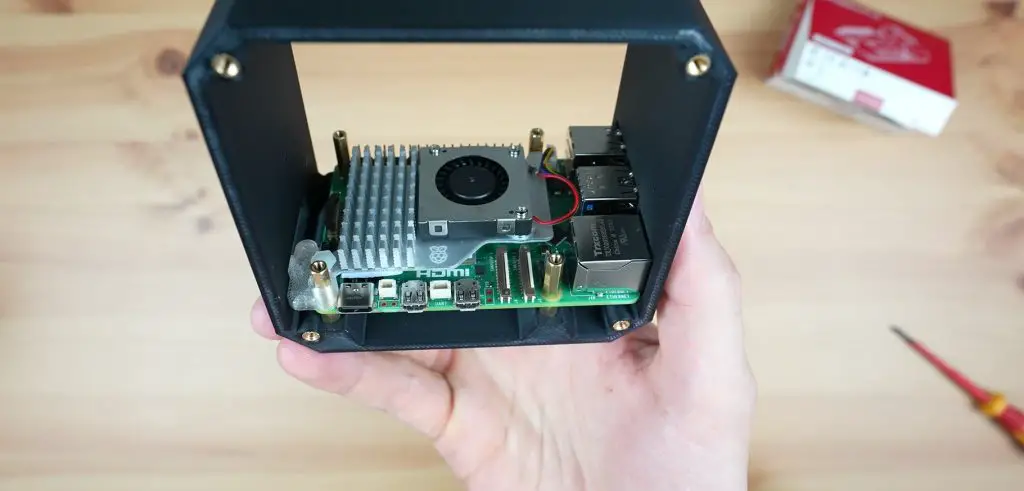
Press your Pi Active cooler into place with the two included plastic studs, these go through the holes in the Pi’s PCB. Remember to add the thermal pad or remove the film from the included thermal pad first.
Plug the fan into the fan port between the GPIO pins and the USB ports.
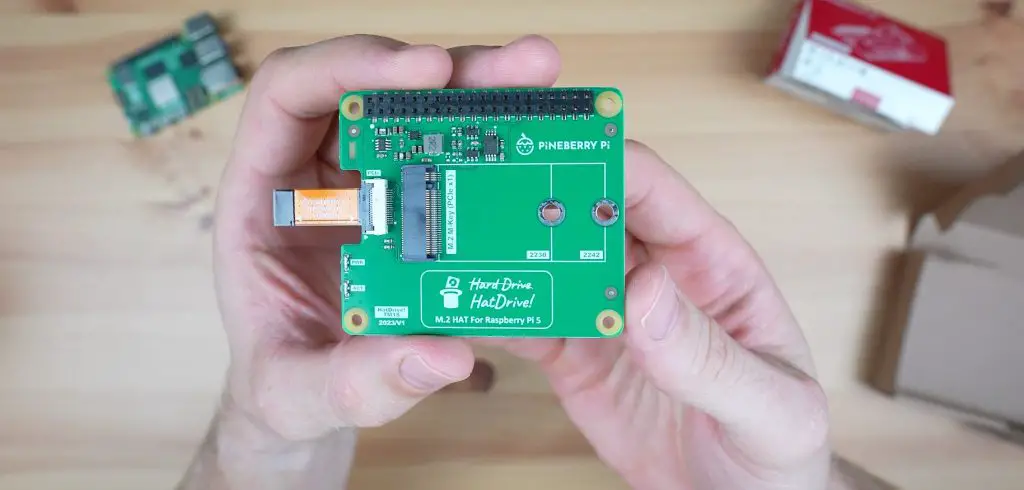
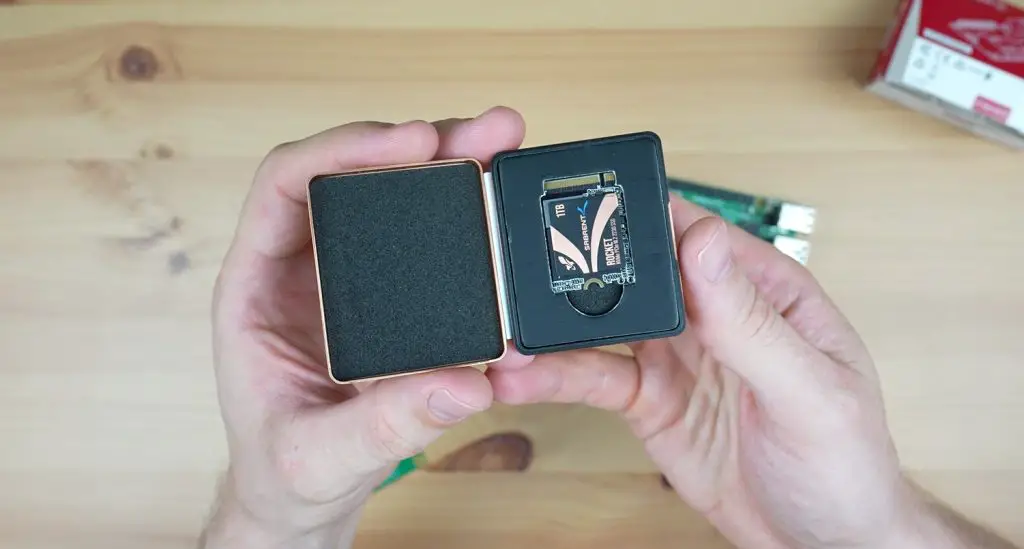
Next, install your NVME SSD onto your HatDrive! I’m using a Sabrent Rocket drive on mine, Pineberry also have a list of compatible drives that have been tested on their website.
Next, add the GPIO extensions through the HatDrive if you’re using them for an accessory like a second fan.
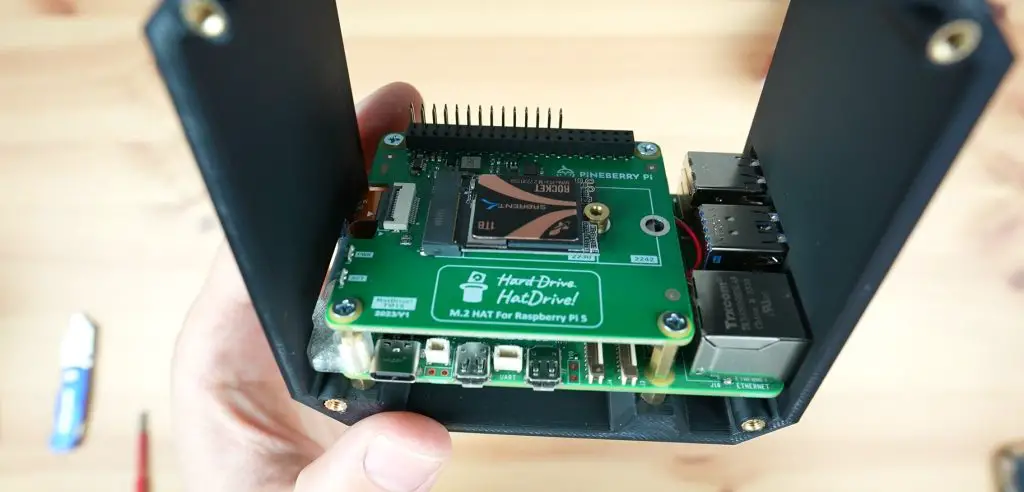
Add your HatDrive with SSD installed, plugging in the PCIe cable into the Pi first. The tab on the connector can be pushed down to secure the cable through the microSD card slot. Likewise, to release it, the tab can be pushed up through the slot as well.
Secure the HatDrive! with the screws included with it.
HatDrive! Bottom Installation
If you are using a bottom-mounted HatDrive!, the first step is to install your NVME SSD onto your HatDrive! I’m using a Sabrent Rocket drive on mine, Pineberry also have a list of compatible drives that have been tested on their website.
Place it onto the brass standoffs and then use the female-to-female brass standoffs supplied with the HatDrive! to hold it in place. Next place the Raspberry Pi on top of the HatDrive! and secure it with three of the M2.5x7mm brass standoffs that came with the Ice Tower cooler. Don’t install a standoff on the hole nearest to the power port, this is where the button adaptor will go.
Plug the PCIe cable into the Pi. The tab on the connector can be pushed down to secure the cable through the microSD card slot. Likewise, to release it, the tab can be pushed up through the slot as well.
Next, we can position the button adaptor over the remaining mount. Slide the button adaptor into position through the microSD card slot at the back of the case in the orientation shown below. It should go in easily – do not force it passed the LED or button as you may damage them. If you feel resistance, rather try to remove and reposition it until it slides into place without interfering with the surrounding components.
Now we can install our Ice Tower cooler. Before we install it, we need to remove the fan by removing the four M3 screws in the corners. We’re going to be installing the fan on the side panel.
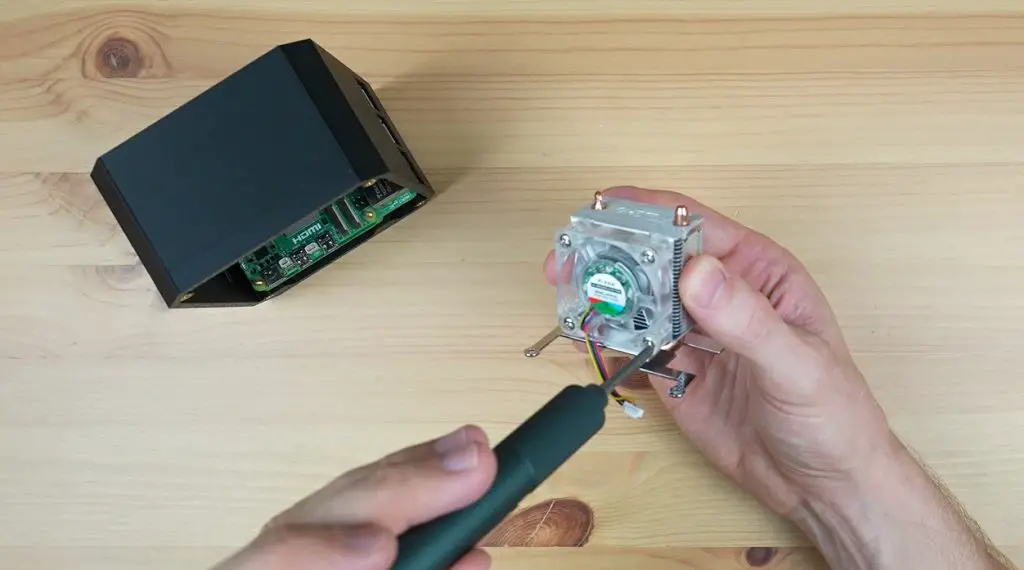
Remember to add the thermal pad to the CPU before putting the cooler into place. Secure the cooler with three M2.5x6mm screws that are supplied with the cooler (I’ve used thumb screws in the below image), one into each of the brass standoffs. Again leave the button adaptor unsecured for this step.
Now use the M2.5x12mm button head screw that was supplied with the case kit to hold the button adaptor in place. You’ll need to add the small black spacer (shown in red below) between the button adaptor and the leg of the Ice Tower cooler as well.
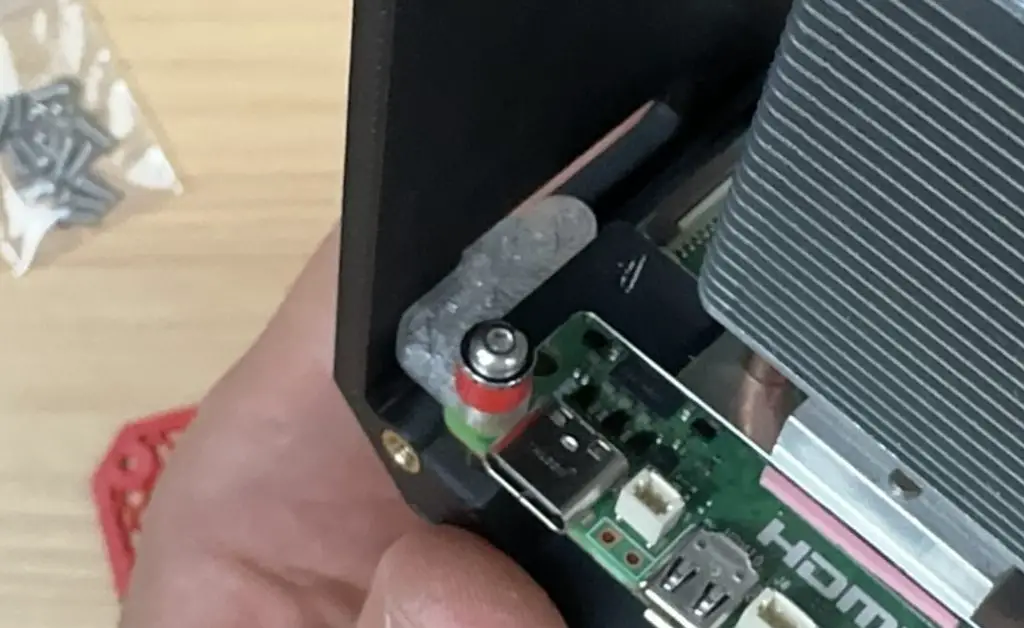
Do not overtighten the screw as you need the button adaptor to be able to move to push and release the button. You should be able to feel the button press and release easily through the button adaptor.
Fan & Side Cover Installation
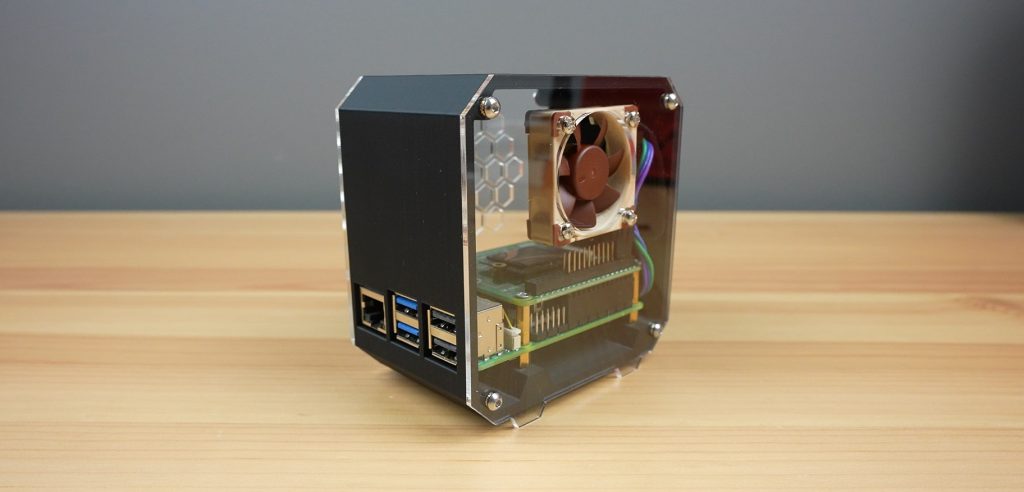
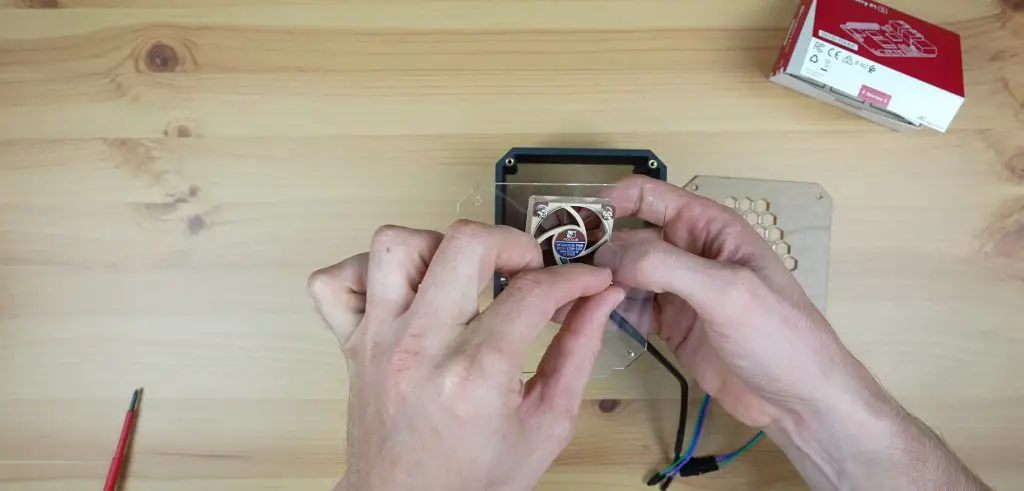
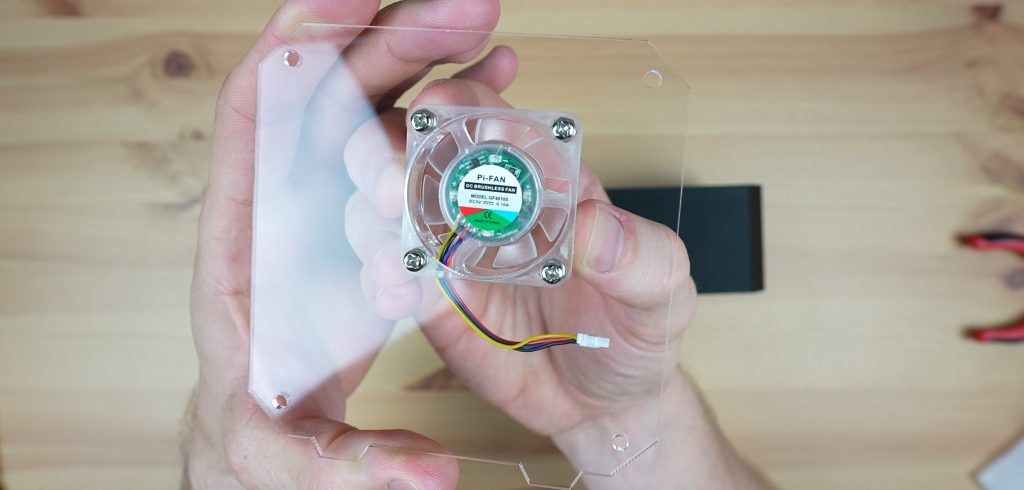
Install the fan onto the side cover with its included screws or rubber mounts.
If you are using the fan from an Ice Tower cooler, we’re going to use the same method that I used on my other case designs where the screws do not go all the way through to the back of the fan. We instead press the M3 nuts into the front of the fan and the screws then hold these in place against the side panel.
It is easiest to press these into place by placing the nuts onto a flat surface and then pushing each pocket in the corner of the fan down onto the nut. The nut is in position when it is flush with the face of the fan.
Then plug the fan into your Raspberry Pi’s GPIO pins before screwing the side panel into place.
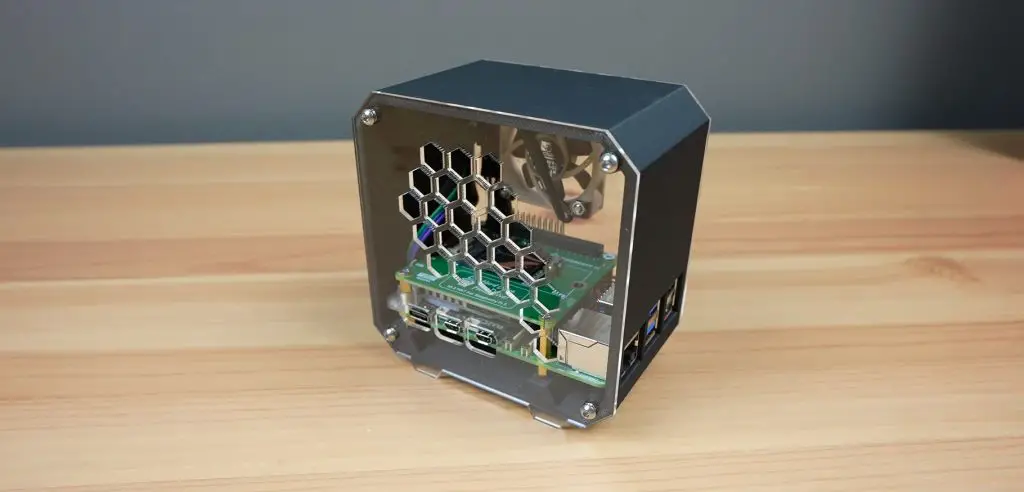
Close up the case with the two side panels and four M3x8mm button head screws on each side.
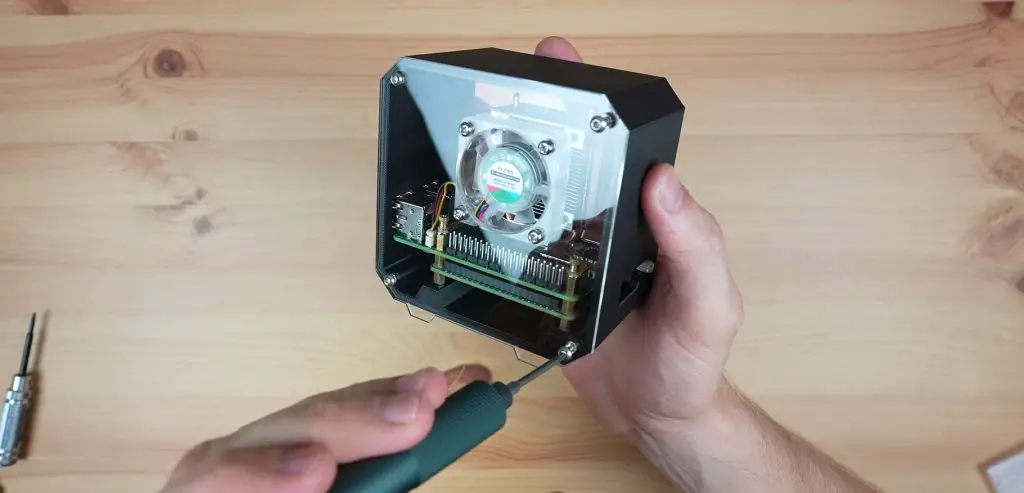
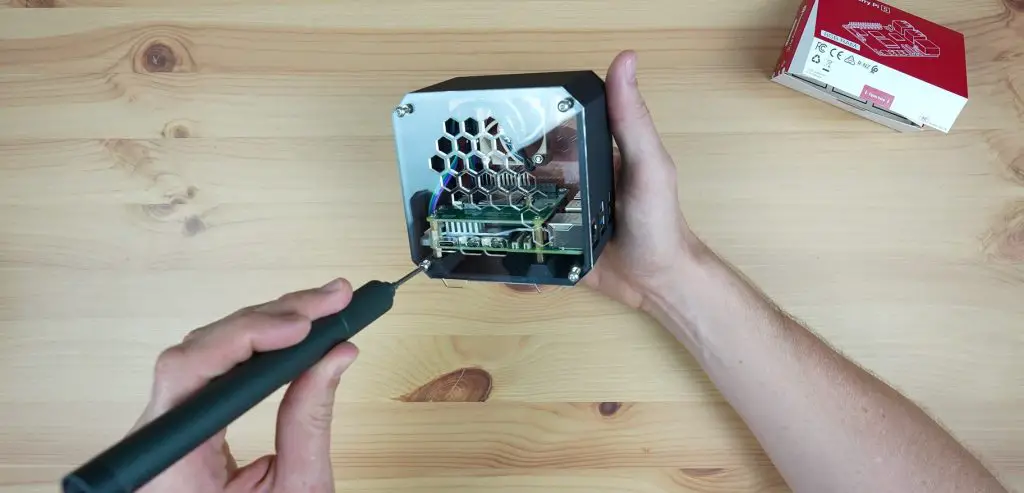
Your case is now complete and ready to run. Follow Pineberry’s documentation for instructions on booting your Pi from the NVME drive.
Thank you for posting this! Is this case compatible with the Pimoroni NVMe Base, or only with the Pineberry Bottom?
Hi, Michael.
I have a Pi 5 with a HatDrive! (Bottom) and an Ice Tower. Looks like it would fit in this case. Has anyone tested or can confirm fit? Thanks!
Please cancel my earlier reply regarding Ice tower. I didn’t read the article completely. I have my answer. Thank you.
Your Etsy-Link doesent work
This is super cool! I love how detailed the instructions are for assembling the 3D-printed case. I’ve always been a bit intimidated by putting together tech stuff, but this makes it seem doable. I’m curious, has anyone tried using a different type of cooler instead of the ones listed? And how easy was it to source all these parts? I might give this a go myself!