Commercially built solar panels are still quite expensive however they don’t need to be. Solar cells are available from a range of suppliers all over the world and can be easily assembled into your own custom built solar panel.
Cell Voltages
The nice thing about building your own solar panel is that you can make it to suite your needs. Solar cells are typically available in 0.5V and a range of power outputs. They can be arranged in series to get any output voltage you require in multiples of 0.5V. If you are looking to charge a 12V deep cycle battery for an off grid application then you need an 18V panel which will consist of 36 cells in series (36 x 0.5V = 18V output). You need 18V so that even when the panel is not in full sun it is able to charge the battery.
In order to reduce the number of cells you need, you could try splitting your solar cells to get a higher voltage out of each cell.
Solar Panel Power Output
The second consideration is the power output you require. To calculate how many solar cells you need, divide the total power you need by the power of each cell. For example, if you need a 200W panel and you are using 4W cells then you need 200W / 4W = 50 cells. It is important to note that the power output is not related to whether the cells are connected in series or parallel. You can read this article on sizing your solar panel system correctly for your home for help estimating your home’s power consumption. There is also a spreadsheet available to assist you with the household power consumption calculations.
Solar Panel Frame
Lastly you need a frame for your solar cells. Solar cells are extremely fragile and need to be protected, usually with a perspex sheet or glass. Additionally you need to protect the back of the cells although this sheet does not have to be clear and can be made from wood, plywood, glass or plastic. You will also need to make a frame which attached to the backing for mounting the panel.
How To Assemble The Panel
In this guide, we will make a small 36W panel although the methodology to create a larger 200W or 300W panel is the same.
What You Will Need For One Panel
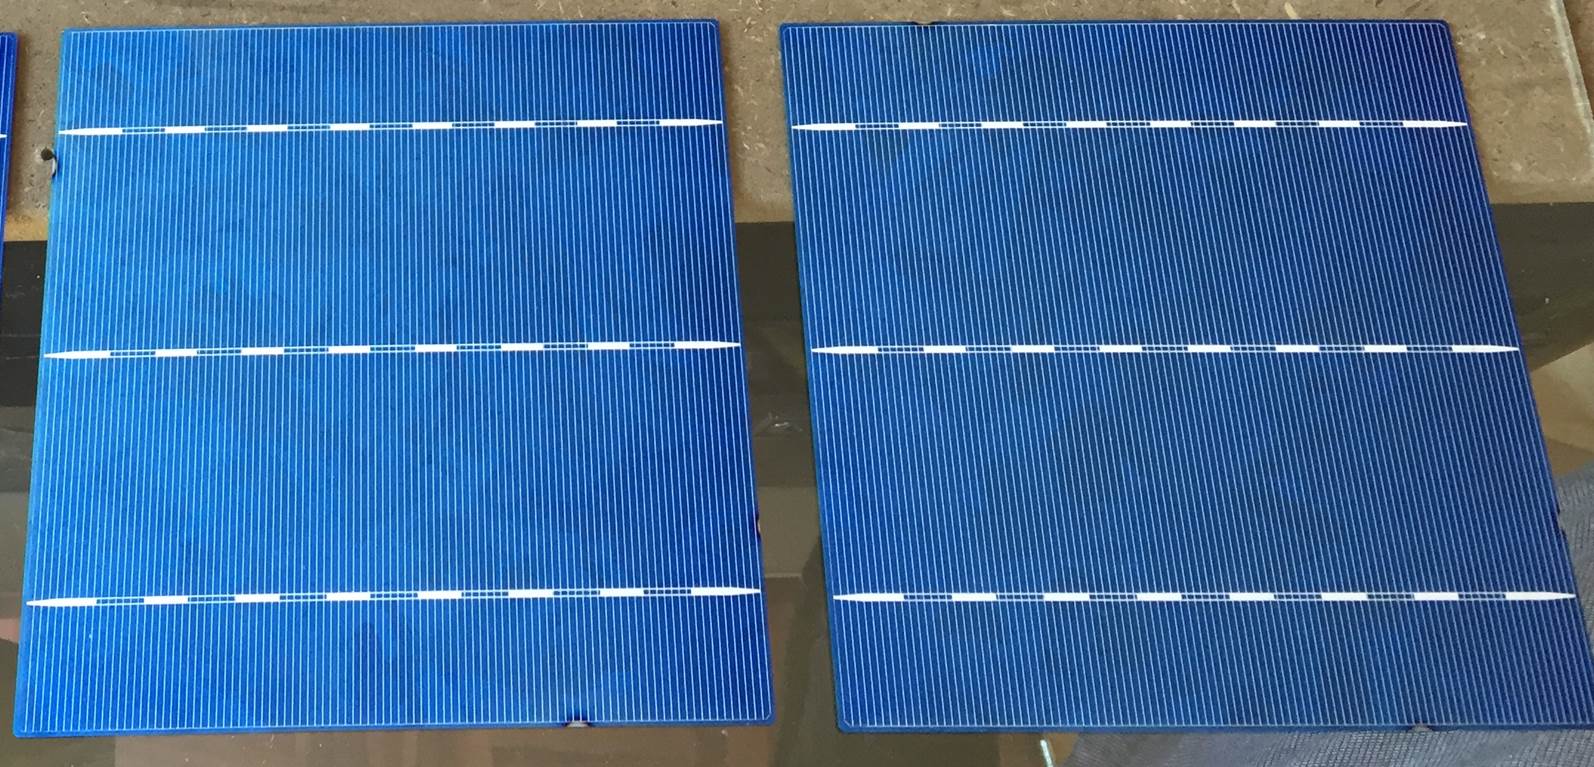
- 9 Solar Cells (0.5V 4W) – Buy Here
- 2 Sheets of 3mm Safety/Shatterproof Glass 0.5m x 0.6m (20″ x 24″) – Buy Here
- Silicon Sealant – Buy Here
- Solar Bus Wire – Buy Here
- Solar Tabbing Wire – Buy Here
- Flux Pen / Solar Pen – Buy Here
- Soldering Iron – Buy Here – Buy Here
How To Build Your Panel
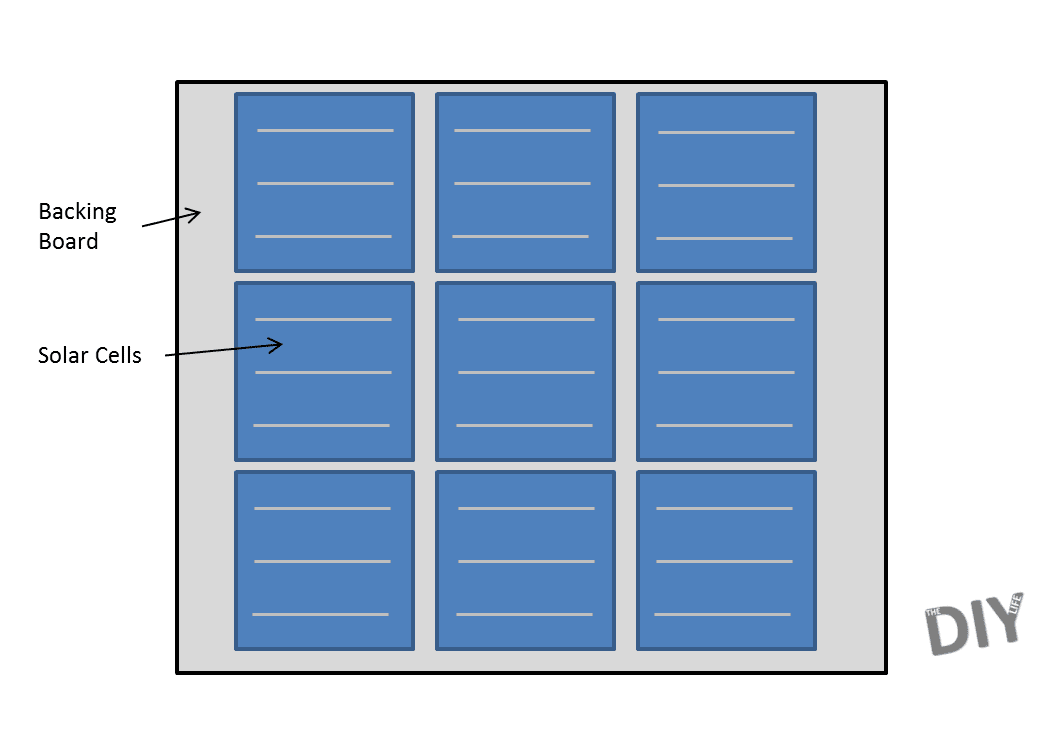
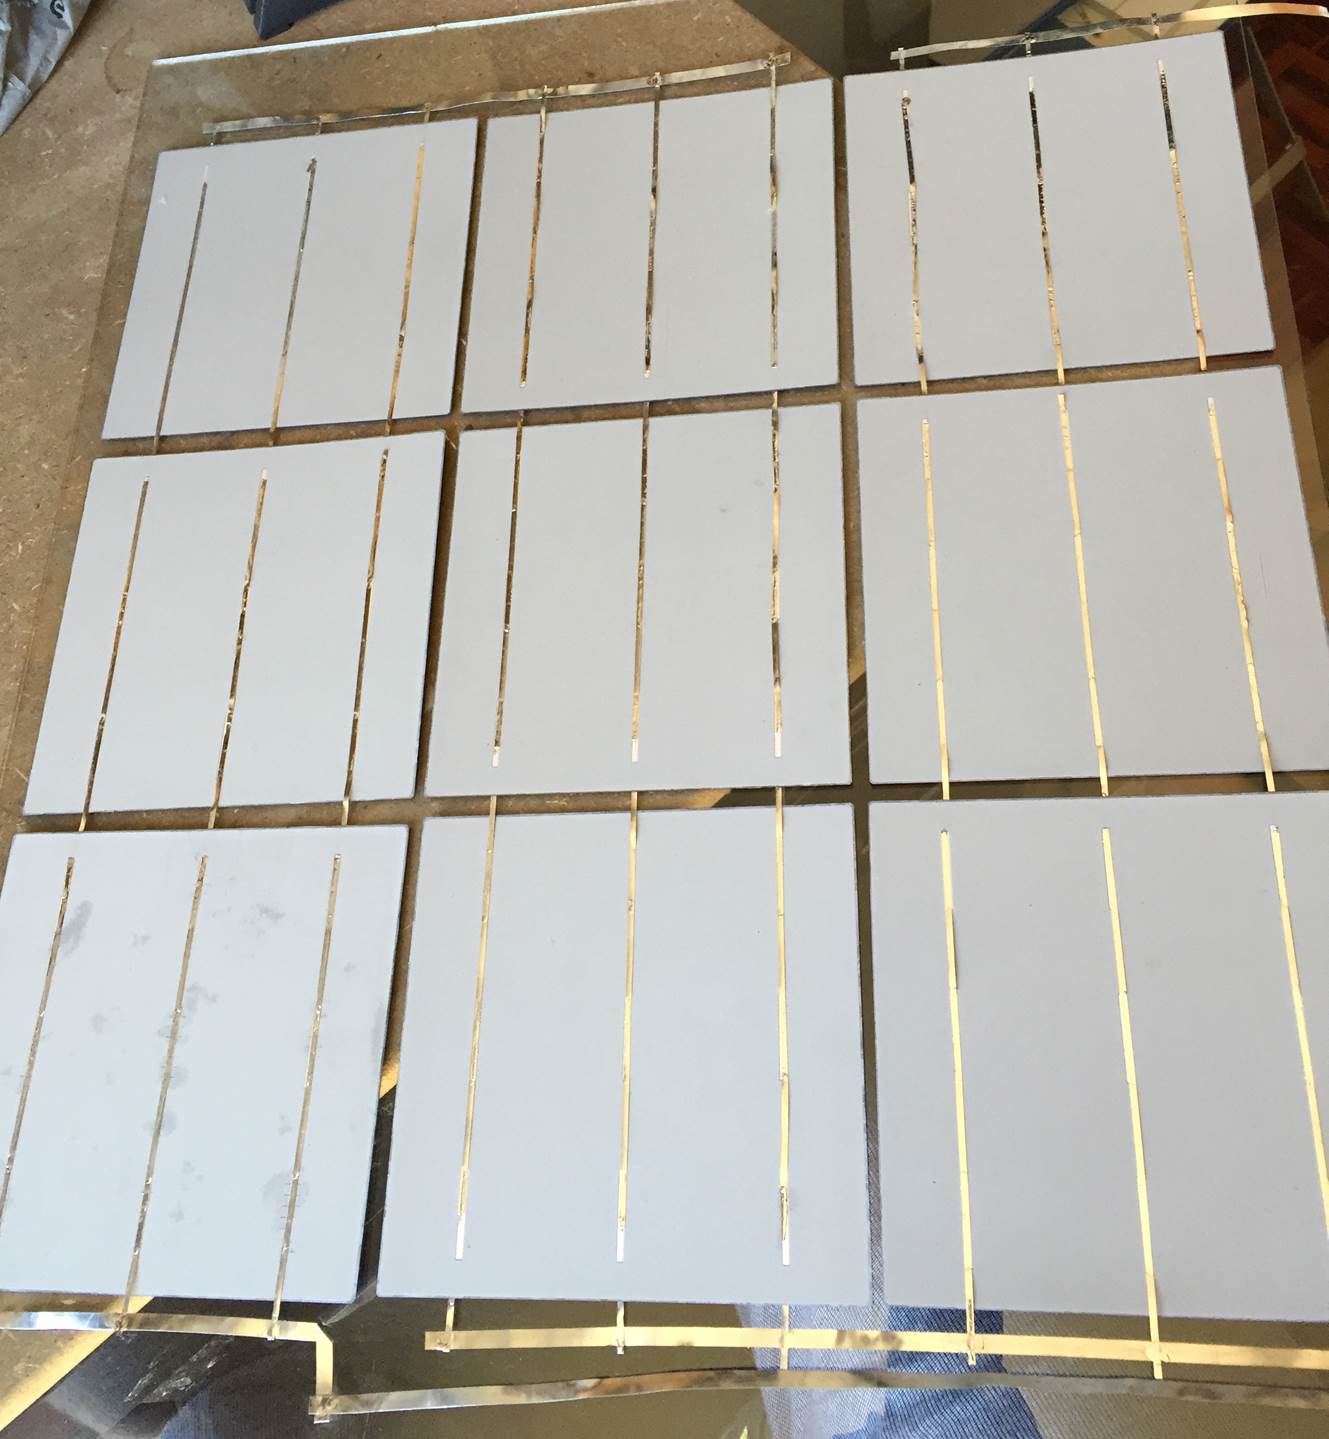
First you need to start by planning your panel layout. This is usually done according to the space you have available for the panel, you may be restricted by length or width of the panel and you can adjust the other dimensions to suite. For the 9 solar cells, a sheet of glass 0.5m x 6m (20″ x 24″) was used and the cells were laid out as shown below:
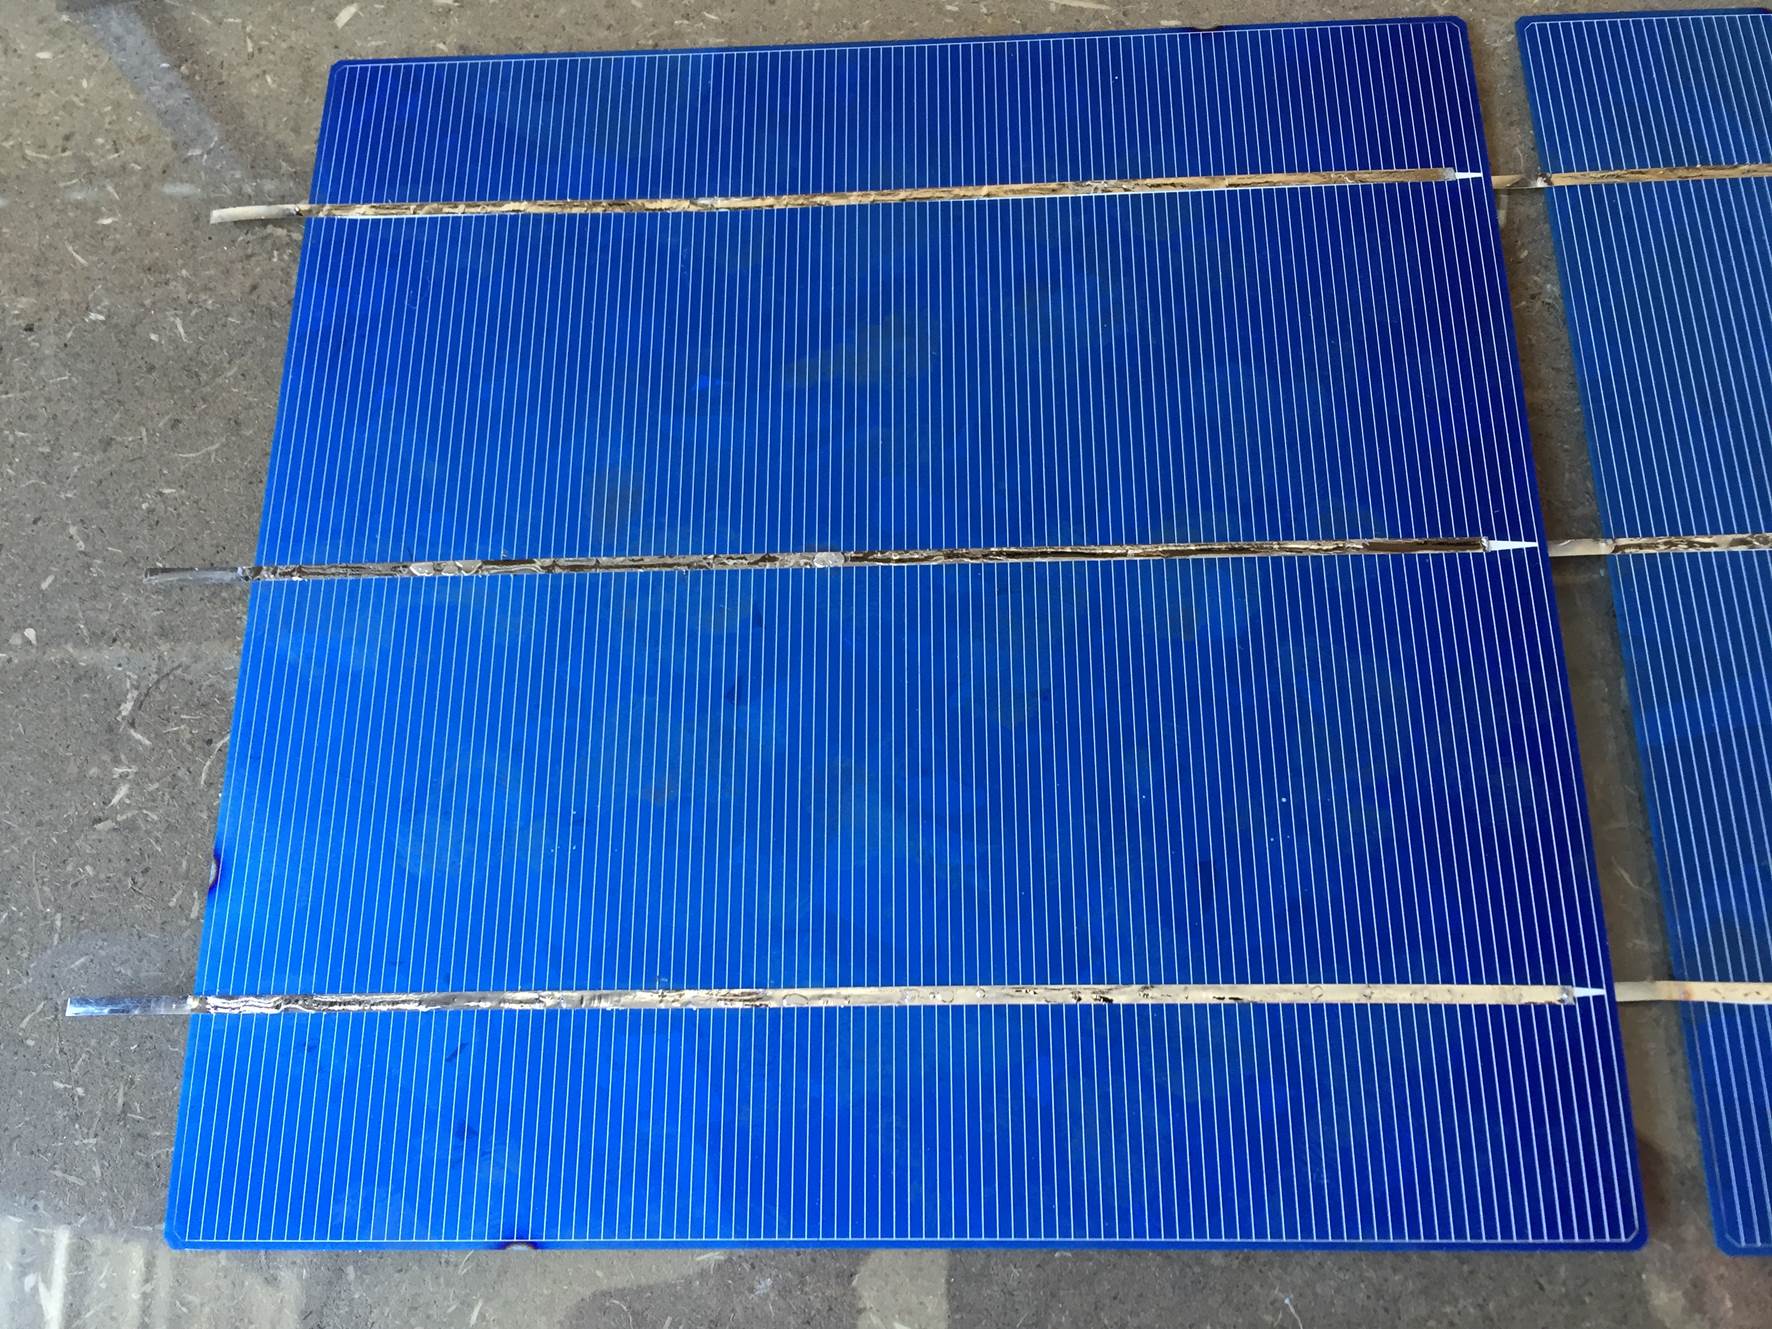
The next step and possibly the most time consuming step to building your panel is tabbing your solar cells. You can buy pre-tabbed cells and this is recommended if you are not familiar with using a soldering iron although most solar cell suppliers will supply you with un-tabbed cells. It is not complicated once you have the correct technique but you may need to practice on one or two cells first as the tabbing wire is not easy to remove.
Cut the tabbing wire to a little (1cm / 1/2″) over the length of one cell for the end tabs and double the length of each cell for the interconnecting tabs. Now begin soldering the tabbing wire to the solar cell. First draw a line with the flux pen down the length of the silver tab lines. Line the tabbing wire over the tab lines and then run the hot soldering iron down the length of the tab. Do not leave the soldering iron in one area for too long as it will overheat and damage the cell. There is no need to add solder to the wire as tabbing wire comes pre-soldered.
Here is a video guide to soldering the tabs onto your solar cells:
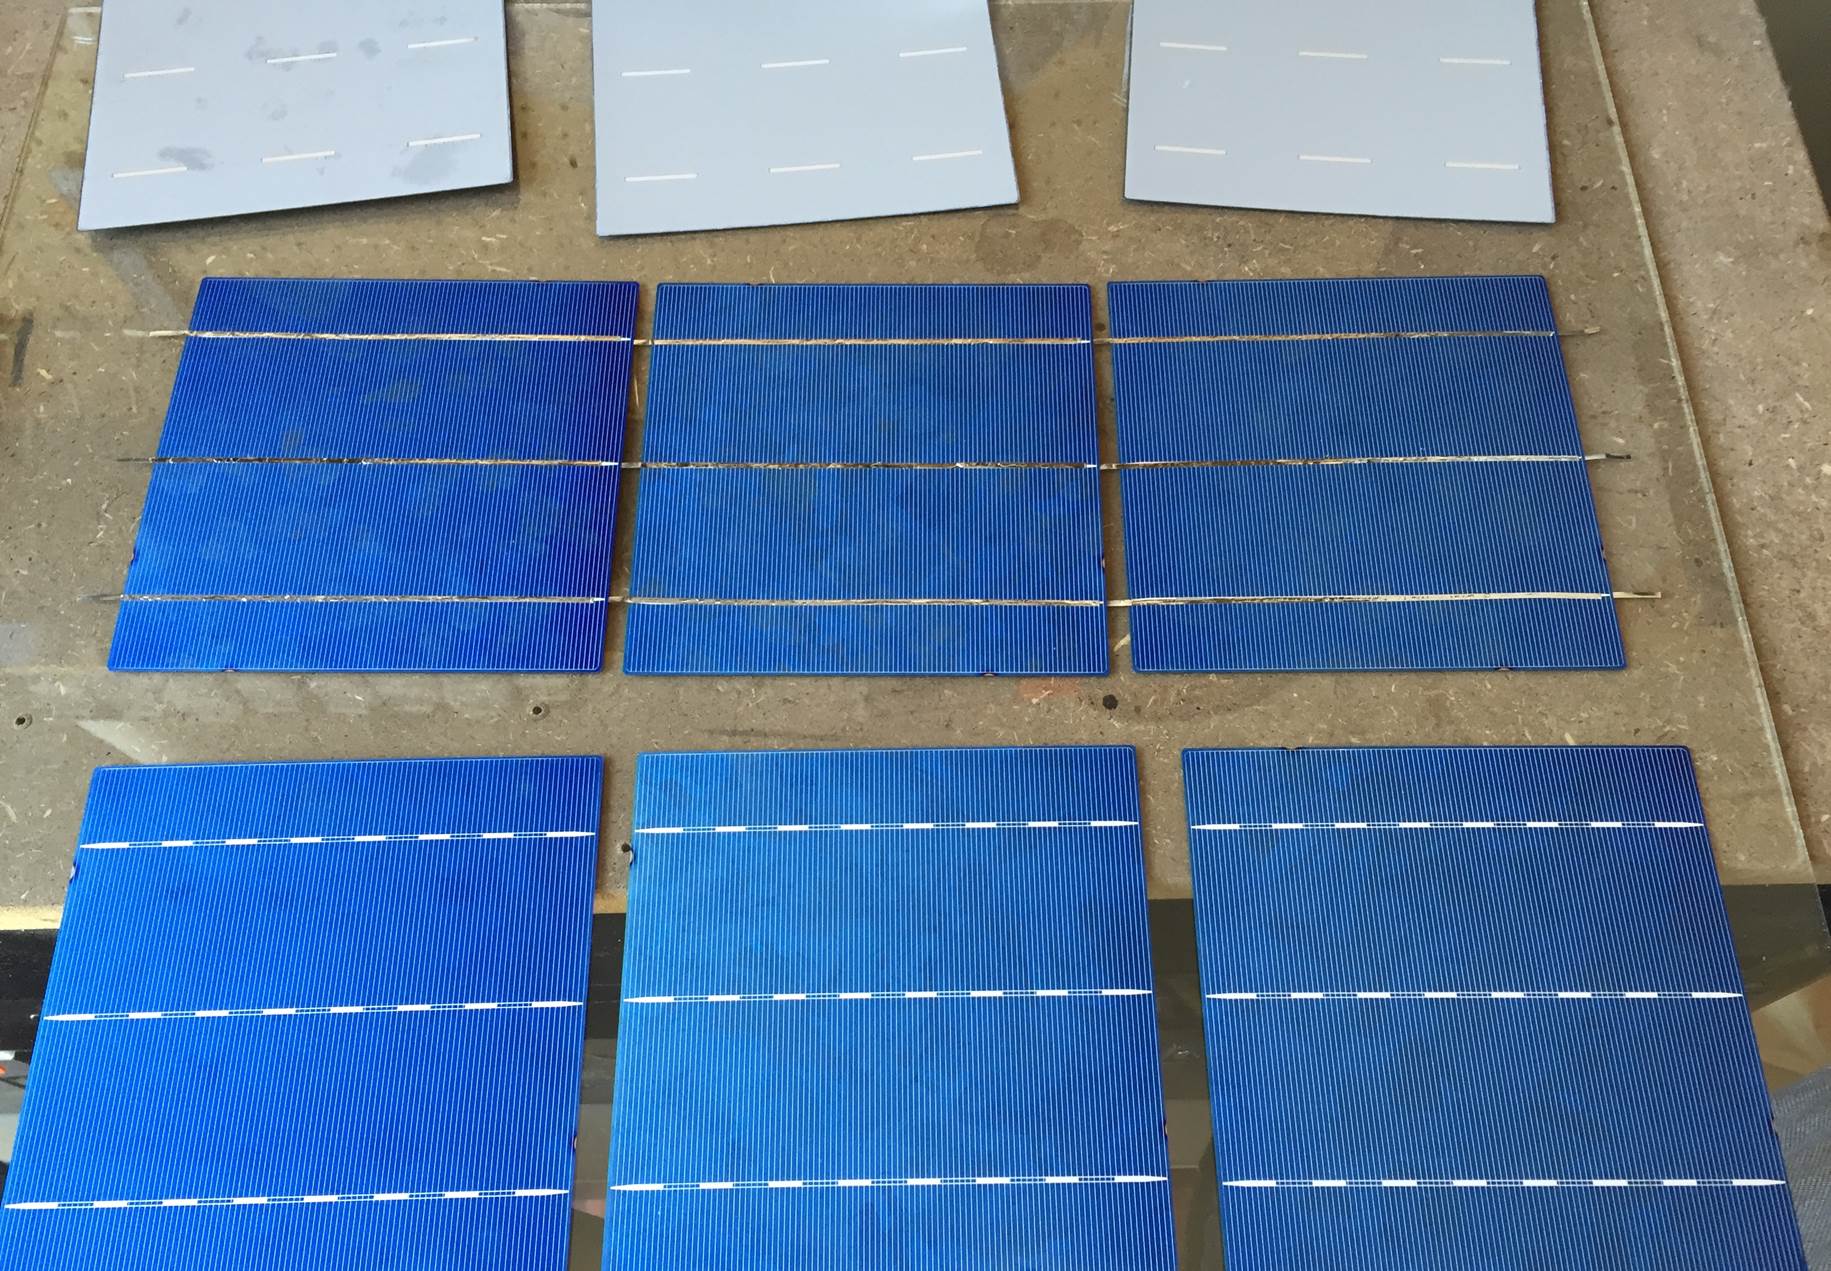
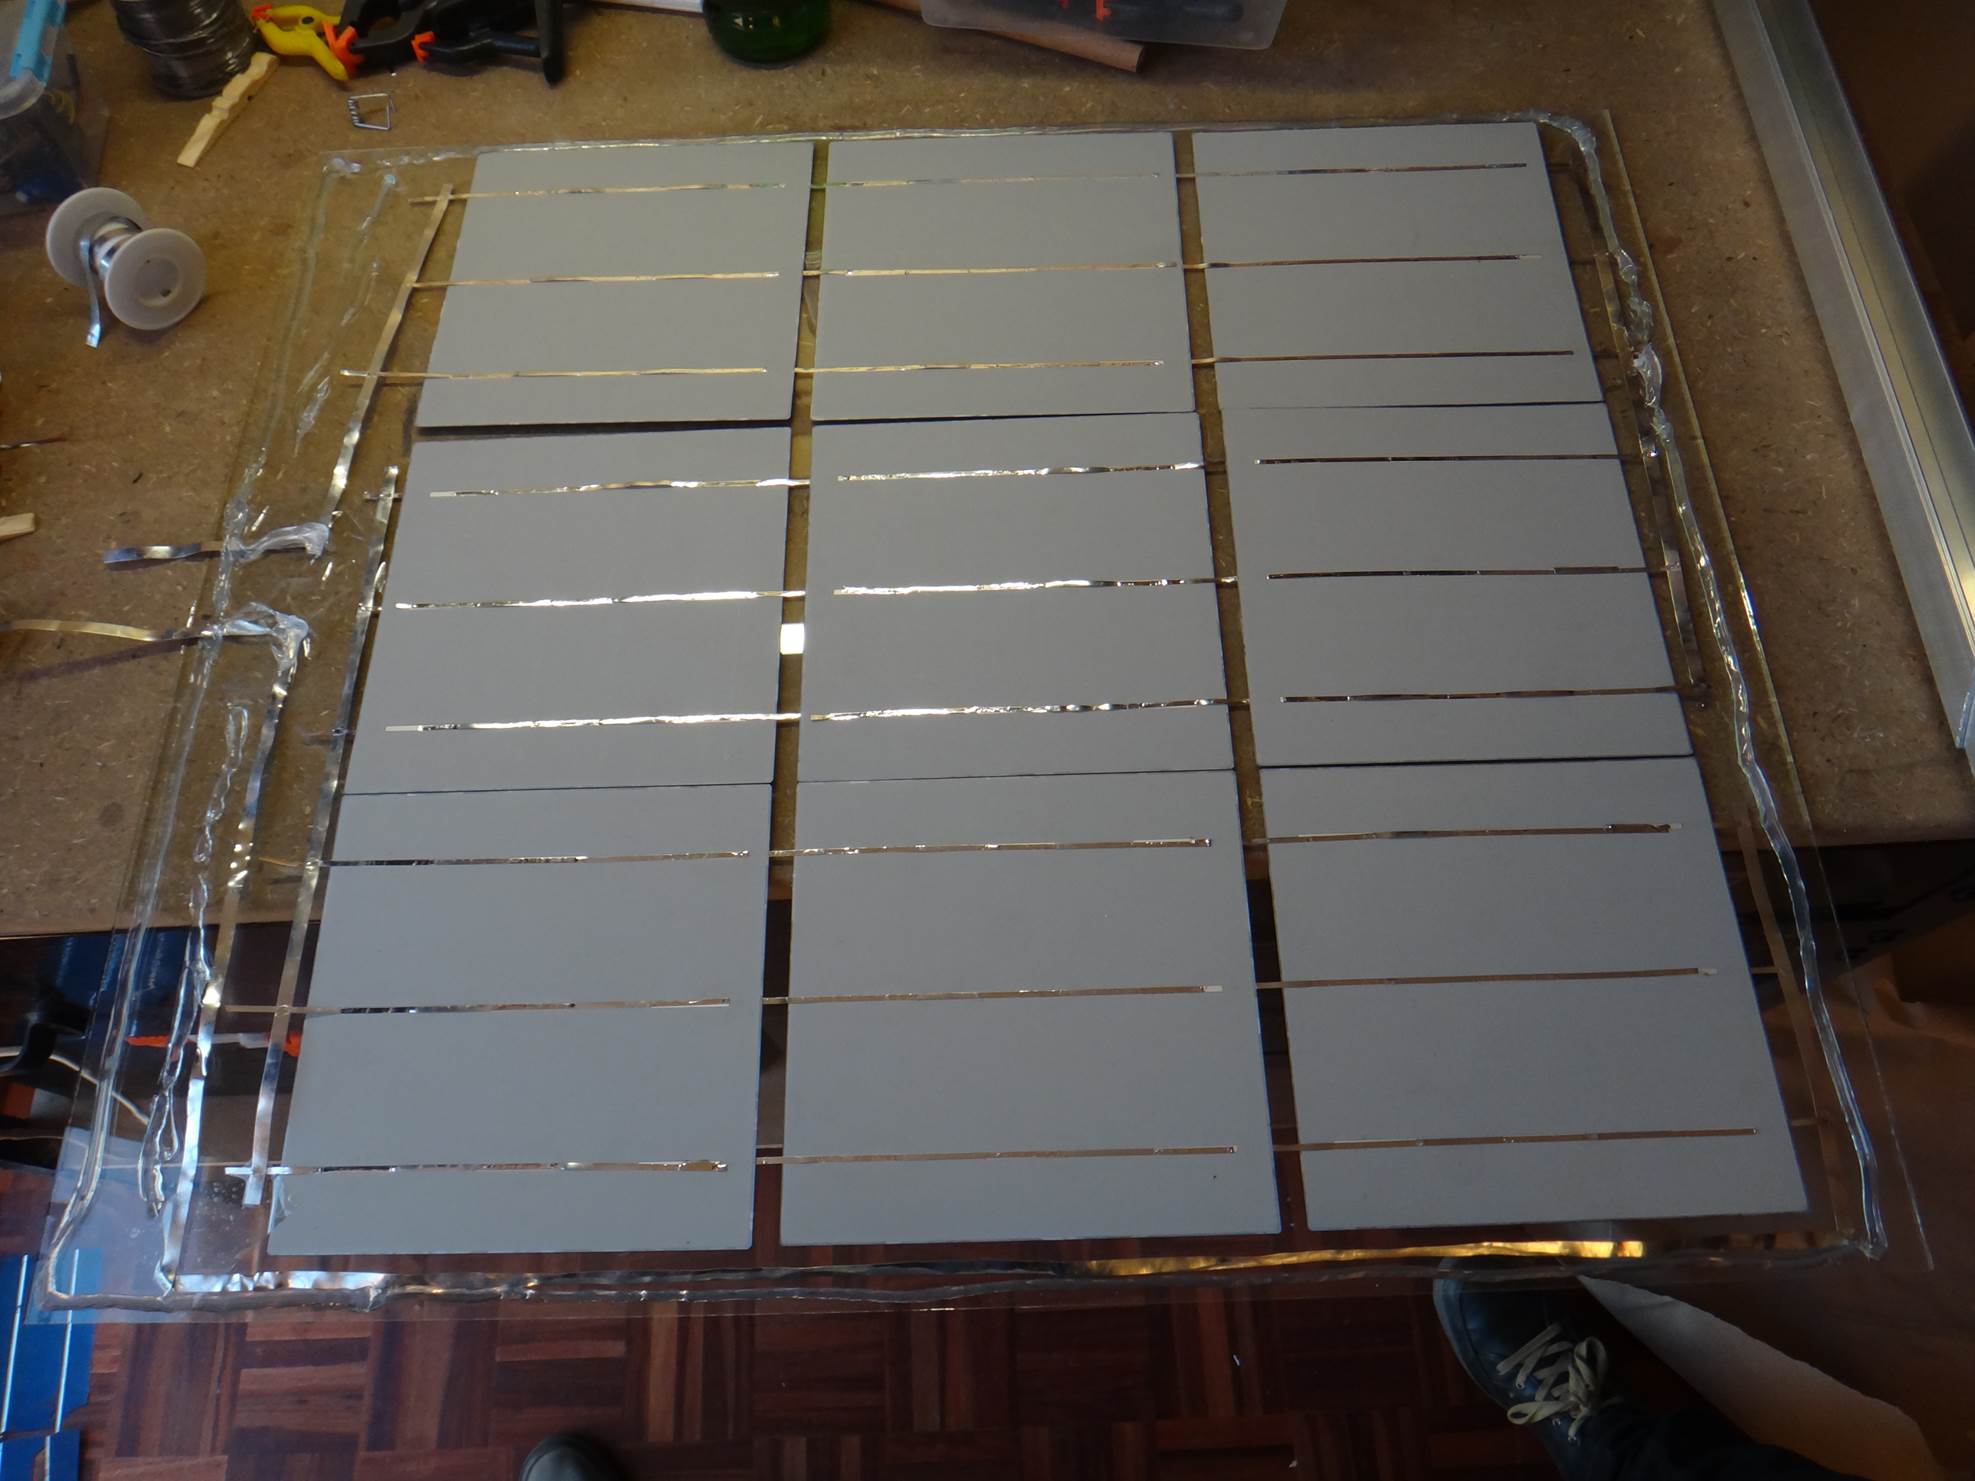
Once you have tabbed all of you cells, you need to connect them together. The front of each cell is negative and the back of the cell positive. These need to be connected like batteries in series to form a string of cells back to front. Solder the tabbing wires from the back of one cell to the front of the adjacent cell until you have completed each line. You then use the bus wire to connect the lines. The end layout should look like the diagram below:
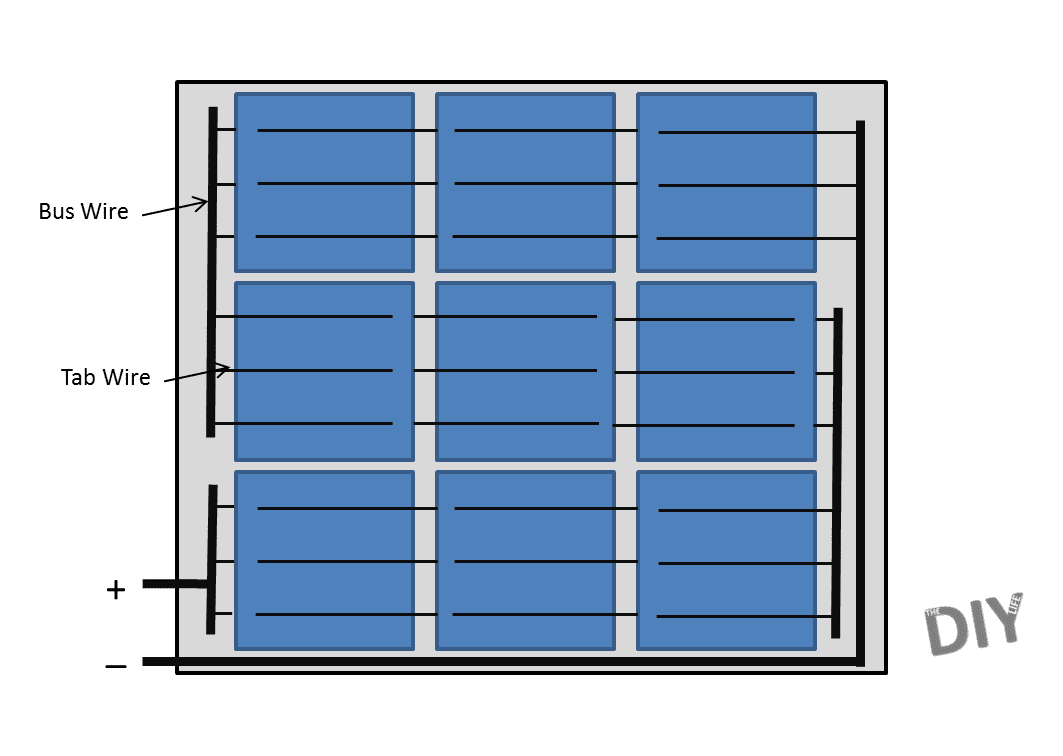
Remember when connecting the lines that they too need to be connected positive to negative so the adjacent lines should run in opposite directions.
When you are done connecting your lines together, you should have one positive bus and one negative bus which will be your solar panel outputs. These can be terminated in a special solar panel box or soldered directly onto wires for smaller panels.
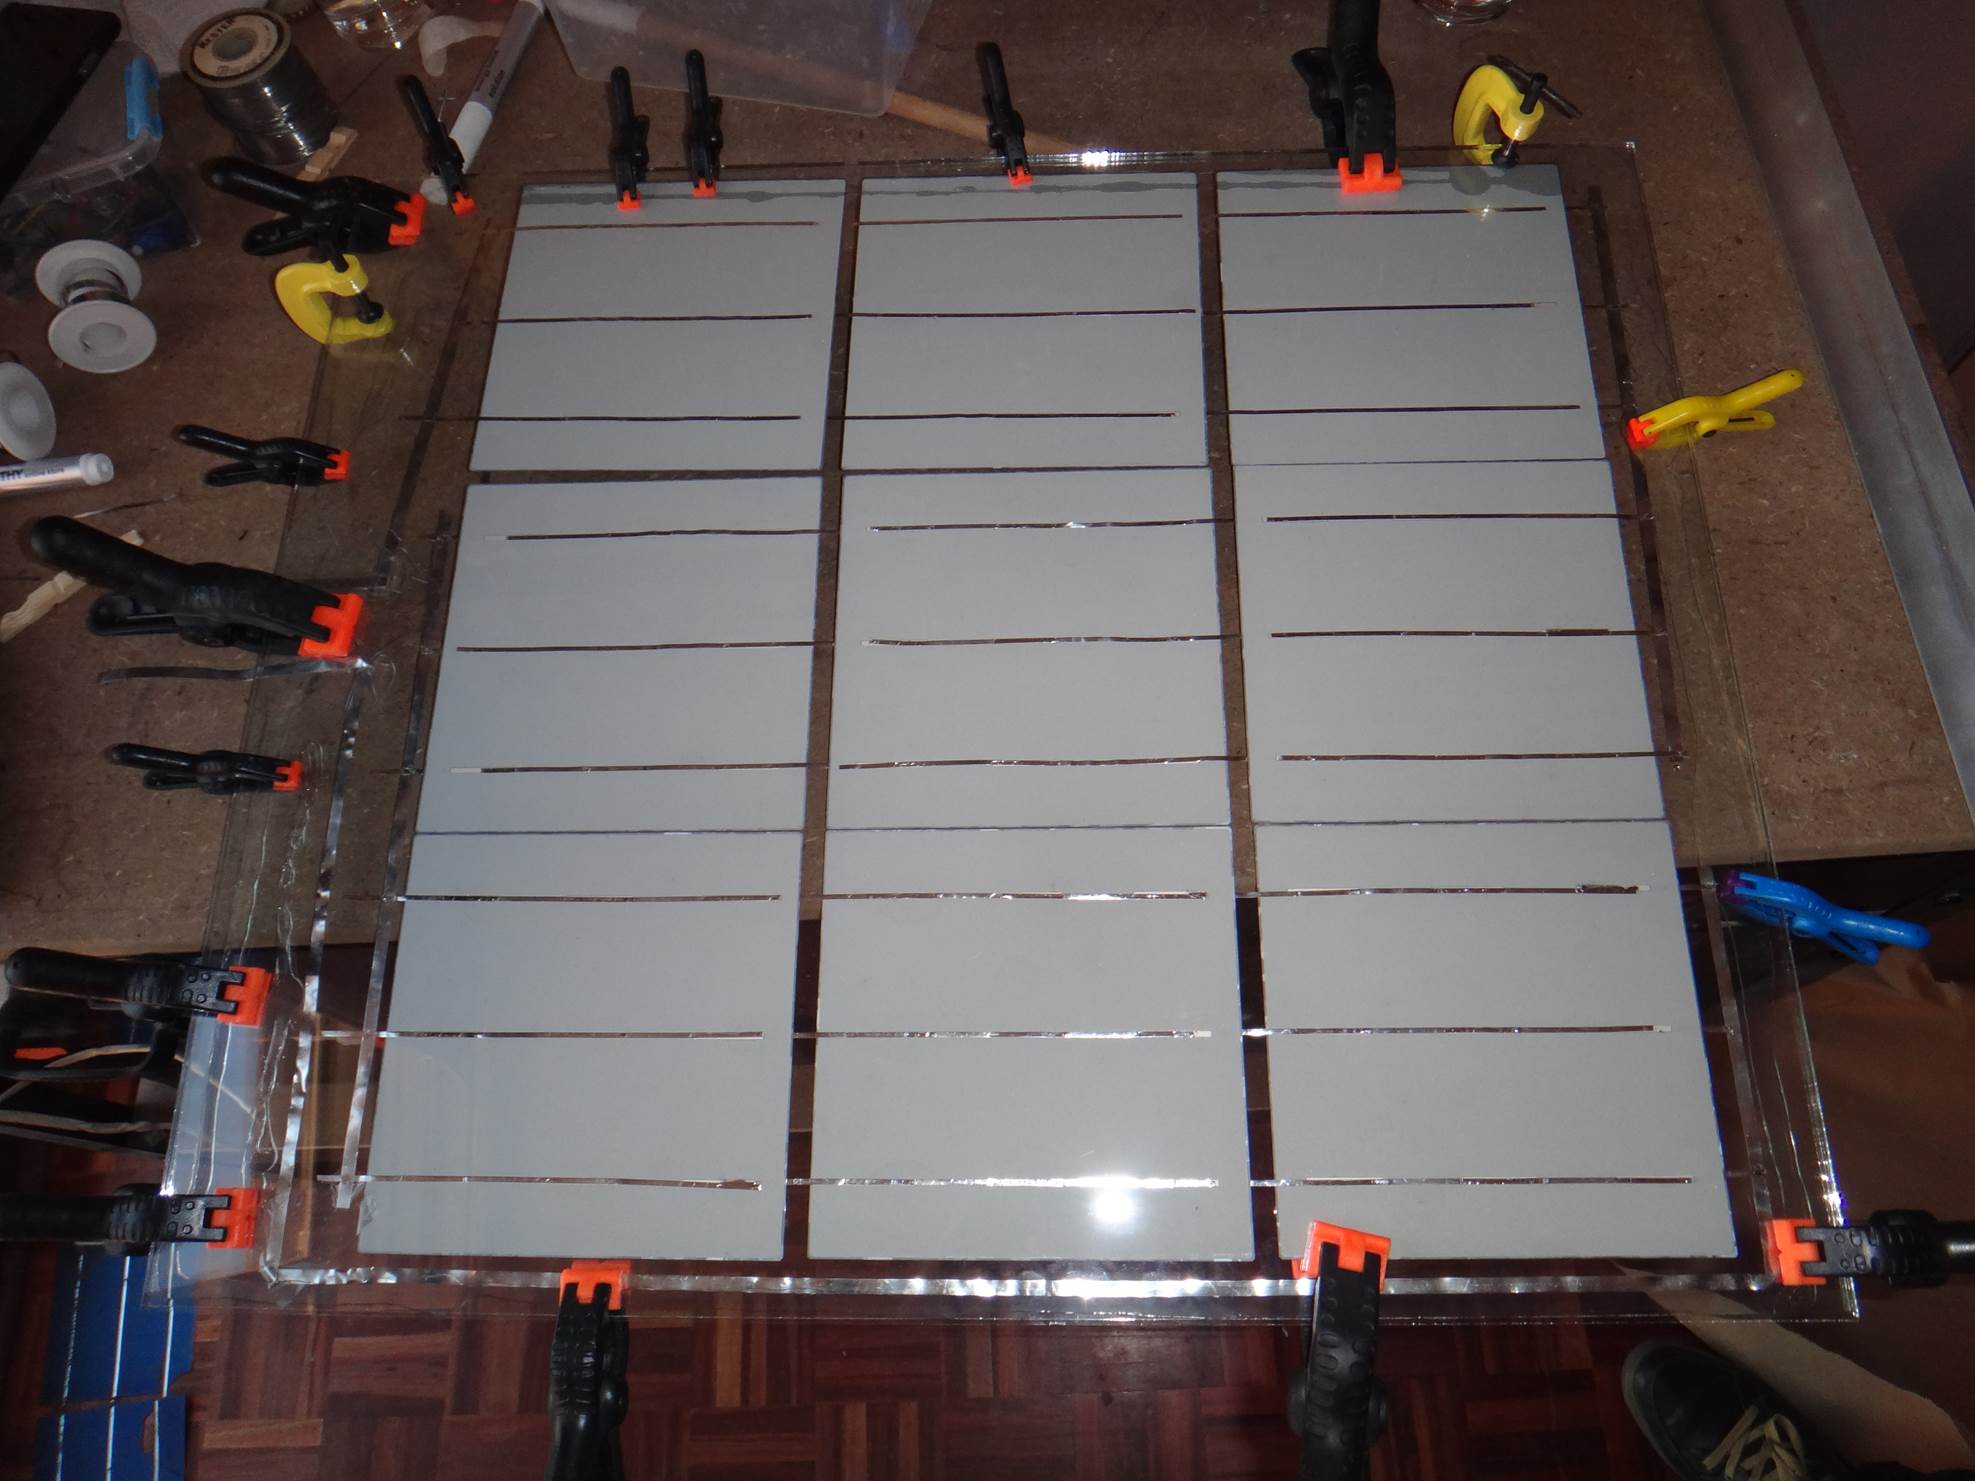
Once your bus wires are completed, you can add the protective glass or perspex cover over your solar cells. Run a continuous bead of silicon around the perimeter of the backing board and then carefully lower the glass onto the backing board over the cells. The silicon should form a continuous seal around the edges of the panel and the cells will now be protected.
Clamp the glass and the backing board together (in this case the backing board is a glass sheet as well) and allow the silicon to cure overnight.
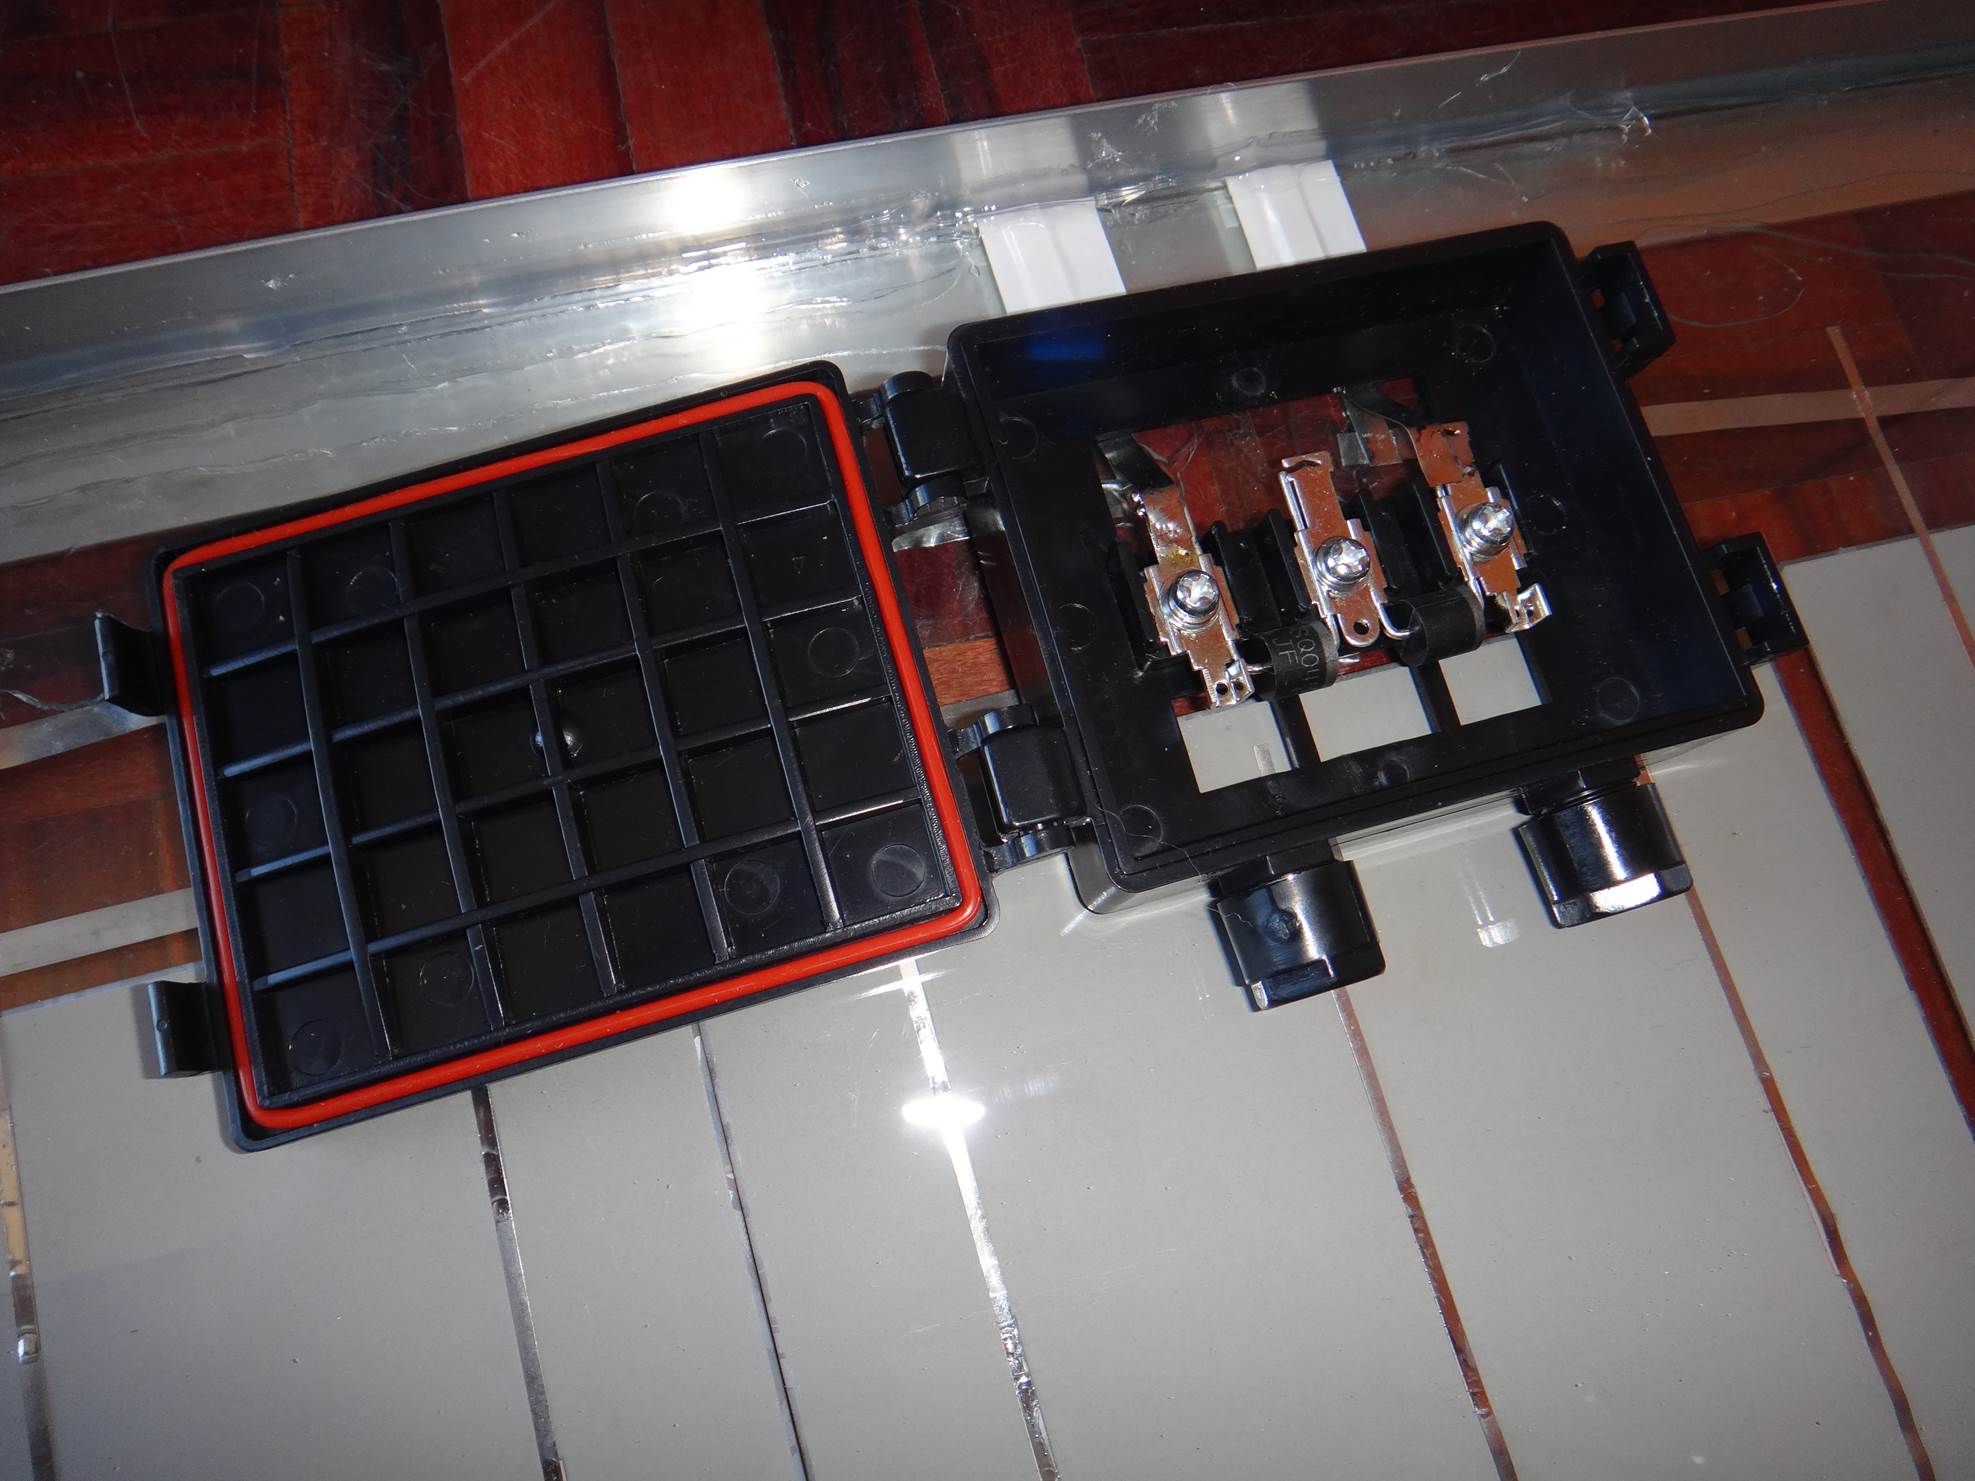
Mount the terminal box on the backing board and solder your outgoing bus terminals to the terminal strip. The box can be mounted with screws on a wood backing board or can be attached with silicon as well if a glass backing board is used.
Lastly attached any mounting bracket you require to the back board and your solar panel is completed.
Connect it up to a solar charge controller to charge batteries or connect it directly to your DC load. If you are powering an AC load then you will need to connect a power inverter, read this guide on selecting a power inverter.
Read our full guide on switching to solar power for more information on designing a solar power system.